Page 4328 of 4449

TROUBLE DIAGNOSIS FOR SYSTEM
TF-27
C
E
F
G
H
I
J
K
L
MA
B
TF
Revision: 2004 November 2004 FX35/FX45
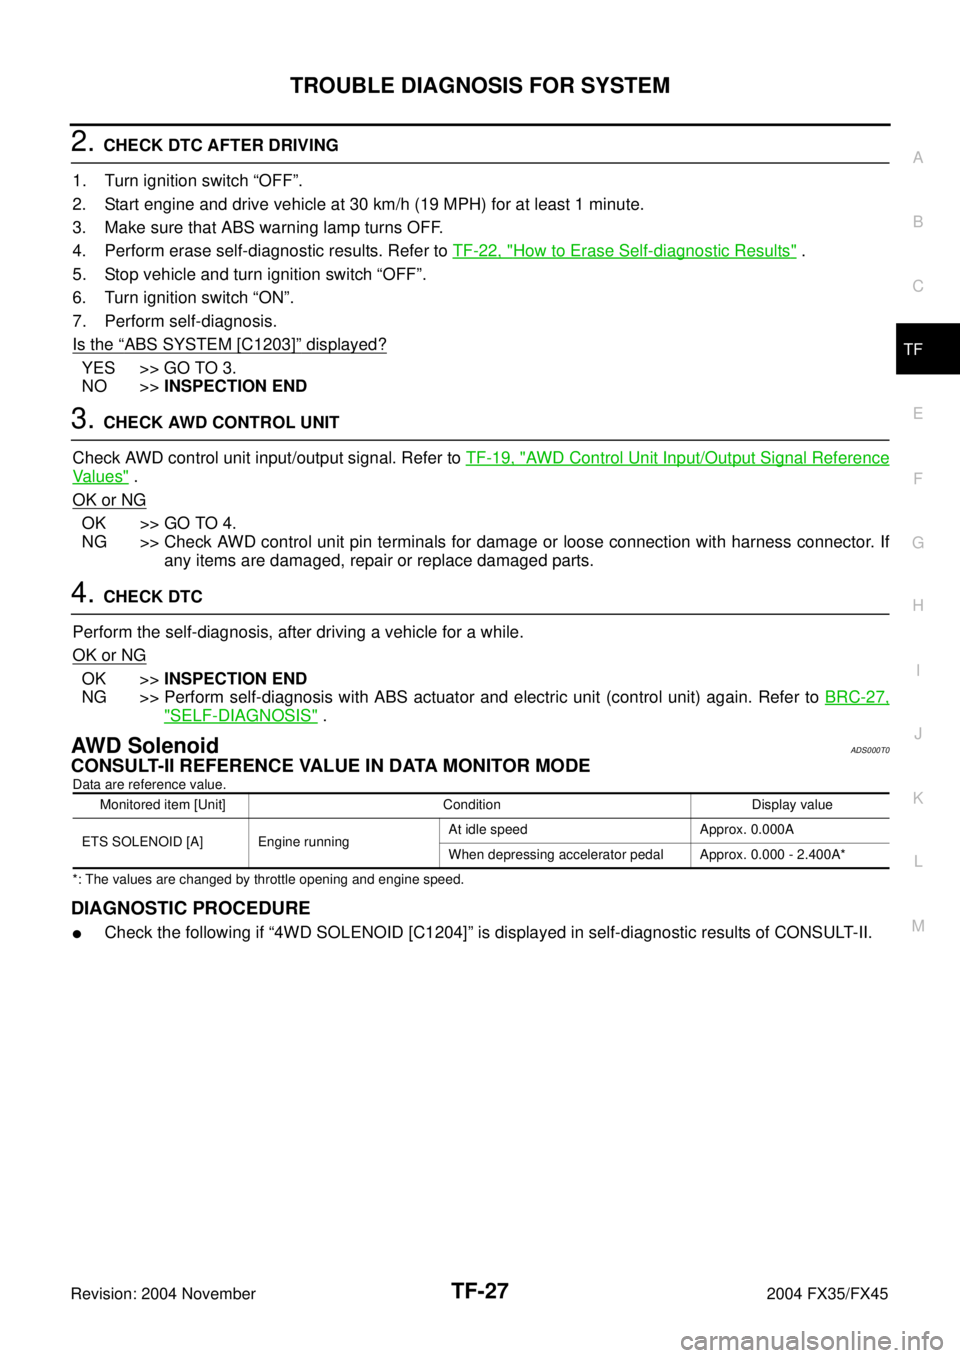
2. CHECK DTC AFTER DRIVING
1. Turn ignition switch “OFF”.
2. Start engine and drive vehicle at 30 km/h (19 MPH) for at least 1 minute.
3. Make sure that ABS warning lamp turns OFF.
4. Perform erase self-diagnostic results. Refer to TF-22, "
How to Erase Self-diagnostic Results" .
5. Stop vehicle and turn ignition switch “OFF”.
6. Turn ignition switch “ON”.
7. Perform self-diagnosis.
Is the
“ABS SYSTEM [C1203]” displayed?
YES >> GO TO 3.
NO >>INSPECTION END
3. CHECK AWD CONTROL UNIT
Check AWD control unit input/output signal. Refer to TF-19, "
AWD Control Unit Input/Output Signal Reference
Va l u e s" .
OK or NG
OK >> GO TO 4.
NG >> Check AWD control unit pin terminals for damage or loose connection with harness connector. If
any items are damaged, repair or replace damaged parts.
4. CHECK DTC
Perform the self-diagnosis, after driving a vehicle for a while.
OK or NG
OK >>INSPECTION END
NG >> Perform self-diagnosis with ABS actuator and electric unit (control unit) again. Refer to BRC-27,
"SELF-DIAGNOSIS" .
AWD SolenoidADS000T0
CONSULT-II REFERENCE VALUE IN DATA MONITOR MODE
Data are reference value.
*: The values are changed by throttle opening and engine speed.
DIAGNOSTIC PROCEDURE
�Check the following if “4WD SOLENOID [C1204]” is displayed in self-diagnostic results of CONSULT-II.
Monitored item [Unit] Condition Display value
ETS SOLENOID [A] Engine runningAt idle speed Approx. 0.000A
When depressing accelerator pedal Approx. 0.000 - 2.400A*
Page 4335 of 4449

TF-34
TROUBLE DIAGNOSIS FOR SYMPTOMS
Revision: 2004 November 2004 FX35/FX45
4. CHECK AWD CONTROL UNIT
Check AWD control unit input/output signal. Refer to TF-19, "
AWD Control Unit Input/Output Signal Reference
Va l u e s" .
OK or NG
OK >> GO TO 5.
NG >> Check AWD control unit pin terminals for damage or loose connection with harness connector. If
any items are damaged, repair or replace damaged parts.
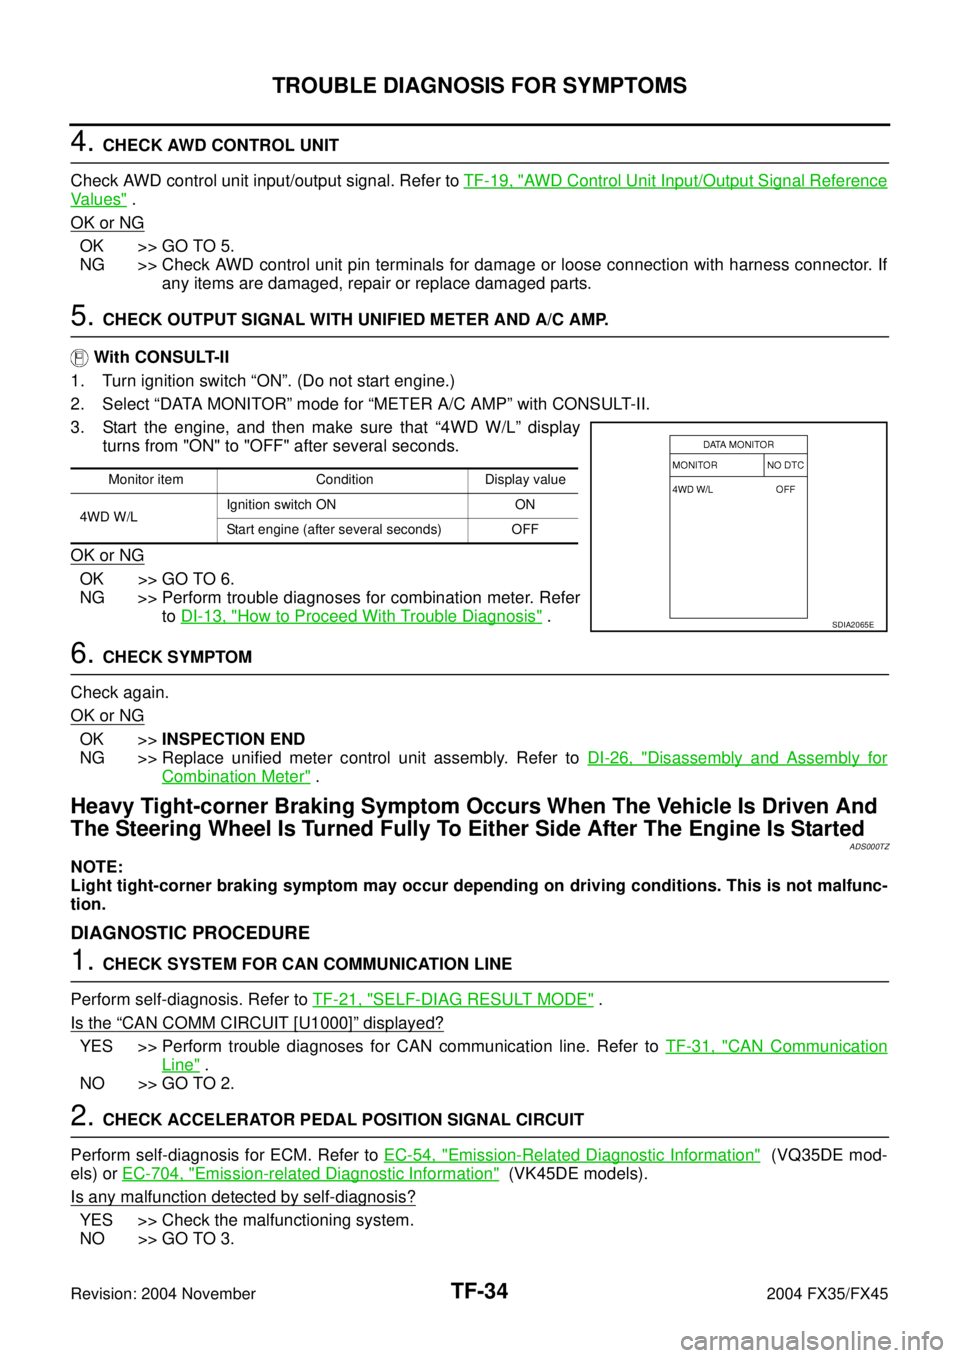
5. CHECK OUTPUT SIGNAL WITH UNIFIED METER AND A/C AMP.
With CONSULT-II
1. Turn ignition switch “ON”. (Do not start engine.)
2. Select “DATA MONITOR” mode for “METER A/C AMP” with CONSULT-II.
3. Start the engine, and then make sure that “4WD W/L” display
turns from "ON" to "OFF" after several seconds.
OK or NG
OK >> GO TO 6.
NG >> Perform trouble diagnoses for combination meter. Refer
to DI-13, "
How to Proceed With Trouble Diagnosis" .
6. CHECK SYMPTOM
Check again.
OK or NG
OK >>INSPECTION END
NG >> Replace unified meter control unit assembly. Refer to DI-26, "
Disassembly and Assembly for
Combination Meter" .
Heavy Tight-corner Braking Symptom Occurs When The Vehicle Is Driven And
The Steering Wheel Is Turned Fully To Either Side After The Engine Is Started
ADS000TZ
NOTE:
Light tight-corner braking symptom may occur depending on driving conditions. This is not malfunc-
tion.
DIAGNOSTIC PROCEDURE
1. CHECK SYSTEM FOR CAN COMMUNICATION LINE
Perform self-diagnosis. Refer to TF-21, "
SELF-DIAG RESULT MODE" .
Is the
“CAN COMM CIRCUIT [U1000]” displayed?
YES >> Perform trouble diagnoses for CAN communication line. Refer to TF-31, "CAN Communication
Line" .
NO >> GO TO 2.
2. CHECK ACCELERATOR PEDAL POSITION SIGNAL CIRCUIT
Perform self-diagnosis for ECM. Refer to EC-54, "
Emission-Related Diagnostic Information" (VQ35DE mod-
els) or EC-704, "
Emission-related Diagnostic Information" (VK45DE models).
Is any malfunction detected by self-diagnosis?
YES >> Check the malfunctioning system.
NO >> GO TO 3.
Monitor item Condition Display value
4WD W/LIgnition switch ON ON
Start engine (after several seconds) OFF
SDIA2065E
Page 4337 of 4449

TF-36
TROUBLE DIAGNOSIS FOR SYMPTOMS
Revision: 2004 November 2004 FX35/FX45
3. CHECK SYMPTOM
Check again.
OK or NG
OK >>INSPECTION END
NG >> Replace electric controlled coupling for mechanical malfunction (mechanical engagement of
clutch is not possible.). Refer to TF-45, "
Disassembly and Assembly" .
While Driving, AWD Warning Lamp Flashes Rapidly (When Flashing In Approx.
1 Minute And Then Turning OFF)
ADS000U1
NOTE:
Rapid flashing: 2 times/second
This symptom protects drivetrain parts when a heavy load is applied to the electric controlled coupling and
multiple disc clutch temperature increases. Also, optional distribution of torque sometimes becomes rigid
before lamp flashes rapidly. Both cases are not malfunction.
When this symptom occurs, stop vehicle and allow it to idle for some times. Flashing will stop and system will
be restored.
While Driving, AWD Warning Lamp Flashes Slowly (When Continuing To Flash
Until Turning Ignition Switch OFF)
ADS000U2
NOTE:
Slow flashing: 1 time/2 seconds
DIAGNOSTIC PROCEDURE
1. CHECK TIRE
Check the following.
�Tire pressure
�Wear condition
�Longitudinal tire size (There is no difference between longitudinal tires.)
OK or NG
OK >> GO TO 2.
NG >> Drive at vehicle speed of 20 km/h (20 MPH) or more for 5 seconds or more after repairing or
replacing damaged parts. (Initialize improper size tire information.)
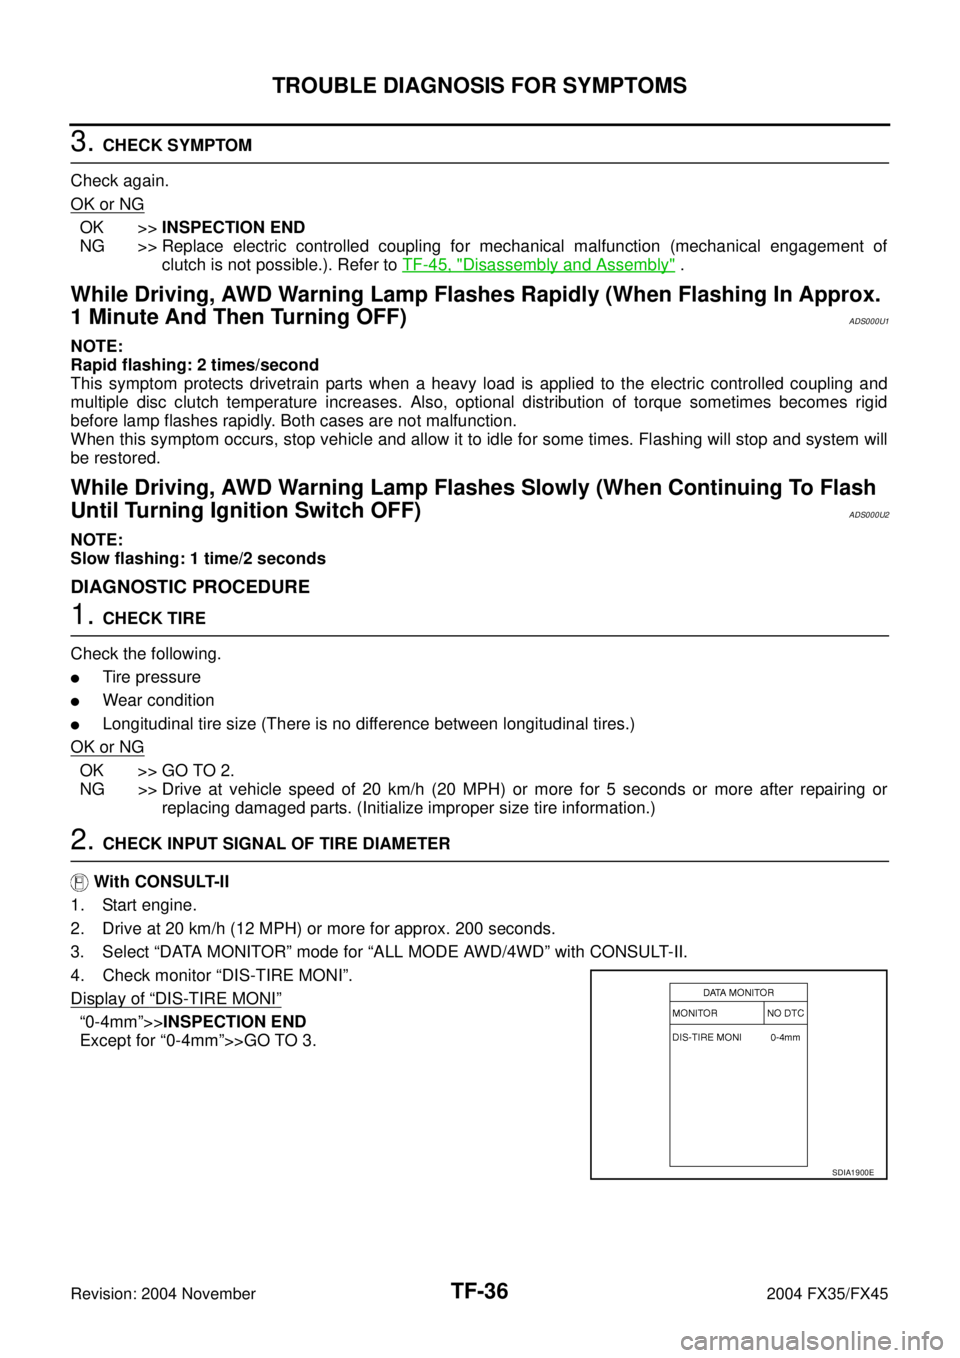
2. CHECK INPUT SIGNAL OF TIRE DIAMETER
With CONSULT-II
1. Start engine.
2. Drive at 20 km/h (12 MPH) or more for approx. 200 seconds.
3. Select “DATA MONITOR” mode for “ALL MODE AWD/4WD” with CONSULT-II.
4. Check monitor “DIS-TIRE MONI”.
Display of
“DIS-TIRE MONI”
“0-4mm”>>INSPECTION END
Except for “0-4mm”>>GO TO 3.
SDIA1900E
Page 4340 of 4449
FRONT OIL SEAL
TF-39
C
E
F
G
H
I
J
K
L
MA
B
TF
Revision: 2004 November 2004 FX35/FX45
FRONT OIL SEALPFP:38189
Removal and InstallationADS000RP
REMOVAL
1. Remove the drain plug to drain the transfer fluid. Refer to TF-8, "Replacement" .
2. Remove the front propeller shaft. Refer to PR-4, "
FRONT PROPELLER SHAFT" .
3. Remove front oil seal using a flat-bladed screwdriver.
CAUTION:
Be careful not to damage the center case.
INSTALLATION
1. Apply multi-purpose grease to oil seal lips. Install the front oil
seal with a drift until the end face of front case.
CAUTION:
�Do not reuse front oil seal.
�When installing, do not incline the oil seal.
2. Install front propeller shaft. Refer to PR-4, "
FRONT PROPEL-
LER SHAFT" .
3. Install transfer fluid, check fluid level and for fluid leakage. Refer
to TF-8, "
Inspection" .
SDIA1782E
Tool number : ST27862000 ( — )
SDIA1783E
Page 4345 of 4449
TF-44
TRANSFER ASSEMBLY
Revision: 2004 November 2004 FX35/FX45
ComponentsADS000RT
1. Front case 2. Front oil seal 3. Main shaft oil seal
4. Main shaft bearing 5. Snap ring (hole) 6. Main shaft
7. Needle bearing 8. Sprocket 9. Bolts
10. Electric controlled coupling 11. Oil cover 12. Spacer
13. Snap ring (shaft) 14. Rear bearing 15. Snap ring (hole)
16. Rear oil seal 17. Spacer 18. Companion flange lock nut
19. Companion flange 20. Baffle plate 21. Rear case
22. Filler plug 23. Oil gutter 24. Seal washer
25. Drain plug 26. Retainer 27. Drive chain
28. Front drive shaft rear bearing 29. Front drive shaft 30. Front drive shaft front bearing
31. Dynamic damper 32. Dynamic damper bracket
SDIA2311E
Page 4347 of 4449
TF-46
TRANSFER ASSEMBLY
Revision: 2004 November 2004 FX35/FX45
4. Remove snap ring from front case.
5. Remove main shaft bearing from front case.
Rear Case
1. Remove the drive chain and front drive shaft from rear case.
2. Remove companion flange lock nut from main shaft using the
flange wrench.
3. Put matching mark on the end of the main shaft corresponding
to the B position matching mark on the companion flange.
SDIA1601E
SDIA1595E
SDIA1693E
Tool number : KV38108300 (J44195)
SDIA1694E
SDIA1798E
Page 4349 of 4449
TF-48
TRANSFER ASSEMBLY
Revision: 2004 November 2004 FX35/FX45
11. Using a puller, remove the rear oil seal from rear case.
12. Remove snap ring from rear case.
CAUTION:
Do not reuse snap ring.
13. Remove the rear bearing from rear case.
14. Remove the baffle plate from rear case.
Front Drive Shaft
1. Remove the front drive shaft front bearing from front drive shaft.
2. Remove the front drive shaft rear bearing from front drive shaft.Tool number : KV381054S0 (J34286)
SDIA1698E
SDIA1699E
SDIA1701E
Tool number : ST33061000 (J8107-2)
SDIA1696E
Tool number : ST35322000 ( — )
SDIA1697E
Page 4352 of 4449
TRANSFER ASSEMBLY
TF-51
C
E
F
G
H
I
J
K
L
MA
B
TF
Revision: 2004 November 2004 FX35/FX45
Main Shaft and Electric Controlled Coupling
1. Fixing needle bearing to main shaft with grease.
2. Install the sprocket, electric controlled coupling and spacer to
main shaft.
3. Install the snap ring to main shaft.
CAUTION:
Do not reuse snap ring.
Front Drive Shaft
1. Using a press and drift, install the front drive shaft front bearing
to front drive shaft.
2. Using a press and drift, install the front drive shaft rear bearing
to front drive shaft.
SDIA1725E
SDIA1602E
Tool number : ST30022000 ( — )
SDIA1704E
Tool number : ST30914000 ( — )
SDIA1705E