2004 CHEVROLET EPICA cooling
[x] Cancel search: coolingPage 73 of 338
Leaving Your Vehicle
If you are leaving your vehicle, take your keys. All of
the doors, except for the driver’s door, can be locked
from the outside by pushing down the door lock and then
closing the door. The driver’s door can only be locked
from the outside by using the key or the remote keyless
entry transmitter.
Trunk
To unlock the trunk from the outside, insert the key and
turn the trunk lock cylinder or use the remote keyless
entry transmitter.
When closing the trunk, close from the center to ensure
it fully latches. Although you may use one hand to
unlock the trunk, it is recommended that two hands on
the upper surface be used to close the trunk.
{CAUTION:
It can be dangerous to drive with the trunk lid
open because carbon monoxide (CO) gas can
come into your vehicle. You can not see or
smell CO. It can cause unconsciousness and
even death. If you must drive with the trunk lid
open or if electrical wiring or other cable
connections must pass through the seal
between the body and the trunk lid:
Make sure all other windows are shut.
Turn the fan on your heating or cooling
system to its highest speed and select the
control setting that will force outside air
into your vehicle. See Climate Control
System in the Index.
If you have air outlets on or under the
instrument panel, open them all the way.
SeeEngine Exhaust on page 2-29.
2-11
Page 116 of 338
Ashtrays and Cigarette Lighter
The front ashtray and cigarette lighter are located at
the lower part of the center instrument panel, behind a
cover. Press in the cover and it will automatically open.
To remove the front ashtray for cleaning, pull the bin
out. To replace, press the bin back into place.
The rear ashtray is located at the rear of the center
console. To remove the rear ashtray, press in the
retaining spring and pull the bin out. To replace the rear
ashtray, insert the bottom tabs first and then press in
the retaining spring and push the ashtray closed.
Notice:If you put papers or other �ammable items
in the ashtray, hot cigarettes or other smoking
materials could ignite them and possibly damage
your vehicle. Never put �ammable items in the
ashtray.
The cigarette lighter is located to the right of the front
ashtray. To use it, turn the ignition to ACC or ON, push
the cigarette lighter in all the way and let go. When it
is ready, it will pop back out by itself.
Notice:Holding a cigarette lighter in while it is
heating will not allow the lighter to back away from
the heating element when it is hot. Damage from
overheating may occur to the lighter or heating
element. Do not hold a cigarette lighter in while it
is heating.
Climate Controls
Climate Control System
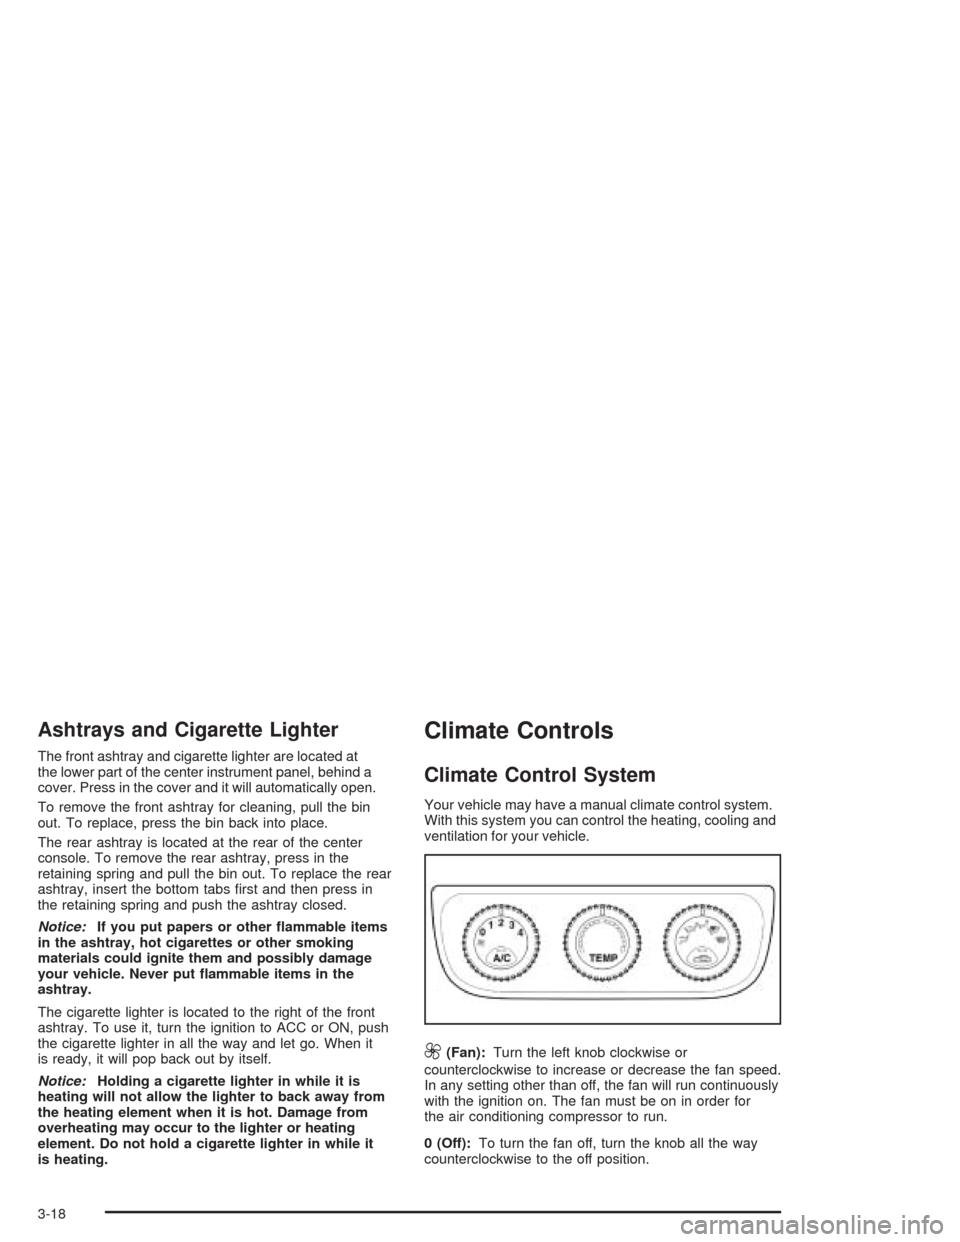
Your vehicle may have a manual climate control system.
With this system you can control the heating, cooling and
ventilation for your vehicle.
9(Fan):Turn the left knob clockwise or
counterclockwise to increase or decrease the fan speed.
In any setting other than off, the fan will run continuously
with the ignition on. The fan must be on in order for
the air conditioning compressor to run.
0 (Off):To turn the fan off, turn the knob all the way
counterclockwise to the off position.
3-18
Page 120 of 338
Automatic Climate Control System
Your vehicle may have an automatic climate control
system. With this system you can control the heating,
cooling and ventilation for your vehicle.
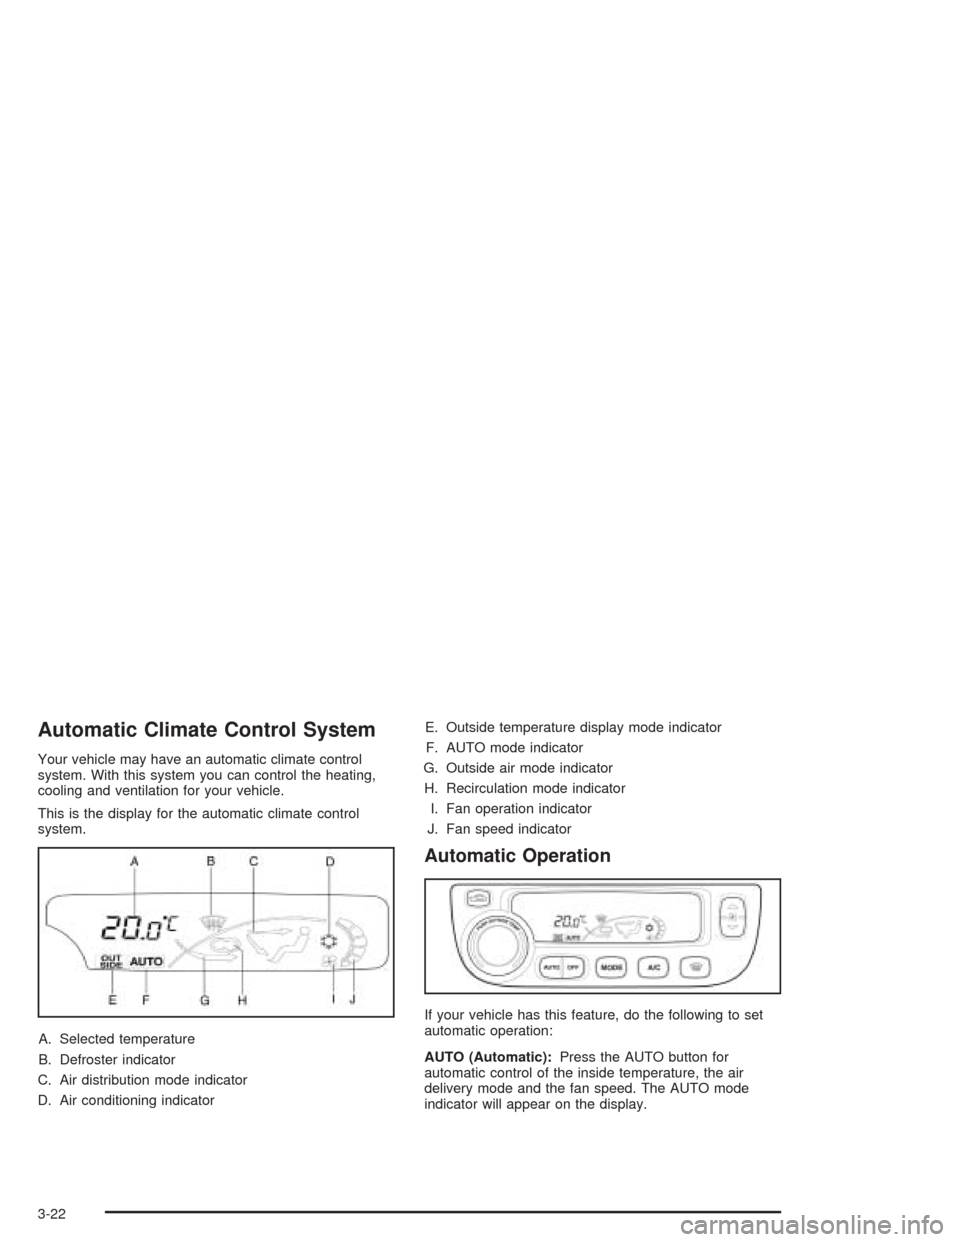
This is the display for the automatic climate control
system.
A. Selected temperature
B. Defroster indicator
C. Air distribution mode indicator
D. Air conditioning indicatorE. Outside temperature display mode indicator
F. AUTO mode indicator
G. Outside air mode indicator
H. Recirculation mode indicator
I. Fan operation indicator
J. Fan speed indicator
Automatic Operation
If your vehicle has this feature, do the following to set
automatic operation:
AUTO (Automatic):Press the AUTO button for
automatic control of the inside temperature, the air
delivery mode and the fan speed. The AUTO mode
indicator will appear on the display.
3-22
Page 122 of 338

?(Recirculation):Press this button to keep
outside air from coming in the vehicle. It can be used
to prevent outside air and odors from entering your
vehicle or to help heat or cool the air inside your vehicle
more quickly. Press this button to turn the recirculation
mode on or off.
Using the recirculation mode for extended periods may
cause your windows to fog. If this happens, select
the defrost mode.
A/C (Air Conditioning):Press this button to override
the automatic system and turn the air conditioning
system on or off. When A/C is pressed, the indicator
light on the display panel will come on to let you know
that it is activated.
Press this button again to turn the air conditioning
system off, or press the OFF button to turn the entire
system off.
On hot days, open the windows to let hot inside air
escape; then close them. This helps to reduce the time
it takes for your vehicle to cool down. It also helps
the system to operate more efficiently.
For quick cool down on hot days, press the AUTO button
and the system will automatically enter recirculation
mode and the temperature will be at the full cold position
for maximum cooling.Using these settings together for long periods of time may
cause the air inside of your vehicle to become too dry.
To prevent this from happening, after the air in your
vehicle has cooled, turn the recirculation mode off.
The air conditioning system removes moisture from the
air, so you may sometimes notice a small amount of
water dripping underneath your vehicle while idling or
after turning off the engine. This is normal.
Outside Temperature:To display the outside
temperature, press the temperature control knob.
Pressing this knob again will cancel the outside
temperature display, otherwise the display will return
to the temperature inside of the vehicle after about
five seconds.
The outside temperature sensor is located near the
front bumper, so the displayed temperature may
be affected by road or engine heat while the vehicle
is idling or traveling at slow speeds. For this reason,
the displayed temperature will be most accurate
at speeds over 25 mph (40 km/h).
3-24
Page 181 of 338
If you drive regularly in steep country, or if you are
planning to visit there, here are some tips that can make
your trips safer and more enjoyable.
•Keep your vehicle in good shape. Check all fluid
levels and also the brakes, tires, cooling system
and transaxle. These parts can work hard on
mountain roads.
•Know how to go down hills. The most important
thing to know is this: let your engine do some of
the slowing down. Shift to a lower gear when you
go down a steep or long hill.
{CAUTION:
If you do not shift down, your brakes could get
so hot that they would not work well. You would
then have poor braking or even none going
down a hill. You could crash. Shift down to let
your engine assist your brakes on a steep
downhill slope.
{CAUTION:
Coasting downhill in NEUTRAL (N) or with the
ignition off is dangerous. Your brakes will have
to do all the work of slowing down. They could
get so hot that they would not work well. You
would then have poor braking or even none
going down a hill. You could crash. Always have
your engine running and your vehicle in gear
when you go downhill.
•Know how to go uphill. Drive in the highest gear
possible.
•Stay in your own lane when driving on two-lane
roads in hills or mountains. Do not swing wide or cut
across the center of the road. Drive at speeds that let
you stay in your own lane.
•As you go over the top of a hill, be alert. There could
be something in your lane, like a stalled car or an
accident.
•You may see highway signs on mountains that warn
of special problems. Examples are long grades,
passing or no-passing zones, a falling rocks area or
winding roads. Be alert to these and take appropriate
action.
4-23
Page 195 of 338
Service............................................................5-3
Doing Your Own Service Work.........................5-4
Adding Equipment to the Outside of
Your Vehicle..............................................5-5
Fuel................................................................5-5
Gasoline Octane............................................5-5
Gasoline Specifications....................................5-5
California Fuel...............................................5-6
Additives.......................................................5-6
Fuels in Foreign Countries...............................5-7
Filling Your Tank............................................5-7
Filling a Portable Fuel Container.....................5-10
Checking Things Under the Hood....................5-10
Hood Release..............................................5-11
Engine Compartment Overview.......................5-12
Engine Oil...................................................5-13
Engine Air Cleaner/Filter................................5-17
Automatic Transaxle Fluid..............................5-19
Engine Coolant.............................................5-19
Coolant Surge Tank Pressure Cap..................5-21
Engine Overheating.......................................5-22
Cooling System............................................5-24
Power Steering Fluid.....................................5-30
Windshield Washer Fluid................................5-31
Brakes........................................................5-32Battery........................................................5-35
Jump Starting...............................................5-36
Headlamp Aiming...........................................5-40
Bulb Replacement..........................................5-41
Halogen Bulbs..............................................5-41
Headlamps..................................................5-41
Front Turn Signal Lamps...............................5-43
Center High-Mounted Stoplamp (CHMSL).........5-44
Parking Lamps.............................................5-45
Taillamps, Turn Signal, Stoplamps and
Back-up Lamps.........................................5-46
Windshield Wiper Blade Replacement..............5-47
Tires..............................................................5-48
Inflation - Tire Pressure.................................5-53
Tire Inspection and Rotation...........................5-54
When It Is Time for New Tires.......................5-55
Buying New Tires.........................................5-56
Uniform Tire Quality Grading..........................5-57
Wheel Alignment and Tire Balance..................5-58
Wheel Replacement......................................5-59
Tire Chains..................................................5-60
If a Tire Goes Flat........................................5-61
Changing a Flat Tire.....................................5-62
Spare Tire...................................................5-68
Section 5 Service and Appearance Care
5-1
Page 207 of 338
A. Engine Coolant Surge Tank. SeeCooling System on
page 5-24.
B. Power Steering Fluid Reservoir. SeePower Steering
Fluid on page 5-30.
C. Windshield Washer Fluid Reservoir. SeeWindshield
Washer Fluid on page 5-31.
D. Engine Oil Fill Cap. See “When to Add Engine Oil”
underEngine Oil on page 5-13.
E. Engine Oil Dipstick. See “Checking Engine Oil”
underEngine Oil on page 5-13.
F. Brake Fluid Reservoir. See “Brake Fluid” under
Brakes on page 5-32.
G. Engine Air Cleaner/Filter. SeeEngine Air
Cleaner/Filter on page 5-17.
H. Battery. SeeBattery on page 5-35.
I. Engine Compartment Fuse Block. See “Engine
Compartment Fuse Block” underFuses and Circuit
Breakers on page 5-79.Engine Oil
If the oil pressure light
appears on the instrument
cluster, it means you
need to check your engine
oil level right away.
For more information, seeOil Pressure Light on
page 3-42.
You should check your engine oil level regularly; this is
an added reminder.
5-13
Page 213 of 338
Automatic Transaxle Fluid
It is not necessary to check the transaxle fluid level.
If a leak occurs, take the vehicle to the dealership
service department and have it repaired as soon as
possible. You may also have your fluid level checked
by your dealer or service center when you have your
oil changed.
Have your dealer or service center change both the fluid
and filter every 50,000 miles (83 000 km) if the vehicle
is mainly driven under one or more of these conditions:
•In heavy city traffic where the outside temperature
regularly reaches 90°F (32°C) or higher.
•In hilly or mountainous terrain.
•Uses such as found in taxi, police or delivery
service.
If you do not use your vehicle under any of these
conditions, the fluid and filter do not require changing.
Notice:Use of automatic transaxle �uid labeled
other than ESSO LT71141 or TOTAL ATF H50235
may damage your vehicle, and the damages may
not be covered by your warranty. Always use
ESSO LT71141 or TOTAL ATF H50235 labeled
automatic transaxle �uid.
Engine Coolant
The following explains your cooling system and how
to add coolant when it is low. If you have a problem with
engine overheating, seeEngine Overheating on
page 5-22.
A 50/50 mixture of clean, drinkable water and proper
coolant will:
•Give freezing protection down to−22°F (−30°C).
•Give boiling protection up to 268°F (131°C).
•Protect against rust and corrosion.
•Help keep the proper engine temperature.
•Let the warning lights and gages work as they
should.
What to Use
Use a 50/50 mixture ofclean, drinkable waterand coolant
that meets GM specification 1825M, which will not
damage aluminum parts. You can also use a recycled
coolant confirming to GM specification 1825M with a
complete coolant flush and refill. If you use this coolant
mixture, you do not need to add anything else.
5-19