2004 BMW 645CI COUPE&CONVERTIBLE handbrake
[x] Cancel search: handbrakePage 15 of 216
At a glance
13Reference
Controls
Driving tips
Communications
Navigation
Entertainment
Mobility
Indicator and warning
lamps
Technology that monitors itself
The indicator and warning lamps identified
by the
+ symbol are subjected to an oper-
ation check each time you switch on the
ignition or start the engine. They each light
up once for different periods of time.
When a malfunction occurs in a monitored
system, the corresponding lamp will either
fail to go out when the engine is started, or
it will come on again during normal driving,
usually accompanied by a Check Control
message. You will find more details on the
specified pages.
Fixed indicator and warning lampsColors The indicator and warning lamps can light
up in different colors and combinations.
>Red:
Stop immediately
or
important reminder
>Red and yellow:
Continue to drive; drive cautiously
>Yellow:
Have the system checked at the earliest
opportunity
or
for your information
>Green or blue:
For your information.
Variable indicator and warning lamps
On the display 5 of the instrument cluster,
other indicator and warning lamps appear
as necessary. Pay attention to the instruc-
tions of the accompanying Check Control
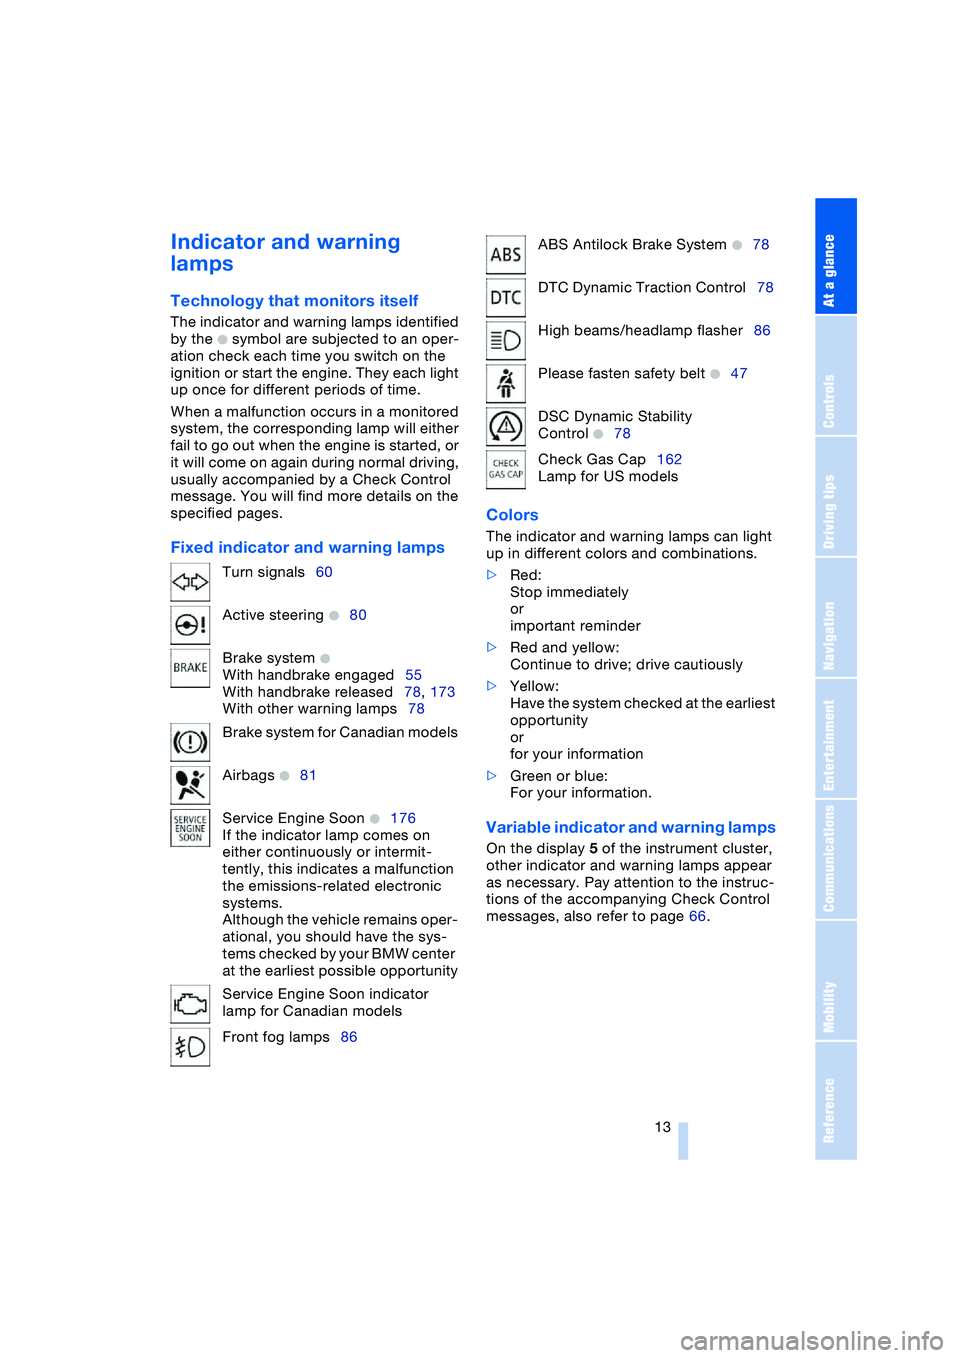
messages, also refer to page 66. Turn signals60
Active steering
+80
Brake system
+
With handbrake engaged55
With handbrake released78, 173
With other warning lamps78
Brake system for Canadian models
Airbags
+81
Service Engine Soon
+176
If the indicator lamp comes on
either continuously or intermit-
tently, this indicates a malfunction
the emissions-related electronic
systems.
Although the vehicle remains oper-
ational, you should have the sys-
tems checked by your BMW center
at the earliest possible opportunity
Service Engine Soon indicator
lamp for Canadian models
Front fog lamps86
ABS Antilock Brake System +78
DTC Dynamic Traction Control78
High beams/headlamp flasher86
Please fasten safety belt
+47
DSC Dynamic Stability
Control
+78
Check Gas Cap162
Lamp for US models
Page 56 of 216
Driving
54
Driving
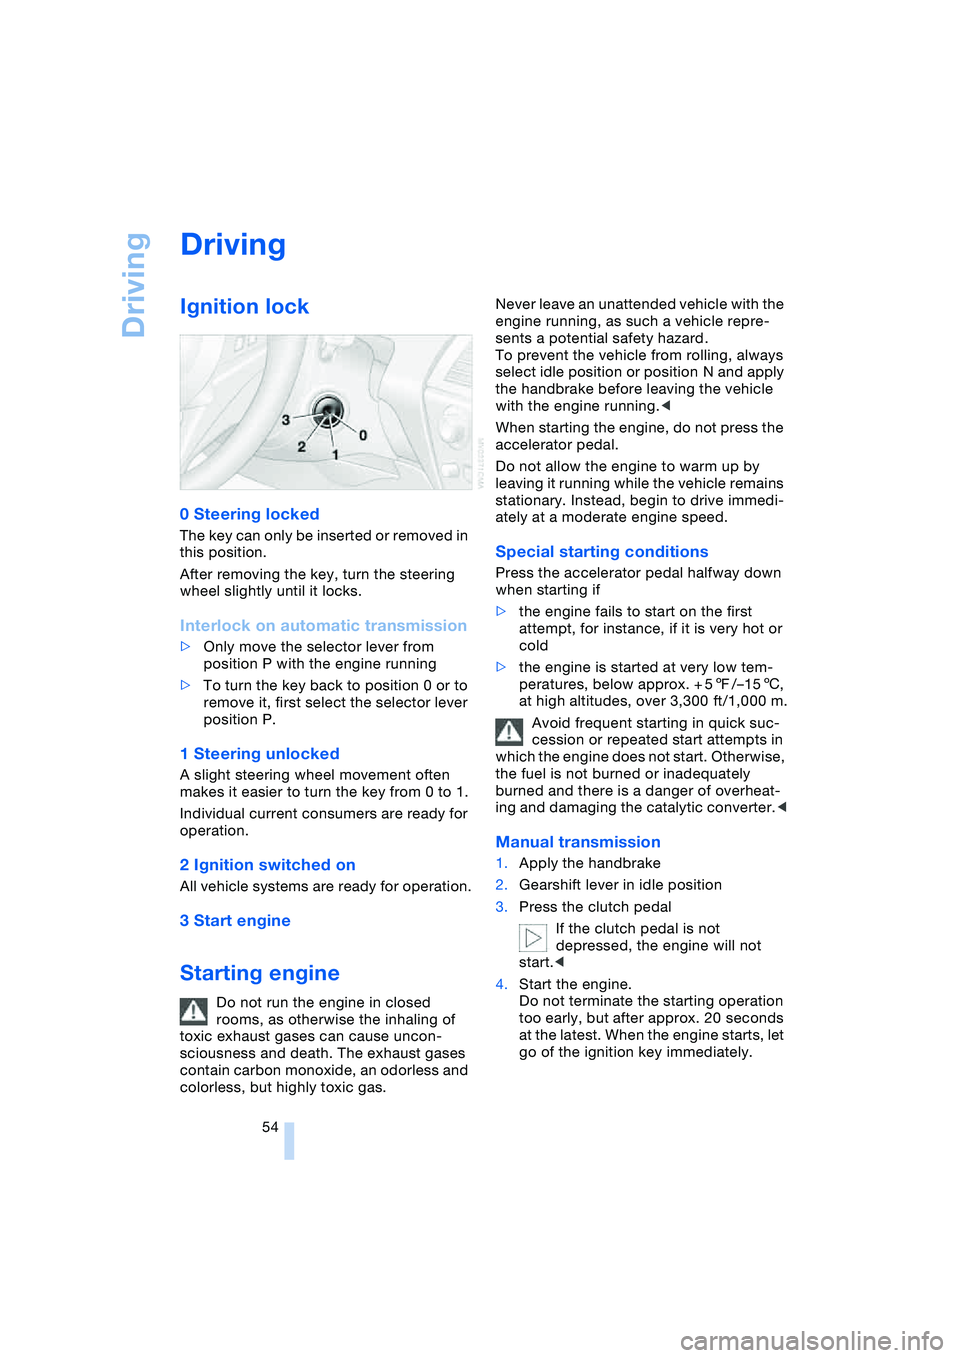
Ignition lock
0 Steering locked
The key can only be inserted or removed in
this position.
After removing the key, turn the steering
wheel slightly until it locks.
Interlock on automatic transmission
>Only move the selector lever from
position P with the engine running
>To turn the key back to position 0 or to
remove it, first select the selector lever
position P.
1 Steering unlocked
A slight steering wheel movement often
makes it easier to turn the key from 0 to 1.
Individual current consumers are ready for
operation.
2 Ignition switched on
All vehicle systems are ready for operation.
3 Start engine
Starting engine
Do not run the engine in closed
rooms, as otherwise the inhaling of
toxic exhaust gases can cause uncon-
sciousness and death. The exhaust gases
contain carbon monoxide, an odorless and
colorless, but highly toxic gas.Never leave an unattended vehicle with the
engine running, as such a vehicle repre-
sents a potential safety hazard.
To prevent the vehicle from rolling, always
select idle position or position N and apply
the handbrake before leaving the vehicle
with the engine running.<
When starting the engine, do not press the
accelerator pedal.
Do not allow the engine to warm up by
leaving it running while the vehicle remains
stationary. Instead, begin to drive immedi-
ately at a moderate engine speed.
Special starting conditions
Press the accelerator pedal halfway down
when starting if
>the engine fails to start on the first
attempt, for instance, if it is very hot or
cold
>the engine is started at very low tem-
peratures, below approx. + 57/–156,
at high altitudes, over 3,300 ft/1,000 m.
Avoid frequent starting in quick suc-
cession or repeated start attempts in
which the engine does not start. Otherwise,
the fuel is not burned or inadequately
burned and there is a danger of overheat-
ing and damaging the catalytic converter.<
Manual transmission
1.Apply the handbrake
2.Gearshift lever in idle position
3.Press the clutch pedal
If the clutch pedal is not
depressed, the engine will not
start.<
4.Start the engine.
Do not terminate the starting operation
too early, but after approx. 20 seconds
at the latest. When the engine starts, let
go of the ignition key immediately.
Page 57 of 216
Controls
55Reference
At a glance
Driving tips
Communications
Navigation
Entertainment
Mobility
SMG Sequential manual
transmission and automatic
transmission
Your BMW is equipped with the conve-
nience starting feature. Here, it is sufficient
to turn the ignition key only briefly to posi-
tion 3 'Start engine' and to let go of it right
away. The system responds by automati-
cally engaging the starter for a certain
period and allowing it to run until the engine
starts, after which it then disengages auto-
matically.
SMG Sequential manual
transmission
1.Press the brake pedal
2.Engage selector-lever position N
3.Start the engine.
If the engine does not start, engage
the last gear selected again, refer to
instrument cluster display, and then
engage selector-lever position N.<
Automatic transmission with
Steptronic
1.Press the brake pedal
2.Engage selector-lever position P or N
3.Start the engine.
Switching off engine
Do not remove the ignition key while
the vehicle is rolling, as otherwise the
steering wheel lock would engage while
steering.
When leaving the vehicle, remove the igni-
tion key and lock the steering.
When parking on a downhill incline, apply
the handbrake, as otherwise the vehicle
could roll away.<
Manual transmission
1.Turn the ignition key to position 1 or 0
2.Engage first or reverse gear.
SMG Sequential manual
transmission
1.Engage a drive position
2.Turn the ignition key to position 1 or 0.
A signal sounds if the idle position N is
engaged on stopping the engine.
Automatic transmission with
Steptronic
1.Engage selector-lever position P
2.Turn the ignition key to position 1 or 0.
Handbrake
The handbrake is primarily intended to pre-
vent the vehicle from rolling while parked;
it brakes the rear wheels.
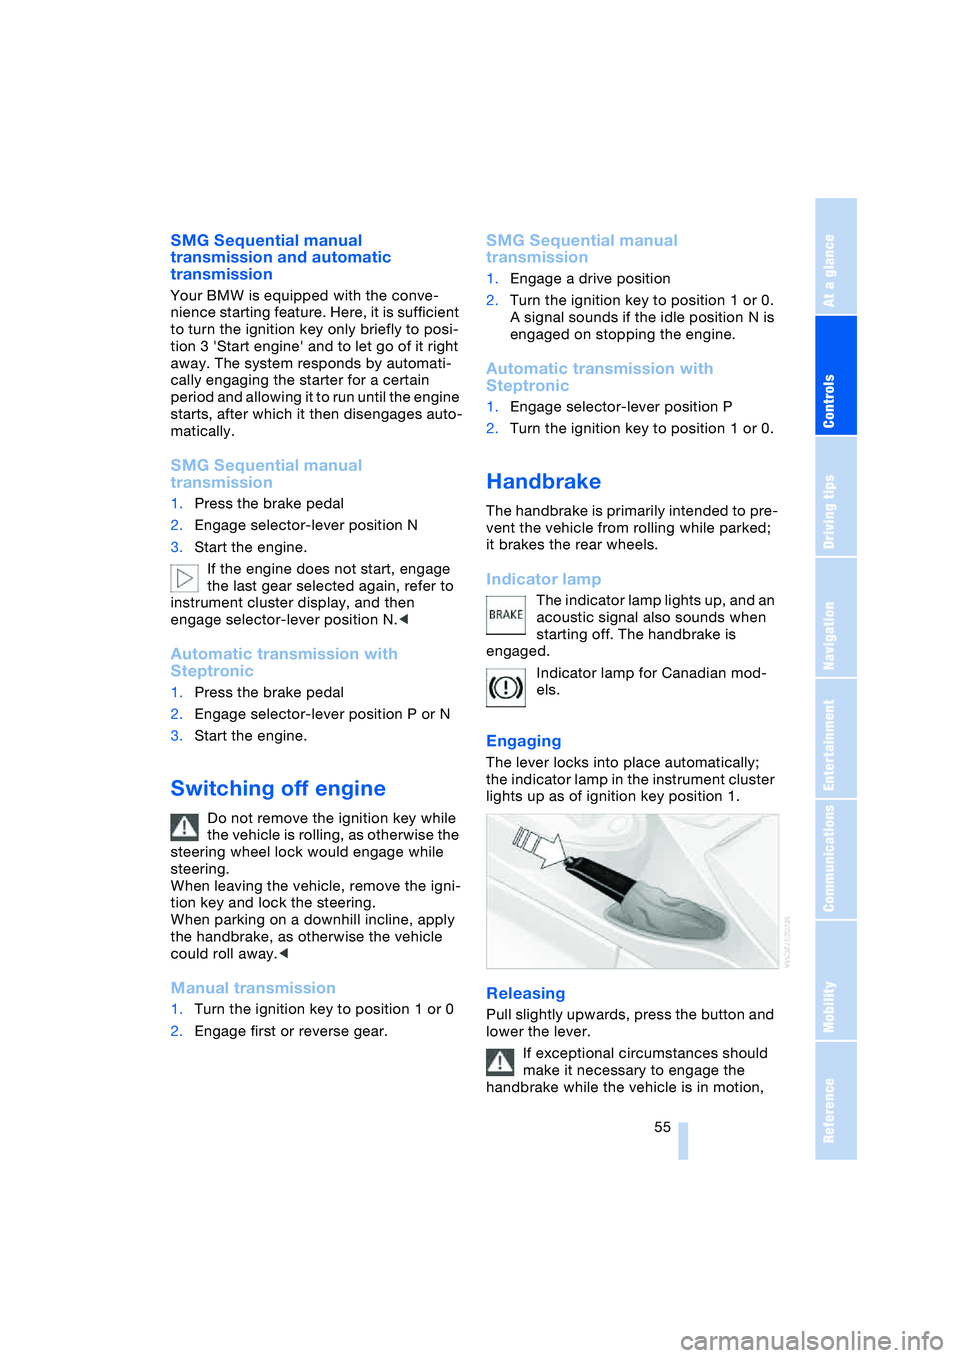
Indicator lamp
The indicator lamp lights up, and an
acoustic signal also sounds when
starting off. The handbrake is
engaged.
Indicator lamp for Canadian mod-
els.
Engaging
The lever locks into place automatically;
the indicator lamp in the instrument cluster
lights up as of ignition key position 1.
Releasing
Pull slightly upwards, press the button and
lower the lever.
If exceptional circumstances should
make it necessary to engage the
handbrake while the vehicle is in motion,
Page 58 of 216
Driving
56 do not pull it too strongly. In doing so, con-
tinuously press the button of the handbrake
lever.
Strong application of the handbrake can
lead to overbraking of the rear axle and
associated 'fishtailing' of the vehicle rear
end.
The brake lamps do not light up when the
handbrake is engaged.
Vehicles with manual or SMG transmission:
When parking on inclines, engage the
handbrake, as even engaging the first or
reverse gear might not under certain cir-
cumstances secure the vehicle against
moving.
Vehicles with automatic transmission:
Engage selector-lever position P.<
To prevent corrosion and one-sided
braking action, occasionally engage
the handbrake lightly when the vehicle is
slowly coming to a standstill if the traffic
conditions are suitable.<
Manual transmission
While shifting gear in the 5th/6th gear
level, press the gearshift lever to the
right, as otherwise engine damage could
occur from inadvertently engaging a gear in
the 3rd/4th gear level.
On inclines, do not hold the vehicle with the
clutch; use the handbrake. Otherwise there
is high clutch wear.<
Reverse gear
Select only when the vehicle is completely
stationary. When pressing the gearshift
lever to the left, overcome some resis-
tance.The backup lamps automatically switch on
in ignition key position 2.
SMG Sequential manual
transmission*
The concept
The SMG Sequential manual transmission
is an automated manual transmission in
which an electro-hydraulic system handles
the clutching and gear changes.
You operate the SMG using the selector
lever in the center console and two shift
paddles on the steering wheel.
It offers the following functions:
>Choice of manual or automatic mode:
Sequential mode or Drive mode
>Options of two drive programs:
Normal or Sport, refer to page 59
>Protection against incorrect gearshifts
and automatic shift down at minimum
engine speed, also in the Sequential
mode
>Kickdown function in the Drive mode
>Acceleration assistant, refer to
page 60.
The SMG is operational in ignition key posi-
tion 2.
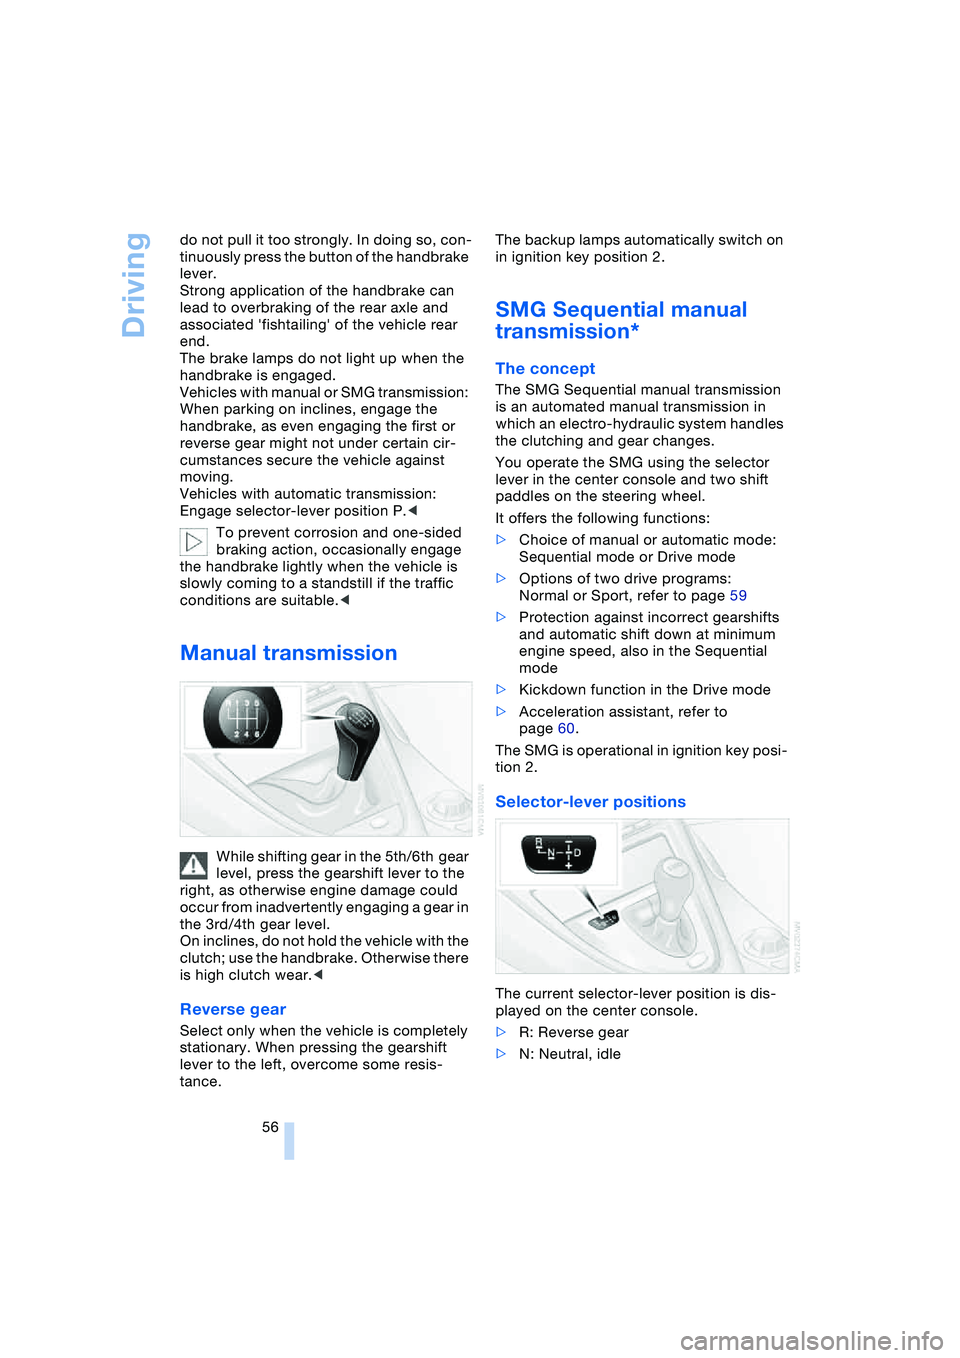
Selector-lever positions
The current selector-lever position is dis-
played on the center console.
>R: Reverse gear
>N: Neutral, idle
Page 59 of 216
Controls
57Reference
At a glance
Driving tips
Communications
Navigation
Entertainment
Mobility
>One-touch function for Sequential
mode
+: manual upshifts
—: manual downshifts
>D: Drive mode.
N is automatically engaged if the
driver's door is opened with the
engine running and neither pedals, shift
paddles nor the selector lever are oper-
ated.
This is indicated by an acoustic signal and
the flashing display N in the instrument
cluster.<
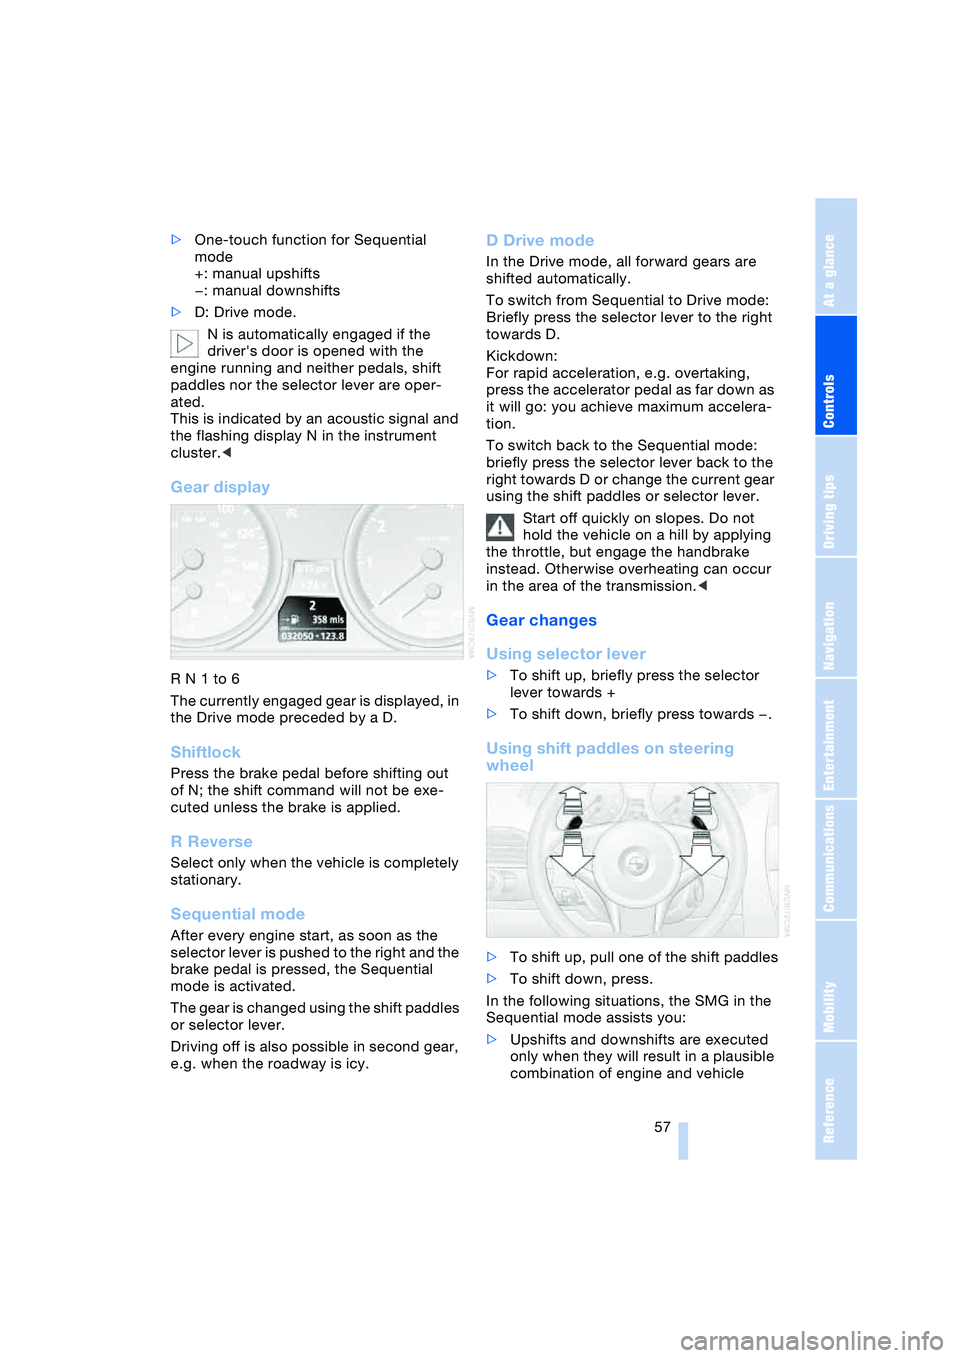
Gear display
R N 1 to 6
The currently engaged gear is displayed, in
the Drive mode preceded by a D.
Shiftlock
Press the brake pedal before shifting out
of N; the shift command will not be exe-
cuted unless the brake is applied.
R Reverse
Select only when the vehicle is completely
stationary.
Sequential mode
After every engine start, as soon as the
selector lever is pushed to the right and the
brake pedal is pressed, the Sequential
mode is activated.
The gear is changed using the shift paddles
or selector lever.
Driving off is also possible in second gear,
e.g. when the roadway is icy.
D Drive mode
In the Drive mode, all forward gears are
shifted automatically.
To switch from Sequential to Drive mode:
Briefly press the selector lever to the right
towards D.
Kickdown:
For rapid acceleration, e.g. overtaking,
press the accelerator pedal as far down as
it will go: you achieve maximum accelera-
tion.
To switch back to the Sequential mode:
briefly press the selector lever back to the
right towards D or change the current gear
using the shift paddles or selector lever.
Start off quickly on slopes. Do not
hold the vehicle on a hill by applying
the throttle, but engage the handbrake
instead. Otherwise overheating can occur
in the area of the transmission.<
Gear changes
Using selector lever
>To shift up, briefly press the selector
lever towards +
>To shift down, briefly press towards —.
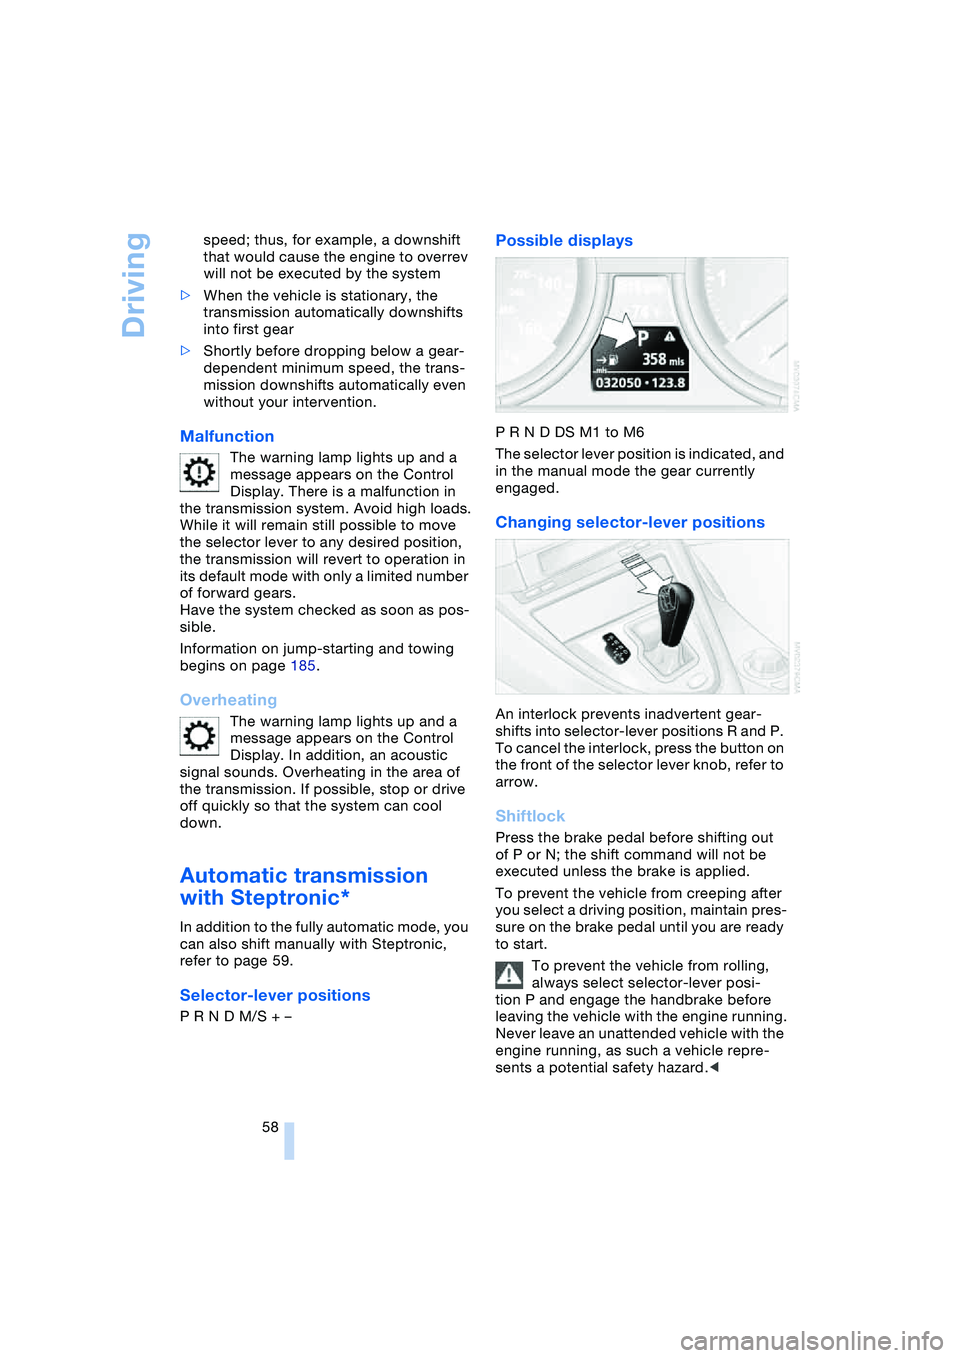
Using shift paddles on steering
wheel
>To shift up, pull one of the shift paddles
>To shift down, press.
In the following situations, the SMG in the
Sequential mode assists you:
>Upshifts and downshifts are executed
only when they will result in a plausible
combination of engine and vehicle
Page 60 of 216
Driving
58 speed; thus, for example, a downshift
that would cause the engine to overrev
will not be executed by the system
>When the vehicle is stationary, the
transmission automatically downshifts
into first gear
>Shortly before dropping below a gear-
dependent minimum speed, the trans-
mission downshifts automatically even
without your intervention.
Malfunction
The warning lamp lights up and a
message appears on the Control
Display. There is a malfunction in
the transmission system. Avoid high loads.
While it will remain still possible to move
the selector lever to any desired position,
the transmission will revert to operation in
its default mode with only a limited number
of forward gears.
Have the system checked as soon as pos-
sible.
Information on jump-starting and towing
begins on page 185.
Overheating
The warning lamp lights up and a
message appears on the Control
Display. In addition, an acoustic
signal sounds. Overheating in the area of
the transmission. If possible, stop or drive
off quickly so that the system can cool
down.
Automatic transmission
with Steptronic*
In addition to the fully automatic mode, you
can also shift manually with Steptronic,
refer to page 59.
Selector-lever positions
P R N D M/S + –
Possible displays
P R N D DS M1 to M6
The selector lever position is indicated, and
in the manual mode the gear currently
engaged.
Changing selector-lever positions
An interlock prevents inadvertent gear-
shifts into selector-lever positions R and P.
To cancel the interlock, press the button on
the front of the selector lever knob, refer to
arrow.
Shiftlock
Press the brake pedal before shifting out
of P or N; the shift command will not be
executed unless the brake is applied.
To prevent the vehicle from creeping after
you select a driving position, maintain pres-
sure on the brake pedal until you are ready
to start.
To prevent the vehicle from rolling,
always select selector-lever posi-
tion P and engage the handbrake before
leaving the vehicle with the engine running.
Never leave an unattended vehicle with the
engine running, as such a vehicle repre-
sents a potential safety hazard.<
Page 175 of 216
Mobility
173Reference
At a glance
Controls
Driving tips
Communications
Navigation
Entertainment
3.The coolant level is correct when the
measuring range of the fill level indica-
tor is at the level of the upper edge of
the filler neck, also refer to the drawing
next to the filler neck
4.If the coolant is low, slowly add coolant
up to the specified level – do not overfill
5.Turn the cap until you hear a click
6.Have the reason for the coolant loss
eliminated as soon as possible.
Brake system
Malfunction
Brake fluid
The warning lamp lights up in red
in spite of the handbrake being
released; a message appears on
the Control Display.
Stop the vehicle immediately.
The brake fluid in the reservoir has fallen to
below the minimum level. At the same time,
a significantly longer brake pedal path is
noticeable. Have the system checked
immediately by a BMW center.
Warning lamp for Canadian models.
When you continue driving, an
increased brake pedal path can be
necessary, and significantly longer braking
distances might be required. Please adapt
your driving style accordingly.<
Brake pads
The warning lamp lights up in red
in spite of the handbrake being
released; a message appears on
the Control Display. The brake pads have
reached their minimum pad thickness.
Have the brake pads replaced as soon as
possible.
Warning lamp for Canadian models.For your own safety: use only brake
pads that BMW has approved for your
particular vehicle model. As BMW cannot
assess the suitability of other brake pads
for use on your vehicle, BMW is unable to
assume continued responsibility for the
vehicle's operating safety if non-approved
pads are installed.<
Page 200 of 216
Everything from A to Z
198 Automatic
– air distribution 89
– air volume 89
– cruise control 62
– curb monitor 45
– headlamp control 85
– service notification 156
– station search 131
– steering wheel
adjustment 49
– storing stations 132
Automatic car wash 102
– also refer to the Caring for
your vehicle brochure
Automatic climate
control 88
– automatic air
distribution 89
– convertible program 91
– settings using Control
Center 90
– switching off 90
"Automatic programs" 91
Automatic recirculated-air
control, AUC 89
Automatic transmission
with Steptronic 58
– convenience start 55
– Dynamic Driving
Control 59
– interlock 54
– kickdown 59
– selector lever interlock 58
– shiftlock 58
– starting engine 55
– towing 186
– tow-starting 187
– warning lamp 59
"Automatic ventilation" 92
AUTO program with
automatic climate
control 89
"Autostore" on the
radio 130, 132
"AUTO" with automatic
climate control 91
Average fuel
consumption 69
– setting units 72
Average speed 69"Avoid ferries" for
navigation 116
Avoid freeways for
navigation 116
"Avoid highways" for
navigation 116
Avoiding unintentional
alarms 33
"Avoid tollroads" for
navigation 116
Axle loads, refer to
Weights 190
"A - Z" 148
B
Backrests, refer to
Seats 43
Backup lamps, refer to
Reverse gear 56
– replacing the bulbs 180
Balance, refer to
Adjusting the tone 128
Balance adjustment in
audio mode
– right/left 128
Bass, refer to
Adjusting the tone 127
"Bass", refer to
Adjusting the tone 128
Battery 181
– in the remote control 26
– jump-starting 184
Being towed 186
Belts, refer to
Safety belts 47
Beverage holder, refer to
Cup holders 97
Black ice, refer to
Ice warning 64
Blower, refer to
Air volume 89
BMW Assist 155
– enabling 155
– services offered 156
BMW maintenance
system 174
"BMW Service" 157
"BMW Service
settings" 155Bore, refer to
Engine data 190
Bottle holder, refer to
Cup holders 97
Brake Assistant, refer to
DBC Dynamic Brake
Control 78
Brake fluid 173
– warning lamp 173
Brake Force Display 80
Brake hydraulic
system 173
Brake lamps
– replacing the bulbs 180
– two-stage brake lamps 80
Brake pads 173
– break-in procedure 102
Brake pedal, refer to
Brakes 103
Brake rotors 103
Brakes 103
– ABS Antilock Brake
System 76
– brake fluid 173
– Brake Force Display 80
– brake pads 102, 173
– break-in procedure 102
– handbrake 55
Brake system 102
– brake fluid level 173
– brake pads 173
– brake rotors 103
– break-in procedure 102
– warning lamp 13, 78, 173
Brake wear warning
– brake pads 173
– warning lamp 173
Breakdown assistance 156
Breakdown services, refer
to Roadside
Assistance 184
Breaking-in the clutch 102
Breaking-in the
differential 102
Break-in procedures 102
"Brightness" 72
Buttons on the steering
wheel 11