2004 BMW 645CI COUPE&CONVERTIBLE change wheel
[x] Cancel search: change wheelPage 5 of 216
Reference
At a glance
Controls
Driving tips
Communications
Navigation
Entertainment
Mobility
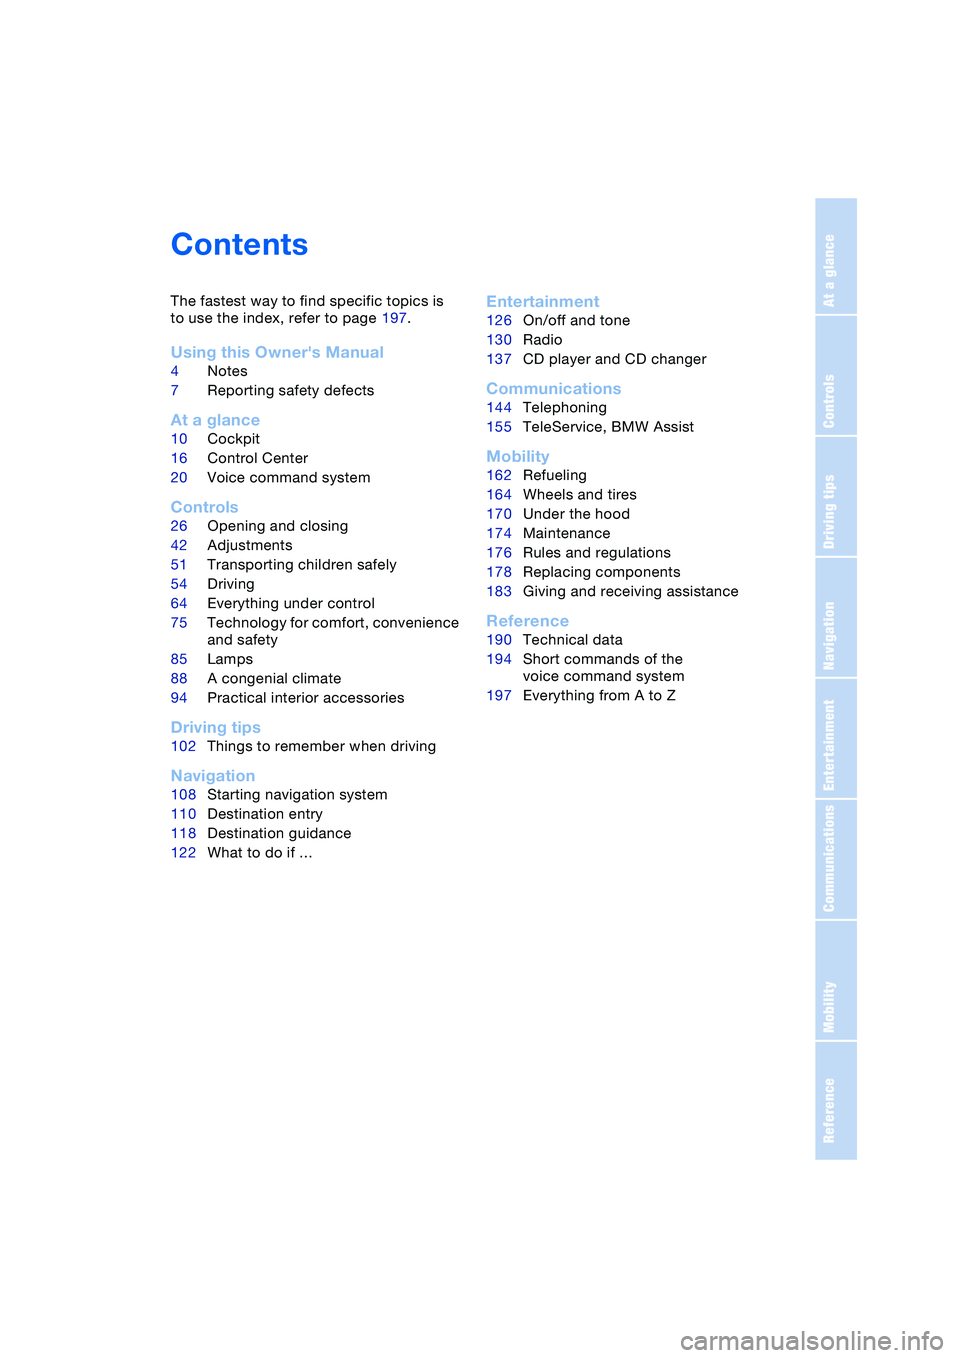
Contents
The fastest way to find specific topics is
to use the index, refer to page 197.
Using this Owner's Manual
4Notes
7Reporting safety defects
At a glance
10Cockpit
16Control Center
20Voice command system
Controls
26Opening and closing
42Adjustments
51Transporting children safely
54Driving
64Everything under control
75Technology for comfort, convenience
and safety
85Lamps
88A congenial climate
94Practical interior accessories
Driving tips
102Things to remember when driving
Navigation
108Starting navigation system
110Destination entry
118Destination guidance
122What to do if …
Entertainment
126On/off and tone
130Radio
137CD player and CD changer
Communications
144Telephoning
155TeleService, BMW Assist
Mobility
162Refueling
164Wheels and tires
170Under the hood
174Maintenance
176Rules and regulations
178Replacing components
183Giving and receiving assistance
Reference
190Technical data
194Short commands of the
voice command system
197Everything from A to Z
Page 13 of 216
At a glance
11Reference
Controls
Driving tips
Communications
Navigation
Entertainment
Mobility
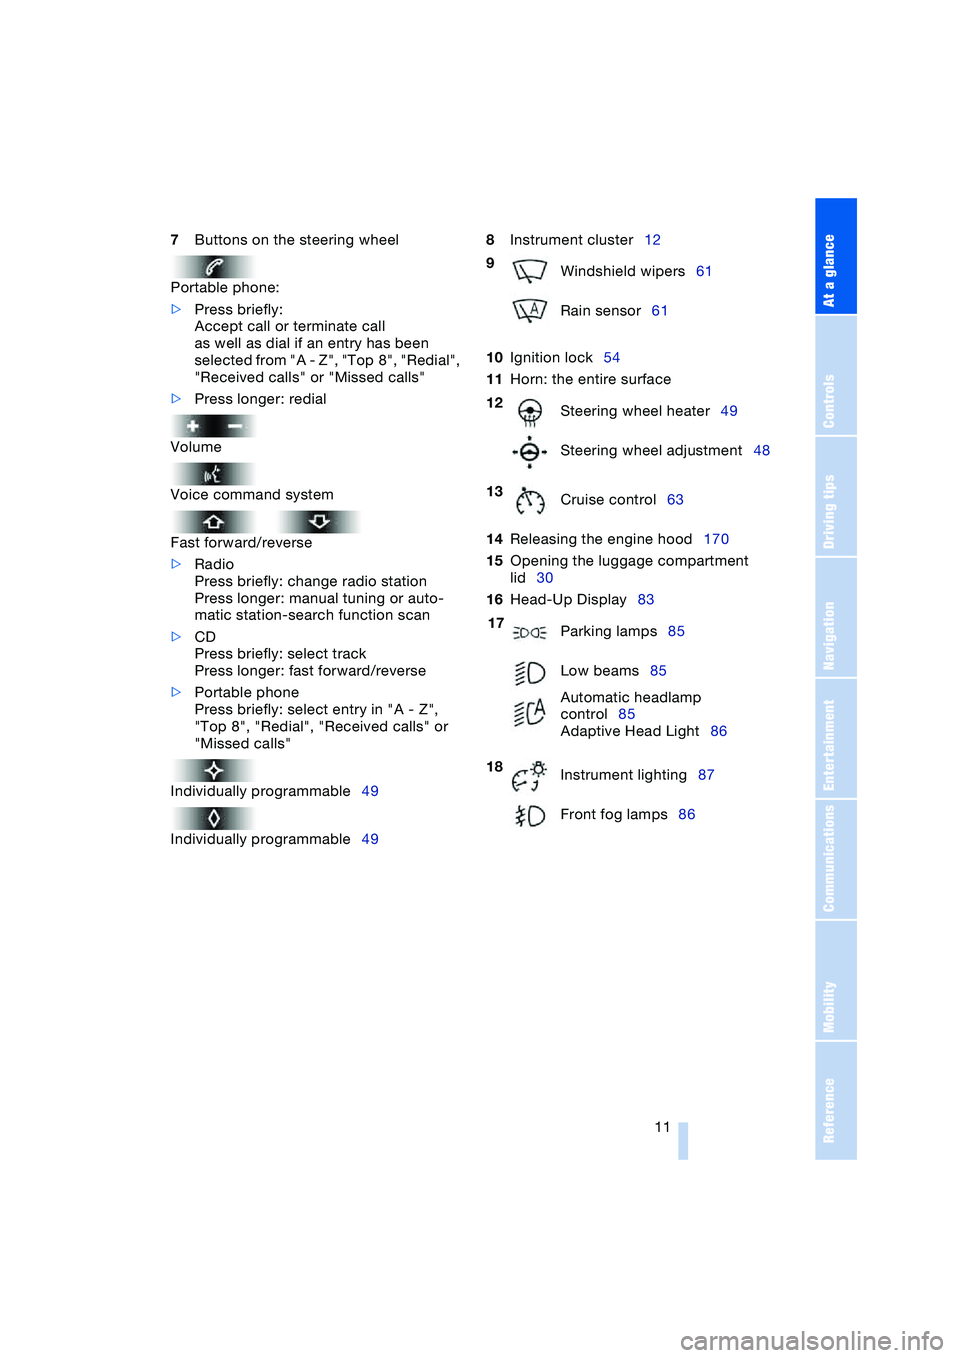
7Buttons on the steering wheel
Portable phone:
>Press briefly:
Accept call or terminate call
as well as dial if an entry has been
selected from "A - Z", "Top 8", "Redial",
"Received calls" or "Missed calls"
>Press longer: redial
Volume
Voice command system
Fast forward/reverse
>Radio
Press briefly: change radio station
Press longer: manual tuning or auto-
matic station-search function scan
>CD
Press briefly: select track
Press longer: fast forward/reverse
>Portable phone
Press briefly: select entry in "A - Z",
"Top 8", "Redial", "Received calls" or
"Missed calls"
Individually programmable49
Individually programmable498Instrument cluster12
10Ignition lock54
11Horn: the entire surface
14Releasing the engine hood170
15Opening the luggage compartment
lid30
16Head-Up Display83
9
Windshield wipers61
Rain sensor61
12
Steering wheel heater49
Steering wheel adjustment48
13
Cruise control63
17
Parking lamps85
Low beams85
Automatic headlamp
control85
Adaptive Head Light86
18
Instrument lighting87
Front fog lamps86
Page 23 of 216
At a glance
21Reference
Controls
Driving tips
Communications
Navigation
Entertainment
Mobility
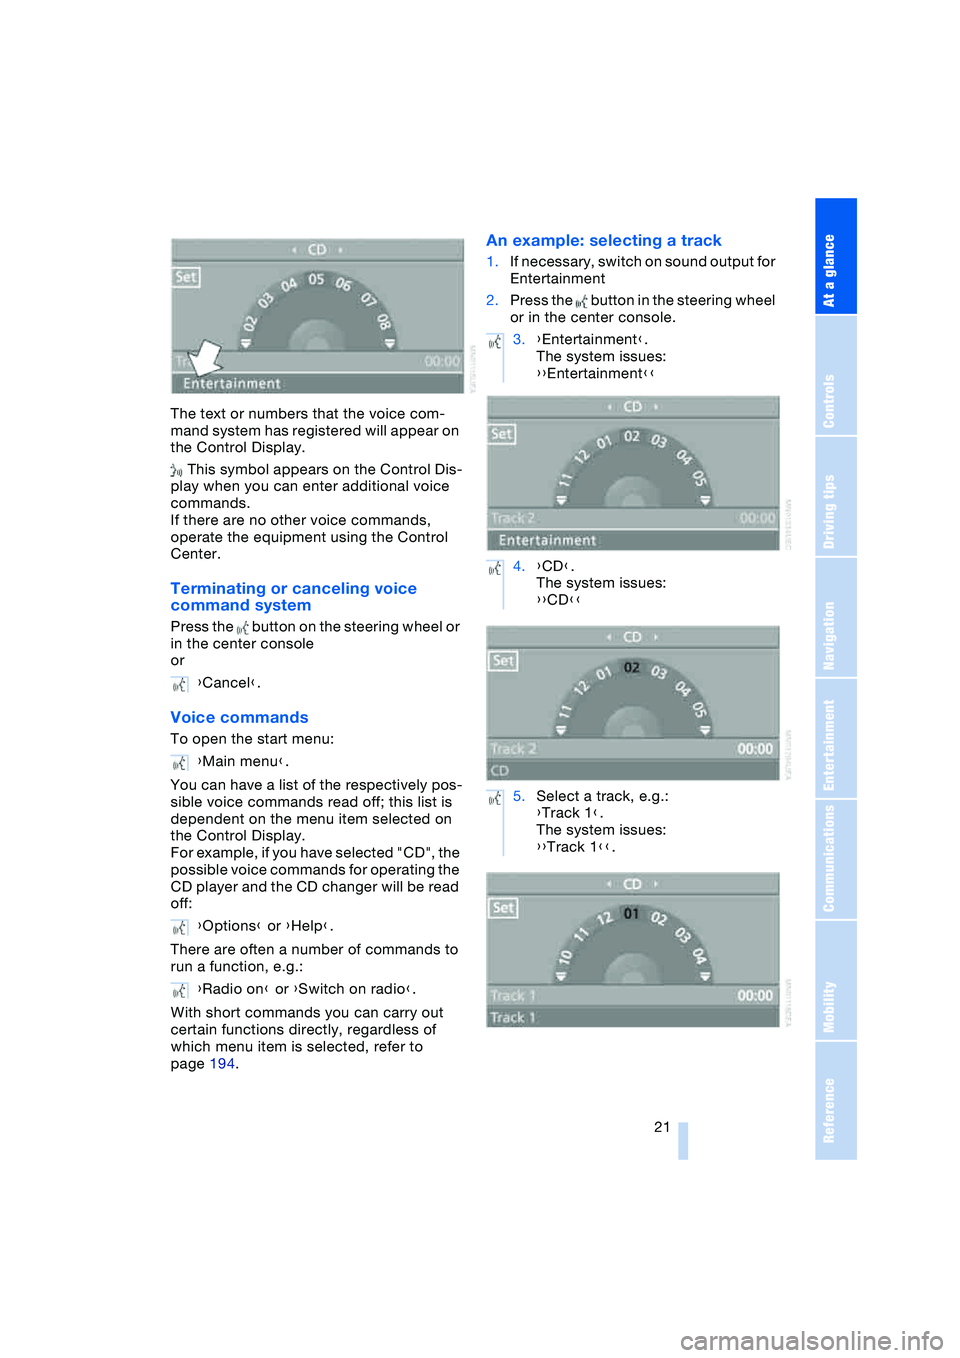
The text or numbers that the voice com-
mand system has registered will appear on
the Control Display.
This symbol appears on the Control Dis-
play when you can enter additional voice
commands.
If there are no other voice commands,
operate the equipment using the Control
Center.
Terminating or canceling voice
command system
Press the button on the steering wheel or
in the center console
or
Voice commands
To open the start menu:
You can have a list of the respectively pos-
sible voice commands read off; this list is
dependent on the menu item selected on
the Control Display.
For example, if you have selected "CD", the
possible voice commands for operating the
CD player and the CD changer will be read
off:
There are often a number of commands to
run a function, e.g.:
With short commands you can carry out
certain functions directly, regardless of
which menu item is selected, refer to
page 194.
An example: selecting a track
1.If necessary, switch on sound output for
Entertainment
2.Press the button in the steering wheel
or in the center console.
{Cancel}.
{Main menu}.
{Options} or {Help}.
{Radio on} or {Switch on radio}.
3.{Entertainment}.
The system issues:
{{Entertainment}}
4.{CD}.
The system issues:
{{CD}}
5.Select a track, e.g.:
{Track 1}.
The system issues:
{{Track 1}}.
Page 51 of 216
Controls
49Reference
At a glance
Driving tips
Communications
Navigation
Entertainment
Mobility
Automatic steering wheel
adjustment
In conjunction with seat, mirror and steer-
ing wheel memory.
The steering wheel automatically moves as
high up and far forward as possible to ease
driver entry and exit before then returning
to the standard position or stored memory
setting.
This automatic feature is governed by the
driver's door and the ignition lock.
Steering wheel heater*
In ignition key position 2, press the button.
The indicator lamp within the button lights
up when the steering wheel heater is in
operation.
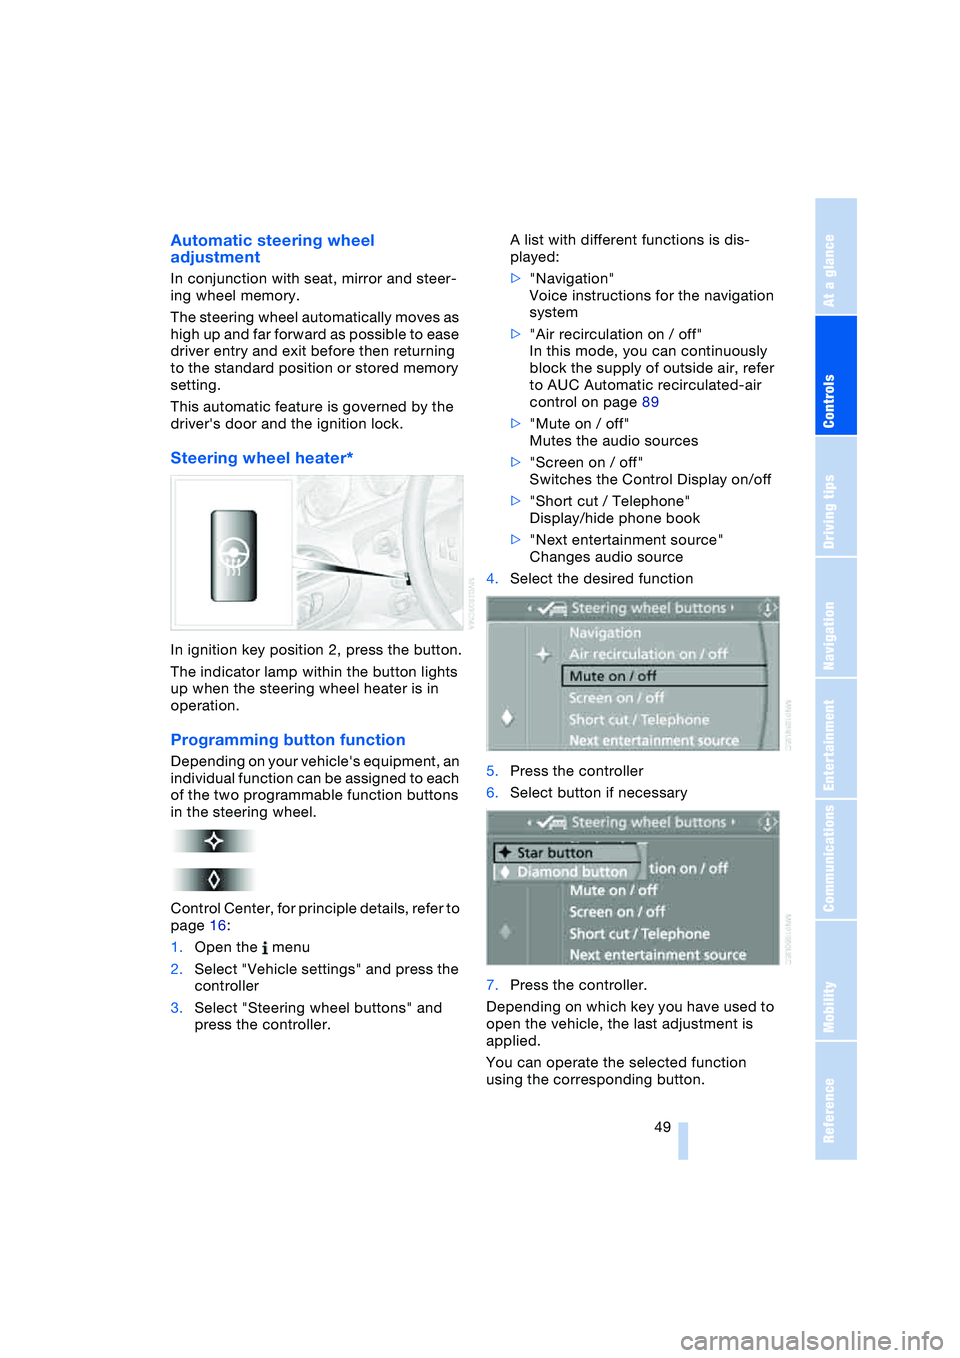
Programming button function
Depending on your vehicle's equipment, an
individual function can be assigned to each
of the two programmable function buttons
in the steering wheel.
Control Center, for principle details, refer to
page 16:
1.Open the menu
2.Select "Vehicle settings" and press the
controller
3.Select "Steering wheel buttons" and
press the controller.A list with different functions is dis-
played:
>"Navigation"
Voice instructions for the navigation
system
>"Air recirculation on / off"
In this mode, you can continuously
block the supply of outside air, refer
to AUC Automatic recirculated-air
control on page 89
>"Mute on / off"
Mutes the audio sources
>"Screen on / off"
Switches the Control Display on/off
>"Short cut / Telephone"
Display/hide phone book
>"Next entertainment source"
Changes audio source
4.Select the desired function
5.Press the controller
6.Select button if necessary
.
7.Press the controller.
Depending on which key you have used to
open the vehicle, the last adjustment is
applied.
You can operate the selected function
using the corresponding button.
Page 58 of 216
Driving
56 do not pull it too strongly. In doing so, con-
tinuously press the button of the handbrake
lever.
Strong application of the handbrake can
lead to overbraking of the rear axle and
associated 'fishtailing' of the vehicle rear
end.
The brake lamps do not light up when the
handbrake is engaged.
Vehicles with manual or SMG transmission:
When parking on inclines, engage the
handbrake, as even engaging the first or
reverse gear might not under certain cir-
cumstances secure the vehicle against
moving.
Vehicles with automatic transmission:
Engage selector-lever position P.<
To prevent corrosion and one-sided
braking action, occasionally engage
the handbrake lightly when the vehicle is
slowly coming to a standstill if the traffic
conditions are suitable.<
Manual transmission
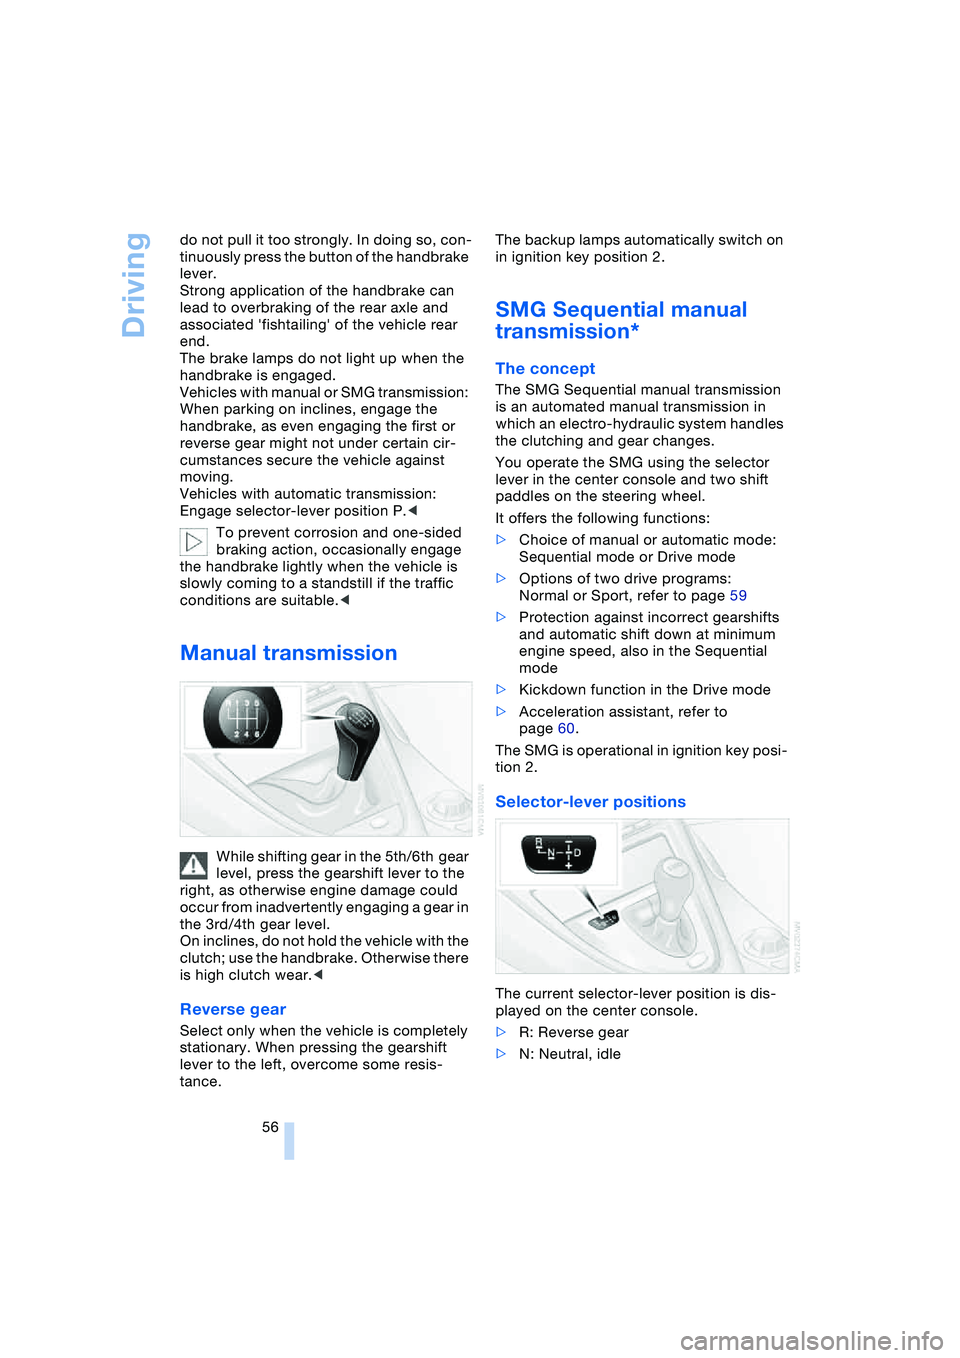
While shifting gear in the 5th/6th gear
level, press the gearshift lever to the
right, as otherwise engine damage could
occur from inadvertently engaging a gear in
the 3rd/4th gear level.
On inclines, do not hold the vehicle with the
clutch; use the handbrake. Otherwise there
is high clutch wear.<
Reverse gear
Select only when the vehicle is completely
stationary. When pressing the gearshift
lever to the left, overcome some resis-
tance.The backup lamps automatically switch on
in ignition key position 2.
SMG Sequential manual
transmission*
The concept
The SMG Sequential manual transmission
is an automated manual transmission in
which an electro-hydraulic system handles
the clutching and gear changes.
You operate the SMG using the selector
lever in the center console and two shift
paddles on the steering wheel.
It offers the following functions:
>Choice of manual or automatic mode:
Sequential mode or Drive mode
>Options of two drive programs:
Normal or Sport, refer to page 59
>Protection against incorrect gearshifts
and automatic shift down at minimum
engine speed, also in the Sequential
mode
>Kickdown function in the Drive mode
>Acceleration assistant, refer to
page 60.
The SMG is operational in ignition key posi-
tion 2.
Selector-lever positions
The current selector-lever position is dis-
played on the center console.
>R: Reverse gear
>N: Neutral, idle
Page 59 of 216
Controls
57Reference
At a glance
Driving tips
Communications
Navigation
Entertainment
Mobility
>One-touch function for Sequential
mode
+: manual upshifts
—: manual downshifts
>D: Drive mode.
N is automatically engaged if the
driver's door is opened with the
engine running and neither pedals, shift
paddles nor the selector lever are oper-
ated.
This is indicated by an acoustic signal and
the flashing display N in the instrument
cluster.<
Gear display
R N 1 to 6
The currently engaged gear is displayed, in
the Drive mode preceded by a D.
Shiftlock
Press the brake pedal before shifting out
of N; the shift command will not be exe-
cuted unless the brake is applied.
R Reverse
Select only when the vehicle is completely
stationary.
Sequential mode
After every engine start, as soon as the
selector lever is pushed to the right and the
brake pedal is pressed, the Sequential
mode is activated.
The gear is changed using the shift paddles
or selector lever.
Driving off is also possible in second gear,
e.g. when the roadway is icy.
D Drive mode
In the Drive mode, all forward gears are
shifted automatically.
To switch from Sequential to Drive mode:
Briefly press the selector lever to the right
towards D.
Kickdown:
For rapid acceleration, e.g. overtaking,
press the accelerator pedal as far down as
it will go: you achieve maximum accelera-
tion.
To switch back to the Sequential mode:
briefly press the selector lever back to the
right towards D or change the current gear
using the shift paddles or selector lever.
Start off quickly on slopes. Do not
hold the vehicle on a hill by applying
the throttle, but engage the handbrake
instead. Otherwise overheating can occur
in the area of the transmission.<
Gear changes
Using selector lever
>To shift up, briefly press the selector
lever towards +
>To shift down, briefly press towards —.
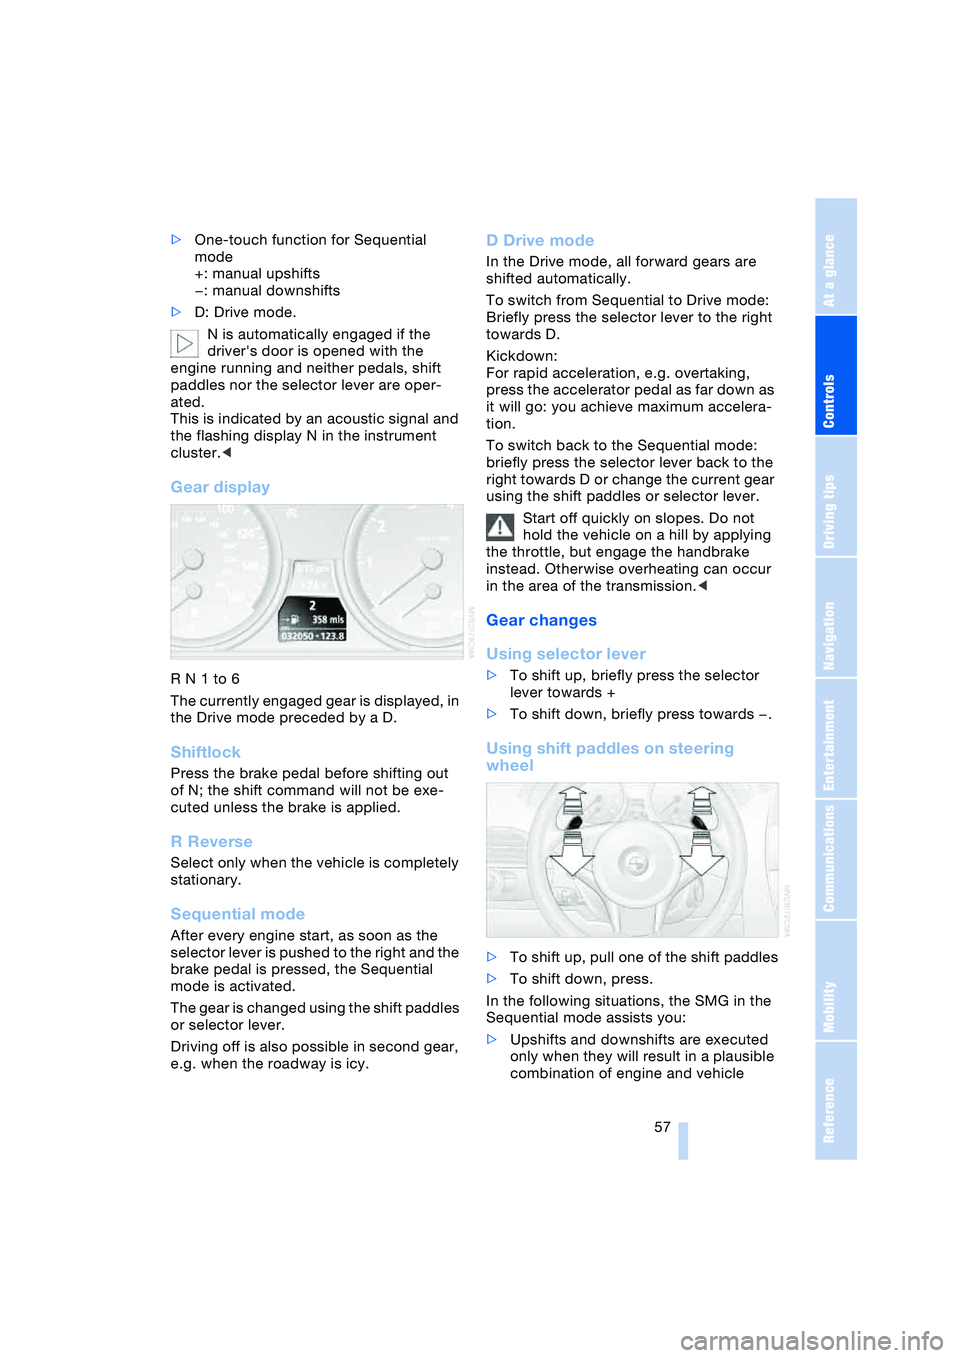
Using shift paddles on steering
wheel
>To shift up, pull one of the shift paddles
>To shift down, press.
In the following situations, the SMG in the
Sequential mode assists you:
>Upshifts and downshifts are executed
only when they will result in a plausible
combination of engine and vehicle
Page 78 of 216
Technology for comfort, convenience and safety
76 indicate the presence of objects in green
before they are close enough to generate a
signal tone.
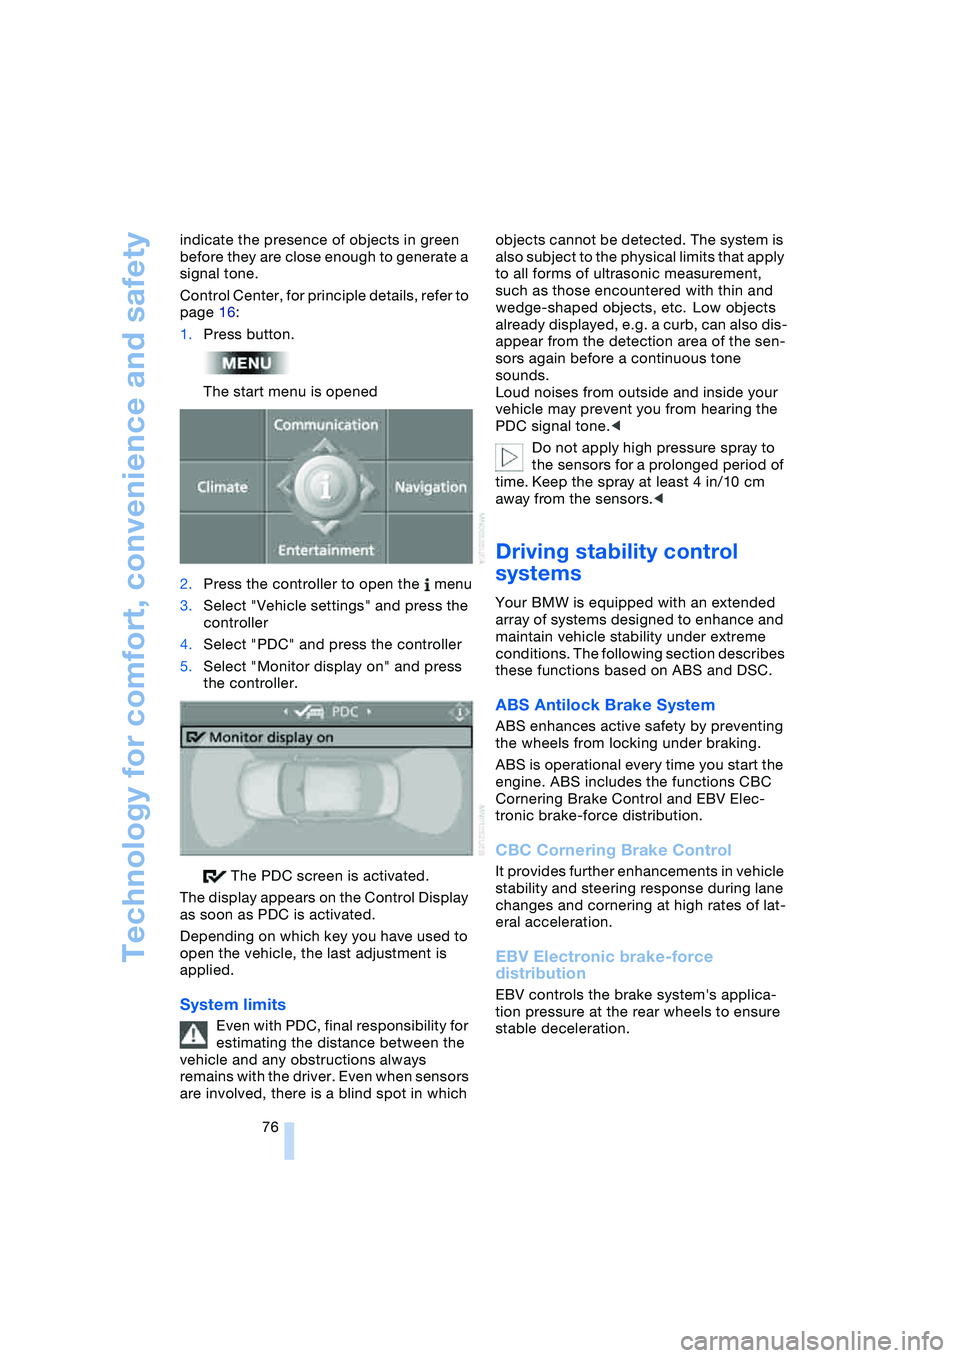
Control Center, for principle details, refer to
page 16:
1.Press button.
The start menu is opened
2.Press the controller to open the menu
3.Select "Vehicle settings" and press the
controller
4.Select "PDC" and press the controller
5.Select "Monitor display on" and press
the controller.
The PDC screen is activated.
The display appears on the Control Display
as soon as PDC is activated.
Depending on which key you have used to
open the vehicle, the last adjustment is
applied.
System limits
Even with PDC, final responsibility for
estimating the distance between the
vehicle and any obstructions always
remains with the driver. Even when sensors
are involved, there is a blind spot in which objects cannot be detected. The system is
also subject to the physical limits that apply
to all forms of ultrasonic measurement,
such as those encountered with thin and
wedge-shaped objects, etc. Low objects
already displayed, e.g. a curb, can also dis-
appear from the detection area of the sen-
sors again before a continuous tone
sounds.
Loud noises from outside and inside your
vehicle may prevent you from hearing the
PDC signal tone.<
Do not apply high pressure spray to
the sensors for a prolonged period of
time. Keep the spray at least 4 in/10 cm
away from the sensors.<
Driving stability control
systems
Your BMW is equipped with an extended
array of systems designed to enhance and
maintain vehicle stability under extreme
conditions. The following section describes
these functions based on ABS and DSC.
ABS Antilock Brake System
ABS enhances active safety by preventing
the wheels from locking under braking.
ABS is operational every time you start the
engine. ABS includes the functions CBC
Cornering Brake Control and EBV Elec-
tronic brake-force distribution.
CBC Cornering Brake Control
It provides further enhancements in vehicle
stability and steering response during lane
changes and cornering at high rates of lat-
eral acceleration.
EBV Electronic brake-force
distribution
EBV controls the brake system's applica-
tion pressure at the rear wheels to ensure
stable deceleration.
Page 82 of 216
Technology for comfort, convenience and safety
80
Report of a flat tire
The warning lamp lights up in red
and a message appears on the
Control Display. In addition, an
acoustic signal sounds. There is a flat tire
or extensive inflation pressure loss.
1.Cautiously reduce the vehicle speed to
below 50 mph/80 km/h. Avoid sudden
braking and steering maneuvers. Do
not exceed a vehicle speed of 50 mph/
80 km/h
Due to the reinforcement on the
side walls of the run-flat tires,
inflation pressure loss can not usually
be recognized from the outside, refer to
Run-flat tires on page 168.<
2.To continue driving, comply with the
instructions for driving with damaged
tires on page 168.
Malfunction
The warning lamp lights up yellow
and a message appears on the
Control Display. The Flat Tire Moni-
tor has a malfunction or has failed. Have
the system checked as soon as possible.
Active steering*
The concept
The active steering is a system that actively
varies the steering angle of the front wheels
in relation to the steering wheel move-
ments.
When you are driving in the low road speed
range, e.g. in a town or when parking, the
steering angle of the wheels is reinforced,
i.e. the steering becomes very direct.
In the higher speed range, on the other
hand, the steering angle of the wheels is
reduced more and more. This improves the
handling capability of your BMW over the
entire speed range.
In critical situations, the system can make
targeted changes to the steering angle pro-
vided by the driver and thus stabilize the
vehicle before the driver intervenes.
Malfunction
The fixed warning lamp lights up.
The active steering is no longer
operational. In the low speed range,
greater steering wheel movement is neces-
sary. Have the system checked.
If the warning lamp lights up during the first
engine starting following a power supply
interruption, the system must be activated
with initialization.
Initializing system
1.Start the engine
2.With the vehicle stationary, turn the
steering wheel from the straight-ahead
position to the left as far as it will go and
then back to the straight-ahead position
3.Switch off the engine.
When you start the engine again, all the
functions of the active steering are avail-
able once again.
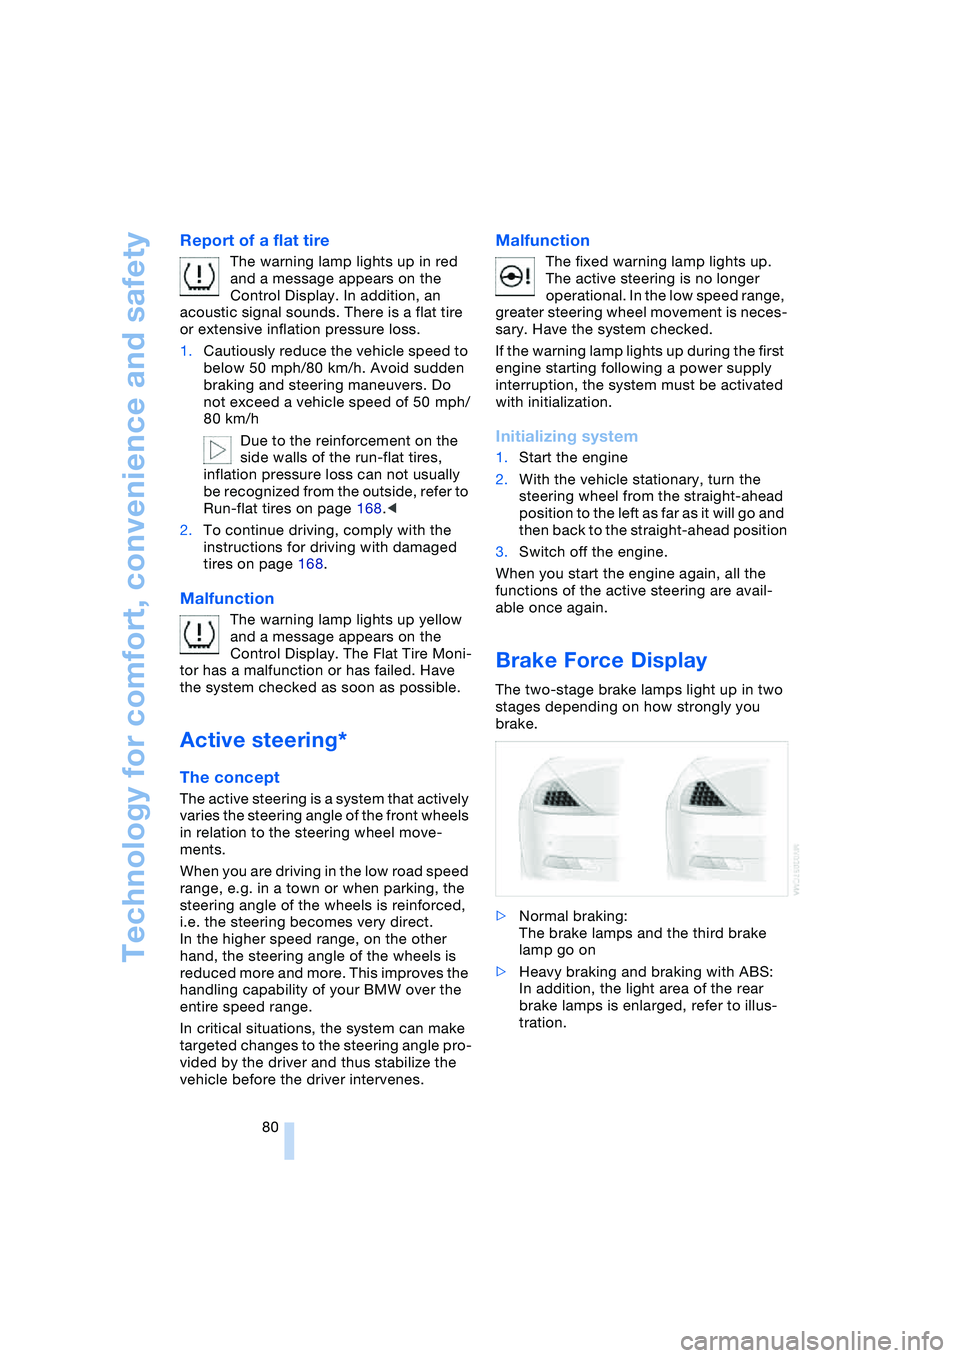
Brake Force Display
The two-stage brake lamps light up in two
stages depending on how strongly you
brake.
>Normal braking:
The brake lamps and the third brake
lamp go on
>Heavy braking and braking with ABS:
In addition, the light area of the rear
brake lamps is enlarged, refer to illus-
tration.