2004 BMW 645CI COUPE&CONVERTIBLE sat nav
[x] Cancel search: sat navPage 91 of 216
Controls
89Reference
At a glance
Driving tips
Communications
Navigation
Entertainment
Mobility
14Indicator lamp for independent ventila-
tion
>Activation time set:
The indicator lamp comes on
>Independent ventilation switched on:
The indicator lamp flashes
15Rear window defroster
16Air grill for interior temperature sensor –
please keep clear and unobstructed
All other setting options for the automatic
climate control can be found at "Climate"
and in the menu on the Control Display,
refer to pages 90 and 91.
The current setting for air distribution is dis-
played on the Control Display.
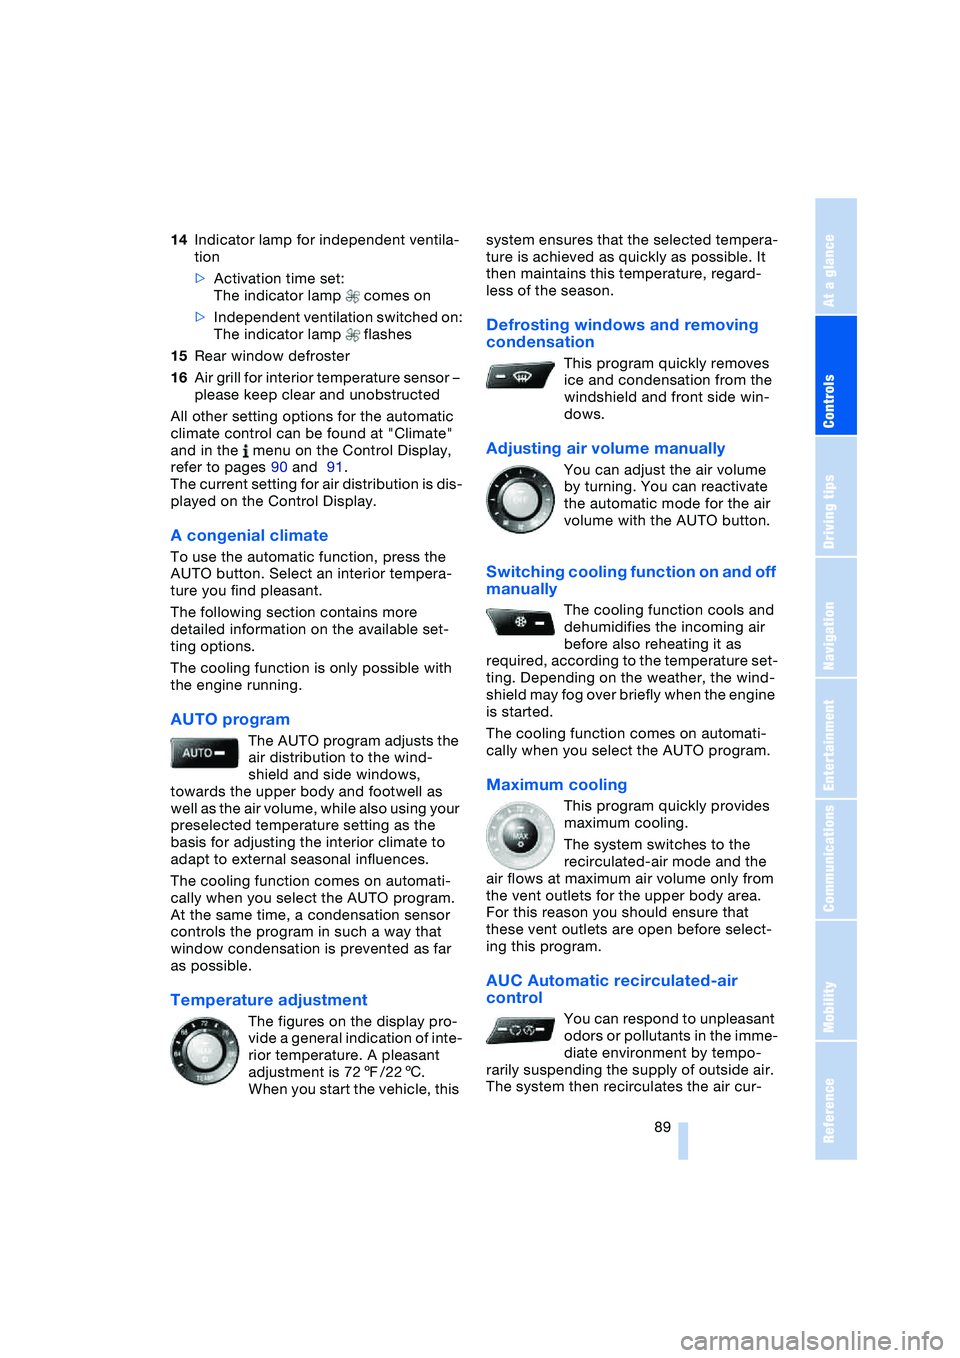
A congenial climate
To use the automatic function, press the
AUTO button. Select an interior tempera-
ture you find pleasant.
The following section contains more
detailed information on the available set-
ting options.
The cooling function is only possible with
the engine running.
AUTO program
The AUTO program adjusts the
air distribution to the wind-
shield and side windows,
towards the upper body and footwell as
well as the air volume, while also using your
preselected temperature setting as the
basis for adjusting the interior climate to
adapt to external seasonal influences.
The cooling function comes on automati-
cally when you select the AUTO program.
At the same time, a condensation sensor
controls the program in such a way that
window condensation is prevented as far
as possible.
Temperature adjustment
The figures on the display pro-
vide a general indication of inte-
rior temperature. A pleasant
adjustment is 727/226.
When you start the vehicle, this system ensures that the selected tempera-
ture is achieved as quickly as possible. It
then maintains this temperature, regard-
less of the season.
Defrosting windows and removing
condensation
This program quickly removes
ice and condensation from the
windshield and front side win-
dows.
Adjusting air volume manually
You can adjust the air volume
by turning. You can reactivate
the automatic mode for the air
volume with the AUTO button.
Switching cooling function on and off
manually
The cooling function cools and
dehumidifies the incoming air
before also reheating it as
required, according to the temperature set-
ting. Depending on the weather, the wind-
shield may fog over briefly when the engine
is started.
The cooling function comes on automati-
cally when you select the AUTO program.
Maximum cooling
This program quickly provides
maximum cooling.
The system switches to the
recirculated-air mode and the
air flows at maximum air volume only from
the vent outlets for the upper body area.
For this reason you should ensure that
these vent outlets are open before select-
ing this program.
AUC Automatic recirculated-air
control
You can respond to unpleasant
odors or pollutants in the imme-
diate environment by tempo-
rarily suspending the supply of outside air.
The system then recirculates the air cur-
Page 92 of 216
A congenial climate
90 rently within the vehicle. AUC executes this
function automatically.
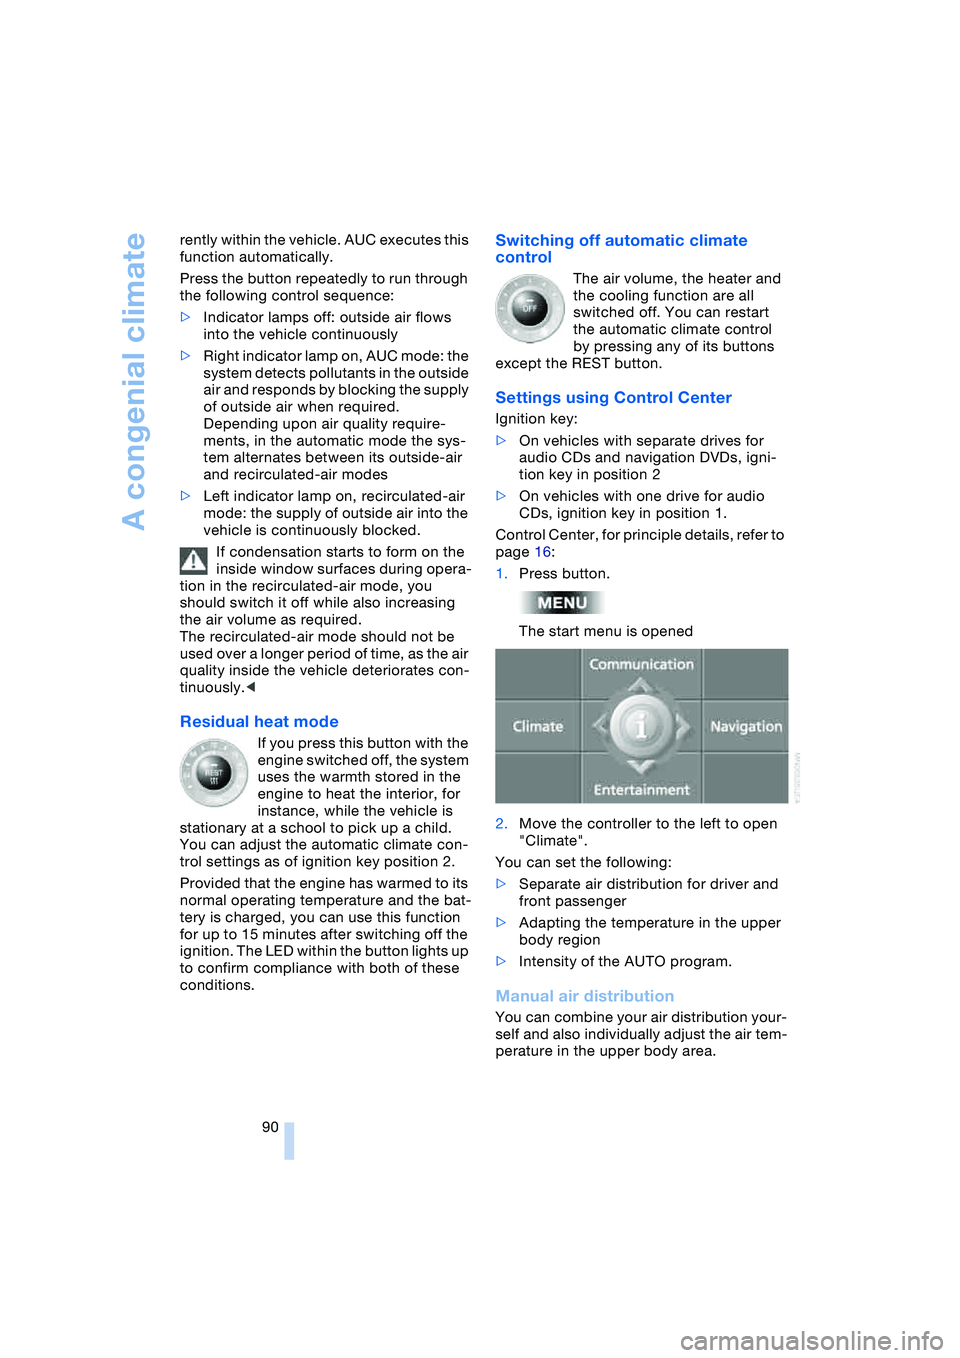
Press the button repeatedly to run through
the following control sequence:
>Indicator lamps off: outside air flows
into the vehicle continuously
>Right indicator lamp on, AUC mode: the
system detects pollutants in the outside
air and responds by blocking the supply
of outside air when required.
Depending upon air quality require-
ments, in the automatic mode the sys-
tem alternates between its outside-air
and recirculated-air modes
>Left indicator lamp on, recirculated-air
mode: the supply of outside air into the
vehicle is continuously blocked.
If condensation starts to form on the
inside window surfaces during opera-
tion in the recirculated-air mode, you
should switch it off while also increasing
the air volume as required.
The recirculated-air mode should not be
used over a longer period of time, as the air
quality inside the vehicle deteriorates con-
tinuously.<
Residual heat mode
If you press this button with the
engine switched off, the system
uses the warmth stored in the
engine to heat the interior, for
instance, while the vehicle is
stationary at a school to pick up a child.
You can adjust the automatic climate con-
trol settings as of ignition key position 2.
Provided that the engine has warmed to its
normal operating temperature and the bat-
tery is charged, you can use this function
for up to 15 minutes after switching off the
ignition. The LED within the button lights up
to confirm compliance with both of these
conditions.
Switching off automatic climate
control
The air volume, the heater and
the cooling function are all
switched off. You can restart
the automatic climate control
by pressing any of its buttons
except the REST button.
Settings using Control Center
Ignition key:
>On vehicles with separate drives for
audio CDs and navigation DVDs, igni-
tion key in position 2
>On vehicles with one drive for audio
CDs, ignition key in position 1.
Control Center, for principle details, refer to
page 16:
1.Press button.
The start menu is opened
2.Move the controller to the left to open
"Climate".
You can set the following:
>Separate air distribution for driver and
front passenger
>Adapting the temperature in the upper
body region
>Intensity of the AUTO program.
Manual air distribution
You can combine your air distribution your-
self and also individually adjust the air tem-
perature in the upper body area.
Page 105 of 216
Driving tips
103Reference
At a glance
Controls
Communications
Navigation
Entertainment
Mobility
road surface. This phenomenon is referred
to as hydroplaning, and is characterized
by a partial or complete loss of contact
between the tires and the road surface, ulti-
mately undermining your ability to steer
and brake the vehicle.<
The risk of hydroplaning increases as the
tread depth of the tires decreases, also
refer to Tire tread on page 167.
Driving through water
Do not drive through water on the
road if it is deeper than 1 ft/30 cm,
and then only at walking speed at the most.
Otherwise, the vehicle's engine, the electri-
cal systems and the transmission may be
damaged.<
Braking safely
Your BMW is equipped with ABS as stan-
dard. The best way to achieve optimized
braking response from the ABS is to apply
maximum pressure to the brake pedal in
situations where this is required: panic
stops. Since the vehicle maintains steering
responsiveness, you can nevertheless
avoid possible obstacles with a minimum
of steering effort.
Pulsation at the brake pedal combines with
sounds from the hydraulic circuits to indi-
cate to the driver that ABS is in its active
mode.
Do not drive with your foot resting on
the brake pedal. Even light but con-
sistent pedal pressure can lead to high
temperatures, brake wear and possibly
even brake failure.<
Driving in wet conditions
While driving in wet conditions and in
heavy rain, it is a good idea to apply light
pressure to the brake pedal every few
miles. Monitor traffic conditions to ensure
that this maneuver does not endanger
other road users. The heat generated in this
process helps dry the pads and rotors to
ensure that full braking efficiency will then
be available when you need it.
Hills
To prevent overheating and thus
reduced efficiency of the brake sys-
tem, downshift to a gear in which only min-
imal brake applications are needed when
descending long or steep downhill
stretches. Even light but consistent pedal
pressure can lead to high temperatures,
brake wear and possibly even brake fail-
ure.<
You can further enhance the engine's brak-
ing effect by selecting a lower gear in the
automatic transmission's manual mode,
downshifting as far as first gear on
extremely steep stretches, refer to
page 59. This strategy helps you avoid
placing excessive loads on the brake sys-
tem.
Never drive with the clutch pressed
or allow the vehicle to coast with the
transmission in Neutral – or with the engine
switched off – there is no engine braking
when the transmission is in Neutral, and no
power assist for brakes and steering when
the engine is not running.
Never allow floor mats, carpets or any other
objects to protrude into the area around the
accelerator and brake pedals and obstruct
their movement.<
Corrosion on brake rotors
When the vehicle is driven only occasion-
ally, during extended periods when the
vehicle is not used at all, and in operating
conditions where brake applications are
less frequent, there is an increased ten-
dency for corrosion to form on rotors, while
contaminants accumulate on the brake
pads. This occurs because the minimum
pressure which must be exerted by the
pads during brake applications to clean the
rotors is not reached.
Should corrosion form on the brake rotors,
the brakes will tend to respond with a pul-
sating effect that even extended applica-
tion will fail to cure.
Page 110 of 216
Starting navigation system
108
Starting navigation system
Your navigation system can use satellites
to ascertain the precise position of your
vehicle and guide you reliably to any desti-
nation you enter.
Navigation DVD
Special navigation DVDs are required;
these are available from your BMW center.
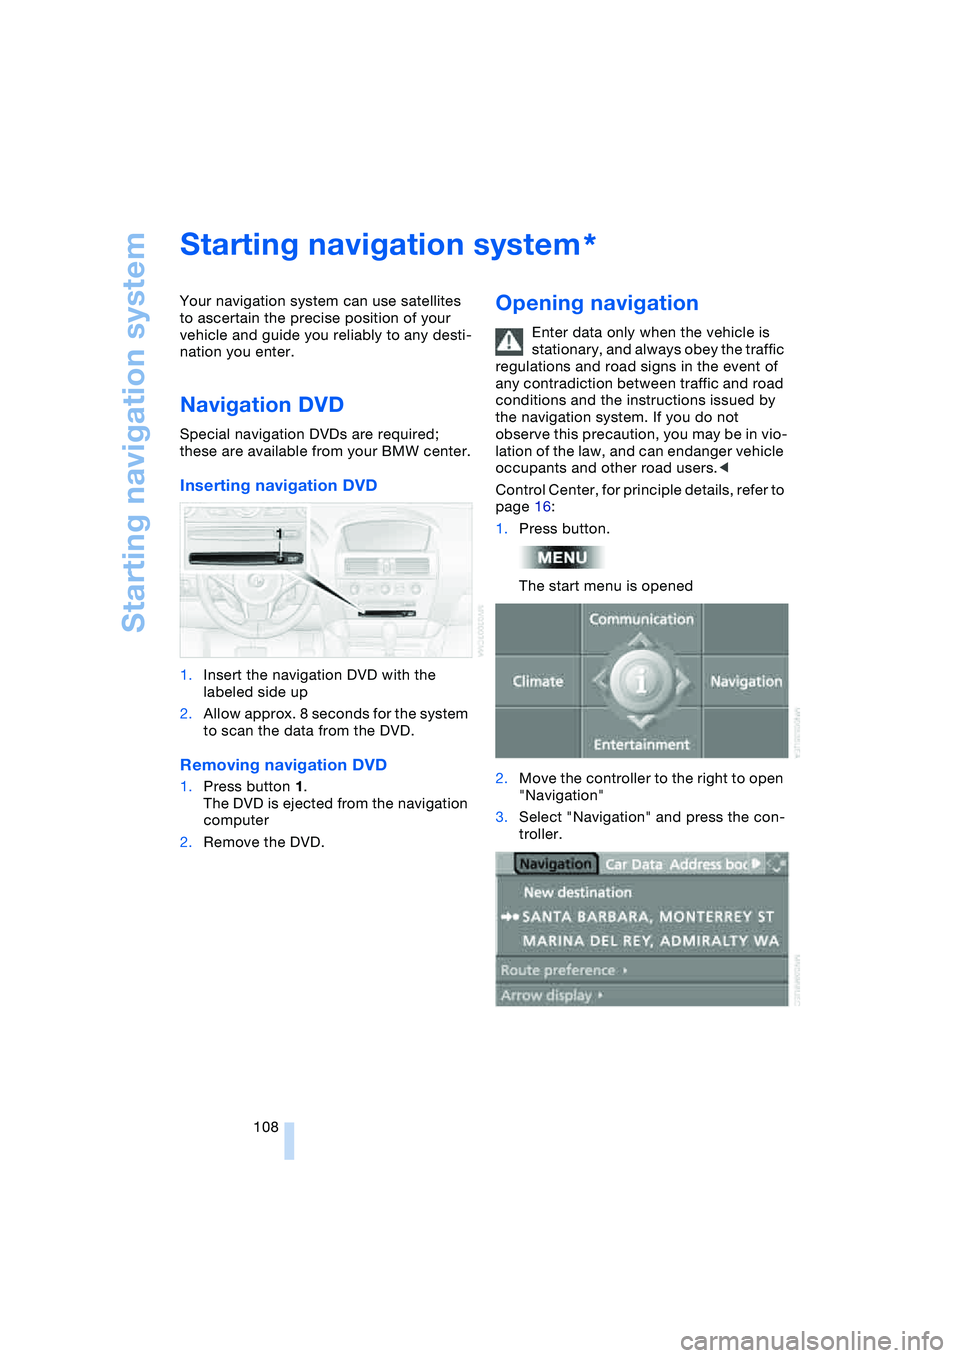
Inserting navigation DVD
1.Insert the navigation DVD with the
labeled side up
2.Allow approx. 8 seconds for the system
to scan the data from the DVD.
Removing navigation DVD
1.Press button 1.
The DVD is ejected from the navigation
computer
2.Remove the DVD.
Opening navigation
Enter data only when the vehicle is
stationary, and always obey the traffic
regulations and road signs in the event of
any contradiction between traffic and road
conditions and the instructions issued by
the navigation system. If you do not
observe this precaution, you may be in vio-
lation of the law, and can endanger vehicle
occupants and other road users.<
Control Center, for principle details, refer to
page 16:
1.Press button.
The start menu is opened
2.Move the controller to the right to open
"Navigation"
3.Select "Navigation" and press the con-
troller.
*
Page 129 of 216
Navigation
Entertainment
Driving tips
127Reference
At a glance
Controls
Communications
Mobility
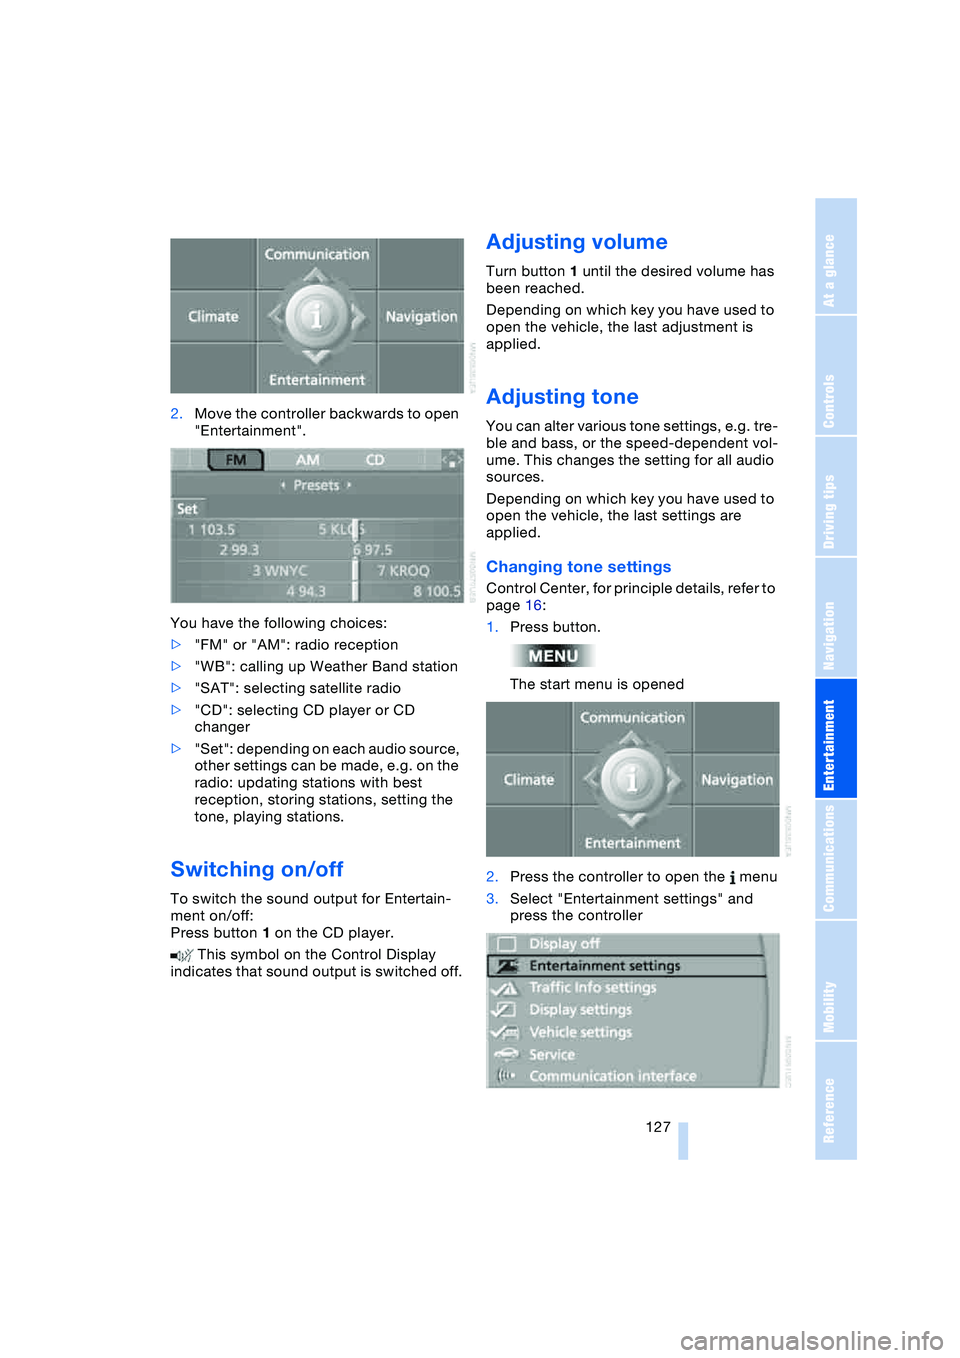
2.Move the controller backwards to open
"Entertainment".
You have the following choices:
>"FM" or "AM": radio reception
>"WB": calling up Weather Band station
>"SAT": selecting satellite radio
>"CD": selecting CD player or CD
changer
>"Set": depending on each audio source,
other settings can be made, e.g. on the
radio: updating stations with best
reception, storing stations, setting the
tone, playing stations.
Switching on/off
To switch the sound output for Entertain-
ment on/off:
Press button 1 on the CD player.
This symbol on the Control Display
indicates that sound output is switched off.
Adjusting volume
Turn button 1 until the desired volume has
been reached.
Depending on which key you have used to
open the vehicle, the last adjustment is
applied.
Adjusting tone
You can alter various tone settings, e.g. tre-
ble and bass, or the speed-dependent vol-
ume. This changes the setting for all audio
sources.
Depending on which key you have used to
open the vehicle, the last settings are
applied.
Changing tone settings
Control Center, for principle details, refer to
page 16:
1.Press button.
The start menu is opened
2.Press the controller to open the menu
3.Select "Entertainment settings" and
press the controller
Page 135 of 216
Navigation
Entertainment
Driving tips
133Reference
At a glance
Controls
Communications
Mobility
The stations of the last selection criterion
are displayed once again after a short time.
Depending on which key you have used to
open the vehicle, other stored stations are
displayed.
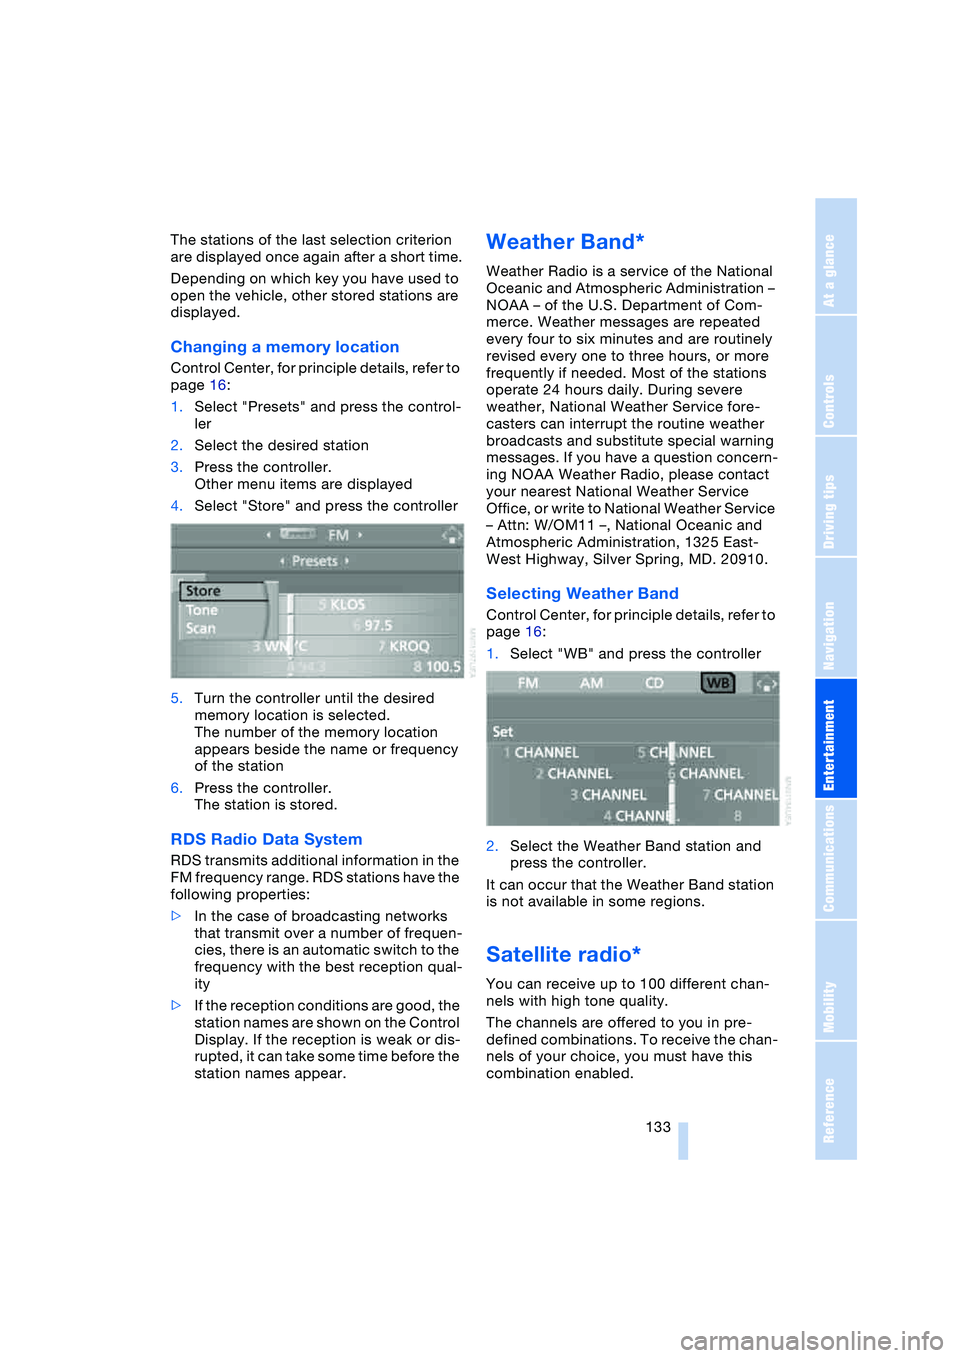
Changing a memory location
Control Center, for principle details, refer to
page 16:
1.Select "Presets" and press the control-
ler
2.Select the desired station
3.Press the controller.
Other menu items are displayed
4.Select "Store" and press the controller
5.Turn the controller until the desired
memory location is selected.
The number of the memory location
appears beside the name or frequency
of the station
6.Press the controller.
The station is stored.
RDS Radio Data System
RDS transmits additional information in the
FM frequency range. RDS stations have the
following properties:
>In the case of broadcasting networks
that transmit over a number of frequen-
cies, there is an automatic switch to the
frequency with the best reception qual-
ity
>If the reception conditions are good, the
station names are shown on the Control
Display. If the reception is weak or dis-
rupted, it can take some time before the
station names appear.
Weather Band*
Weather Radio is a service of the National
Oceanic and Atmospheric Administration –
NOAA – of the U.S. Department of Com-
merce. Weather messages are repeated
every four to six minutes and are routinely
revised every one to three hours, or more
frequently if needed. Most of the stations
operate 24 hours daily. During severe
weather, National Weather Service fore-
casters can interrupt the routine weather
broadcasts and substitute special warning
messages. If you have a question concern-
ing NOAA Weather Radio, please contact
your nearest National Weather Service
Office, or write to National Weather Service
– Attn: W/OM11 –, National Oceanic and
Atmospheric Administration, 1325 East-
West Highway, Silver Spring, MD. 20910.
Selecting Weather Band
Control Center, for principle details, refer to
page 16:
1.Select "WB" and press the controller
2.Select the Weather Band station and
press the controller.
It can occur that the Weather Band station
is not available in some regions.
Satellite radio*
You can receive up to 100 different chan-
nels with high tone quality.
The channels are offered to you in pre-
defined combinations. To receive the chan-
nels of your choice, you must have this
combination enabled.
Page 138 of 216
Radio
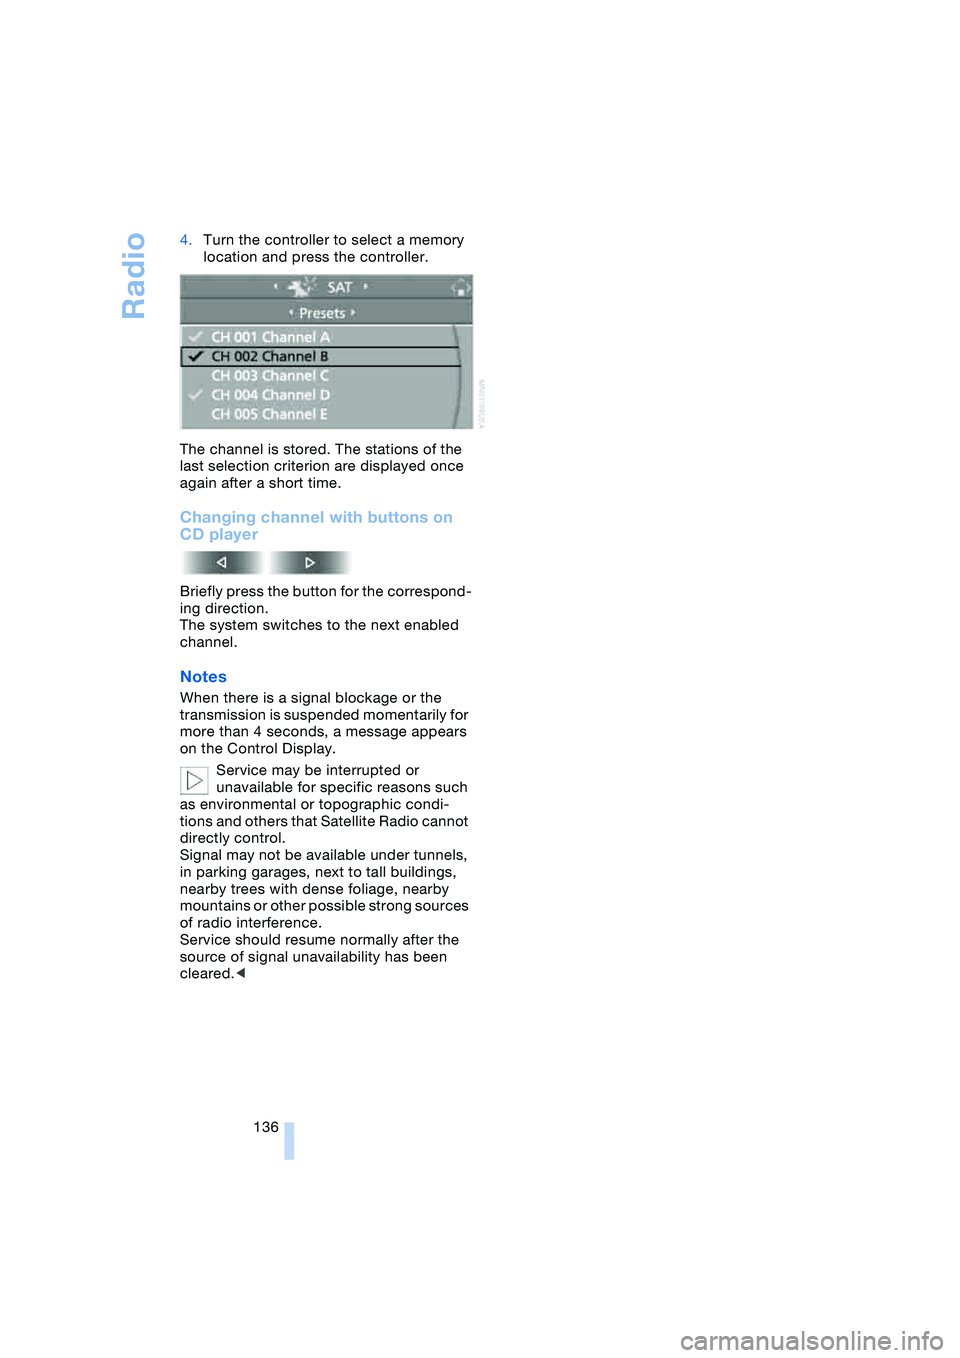
136 4.Turn the controller to select a memory
location and press the controller.
The channel is stored. The stations of the
last selection criterion are displayed once
again after a short time.
Changing channel with buttons on
CD player
Briefly press the button for the correspond-
ing direction.
The system switches to the next enabled
channel.
Notes
When there is a signal blockage or the
transmission is suspended momentarily for
more than 4 seconds, a message appears
on the Control Display.
Service may be interrupted or
unavailable for specific reasons such
as environmental or topographic condi-
tions and others that Satellite Radio cannot
directly control.
Signal may not be available under tunnels,
in parking garages, next to tall buildings,
nearby trees with dense foliage, nearby
mountains or other possible strong sources
of radio interference.
Service should resume normally after the
source of signal unavailability has been
cleared.<
Page 143 of 216
Navigation
Entertainment
Driving tips
141Reference
At a glance
Controls
Communications
Mobility
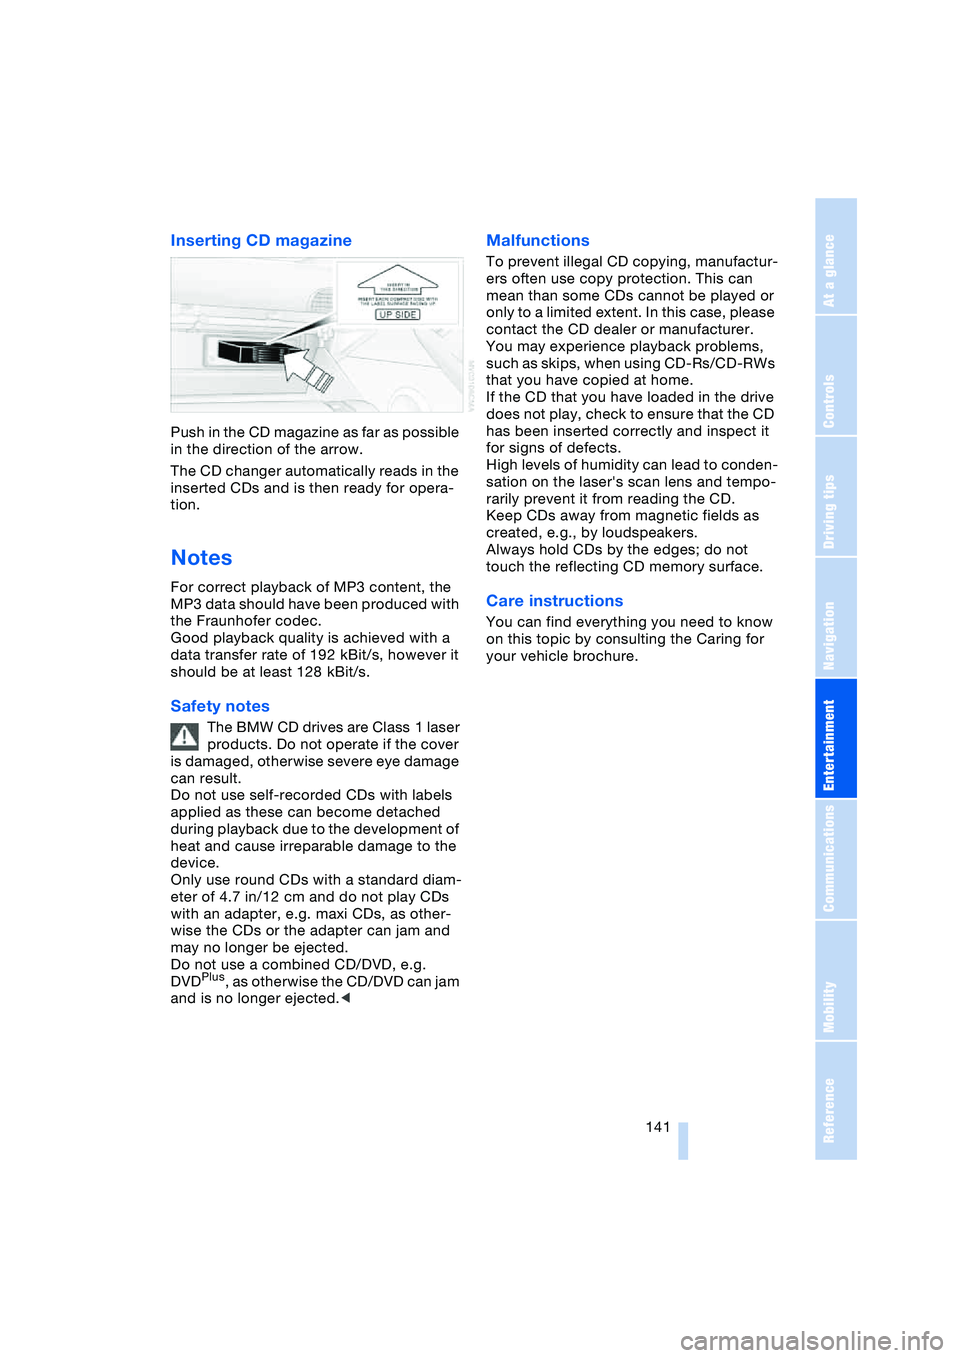
Inserting CD magazine
Push in the CD magazine as far as possible
in the direction of the arrow.
The CD changer automatically reads in the
inserted CDs and is then ready for opera-
tion.
Notes
For correct playback of MP3 content, the
MP3 data should have been produced with
the Fraunhofer codec.
Good playback quality is achieved with a
data transfer rate of 192 kBit/s, however it
should be at least 128 kBit/s.
Safety notes
The BMW CD drives are Class 1 laser
products. Do not operate if the cover
is damaged, otherwise severe eye damage
can result.
Do not use self-recorded CDs with labels
applied as these can become detached
during playback due to the development of
heat and cause irreparable damage to the
device.
Only use round CDs with a standard diam-
eter of 4.7 in/12 cm and do not play CDs
with an adapter, e.g. maxi CDs, as other-
wise the CDs or the adapter can jam and
may no longer be ejected.
Do not use a combined CD/DVD, e.g.
DVD
Plus, as otherwise the CD/DVD can jam
and is no longer ejected.<
Malfunctions
To prevent illegal CD copying, manufactur-
ers often use copy protection. This can
mean than some CDs cannot be played or
only to a limited extent. In this case, please
contact the CD dealer or manufacturer.
You may experience playback problems,
such as skips, when using CD-Rs/CD-RWs
that you have copied at home.
If the CD that you have loaded in the drive
does not play, check to ensure that the CD
has been inserted correctly and inspect it
for signs of defects.
High levels of humidity can lead to conden-
sation on the laser's scan lens and tempo-
rarily prevent it from reading the CD.
Keep CDs away from magnetic fields as
created, e.g., by loudspeakers.
Always hold CDs by the edges; do not
touch the reflecting CD memory surface.
Care instructions
You can find everything you need to know
on this topic by consulting the Caring for
your vehicle brochure.