2004 BMW 645CI COUPE&CONVERTIBLE driver seat adjustment
[x] Cancel search: driver seat adjustmentPage 28 of 216
Opening and closing
26
Opening and closing
The key set
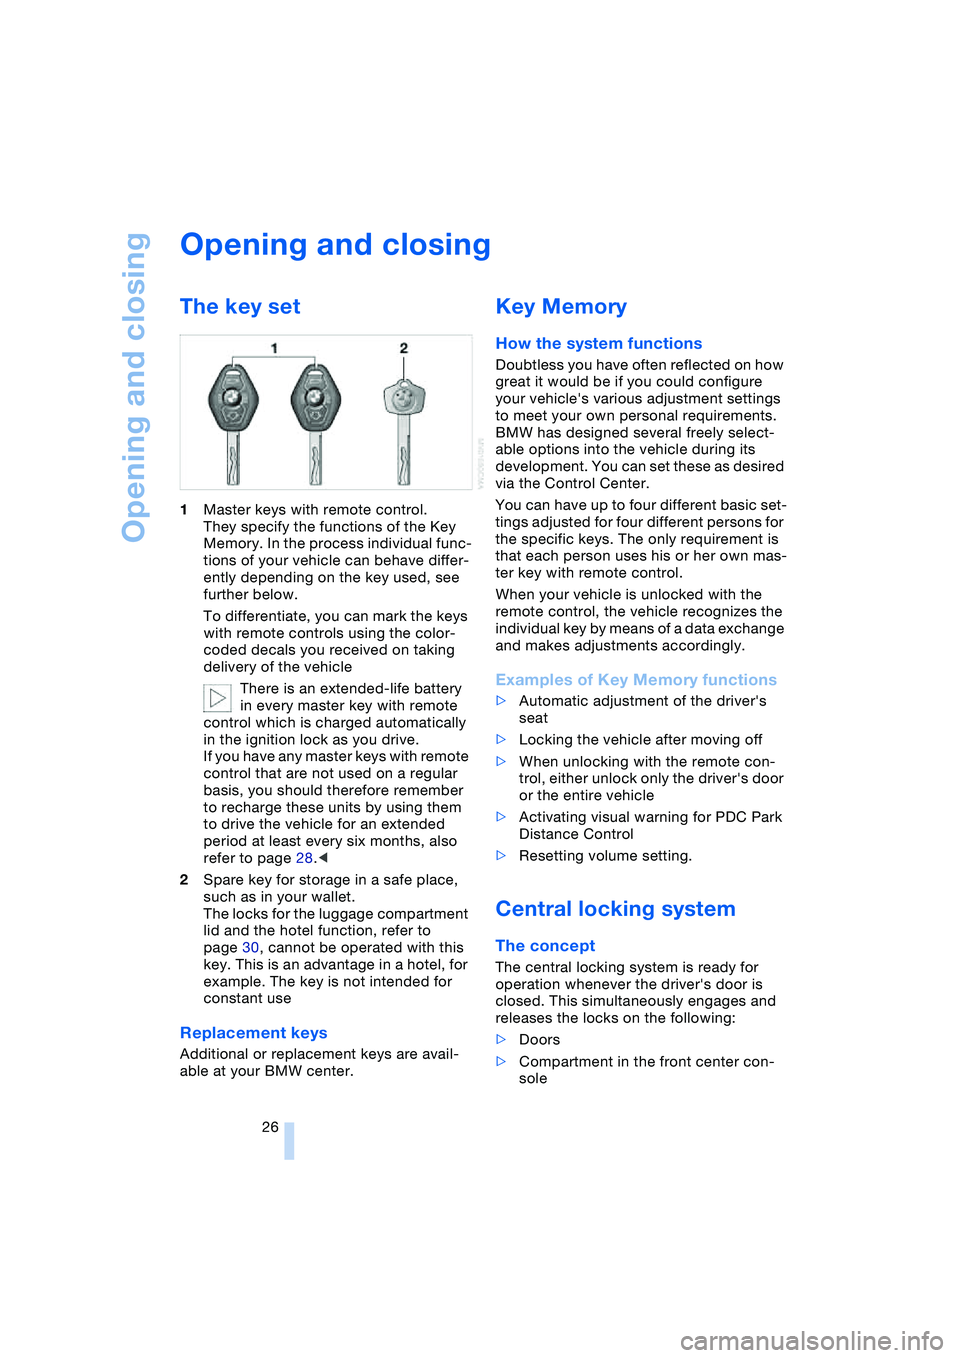
1Master keys with remote control.
They specify the functions of the Key
Memory. In the process individual func-
tions of your vehicle can behave differ-
ently depending on the key used, see
further below.
To differentiate, you can mark the keys
with remote controls using the color-
coded decals you received on taking
delivery of the vehicle
There is an extended-life battery
in every master key with remote
control which is charged automatically
in the ignition lock as you drive.
If you have any master keys with remote
control that are not used on a regular
basis, you should therefore remember
to recharge these units by using them
to drive the vehicle for an extended
period at least every six months, also
refer to page 28.<
2Spare key for storage in a safe place,
such as in your wallet.
The locks for the luggage compartment
lid and the hotel function, refer to
page 30, cannot be operated with this
key. This is an advantage in a hotel, for
example. The key is not intended for
constant use
Replacement keys
Additional or replacement keys are avail-
able at your BMW center.
Key Memory
How the system functions
Doubtless you have often reflected on how
great it would be if you could configure
your vehicle's various adjustment settings
to meet your own personal requirements.
BMW has designed several freely select-
able options into the vehicle during its
development. You can set these as desired
via the Control Center.
You can have up to four different basic set-
tings adjusted for four different persons for
the specific keys. The only requirement is
that each person uses his or her own mas-
ter key with remote control.
When your vehicle is unlocked with the
remote control, the vehicle recognizes the
individual key by means of a data exchange
and makes adjustments accordingly.
Examples of Key Memory functions
>Automatic adjustment of the driver's
seat
>Locking the vehicle after moving off
>When unlocking with the remote con-
trol, either unlock only the driver's door
or the entire vehicle
>Activating visual warning for PDC Park
Distance Control
>Resetting volume setting.
Central locking system
The concept
The central locking system is ready for
operation whenever the driver's door is
closed. This simultaneously engages and
releases the locks on the following:
>Doors
>Compartment in the front center con-
sole
Page 45 of 216
Controls
43Reference
At a glance
Driving tips
Communications
Navigation
Entertainment
Mobility
Seats
Note before adjusting
Never attempt to adjust your seat
while operating the vehicle. The seat
could respond with unexpected move-
ment, and the ensuing loss of vehicle con-
trol could lead to an accident.
On the front passenger side as well, do not
tilt the backrest too far toward the rear
while driving. Failure to observe this pre-
caution can prevent the belt from providing
effective protection against injury, as the
passenger could slide under the belt in an
accident.
Make sure that the footwell behind the
driver's and front passenger's seat is empty
and unobstructed. If you fail to do so, any
persons or objects behind the seat could
be injured or damaged by a rearward
movement of the seat.<
Also observe the instructions regarding
damage to the safety belt on page 47.
Convertible: with the wind deflector
fitted, do not incline the front seat
backrests too far backwards if the seat is to
be moved back to the end position, as oth-
erwise the wind deflector will be dam-
aged.<
Seat adjustment
To ensure that the safety systems
continue to provide optimized protec-
tion, please observe the adjustment
instructions above.<
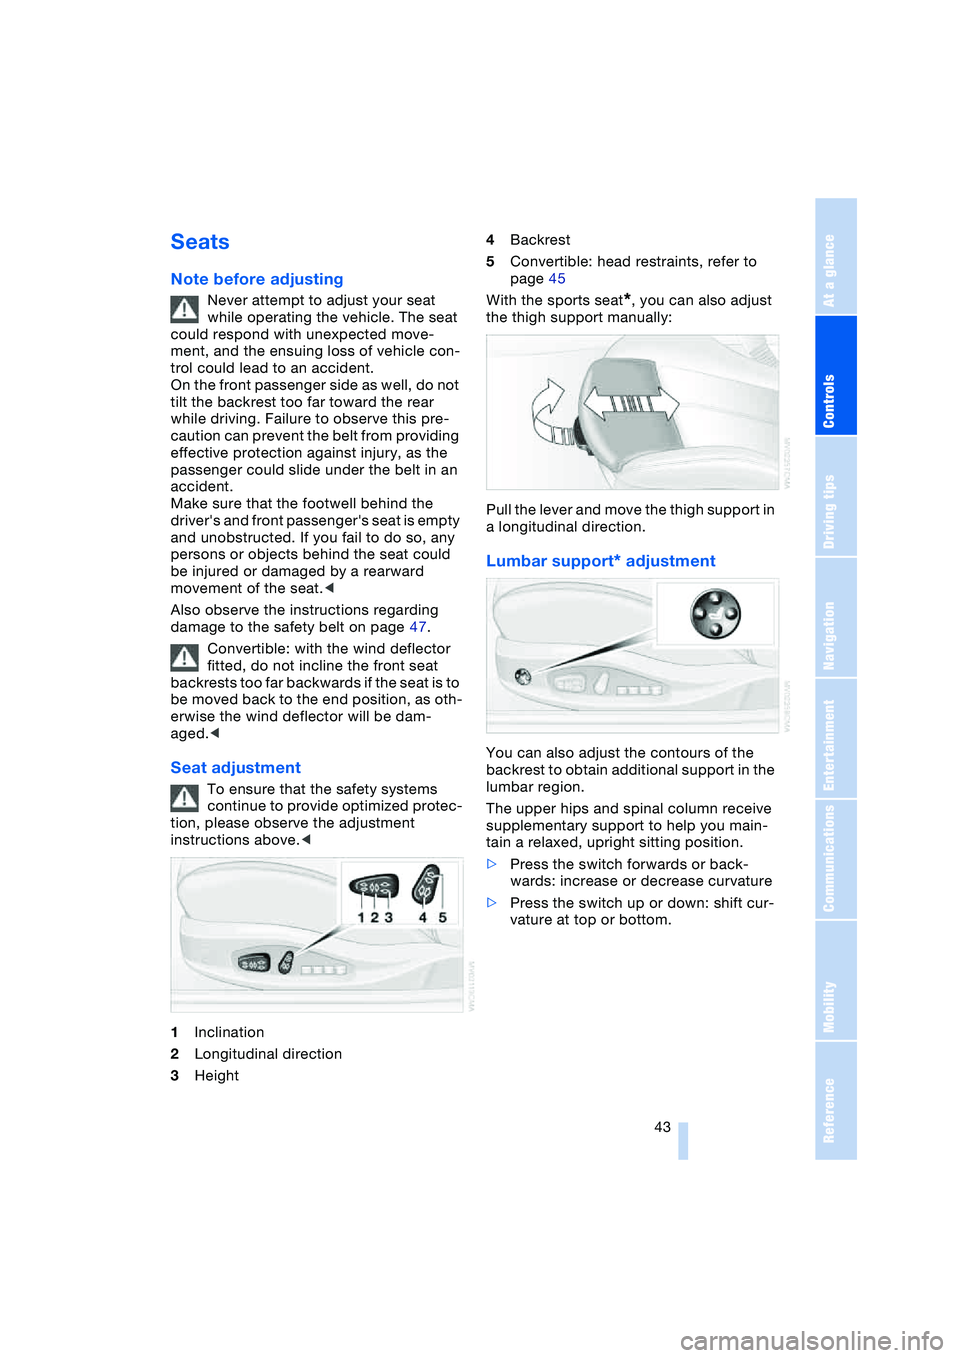
1Inclination
2Longitudinal direction
3Height4Backrest
5Convertible: head restraints, refer to
page 45
With the sports seat
*, you can also adjust
the thigh support manually:
Pull the lever and move the thigh support in
a longitudinal direction.
Lumbar support* adjustment
You can also adjust the contours of the
backrest to obtain additional support in the
lumbar region.
The upper hips and spinal column receive
supplementary support to help you main-
tain a relaxed, upright sitting position.
>Press the switch forwards or back-
wards: increase or decrease curvature
>Press the switch up or down: shift cur-
vature at top or bottom.
Page 46 of 216
Adjustments
44
Seat, mirror and steering
wheel memory
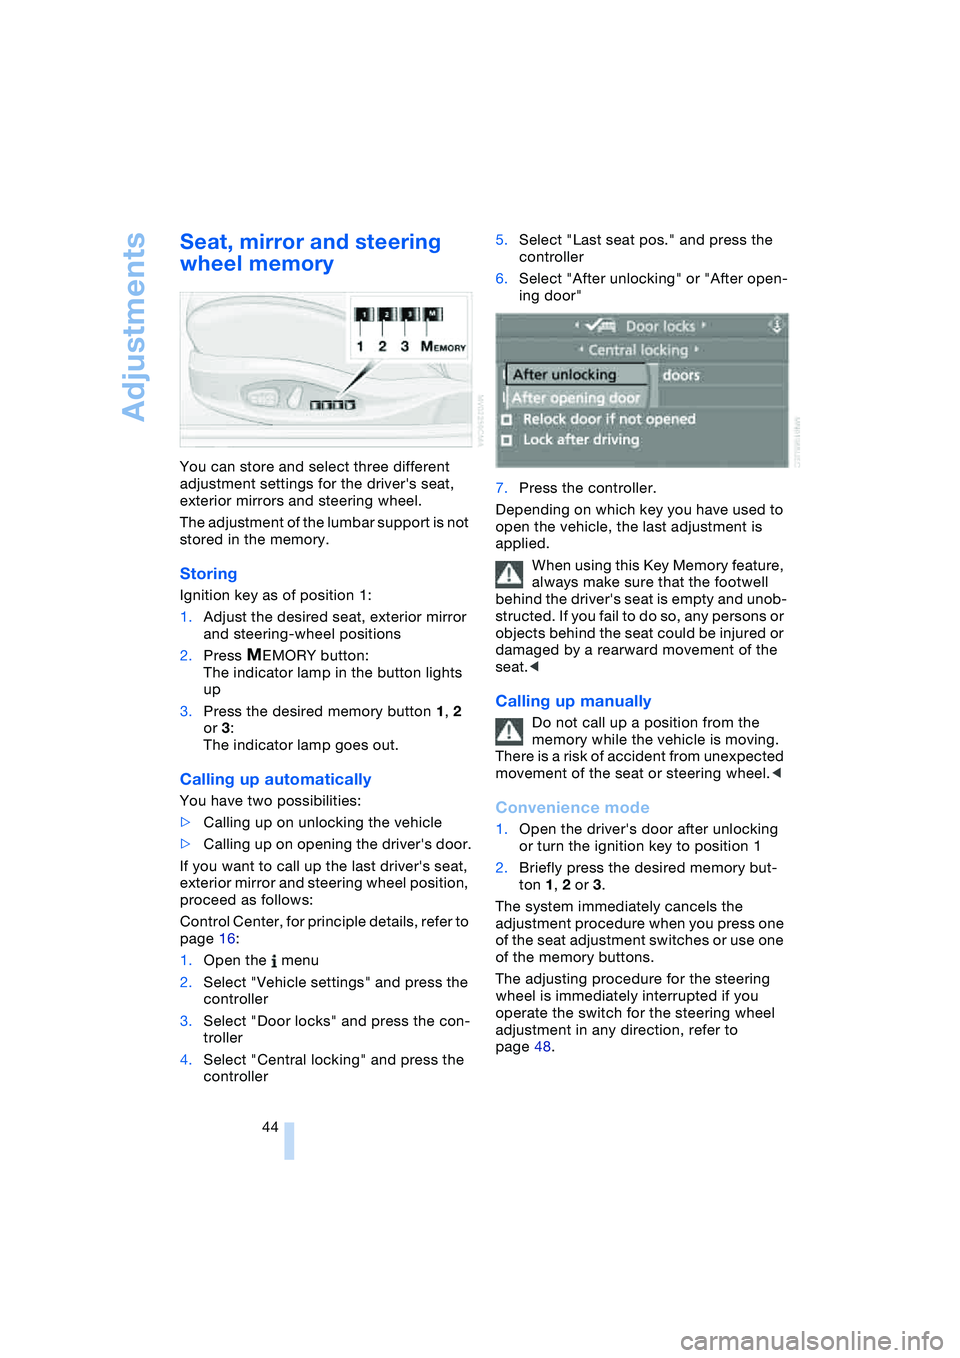
You can store and select three different
adjustment settings for the driver's seat,
exterior mirrors and steering wheel.
The adjustment of the lumbar support is not
stored in the memory.
Storing
Ignition key as of position 1:
1.Adjust the desired seat, exterior mirror
and steering-wheel positions
2.Press
MEMORY button:
The indicator lamp in the button lights
up
3.Press the desired memory button 1, 2
or 3:
The indicator lamp goes out.
Calling up automatically
You have two possibilities:
>Calling up on unlocking the vehicle
>Calling up on opening the driver's door.
If you want to call up the last driver's seat,
exterior mirror and steering wheel position,
proceed as follows:
Control Center, for principle details, refer to
page 16:
1.Open the menu
2.Select "Vehicle settings" and press the
controller
3.Select "Door locks" and press the con-
troller
4.Select "Central locking" and press the
controller5.Select "Last seat pos." and press the
controller
6.Select "After unlocking" or "After open-
ing door"
7.Press the controller.
Depending on which key you have used to
open the vehicle, the last adjustment is
applied.
When using this Key Memory feature,
always make sure that the footwell
behind the driver's seat is empty and unob-
structed. If you fail to do so, any persons or
objects behind the seat could be injured or
damaged by a rearward movement of the
seat.<
Calling up manually
Do not call up a position from the
memory while the vehicle is moving.
There is a risk of accident from unexpected
movement of the seat or steering wheel.<
Convenience mode
1.Open the driver's door after unlocking
or turn the ignition key to position 1
2.Briefly press the desired memory but-
ton 1, 2 or 3.
The system immediately cancels the
adjustment procedure when you press one
of the seat adjustment switches or use one
of the memory buttons.
The adjusting procedure for the steering
wheel is immediately interrupted if you
operate the switch for the steering wheel
adjustment in any direction, refer to
page 48.
Page 50 of 216
Adjustments
48
Mirrors
Adjusting exterior mirrors
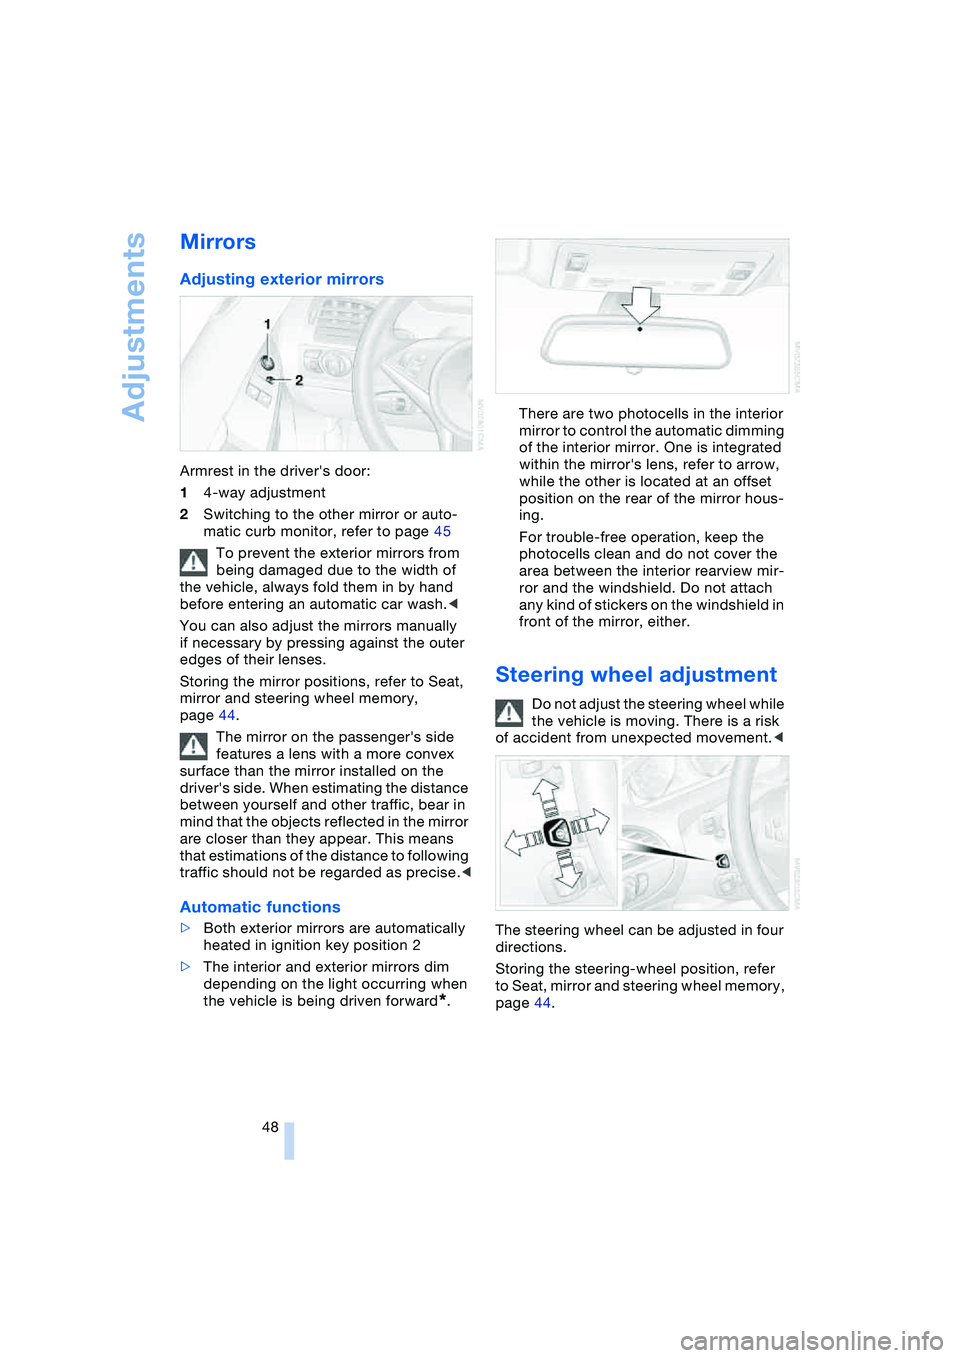
Armrest in the driver's door:
14-way adjustment
2Switching to the other mirror or auto-
matic curb monitor, refer to page 45
To prevent the exterior mirrors from
being damaged due to the width of
the vehicle, always fold them in by hand
before entering an automatic car wash.<
You can also adjust the mirrors manually
if necessary by pressing against the outer
edges of their lenses.
Storing the mirror positions, refer to Seat,
mirror and steering wheel memory,
page 44.
The mirror on the passenger's side
features a lens with a more convex
surface than the mirror installed on the
driver's side. When estimating the distance
between yourself and other traffic, bear in
mind that the objects reflected in the mirror
are closer than they appear. This means
that estimations of the distance to following
traffic should not be regarded as precise.<
Automatic functions
>Both exterior mirrors are automatically
heated in ignition key position 2
>The interior and exterior mirrors dim
depending on the light occurring when
the vehicle is being driven forward
*.There are two photocells in the interior
mirror to control the automatic dimming
of the interior mirror. One is integrated
within the mirror's lens, refer to arrow,
while the other is located at an offset
position on the rear of the mirror hous-
ing.
For trouble-free operation, keep the
photocells clean and do not cover the
area between the interior rearview mir-
ror and the windshield. Do not attach
any kind of stickers on the windshield in
front of the mirror, either.
Steering wheel adjustment
Do not adjust the steering wheel while
the vehicle is moving. There is a risk
of accident from unexpected movement.<
The steering wheel can be adjusted in four
directions.
Storing the steering-wheel position, refer
to Seat, mirror and steering wheel memory,
page 44.
Page 51 of 216
Controls
49Reference
At a glance
Driving tips
Communications
Navigation
Entertainment
Mobility
Automatic steering wheel
adjustment
In conjunction with seat, mirror and steer-
ing wheel memory.
The steering wheel automatically moves as
high up and far forward as possible to ease
driver entry and exit before then returning
to the standard position or stored memory
setting.
This automatic feature is governed by the
driver's door and the ignition lock.
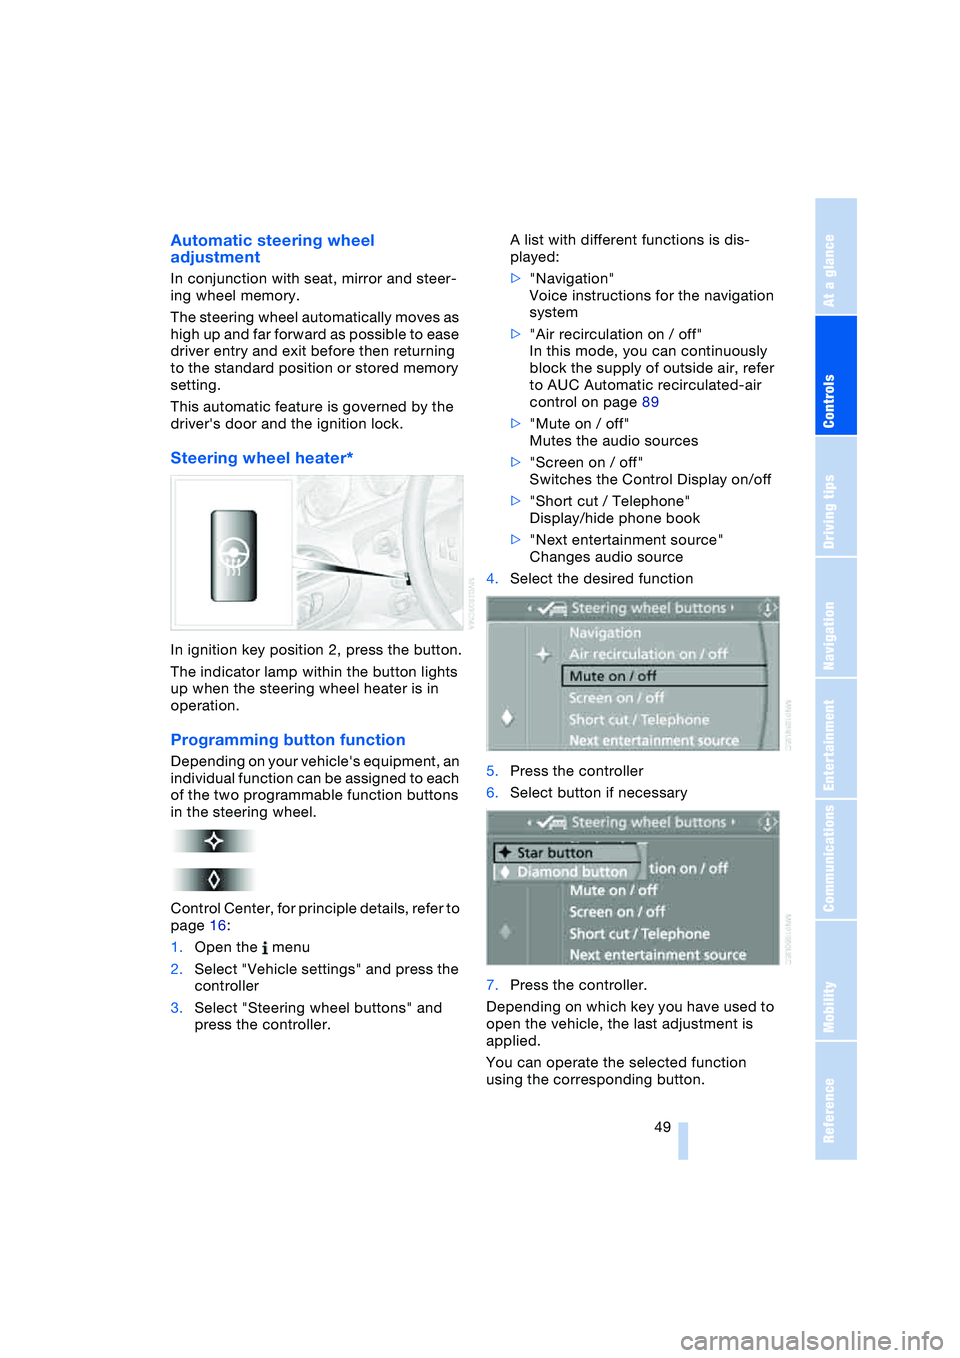
Steering wheel heater*
In ignition key position 2, press the button.
The indicator lamp within the button lights
up when the steering wheel heater is in
operation.
Programming button function
Depending on your vehicle's equipment, an
individual function can be assigned to each
of the two programmable function buttons
in the steering wheel.
Control Center, for principle details, refer to
page 16:
1.Open the menu
2.Select "Vehicle settings" and press the
controller
3.Select "Steering wheel buttons" and
press the controller.A list with different functions is dis-
played:
>"Navigation"
Voice instructions for the navigation
system
>"Air recirculation on / off"
In this mode, you can continuously
block the supply of outside air, refer
to AUC Automatic recirculated-air
control on page 89
>"Mute on / off"
Mutes the audio sources
>"Screen on / off"
Switches the Control Display on/off
>"Short cut / Telephone"
Display/hide phone book
>"Next entertainment source"
Changes audio source
4.Select the desired function
5.Press the controller
6.Select button if necessary
.
7.Press the controller.
Depending on which key you have used to
open the vehicle, the last adjustment is
applied.
You can operate the selected function
using the corresponding button.
Page 98 of 216
Practical interior accessories
96 Be sure that the flashlight is switched
off when it is inserted into its holder.
Failure to comply with this precaution
could lead to overcharging and damage.<
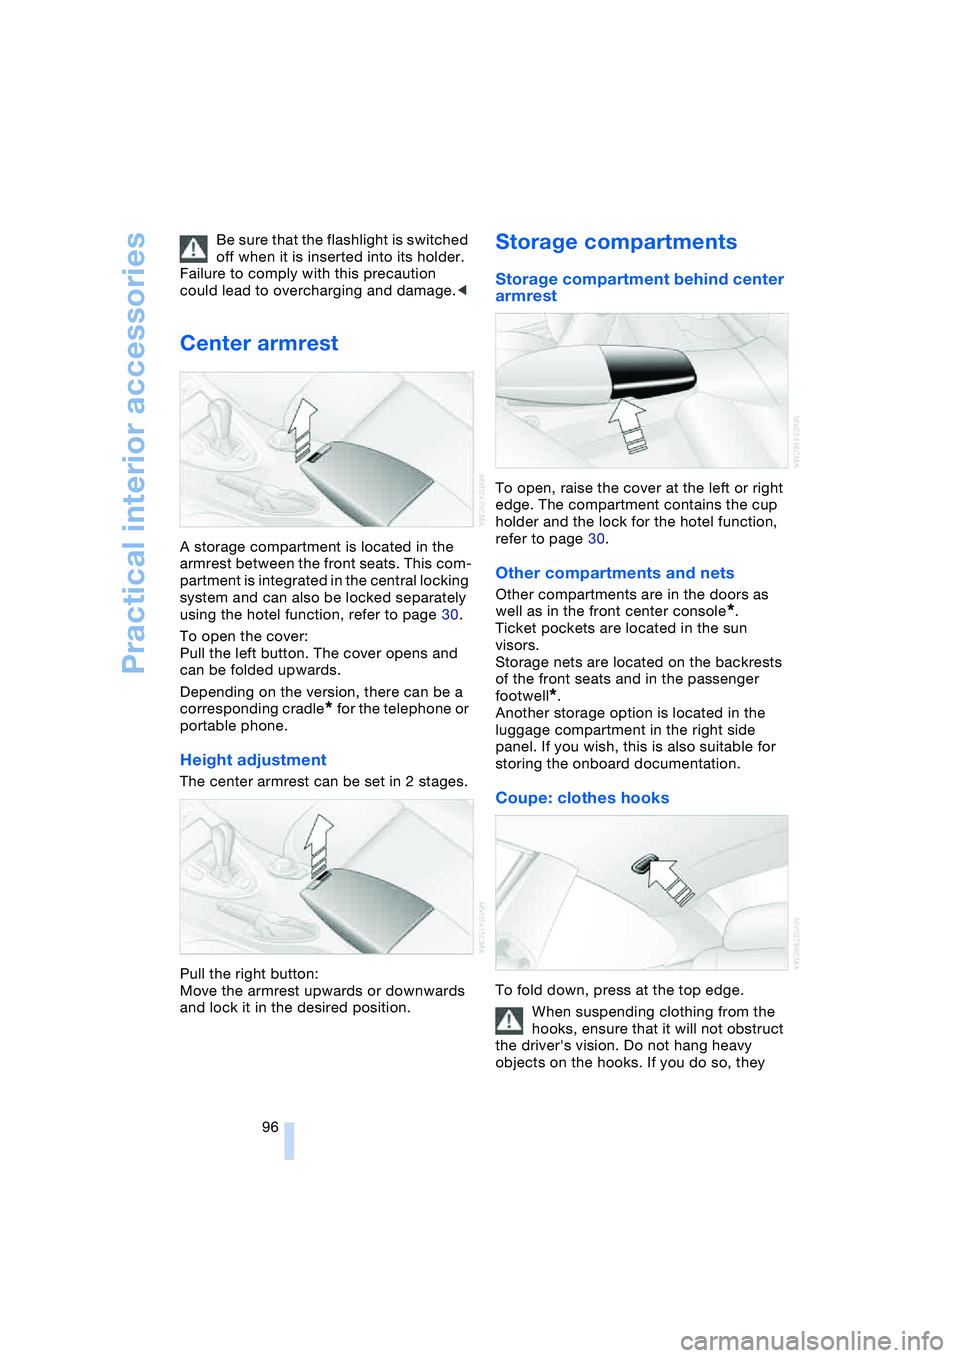
Center armrest
A storage compartment is located in the
armrest between the front seats. This com-
partment is integrated in the central locking
system and can also be locked separately
using the hotel function, refer to page 30.
To open the cover:
Pull the left button. The cover opens and
can be folded upwards.
Depending on the version, there can be a
corresponding cradle
* for the telephone or
portable phone.
Height adjustment
The center armrest can be set in 2 stages.
Pull the right button:
Move the armrest upwards or downwards
and lock it in the desired position.
Storage compartments
Storage compartment behind center
armrest
To open, raise the cover at the left or right
edge. The compartment contains the cup
holder and the lock for the hotel function,
refer to page 30.
Other compartments and nets
Other compartments are in the doors as
well as in the front center console
*.
Ticket pockets are located in the sun
visors.
Storage nets are located on the backrests
of the front seats and in the passenger
footwell
*.
Another storage option is located in the
luggage compartment in the right side
panel. If you wish, this is also suitable for
storing the onboard documentation.
Coupe: clothes hooks
To fold down, press at the top edge.
When suspending clothing from the
hooks, ensure that it will not obstruct
the driver's vision. Do not hang heavy
objects on the hooks. If you do so, they
Page 207 of 216
Reference 205
At a glance
Controls
Driving tips
Communications
Navigation
Entertainment
Mobility
Manual operation
– convertible top 39
– door lock 29
– driver's door 29
– fuel filler door 162
– glass roof 36
– luggage compartment
lid 30, 31
Manual transmission 56
Map
– changing scale 120
– destination entry 112
– facing north 120
"Map, direction of
travel" 120
"Map, facing north" 120
Master key with remote
control 26
Maximum cooling 89
Maximum speed with
winter tires 169
Memory
– refer to Key Memory 26
– refer to Seat, mirror and
steering wheel
memory 44
Menus, refer to
Control Center 16
Microfilter 92
Microphone
– for hands-free
system 146
– for portable phone 14
– for voice command
system 14
Mirrors 48
– automatic curb
monitor 45
– dimming feature 48
– heating 48
– memory, refer to Seat,
mirror and steering wheel
memory 44
"Missed calls" 149
Missed calls 149
Mobile communication
devices in vehicle 104
Monitor, refer to
Control Center 16
"Monitor display on" 76Most recent portable phone
numbers 149
Multifunction steering
wheel MFL 11
Multifunction switch
– refer to Turn signals/
headlamp flasher 60
– refer to Wiper/washer
system 61
Music track, finding 139
"Mute on / off" 49
MW, waveband 130
N
"Navigation" 108
Navigation destination
– manual entry 110
– selecting via map 112
Navigation drive,
location 108
Navigation DVD 108
Navigation system 108
– address book 114
– bypassing route
sections 120
– destination entry 110
– destination guidance in
assistance window 109
– destination list 113
– displaying current
position 109
– entering a destination
manually 110
– looking for interesting
destination 113
– navigation DVD 108
– route display 119
– route list 120
– selecting destination
using information 113
– selecting destination
using map 112
– selecting route
criteria 116
– starting 108
– starting destination
guidance 118
– terminating/continuing
destination guidance 118
– voice instructions 119
– volume adjustment 119"Navigation voice instruc-
tions on" 119
Neck support, refer to
Front head restraints 45
"New address" for
navigation 114
"New destination" 110, 112
"New route" 120
New wheels and tires 168
"Next entertainment
source" 49
Nozzles
– refer to Ventilation 88
– refer to Windshield
washer nozzles 61
Nylon rope, refer to Tow-
starting and towing 185
O
OBD connector 176
Octane numbers, refer to
Fuel specifications 163
Odometer 64
Oil
– additives 172
– capacity 193
– consumption 171
– dipstick 171
– level 171
– specified engine oils 172
Oil change intervals
– refer to Service
requirement display 65
– refer to the Service and
Warranty Information
Booklet for US models or
to the Warranty and
Service Guide Booklet for
Canadian models 174
Old batteries, refer to
Disposal 181
"On a new destination" for
navigation 113
Onboard computer, refer to
Control Center 16
"Onboard information" 70
Onboard tool kit 178
"On destination" 113
"On location" 113