2003 PONTIAC BONNEVILLE homelink
[x] Cancel search: homelinkPage 2 of 418
The 2003 Pontiac Bonneville Owner Manual
Seats and Restraint Systems ........................... 1-1
Front Seats
............................................... 1-2
Safety Belts
.............................................. 1-7
Child Restraints
....................................... 1-27
Air Bag Systems
...................................... 1-47
Restraint System Check
............................ 1-56
Features and Controls ..................................... 2-1
Keys
........................................................ 2-3
Doors and Locks
...................................... 2-10
Windows
................................................. 2-1 9
Theft-Deterrent Systems
............................ 2-21
Starting and Operating Your Vehicle
........... 2-25
Mirrors
.................................................... 2-38
OnStap
.................................................. 2-40
HomeLink@ Transmitter
............................. 2-42
Storage Areas
......................................... 2-46
SlJnroof
................................................. 2-47
Vehicle Personalization
............................. 2-48
Instrument Panel ............................................. 3-1
Instrument Panel Overview
.......................... 3-4
Climate Controls
...................................... 3-25
Warning Lights, Gages and Indicators
......... 3-34
Systems Monitor
...................................... 3-55
Driver Information Center (DIC)
.................. 3-57 Secondary
Information Center (SIC)
............ 3-68
Audio System(s)
....................................... 3-71
Driving Your Vehicle ....................................... 4-1
Your Driving, the Road, and Your Vehicle
..... 4-2
Towing
................................................... 4-32
Service
..................................................... 5-3
Fuel
......................................................... 5-5
Checking Things Under the Hood
............... 5-12
Headlamp Aiming
..................................... 5-52
Bulb Replacement
.................................... 5-56
Windshield Wiper Blade Replacement
......... 5-61
Tires
...................................................... 5-62
Appearance Care
..................................... 5-82
Vehicle Identification
................................. 5-90
Electrical System
...................................... 5-91
C8pa.citigs
and Specifications ......... 5-100
Normal Maintenance Replacement Parts .... 5-101
Maintenance Schedule
................................ 6-2
Customer Assistance Information .................... 7-1
Customer Assistance Information
.................. 7-2
Reporting Safety Defects
............................ 7-8
index ................................................................ 1
Service and Appearance Care .......................... 5-1
Maintenance Schedule ..................................... 6-1
Page 67 of 418
Section 2 Features and Controls
Mirrors .................................................... 2.38
Manual Rearview Mirror
................................. 2.38
Automatic Dimming Rearview Mirror
................ 2.38
Outside Power Mirrors
................................... 2.38
Outside Convex Mirror
................................... 2-39
Outside Heated Mirrors
.................................. 2-39
Onstar@ System ............................................. 2-40
HomeLink@ Transmitter ................................... 2-42
HomeLink@ Transmitter
................................. -2-42
Programming the HomeLink Transmitter
.......... -2-43
Outside
Curb View Assist Mirror
..................... 2-39
Storage Areas ................................................ 2.46
Glove
Box ................................................... 2.46
Front Storage Area
....................................... 2.46
Center Console Storage Area
.. ........... 2.46
Rear Seat Pass Through
........................... 2.46
Convenience Net
.......................................... 2.46
Sunroof ......................................................... 2.47
Vehicle Personalization ................................... 2.48
Memory Seat and Mirrors
.......................... 2.48
2-2
Page 107 of 418
HomeLink@ Transmitter
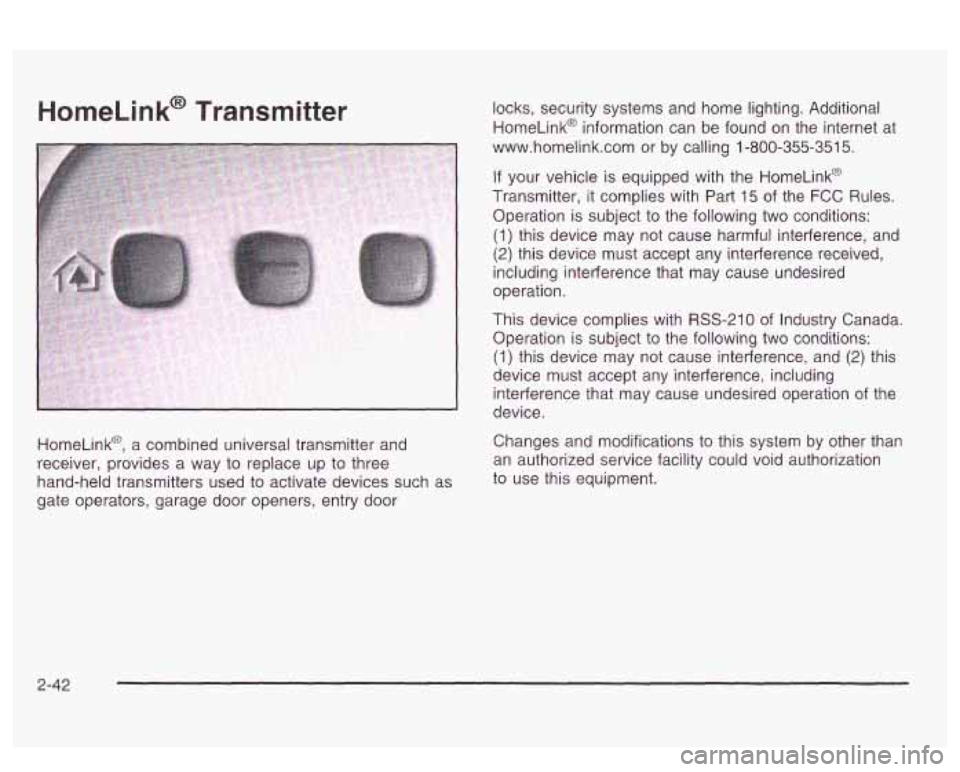
HomeLink@, a combined universal transmitter and
receiver, provides a way to replace up to three
hand-held transmitters used to activate devices such
as
gate operators, garage door openers, entry door locks, security
systems and home lighting. Additional
HomeLink@ information can be found on the internet at
www.homelink.com or by calling 1-800-355-351
5.
If your vehicle is equipped with the Homelink@
Transmitter, it complies with Part
15 of the FCC Rules.
Operation is subject to the following two conditions:
(1) this device may not cause harmful interference, and
(2) this device must accept any interference received,
including interference that may cause undesired
operation.
This device complies with RSS-210 of Industry Canada.
Operation is subject to the following
two conditions:
(1) this device may not cause interference, and (2) this
device must accept any interference, including
interference that may cause undesired operation of the
device.
Changes and modifications to this system by other than
an authorized service facility could void authorization
to use this equipment.
2-42
Page 108 of 418
Programming the HomeLinkB
Transmitter
Do not use the HomeLink@ Transmitter with any garage
door opener that does not have the “stop and reverse”
feature. This includes any garage door opener model
manufactured before April
1, 1982.
Keep the original transmitter for use in other vehicles as
well as for future HomeLink@ programming. It is also
recommended that upon the sale of the vehicle,
the programmed HomeLink@ buttons should be erased
for security purposes. Refer to “Erasing HomeLink@
Buttons” or, for assistance, contact HomeLink@ on the
internet at: www.homelink.com or by calling
1 -800-355-351 5.
Be sure that people and objects are clear of the garage
door or gate operator you are programming. When
programming a garage door, it is advised to park outside
of the garage.
It is recommended that a new battery be installed in
your hand-held transmitter for quicker and more
accurate transmission of the radio frequency. Your vehicle’s engine should
be turned
off while
programming the transmitter. Follow these steps to
program up to three channels:
1. Press and hold down the two outside buttons,
releasing only when the indicator light begins to
flash, after
20 seconds. Do not hold down the
buttons for longer than
30 seconds and do not
repeat this step to program
a second and/or third
transmitter to the remaining two HomeLink@ buttons.
2. Position the end of your hand-held transmitter about
1 to 3 inches (3 to 8 cm) away from the HomeLink@
buttons while keeping the indicator light in view.
3. Simultaneously press and hold both the desired
button on HomeLink@ and the hand-held transmitter
button.
Do not release the buttons until Step 4
has been completed.
Some entry gates and garage door openers may
require you to substitute Step
3 with the procedure
noted in “Gate Operator and Canadian
Programming” later in this section.
4. The indicator light wiii tiasn siowiy at iirsi and iilerl
rapidly after HomeLink@ successfully receives the
frequency signal from the hand-held transmitter.
Release both buttons.
2-43
Page 109 of 418
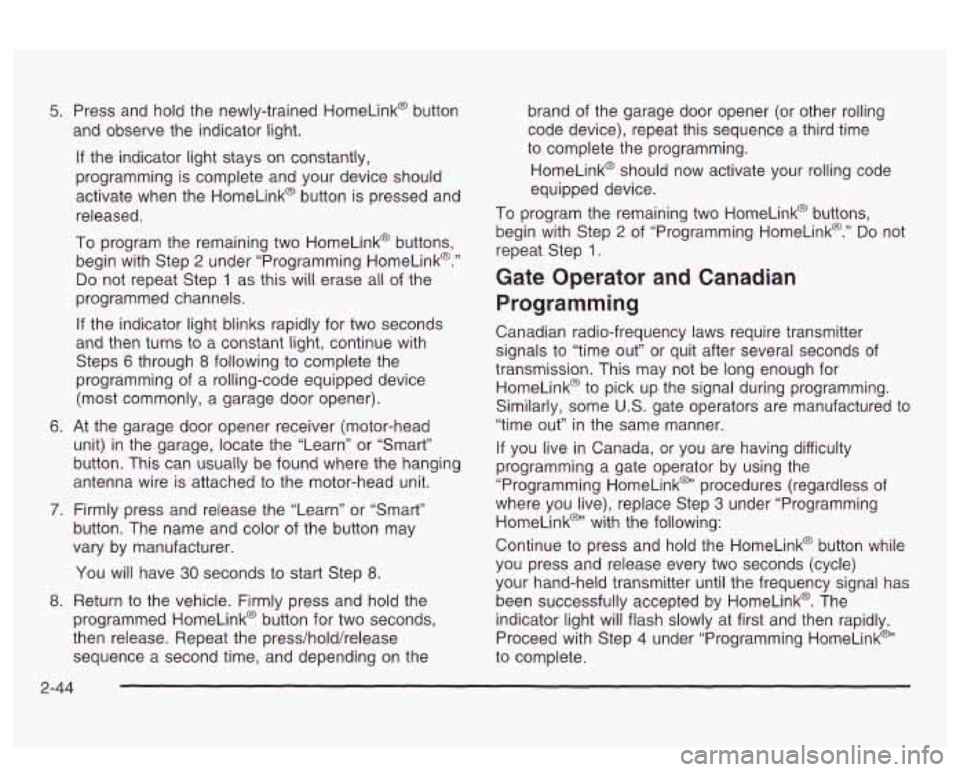
5. Press and hold the newly-trained HomeLink@ button
and observe the indicator light.
If the indicator light stays on constantly,
programming is complete and your device should
activate when the HomeLink@ button is pressed and
released.
To program the remaining two HomeLink@ buttons,
begin with Step
2 under “Programming HomeLink@.”
Do not repeat Step 1 as this will erase all of the
programmed channels.
If the indicator light blinks rapidly for two seconds
and then turns to a constant light, continue with
Steps
6 through 8 following to complete the
programming
of a rolling-code equipped device
(most commonly, a garage door opener).
6. At the garage door opener receiver (motor-head
unit) in the garage, locate the “Learn” or “Smart”
button. This can usually be found where the hanging
antenna wire is attached to the motor-head unit.
7. Firmly press and release the “Learn” or “Smart”
button. The name and color
of the button may
vary by manufacturer.
You will have
30 seconds to start Step 8.
8. Return to the vehicle. Firmly press and hold the
programmed HomeLink@ button for two seconds,
then release. Repeat the press/hold/release
sequence a second time, and depending on the
2-44
brand of the garage door opener (or other rolling
code device), repeat this sequence
a third time
to complete the programming.
HomeLink@ should now activate your rolling code
equipped device.
To program the remaining two HomeLink@ buttons,
begin with Step
2 of “Programming HomeLink@.” Do not
repeat Step
1.
Gate Operator and Canadian
Programming
Canadian radio-frequency laws require transmitter
signals
to “time out” or quit after several seconds of
transmission. This may not be long enough for
HomeLink@ to pick up the signal during programming.
Similarly, some
U.S. gate operators are manufactured to
“time out” in the same manner.
If you live in Canada, or you are having difficulty
programming a gate operator by using the
“Programming HomeLink@’ procedures (regardless
of
where you live), replace Step 3 under “Programming
HomeLink@’ with the following:
Continue to press and hold the HomeLink@ button while
you press and release every two seconds (cycle)
your hand-held transmitter until the frequency signal has
been successfully accepted by HomeLink@. The
indicator light will flash slowly at first and then rapidly.
Proceed with Step
4 under “Programming HomeLink@“
to complete.
Page 110 of 418
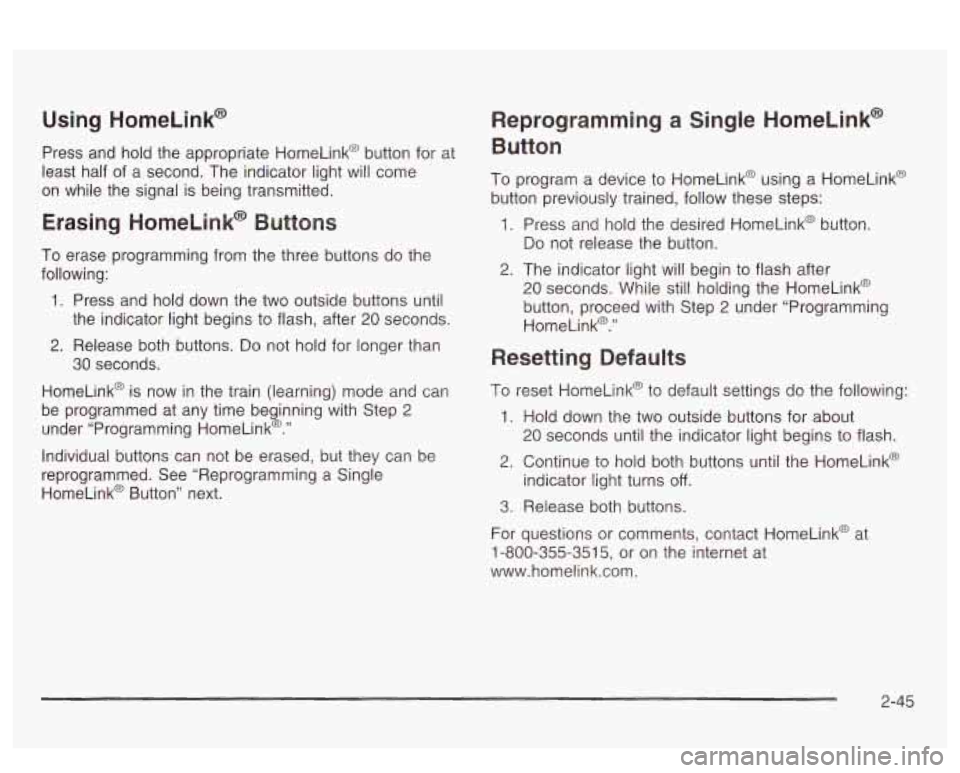
Using HomeLink@
Press and hold the appropriate HomeLink@ button for at
least half of a second. The indicator light will come
on while the signal is being transmitted.
Erasing HomeLink@ Buttons
To erase programming from the three buttons do the
following:
1. Press and hold down the two outside buttons until
the indicator light begins to flash, after
20 seconds.
2. Release both buttons. Do not hold for longer than
HomeLink@ is now in the train jiearning) mode
and can
be programmed at any time beginning with Step
2
under “Programming HomeLink@.”
30 seconds.
Individual buttons can not be erased, but they can be
reprogrammed. See “Reprogramming a Single
HomeLink@ Button” next.
Reprogramming a Single HomeLink@
Button
To program a device to HomeLink@ using a HomeLink@
button previously trained, follow these steps:
1. Press and hold the desired HomeLink@ button.
Do not release the button.
2. The indicator light will begin to flash after
20 seconds. While still holding the HomeLink@
button, proceed with Step
2 under “Programming
HomeLink@.”
Resetting Defaults
1. Hold down the two outside buttons for about
20 seconds until the indicator light begins to flash.
2. Continue to hold both buttons until the HomeLink@
indicator light turns
off.
3. Release both buttons.
For questions or comments, contact HomeLink@ at
1-800-355-351 5, or on the internet at
www.homelink.com.
2-45
Page 404 of 418
Electrical System Add-on Equipment
...................................... 5-91
Fuses and Circuit Breakers
........................... 5-92
Headlamp Wiring
......................................... 5-91
Power Windows and Other Power Options
...... 5-91
Removing the Rear Seat Cushion
.................. 5-95
Windshield Wiper Fuses
............................... 5-91
Electronic Compass
......................................... 3-68
Programs
................................................... 3-48
Air Cleaner/Filter
......................................... 5-22
Battery
....................................................... 5-44
Check and Service Engine Soon Light
............ 3-46
Coolant
...................................................... 5-26
Coolant Heater
............................................ 2-27
Coolant Temperature Gage
........................... 3-45
Cooling System Inspection
............................ 6-23
Engine Compartment Overview
...................... 5-1 4
Overheating
................................................ 5-29
Starting
...................................................... 2-26
Supercharger Oil
......................................... 5-21
Engine Cooling When Trailer Towing
.................. 4-42
Emergency Trunk Release Handle
..................... 2-18
Emissions Inspection and Maintenance
Engine
Exhaust
..................................................... 2-36
Oil ............................................................. 5-15
Engine Compartment Fuse Block ...................... 5-92
Engine Coolant Level Check
............................. 6-18 Engine
Oil Additives
......, .......................... 5-19
Entry Lighting
................................................. 3-17
Erasing HomeLink@ Buttons
.............................. 2-45
Exterior Lamps
............................................... 3-13
Exterior Lighting Battery Saver
............... ... 3-16
Engine
Oil Level Check
..... ...................... 6-18
Express-Down Window
.................................... 2-20
Extender, Safety Belt
....................................... 1-26
F
FabridCarpet .........................
Filter
............. ... 5-82
Engine Air Cleaner
...................................... 5-22
Finding a
PTY Station (RDS and XMTM) ..... 3-75, 3-85
Finding a Station
.................................... 3-73, 3-83
Finish Care
.................................................... 5-86
Finish Damage
............................................... 5-87
Flash-To-Pass
.................................................. 3-8
Flat Tire
........................................................ 5-72
Flat Tire, Changing
......................................... 5-73
!=!zid
Automatic Transaxle ..................................... 5-23
Power Steering
........................................... 5-40
Windshield Washer
...................................... 5-40
FM Stereo
..................................................... 3-99
Fog Lamps
.................................................... 3-15
Following Distance
.......................................... 4-40
Footnotes ................................................ 6-7, 6-13
5
Page 406 of 418
HomeLink@ Transmitter. Programming ................ 2-43
HomeLink@ Transmitter
.................................... 2-42
Hood Checking Things Under
................................ 5-12
Release
..................................................... 5-1 3
Horn
............................................................... 3-6
How to Add Coolant to the Coolant
How to Add Coolant to the Radiator
.................. 5-36
How to Add Fluid
............................................ 5-26
How to Check
................................................ 5-24
How
to Check and Add Oil ............................... 5-22
How to Check Power Steering Fluid
.................. 5-40
How to Use This Manual
...................................... ii
How to Wear Safety Belts Properly ................... 1-12
Hydroplaning
.................................................. 4-1 9
Recovery Tank ............................................ 5-34 Infants
and Young Children. Restraints
............... 1-29
Inflation
.. Tire Pressure .................................. 5-62
Inspection Brake System
............................................. 6-23
Exhaust System
.......................................... 6-22
Fuel System
............................................... 6-22
Part C
- Periodic Maintenance ....................... 6-22
Steering, Suspension and Front Drive Axle
Boot and Seal
......................................... 6-22
Throttle System
........................................... 6-23
Cluster
....................................................... 3-35
Overview
..................................................... 3-4
Instrument Panel Brightness
............................. 3-16
Interior Lamps
................................................ 3-16
Interior Plastic Components
........................... 5-84
Engine Cooling
System
................................ 6-23
Instrument Panel
If No Steam Is Coming From Your Engine .......... 5-31 J
If Steam 1s Coming From Your Engine ............... 5-30 Jump Starting ............................ If the Light Is Flashing ..................................... 3-47 ... 5-46
.
If the Light Is On Steady ................................. 3-48
If You Are Stuck in Sand, Mud, Ice or Snow ....... 4-30
If You Do Decide To Pull A Trailer ..................... 4-37
If You’re Caught in a Blizzard ........................... 4-28 Key Lock Cylinders Service .......................... 6-19
Ignition Positions
............................................. 2-25 Key Fkminder Warning .................................... 2-26
Ignition Transaxle Lock Check
.......................... 6-21 Keyless Entry System ....................................... 2-5
K
Inadvertent Power Battery Saver .................... 3-20 Keys ............................................................... 2-3
7