2003 PONTIAC BONNEVILLE maintenance
[x] Cancel search: maintenancePage 320 of 418
Windshield Wiper Blade Replacement
Windshield wiper blades should be inspected at least
twice a year for wear or cracking. See
Part B:
Owner Checks and Services on page 6-18 for more
information.
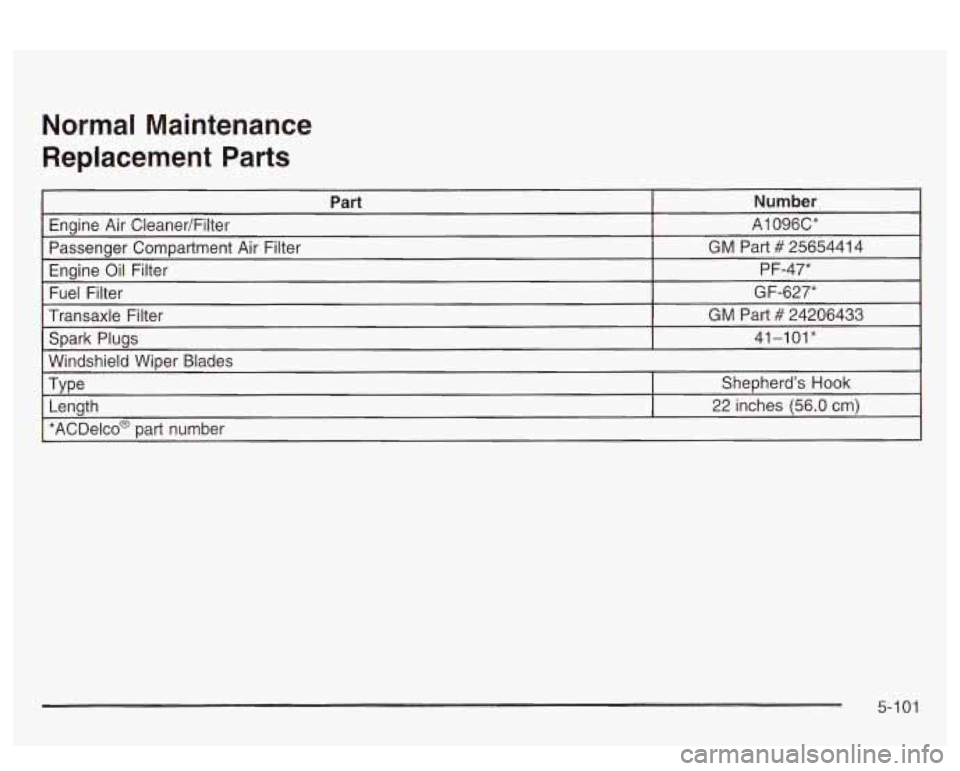
For the proper windshield wiper blade replacement
length and type, see
Normal Maintenance Replacement
Parts on page
5- 101.
To replace the wiper blade assembly:
the vertically-locked position.
1. Lift the wiper up from the windshield and set into
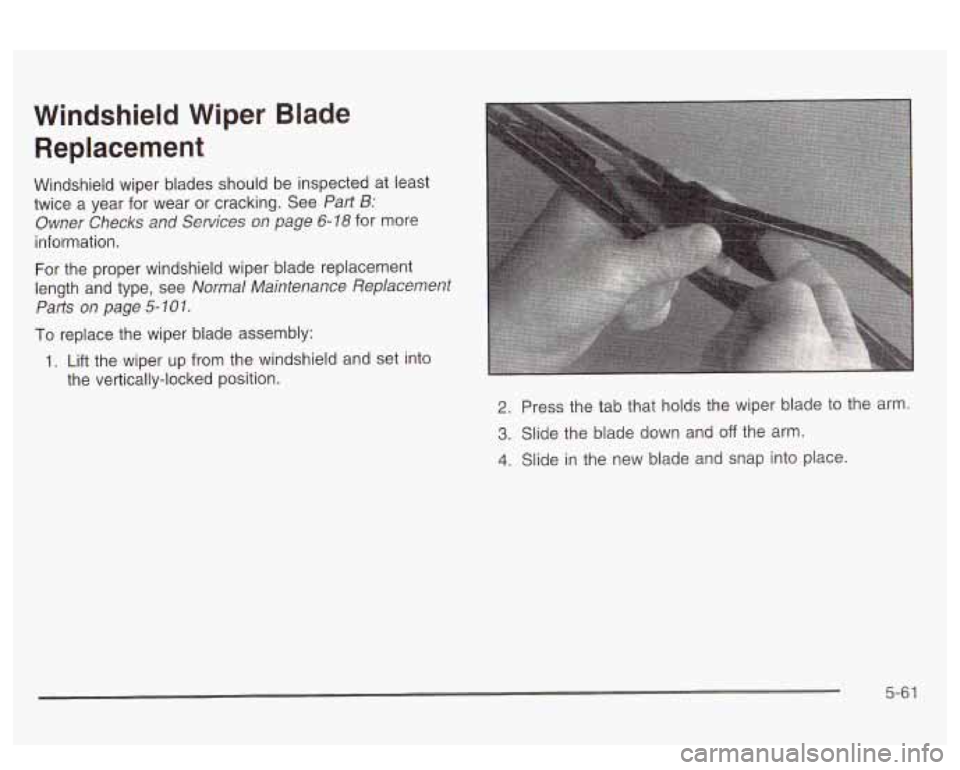
2. Press the tab that holds the wiper blade to the arm.
3. Slide the blade down and off the arm.
4. Slide in the new blade and snap into place.
5-6 1
Page 323 of 418
Check Tire Pressure System
The check tire pressure system can alert you to a large
change in the pressure of one tire. The system won’t
alert you before you drive that a tire is low or flat.
You must begin driving before the system will work
properly.
The CHECK TIRE PRESSURE message will appear on
the Driver Information Center (DIC) or the system
monitor TIRE PRESS light will come on
if pressure
difference (low pressure) is detected in one tire.
The check tire pressure system may not alert you
if:
more than one tire is low,
the vehicle is moving faster than 65 mph (105 km/h),
the system is not yet calibrated,
the compact spare tire is installed,
the tire treadwear is uneven,
tire chains are being used, or
the vehicle is being driven on a rough or
frozen road. If
the anti-lock brake system warning light comes on,
the check tire pressure system may not be working
properly. See your dealer for service. Also, see
Anti-Lock Brake System Warning Light on page 3-43.
The check tire pressure system detects differences
in tire rotation speeds that are caused by changes in tire
pressure. The system can alert you about a low
tire
- but it doesn’t replace normal tire maintenance.
See
Tires on page 5-62.
When the CHECK TIRE PRESSURE message appears
on the Driver Information Center (DIC) or the systems
monitor TIRE PRESS light comes on, you should
stop as soon as you can and check all your tires for
damage. If a tire is flat, see
If a Tire Goes Flat on
page
5-72. Also check the tire pressure in all four tires
as soon as you can. See
Inflation -- Tire Pressure
on page
5-62.
Any time you adjust a tire’s pressure or have one or more
tires repaired or replaced, you’ll need to reset (calibrate)
the check tire pressure system. You’ll also need to reset
the system whenever you rotate the tires, buy new tires
and install or remove the compact spare.
Don’t reset the check tire pressure system without first
correcting the cause of the problem and checking
and adjusting the pressure in all four tires.
If you reset
the system when the tire pressures are incorrect,
the check tire pressure system will not work properly
and may not alert you when a tire is low
or high.
5-64
Page 324 of 418
To reset (calibrate) the system with a Driver Information
Center (DIC):
1.
2.
3.
4.
5.
Turn the ignition switch to ON.
Using the MODE and SELECT buttons, change the The system Completes
the calibration process during
DIC to display TIRE PRESSURE. driving. Calibration time
can take
45 to 90 minutes, ..,
Press and hold the RESET button for about five
seconds.
The display should change to read TIRE
PRESSURE RESET. If TIRE PRESSURE RESET
does not appear on the display after about five
seconds, see your dealer for service.
When you release the button after seeing the TIRE
PRESSURE RESET message, the display will
change to read TIRE PRESSURE NORMAL.
1.
2.
4. Release the TIRE PRESS RESET button and the
system should reset. The TIRE PRESS light will
go out.
To reset (calibrate) the system with a systems monitor:
n 3.
Turn the ignition switch to ON.
Press and hold the TIRE PRESS RESET button for
about five seconds.
should begin to flash.
If the TIRE PRESS light
does not begin to flash after about five seconds, see
your dealer for service.
TIL- TI~T nnr-nn I:-.LL -- LL- -..-.I.--- I I le I 1nc r ncaa II~I 11 VI I 11 IC ayatcl I 13 I I IUI IILUI
depending on your driving habits. After the system has
been calibrated, the system will alert the driver that
a tire is low, up to a maximum speed of
65 mph
(1 05 km/h).
Tire Inspection and Rotation
Tires should be rotated every 6,000 to 8,000 miles
(10 000 to 13 000 km).
Any time you notice unusual wear rotate your tires as
soon as possible and check wheel alignment. Also
check for damaged tires or wheels. See
When It Is Time
for New Tires on page 5-67 and Wheel Replacement
on page 5-69 for more information.
Tne purpose
oi reguiar rorarion is io acnieve more
uniform wear for all tires on the vehicle. The first rotation
is the most important. See “Part A: Scheduled
Maintenance Services,” in Section
6, for scheduled
rotation intervals.
5-65
Page 346 of 418
cleaners with acid, or abrasive cleaning brushes on
them because you could damage the surface.
Do not
use chrome polish on aluminum wheels.
Use chrome polish only on chrome-plated wheels, but
avoid any painted surface of the wheel, and buff off
immediately after application.
Don’t take your vehicle through an automatic car wash
that has silicone carbide tire cleaning brushes. These
brushes can also damage the surface of these wheels.
Tires
To clean your tires, use a stiff brush with tire cleaner.
Nofice: When applying a tire dressing, always take
care to wipe off any overspray or splash from all
painted surfaces
on the body or wheels of the
vehicle. Petroleum-based products may damage the
paint finish and tires.
If your vehicle is damaged and requires sheet metal
repair or replacement, make sure the body repair shop
applies anti-corrosion material to parts repaired or
replaced to restore corrosion protection.
Finish Damage
Any stone chips, fractures or deep scratches in the
finish should be repaired right away. Bare metal
will corrode quickly and may develop into major repair
expense.
Minor chips and scratches can be repaired with touch-up
materials avaliable from your dealer or other service
outlets. Larger areas of finish damage can be corrected
in your dealer’s body and paint shop.
Underbody Maintenance
Chemicals used for ice and snow removal and dust
control can collect on the underbody.
If these are not
removed, accelerated corrosion (rust) can occur on
the underbody parts such as fuel lines, frame, floor pan
and exhaust system even though they have corrosion
protection.
At least everv sprinq, flush these materials from the
underbody with plain water. Clean any areas where mud
and debris can collect. Dirt packed
in close areas of
the frame should be loosened before being flushed.
Your dealer or an underbody car washing system can
do this for you.
Original manufacturer replacement parts will provide the
corrosion protection while maintaining the warranty.
5-a7
Page 360 of 418
Normal Maintenance Replacement Parts
5-1 01
Page 362 of 418
6 Maintenance Schedule
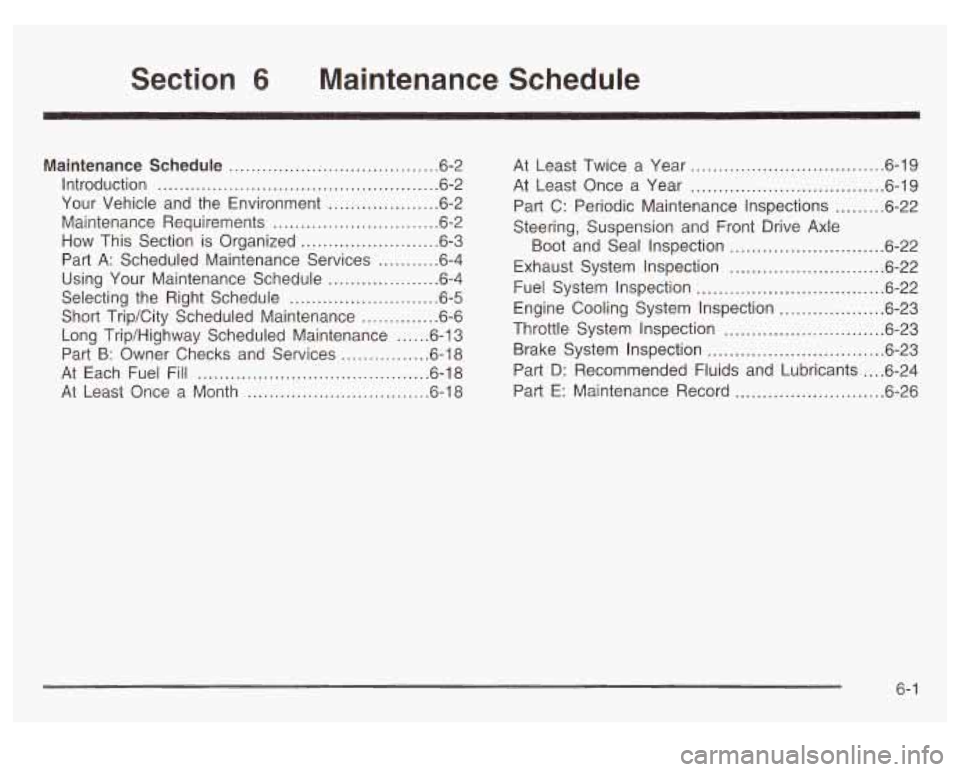
Maintenance Schedule ...................................... 6.2
Introduction
................................................... 6.2
Your Vehicle and the Environment
.................... 6-2
Maintenance Requirements
.......................... 6.2
How This Section is Organized
..................... 6-3
Selecting the Right Schedule
........................... 6-5
Part
A: Scheduled Maintenance Services
........... 6.4
Using Your Maintenance Schedule
.................... 6-4
Short Trip/City Scheduled Maintenance
.............. 6-6
Long Trip/Highway Scheduled Maintenance
...... 6-13
Part
B: Owner Checks and Services ................ 6-18
At Each Fuel Fill
.......................................... 6-18
At Least Once a Month 0- IO P 40 .................................
At Least Twice a Year ................................... 6.19
At Least Once a Year
................................... 6.19
Part C: Periodic Maintenance Inspections
......... 6.22
Steering, Suspension and Front Drive Axle
Boot and Seal Inspection
............................ 6-22
Exhaust System Inspection
........................... -6-22
Fuel System Inspection
.................................. 6-22
Engine Cooling System Inspection
................... 6-23
Throttle System Inspection
............................. 6-23
Brake System Inspection
................................ 6-23
Part
D: Recommended Fluids and Lubricants .... 6-24
Part
E: Maintenance Record ........................... 6-26
6- 1
Page 363 of 418
Maintenance Schedule
Introduction
IMPORTANT:
XEEP ENGINE OIL
AT THE PROPER
LEVEL AND CHANGE AS
RECOMMENDED
I
a
protection
Plan
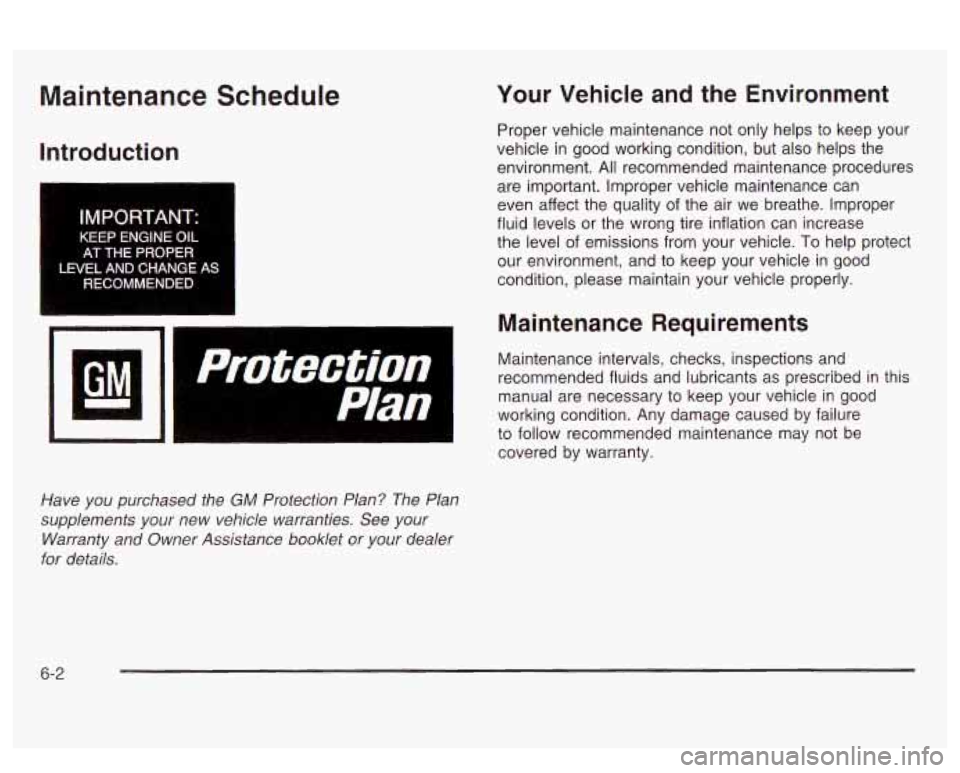
Have you purchased the GM Protection Plan? The Plan
supplements your new vehicle warranties.
See your
Warranty and Owner Assistance booklet or your dealer
for details.
Your Vehicle and the Environment
Proper vehicle maintenance not only helps to keep your
vehicle in good working condition, but also helps the
environment.
All recommended maintenance procedures
are important. Improper vehicle maintenance can
even affect the quality of the air we breathe. Improper
fluid levels or the wrong tire inflation can increase
the level of emissions from your vehicle.
To help protect
our environment, and to keep your vehicle in good
condition, please maintain your vehicle properly.
Maintenance Requirements
Maintenance intervals, checks, inspections and
recommended fluids and lubricants as prescribed in this
manual are necessary to keep your vehicle in good
working condition. Any damage caused by failure
to follow recommended maintenance may not be
covered by warranty.
6-2
Page 364 of 418
How This Section is Organized
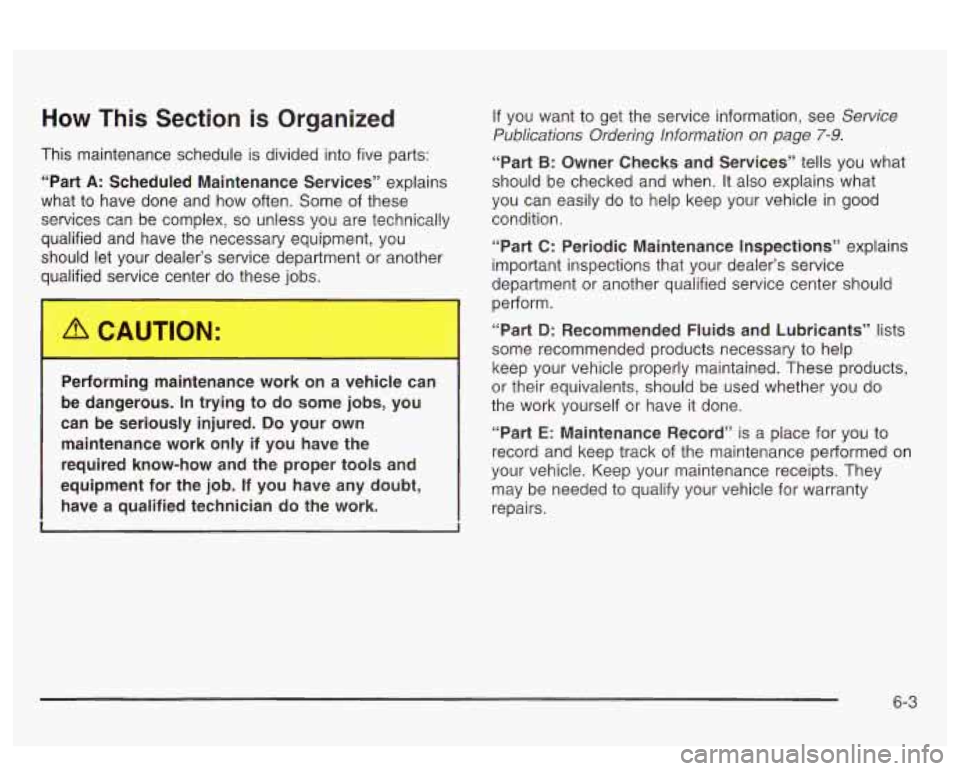
This maintenance schedule is divided into five parts:
“Part
A: Scheduled Maintenance Services” explains
what to have done and how often. Some of these
services can be complex,
so unless you are technically
qualified and have the necessary equipment, you
should let your dealer’s service department or another
qualified service center do these jobs.
If you want to get the service information, see Service
Publications Ordering Information on page
7-9.
“Part B: Owner Checks and Services” tells you what
should be checked and when. It also explains what
you can easily do to help keep your vehicle in good
condition.
“Part C: Periodic Maintenance Inspections” explains
important inspections that your dealer’s service
department or another qualified service center should
petform.
Performing maintenance work on a vehicle can
be dangerous. In trying to do some jobs, you
can be seriously injured.
Do your own
maintenance work only if you have the
required know-how and the proper tools and
equipment for the job.
If you have any doubt,
have a qualified technician
do the work.
I
“Part D: Recommended Fluids and Lubricants” lists
some recommended products necessary
to help
keep your vehicle properly maintained. These products,
or their equivalents, should be used whether you do
the work yourself or have it done.
“Part E: Maintenance Record” is a place for you to
record and keep track of the maintenance performed on
your vehicle. Keep your maintenance receipts. They
may be needed to qualify your vehicle for warranty
repairs.
6-3