2003 PONTIAC BONNEVILLE display
[x] Cancel search: displayPage 136 of 418
Head-Up Display (HUD)
If the HUD image is too bright, or too high in
your field
of view, it may take you more time to
see things you need to see when it's dark
outside. Be sure to keep the HUD image dim
and placed low in your field of view.
If you have the optional Head-Up Display (HUD), you
can see
some of the driver information also available 08
your instrument panel cluster. The information may
be displayed in English
or metric units and appears as a
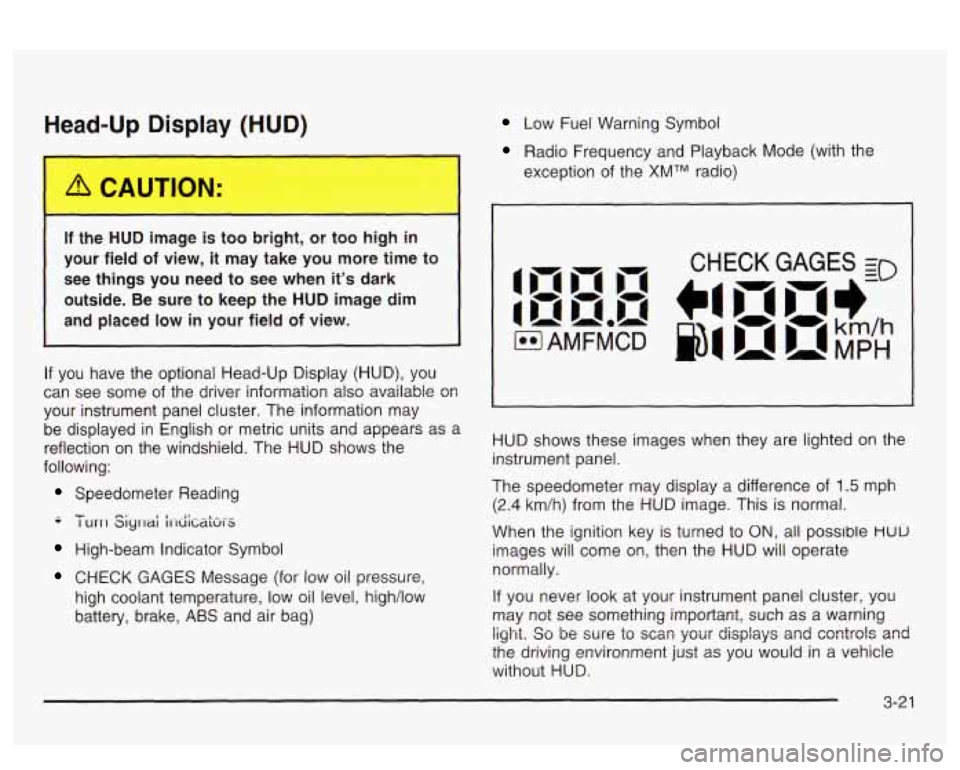
reflection on the windshield. The HUD shows the
following:
Speedometer Reading
-- - I urrl Siyrlai i1-diCaki-S
High-beam Indicator Symbol
CHECK GAGES Message (for low oil pressure,
high coolant temperature, low oil level, high/low
battery, brake,
ABS and air bag)
Low Fuel Warning Symbol
Radio Frequency and Playback Mode (with the
exception of the
XMTM radio)
HUD shows these images when they are lighted on the
instrument panel.
The speedometer may display a difference of
1.5 mph
(2.4 km/h) from the HUD image. This is normal.
When the ignition key is turned to
ON, all possible HUU
images will come on, then the HUD will operate
normally.
If you never look at your instrument panel cluster, you
may not see something important, such as a warning
light. So be wre to scm your displays and csntrols and
the driving environment just as you would in a vehicle
without HUD.
Page 143 of 418

Automatic Climate Control System
With this system you can control the heating, cooling
and ventilation for your vehicle.
Automatic Operation
AUTO (Automatic): Press the AUTO button for
automatic control of the inside temperature, the air
delivery mode and the fan speed.
1. Press the AUTO button. Whenever this button is
pressed, the display will show the current settings
for five seconds before returning the display to
the exterior temperature.
2. Adjust the temperature to 75” F (24” C).
Choosing the coldest or warmest temperature
setting will not cause the system to heat or cool any
faster.
If you set the system at the warmest
temperature setting, the system will remain at the
maximum heat setting and fan speed.
In cold weather, the system will start at reduced fan
speeds to avoid blowing cold air into your vehicle
until warmer air is available. The system will
start out blowing air at the floor but may change
modes automatically as the vehicle warms up
to maintain the chosen temperature setting. The
length of time needed for warm up will depend on
the outside temperature and the length of time
that has elapsed since your vehicle was last driven.
3. Wait for the system to regulate. This may take from
10 to 30 minutes. Then adjust the temperature, if
necessary.
Do not cover the solar sensor located in the center OT
the instrument panel, near the windshield. For more
information on the solar sensor, see “Sensors” later in
this section.
3-28
Page 144 of 418
Manual Operation
DRIVER (Driver’s Side Temperature): The knob on
the left is used to change the temperature of the
air coming through the system on the driver’s side of
the vehicle. Push this knob to turn the system on and
off.
Turn the knob toward the blue area to decrease the
set temperature, and toward the red area to increase the
set temperature. When this knob is adjusted, the word
DRIVER will be displayed under the set temperature.
When the passenger’s set temperature is not active, this
knob controls both the driver’s and passenger’s side,
and both DRIVER and PASS will be displayed under the
set temperature.
PASS (Passenger’s Side Temperature): The knob on
the right is used to change the temperature of the air
coming through the system on the passenger’s side of
the vehicle. Push this knob to turn the system on
and
off. Turn the knob toward the blue area to decrease
the set temperature, and toward the red area to
increase the set temperature. When this knob is
adjusted, only the word PASS will be displayed under
the set temperature.
@ FAN: Pressing the FAN button will display and hold
the current fan speed while in manual mode. Press
the
HIGH side to increase fan speed and the LOW side
to decrease the fan speed.
MODE: Press this button repeatedly to cycle through
and choose the mode of air delivery into the vehicle. The
system will stay in the selected mode until MODE is
pressed again or until the AUTO button is pressed.
FLOOR: This mode directs most of the airflow to the
floor outlets with some directed to the outboard
outlets (for the side windows) and the windshield.
BI-LEVEL: This mode directs airflow through the
instrument panel outlets and slightly warmer air through
the floor outlets.
PANEL: This mode directs airflow through the
instrument panel outlets.
Whenever MODE is pressed, the display will show the
current system settings for five seconds before
returning the display to the exterior temperature.
The mode button can also be used to select the DEFOG
mode. Information
on defogging and defrosting can
be found later in this section.
(Uulslut: nrrj. r ttaa Lilia UULIWI I cu LCII~I *---*-:-n- a:--\- nu-,, +L:- L,,++-- tr +ha
outside air mode on or off. When this mode is on,
outside air will circulate through your vehicle. When the
button is pressed, an indicator light in the button will
come on
to let you know that it is activated. The outside
air mode can be used with all modes except the
recirculation mode.
3-29
Page 153 of 418
Speedometer and Odometer
Your speedometer lets you see your speed in miles per
hour (mph) or kilometers per hour (km/h). Your
odometer shows how far your vehicle has been driven,
in either miles (used
in the United States) or kilometers
(used in Canada).
The speedometer shows a top speed
of 140 mph
(220 km/h). This is not intended to be the vehicle’s top
speed.
Your vehicle is equipped with a tamper resistant
odometer.
If you see ERROR displayed, you’ll know that
someone has probably tried to turn it back.
You may wonder what happens
if your vehicle needs a
new odometer installed. If the new one can be set to
the mileage total of the old odometer, then
it must
be. But
if it can’t, then it’s set at zero and a label must
be put on the driver’s door to show the old mileage
reading when the new odometer was installed.
Trip Odometer
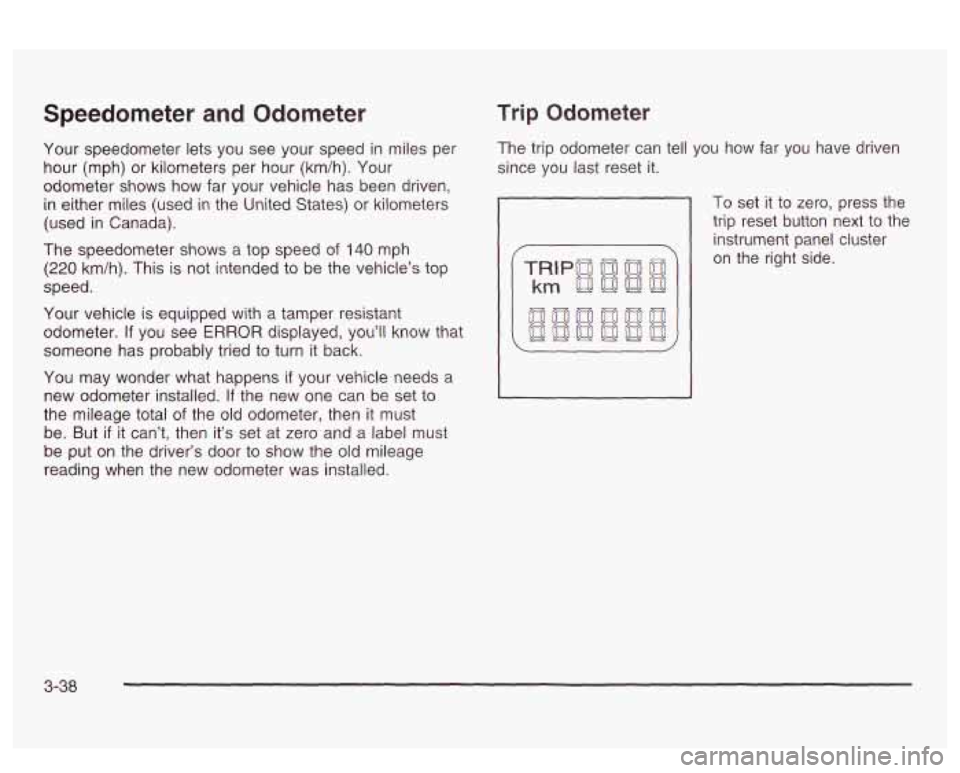
The trip odometer can tell you how far you have driven
since you last reset it.
To set it to zero, press the
trip reset button next to the
instrument panel cluster
on the right side.
3-38
Page 155 of 418

Air Bag Readiness Light
There is an air bag readiness light on the instrument
panel, which shows
AIR BAG. The system checks
the air bag’s electrical system for malfunctions. The light
tells you
if there is an electrical problem. The system
check includes the air bag sensors, the air bag modules,
the wiring and the crash sensing and diagnostic
module. For more information on the air bag system,
see
Air Bag Systems on page 1-47.
AIR
BAG
This light will come on
when you start your
vehicle, and it will flash for
a few seconds. Then
the light should go out.
This means the system is
ready.
If the air bag readiness light stays on after you start the
vehicle or comes on when you are driving, your air
bag system may not work properly. Have your vehicle
serviced right away. If the air
I ~ 3 reac ess IiL ~ :ays on after
you
start your vehicle,
it means the air bag system
may not be working properly. The air bags in
your vehicle may not inflate
in a crash, or they
could even inflate without a crash.
To help
avoid injury
to yourself or others, have your
vehicle serviced right away if the air bag
readiness
light stays on after you start your
vehicle.
The air bag readiness light should flash for a few
seconds when you turn the ignition key to
ON. If the
light doesn’t come
on then, have it fixed so it will
be ready to warn you if there is a problem.
On vehicles with the
DIC, a SERVICE AIR BAG
message will be displayed when there is a problem with
the air bag system. See
DIC Warnings and Messages
on page 3-60 for more information.
3-40
Page 156 of 418
Battery Warning Light
If your vehicle has this
feature, this light will come
on briefly when you
start the vehicle, as a
check to show you
it is working; then it should
go out.
If it stays on, or comes on while you are driving, you
may have a problem with the electrical charging system.
Have
it checked right away. Eriving while this light is
on could drain your battery and result in a vehicle that
may stall.
If you must drive a short distance with the light on, be
certain to turn
off all your accessories, such as the radio
and climate control system.
Some instrument panel clusters with a voltmeter gage
do not have a battery warning light. They have a CHECK
GAGES warning to indicate a problem.
On vehicles with a DIC, a CHECK CHARGE SYSTEM
message will be displayed and a warning chime will
sound. See
DIC Warnings and Messages on page 3-60
for more information.
Voltmeter Gage
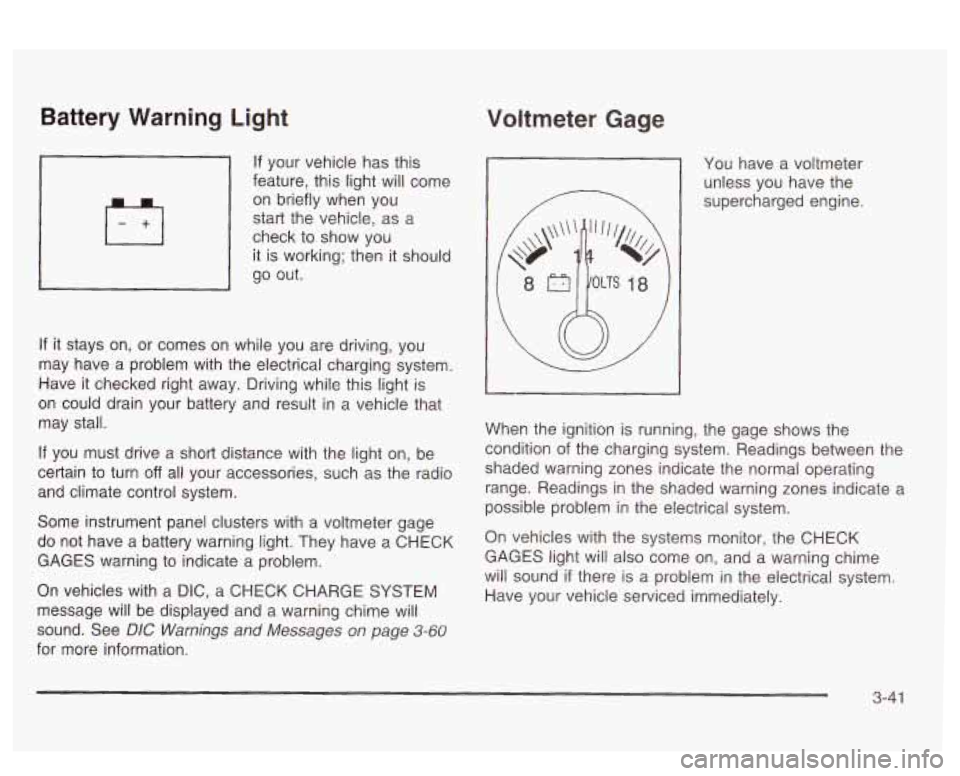
You have a voltmeter
unless you have the
supercharged engine.
When the ignition is running, the gage shows the
condition
of the charging system. Readings between the
shaded warning zones indicate the normal operating
range. Readings in the shaded warning zones indicate a
possible problem in the electrical system.
On vehicles with the systems monitor, the CHECK
GAGES light will also come on, and a warning chime
will sound
if there is a problem in the electrical system.
Have your vehicle serviced immediately.
3-41
Page 157 of 418
On vehicles with a DIC, a CHECK CHARGE SYSTEM
message will be displayed and a warning chime will
sound
if there is a problem in the electrical system. Have
your vehicle serviced immediately. See
DIC Warnings
and Messages on page
3-60 for more information.
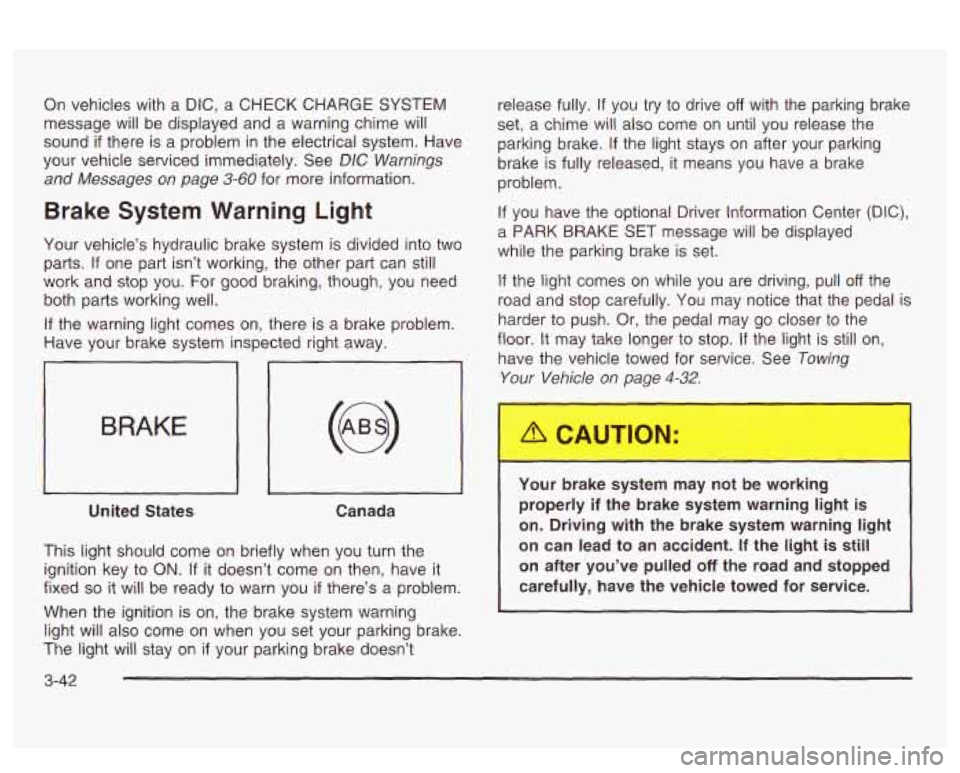
Brake System Warning Light
Your vehicle’s hydraulic brake system is divided into two
parts.
If one part isn’t working, the other part can still
work and stop you. For good braking, though, you need
both parts working well.
If the warning light comes on, there is a brake problem.
Have your brake system inspected right away.
iL
BRAKE
United States Canada
This light should come on briefly when you turn the
ignition key to
ON. If it doesn’t come on then, have it
fixed
so it will be ready to warn you if there’s a problem.
When the ignition is on, the brake system warning
light will also come on when you set your parking brake.
The light will stay on
if your parking brake doesn’t release fully.
If you
try to drive off with the parking brake
set,
a chime will also come on until you release the
parking brake.
If the light stays on after your parking
brake is fully released, it means you have a brake
problem.
If you have the optional Driver Information Center (DIC),
a PARK BRAKE SET message will be displayed
while the parking brake is set.
If the light comes on while you are driving, pull off the
road and stop carefully. You may notice that the pedal is
harder to push. Or, the pedal may go closer to the
floor.
It may take longer to stop. If the light is still on,
have the vehicle towed for service. See
Towing
Your Vehicle on page 4-32.
Your brake system may not be working
properly
if the brake system warning light is
on. Driving with the brake system warning light
on can lead to an accident.
If the light is still
on after you’ve pulled
off the road and stopped
carefully, have the vehicle towed for service.
I
3-42
Page 160 of 418
The optional Traction Control System is active and
is limiting wheel spin. You may feel the system
working, but this is normal. Slippery road conditions
may exist,
so adjust your driving accordingly.
If the LOW TRAC light comes on, slippery road
conditions may exist,
so you should consider slowing
down and adjusting your driving accordingly.
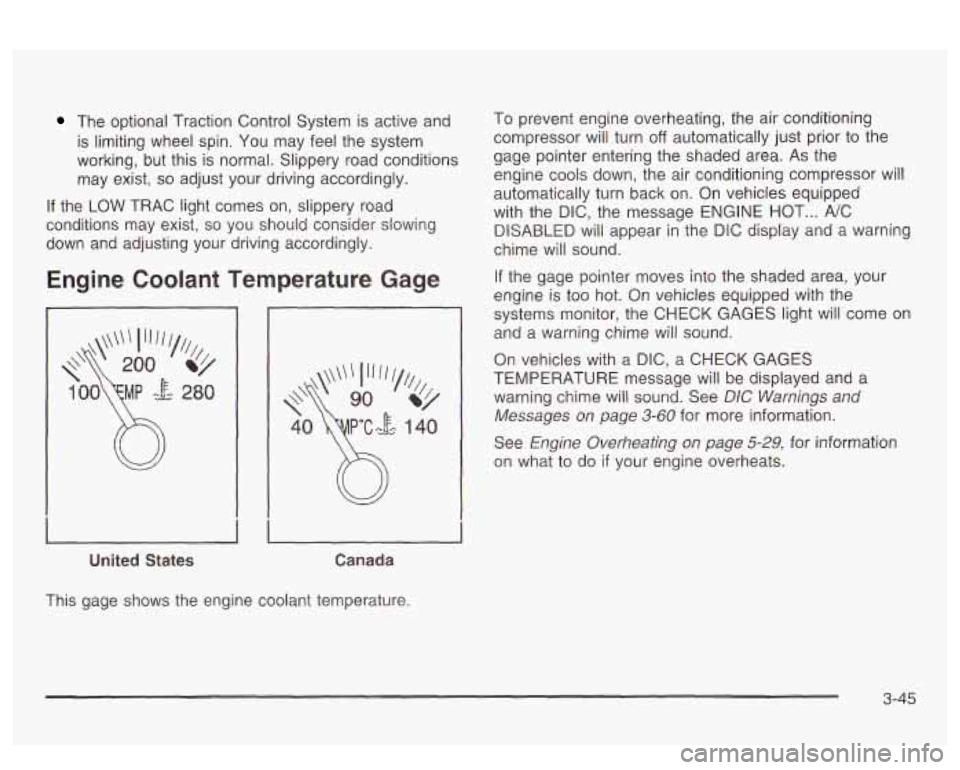
Engine Coolant Temperature Gage
United States Canada
To prevent engine overheating, the air conditioning
compressor will turn
off automatically just prior to the
gage pointer entering the shaded area. As the
engine cools down, the air conditioning compressor will
automatically turn back on. On vehicles equipped
with the DIC, the message ENGINE HOT
... NC
DISABLED will appear in the DiC display and a warning
chime will sound.
If the gage pointer moves into the shaded area, your
engine is too hot.
On vehicles equipped with the
systems monitor, the CHECK GAGES light will come
on
and a warning chime will sound.
On vehicles with a
DIC, a CHECK GAGES
TEMPERATURE message will be displayed and a
warning cnime wili sound.
See DIC bVamiisgs and
Messages on page 3-60 for more information.
See
Engine Overheating on page 5-29, for information
on what to do
if your engine overheats.
This gage shows the engine coolant temperature.
3-45