2003 PONTIAC BONNEVILLE engine overheat
[x] Cancel search: engine overheatPage 93 of 418
To Use the Engine Coolant Heater
1. Turn off the engine.
2. Open the hood and unwrap the electrical cord.
The engine coolant heater cord is located on the
passenger’s side of the vehicle, above the
headlamp assembly.
3. Plug it into a normal, grounded 1 IO-volt AC outlet.
Plu ing the cord into an
L Jrounded outlet
could cause an electrical shock.
Also, the
wrong kind of extension cord could overheat
and cause a fire. You could
be seriously
injured. Plug the cord into a properly grounded
three-prong 110-volt
AC outlet. If the cord
won’t reach, use a heavy-duty three-prong
extension cord rated for at least 15 amps.
4. Before starting the engine, be sure to unplug and
store the cord
as it was before to keep it away
from moving engine parts.
If you don’t, it could be
damaged. How long should
you keep the coolant heater plugged
in? The answer depends
on the outside temperature, the
kind of oil you have, and some other things. Instead
of trying to list everything here, we ask that you contact
your dealer in the area where you’ll be parking your
vehicle. The dealer can give you the best advice for that
particular area.
Automatic Transaxle Operation
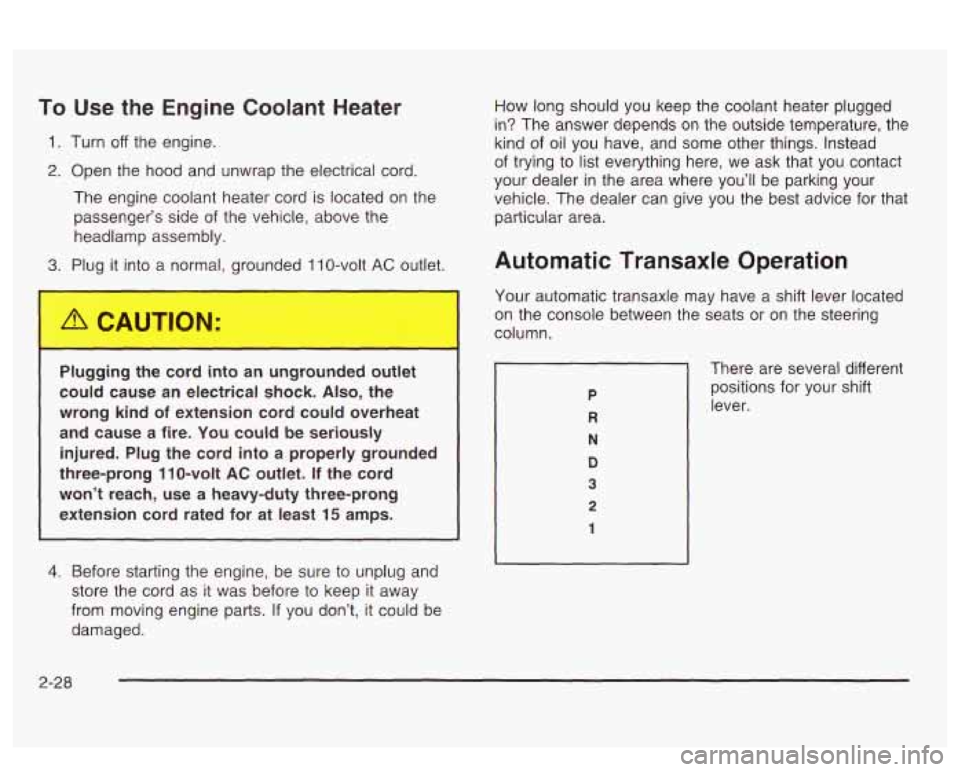
Your automatic transaxle may have a shift lever located
on the console between the seats or on the steering
column.
There are several different
positions for your shift
lever.
2-28
Page 96 of 418
SECOND (2): This position gives you more power but
lower fuel economy.
You can use SECOND (2) on
hills. It can help control your speed as you go down
steep mountain roads, but then you would also want to
use your brakes
off and on.
Notice: Don’t drive in SECOND (2) for more than
5 miles (8 km), or at speeds over 55 mph (98 km/h),
or you can damage your transaxle. Use AUTOMATIC
OVERDRIVE
(@) or THIRD (3) as much as
possible.
Don’t shift into SECOND
(2) unless you are going
slower than
65 mph (105 km/h), or you can damage
your engine.
FIRST
(1): This position gives you even more power
but lower fuel economy than SECOND
(2). You can use
it on very steep hills, or
in deep snow or mud. If the
shift lever is put in
FIRST (l), the transaxle won’t shift
into first gear until the vehicle is going slowly enough.
Notice: If your front wheels won’t turn, don’t
try to drive. This might happen if you were stuck
in
very deep sand or mud or were up against a solid
object. You could damage your transaxle.
Also,
if you stop when going uphill, don’t hold your
vehicle there with only the accelerator pedal. This
could overheat and damage the transaxle. Use your
brakes to
hold your vehicle in position on a hill.
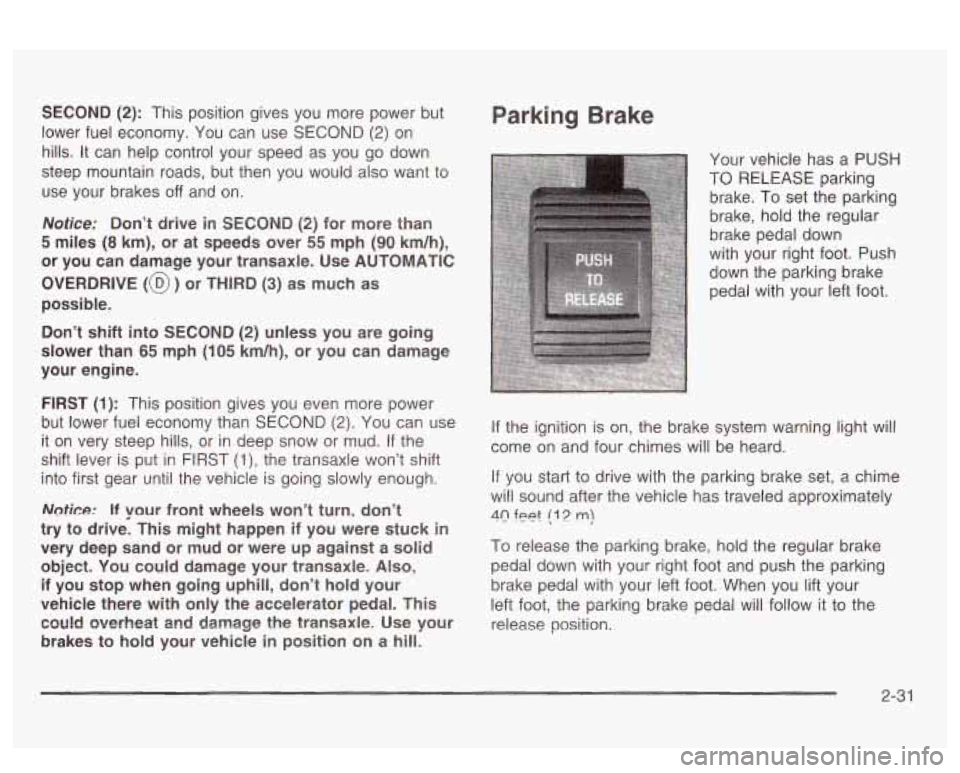
Parking Brake
Your vehicle has a PUSH
TO RELEASE parking
brake. To set the parking
brake, hold the regular
brake pedal down
with your right foot. Push
down the parking brake
pedal with your left foot.
If the ignition is on, the brake system warning light will
come on and four chimes will be heard.
If you start to drive with the parking brake set, a chime
will sound after the vehicle has traveled approximately
40 feet (1 2 m)
To release the parking brake, hold the regular brake
pedal down with your right foot and push the parking
brake pedal with your left foot. When you lift your
left foot, the parking brake pedal will follow it to the
release position.
2-3 1
Page 97 of 418
If you try to drive with the parking brake on, the brake
light stays on and a chime sounds until you release the
parking brake.
Notice: Driving with the parking brake on can
cause your rear brakes to overheat. You may have
to replace them, and you could also damage
other parts of your vehicle.
If you are towing a trailer and are parking on any hill,
see Towing a Trailer on page 4-36. That section shows
what to do first to keep the trailer from moving.
Shiftinc '--lo Park (P)
It can be dangerous to get out of your vehicle
if the shift lever is not fully in PARK (P) with
the parking brake firmly set. Your vehicle can
roll. If you have
left the engine running, the
vehicle can move suddenly. You or others
could be injured.
To be sure your vehicle won't
move, even when you're
on fairly level ground,
use the steps that follow.
If you're pulling a
trailer, see "Towing a Trailer"
in the Index.
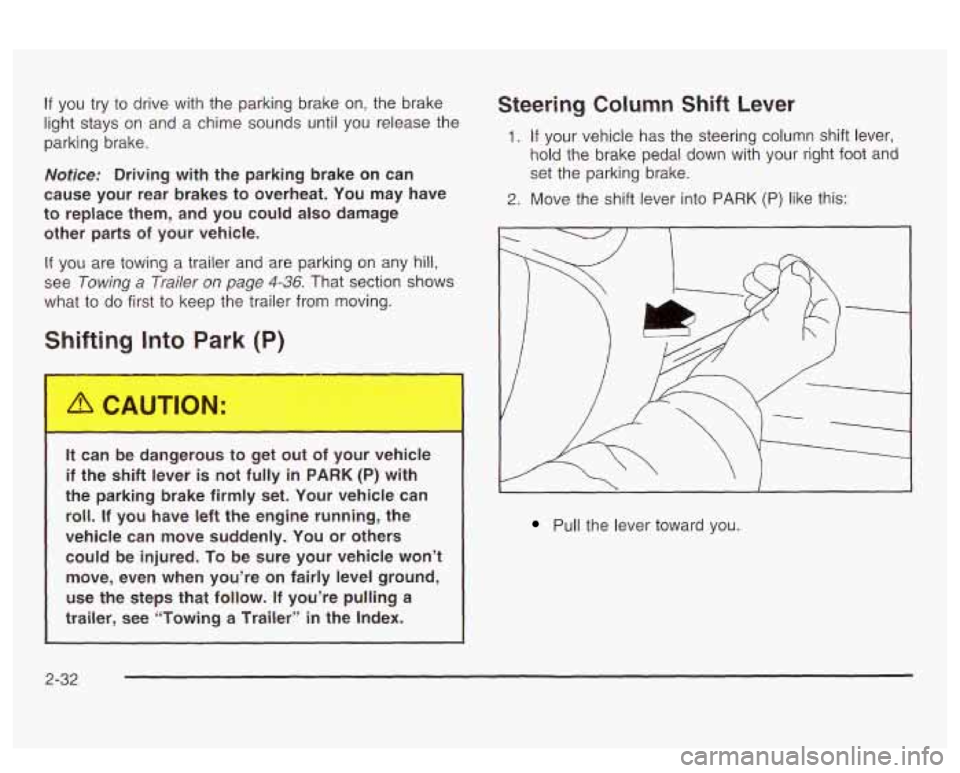
Steering Column Shift Lever
1. If your vehicle has the steering column shift lever,
hold the brake pedal
down with your right foot and
set the parking brake.
2. Move the shift lever into PARK (P) like this:
I I I
Pull the lever toward you.
2-32
Page 99 of 418
Leaving Your Vehicle With the Engine
Running
It can be dangerous to leave your vehicle with
the engine running. Your vehicle could move
suddenly if the shift lever is not fully in
PARK
(P) with the parking brake firmly set.
And, if you leave the vehicle with the engine
running, it could overheat and even catch fire.
You or others could be injured. Don’t leave
your vehicle with the engine running.
If you have to leave your vehicle with the engine
running, be sure your vehicle is in PARK (P) and your
parking brake is firmly set before you leave it. After
you’ve moved the shift lever into PARK (P), hold
the regular brake pedal down. Then, see
if you can
move the shift lever away from PARK (P) without first
pulling it toward you (or,
if you have the console
shift lever, without first pushing the button). If you can,
it
means that the shift lever wasn’t fully locked into
PARK (P).
Torque Lock
If you are parking on a hill and you don’t shift your
transaxle into PARK (P) properly, the weight of
the vehicle may put
too much force on the parking pawl
in the transaxle. You may find it difficult to pull the
shift lever out of PARK (P). This is called “torque lock.’’
To prevent torque lock, set the parking brake and
then shift into PARK (P) properly before you leave the
driver’s seat. To find out how, see
Shifting Into Park (P)
on page 2-32.
When you are ready to drive, move the shift lever out OT
PARK (P) before you release the parking brake.
If torque lock does occur, you may need
to have another
vehicle push yours a little uphill to take some of the
pressure from the parking pawl in the transaxle,
so you
can pull the shift lever out of PARK
(P).
2-34
Page 139 of 418
Notice: Adding some electrical equipment to your
vehicle can damage
it or keep other things from
working as they should. This wouldn’t be covered by
your warranty. Check with your dealer before adding electrical equipment, and never use anything
that exceeds the amperage rating.
When adding electrical equipment, be sure to follow the
proper installation instructions included with the
equipment.
Notice: Power outlets are designed for accessory
plugs only.
Do not hang any type of accessory
or accessory bracket from the plug. Improper use of
the power outlet can cause damage not covered
by your warranty.
Ashtrays and Cigarette Lighter
Push down on the cover to reveal the front ashtray.
To clean the ashtray,
lift it out by pulling on the finger
holes on each side.
On models without a console, an ashtray is located
underneath the instrument panel.
To clean the ashtray,
lift it out by pulling up on the tabs on either side.
It snaps back into place.
To open a rear ashtray, lift the cover
Notice: Don’t put papers or other flammable
items into your ashtrays. Hot cigarettes or other
smoking materials could ignite them, causing
a damaging fire.
The cigarette lighter is located next to the storage tray.
To use a lighter, just push the center in all the way
and let
it go. When it is ready, the center will pop back
out by itself. Pull out the entire unit to use it.
Notice: Don’t hold a cigarette lighter in with your
hand while
it is heating. If you do, it won’t be able to
back away from the heating element when it’s
ready. That can make
it overheat, damaging the
lighter and the heating element.
The cigarette lighter will only operate when the ignition
key is in
ON and for 10 minutes after turning the
ignition
OFF. If you would like the lighter to operate
regardless of ignition position, and for extended periods
of time, see “Engine Compartment Fuse Block under
Fuses and Circuit Breakers on page 5-92 or see
your dealer.
3-24
Page 159 of 418
The traction control system warning light may come on
for the following reasons:
If you turn the system off by pressing the
TRACTION CONTROL button located on the center
console, the warning light will come on and stay
on.
To turn the system back on, press the button
again. The warning light should go
off. See Traction
Control System (TCS) on page 4-9 for more
information.
If there’s a brake system problem that is specifically
related
to traction control, the traction control
system will turn
off and the warning light will come
on.
If your brakes begin to overheat, the traction
control system will turn
off and the warning light will
come on until your brakes cool down.
If the traction control system is affected by an
engine-related problem, the system will turn off and
the warning light will come on.
If the traction control system warning light comes on
and stays on for an extended period of time when the
system
is turned on, your vehicle needs service.
Low Traction Active Light
LOW
TRAC
Your LOW TRAC (Low
Traction Active) light may
come on for one of the
following reasons:
An advanced computer-controlled system called
Stabilitrak@
(if equipped) has come on to help
your vehicle continue
to go in the direction in which
you’re steering. This stability enhancement
system activates when the computer senses that
your vehicle is just starting
to spin, as it might if you
hit a patch of ice or other slippery spot on the
road. When the system is on, you may hear a noise
or feel
a vibration in the brake pedal. This is
normal.
In these situations when the
LOW TRAC light is on
and the system is engaged, you should continue
to steer in the direction you want
to go. The system
is designed to help you in bad weather or other
difficult driving situations by making the most
of whatever road conditions will permit.
3-44
Page 160 of 418
The optional Traction Control System is active and
is limiting wheel spin. You may feel the system
working, but this is normal. Slippery road conditions
may exist,
so adjust your driving accordingly.
If the LOW TRAC light comes on, slippery road
conditions may exist,
so you should consider slowing
down and adjusting your driving accordingly.
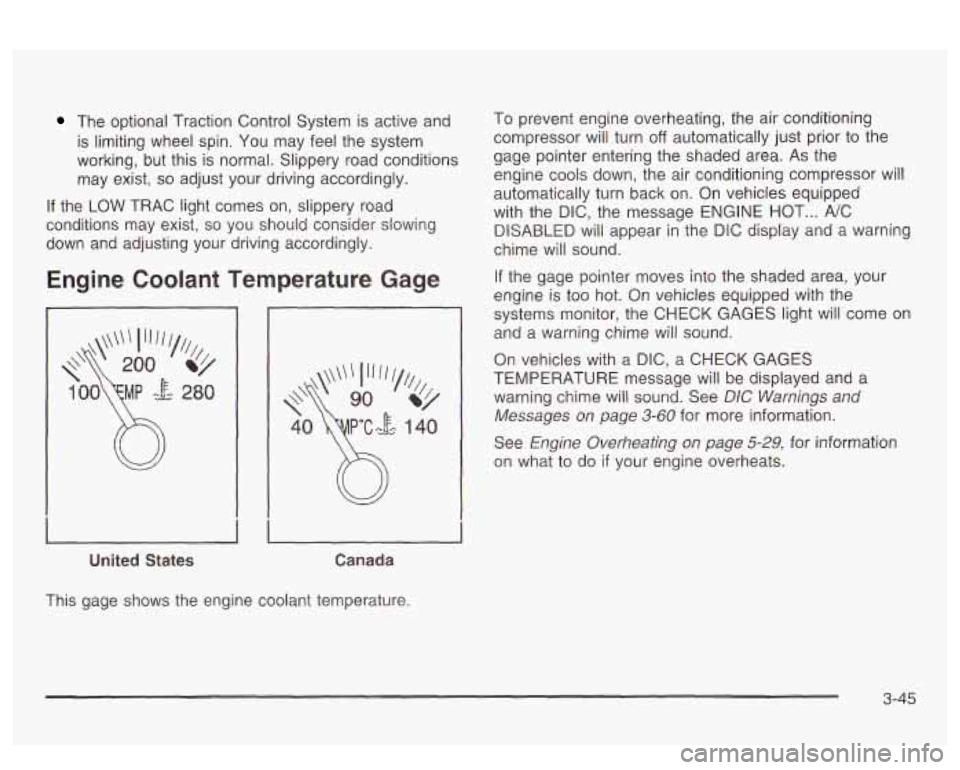
Engine Coolant Temperature Gage
United States Canada
To prevent engine overheating, the air conditioning
compressor will turn
off automatically just prior to the
gage pointer entering the shaded area. As the
engine cools down, the air conditioning compressor will
automatically turn back on. On vehicles equipped
with the DIC, the message ENGINE HOT
... NC
DISABLED will appear in the DiC display and a warning
chime will sound.
If the gage pointer moves into the shaded area, your
engine is too hot.
On vehicles equipped with the
systems monitor, the CHECK GAGES light will come
on
and a warning chime will sound.
On vehicles with a
DIC, a CHECK GAGES
TEMPERATURE message will be displayed and a
warning cnime wili sound.
See DIC bVamiisgs and
Messages on page 3-60 for more information.
See
Engine Overheating on page 5-29, for information
on what to do
if your engine overheats.
This gage shows the engine coolant temperature.
3-45
Page 247 of 418
Then, shut the engine off and close the window almost
all the way to preserve the heat. Start the engine
again and repeat this only when you feel really
uncomfortable from the cold. But do it as little as
possible. Preserve the fuel as long as you can. To help
keep warm, you can get out of the vehicle and do
some fairly vigorous exercises every half hour or
so until
help comes.
If You Are Stuck: In Sand, Mud, Ice
or Snow
In order to free your vehicle when it is stuck, you will
need to spin the wheels, but you don’t want to spin your
wheels too fast. The method known as “rocking” can
help you get out when you’re stuck, but you must
use caution. If
you let your tires
s 1 at high speed, they
can explode, and you or others could be
injured. And, the transaxle or other parts of the
vehicle can overheat. That could cause an
engine compartment fire
or other damage.
When you’re stuck, spin the wheels as little as
possible. Don’t spin the wheels above
35 mph
(55 km/h) as shown on the speedometer.
Notice: Spinning your wheels can destroy parts of
your vehicle as well as the tires. If you spin the
wheels too fast while shifting your transaxle back
and forth, you can destroy your transaxle. See
“Rocking Your Vehicle
To Get It Out.”
For information about using tire chains on your vehicle.
see
Tire Chains on page 5-71.
4-30