Page 2916 of 4500
Fig. 10: Identifying Connector Terminals Heated Oxygen Sensor
Courtesy of TOYOTA MOTOR SALES, U.S.A., INC.
INSPECTION
1.INSPECT CHARCOAL CANISTER ASSY
a. Visually check the charcoal canister for cracks or damage.
If cracks or damage are found, replace the canister.
Page 3286 of 4500

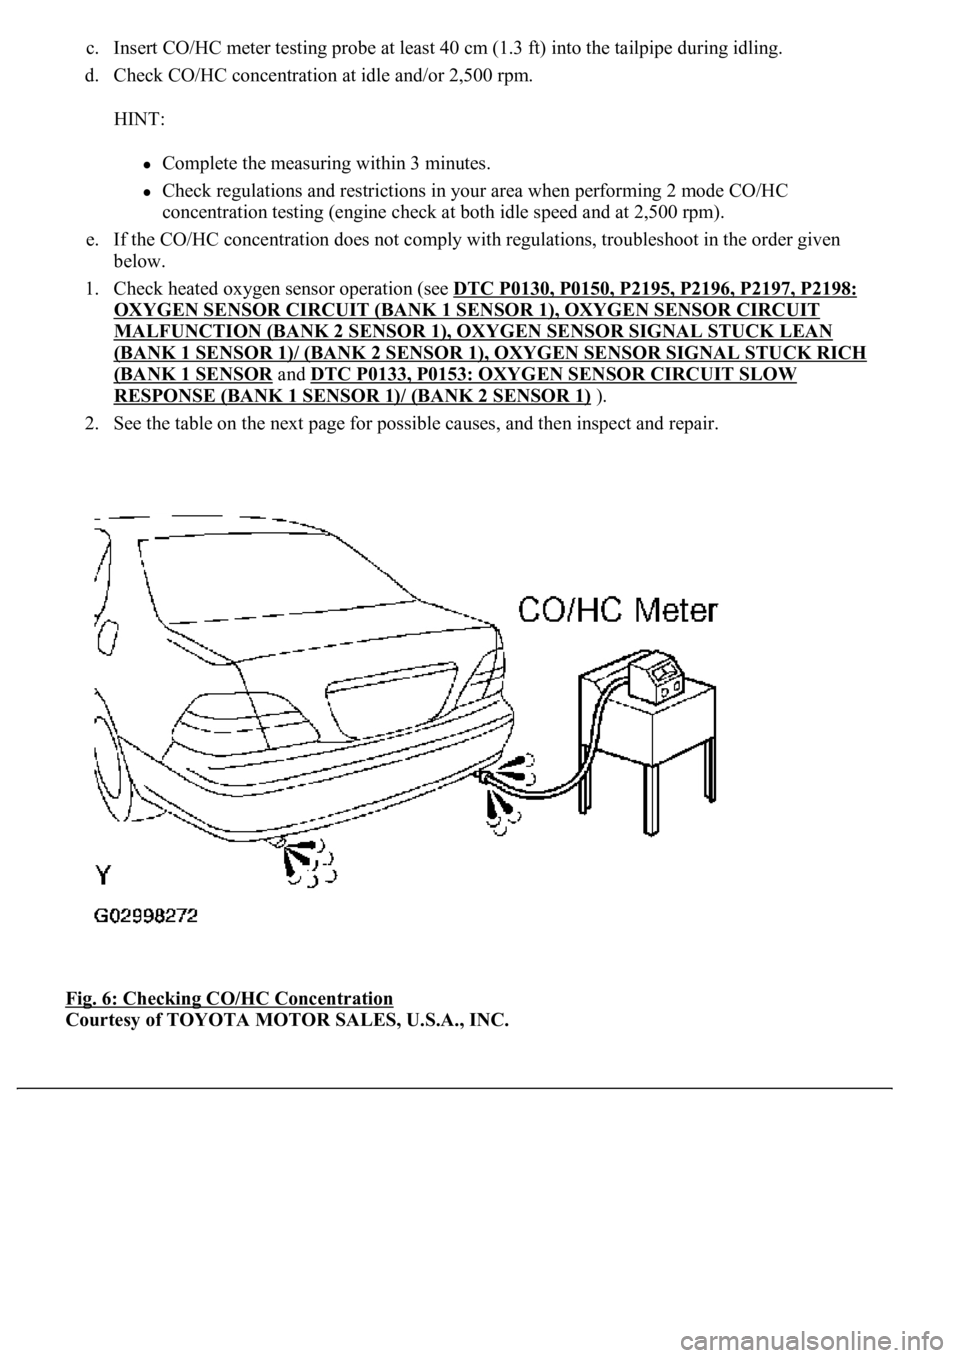
c. Insert CO/HC meter testing probe at least 40 cm (1.3 ft) into the tailpipe during idling.
d. Check CO/HC concentration at idle and/or 2,500 rpm.
HINT:
Complete the measuring within 3 minutes.
Check regulations and restrictions in your area when performing 2 mode CO/HC
concentration testing (engine check at both idle speed and at 2,500 rpm).
e. If the CO/HC concentration does not comply with regulations, troubleshoot in the order given
below.
1. Check heated oxygen sensor operation (see DTC P0130, P0150, P2195, P2196, P2197, P2198:
OXYGEN SENSOR CIRCUIT (BANK 1 SENSOR 1), OXYGEN SENSOR CIRCUIT
MALFUNCTION (BANK 2 SENSOR 1), OXYGEN SENSOR SIGNAL STUCK LEAN
(BANK 1 SENSOR 1)/ (BANK 2 SENSOR 1), OXYGEN SENSOR SIGNAL STUCK RICH
(BANK 1 SENSOR and DTC P0133, P0153: OXYGEN SENSOR CIRCUIT SLOW
RESPONSE (BANK 1 SENSOR 1)/ (BANK 2 SENSOR 1) ).
2. See the table on the next page for possible causes, and then inspect and repair.
Fig. 6: Checking CO/HC Concentration
Courtesy of TOYOTA MOTOR SALES, U.S.A., INC.
Page 3780 of 4500

1.REMOVE FRONT FLOOR BRACE CENTER
a. Remove the 4 bolts and floor brace.
2.Bank 1, 2 sensor 2:
REMOVE HEATED OXYGEN SENSOR
a. Remove the 2 sensors.
3.REMOVE EXHAUST PIPE ASSY FRONT
a. Loosen the clamp.
b. Remove the 4 bolts, 4 nuts, pipe and 2 gaskets.
4.REMOVE EXHAUST PIPE ASSY CENTER
a. Loosen the 2 clamps.
b. Remove the pipe.
5.REMOVE EXHAUST PIPE ASSY TAIL (LH)
a. Remove the pipe from the 3 rings.
6.REMOVE EXHAUST PIPE ASSY TAIL (RH)
a. Remove the pipe from the 3 rings.
7.INSTALL EXHAUST PIPE ASSY FRONT
a. Install the 2 new gaskets to the pipe.
b. Install the pipe to the TWC with the 4 bolts and 4 nuts.
Torque: 44 N.m (450 kgf.cm, 32 ft.lbf)
8.Bank 1, 2 sensor 2:
INSTALL HEATED OXYGEN SENSOR
a. Install the 2 sensors.
Torque: 44 N.m (450 kgf.cm, 32 ft.lbf)
HINT:
Before installing the sensor, twist the sensor wire counterclockwise 3 and 1/2 turns.
After installing the sensor, check that the sensor wire is not twisted. If it is twisted, remove the
sensor and reinstall it.
9.INSTALL EXHAUST PIPE ASSY CENTER
a. Install the pipe.
b. Tighten the clamp.
Standard dimension (A): 13 to 15 mm (0.51 to 0.59 in.)
Page:
< prev 1-8 9-16 17-24