Page 153 of 256

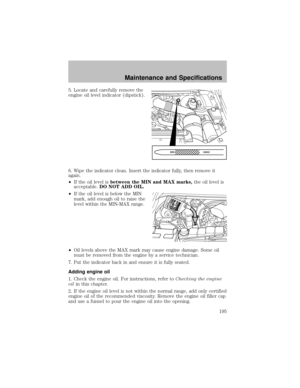
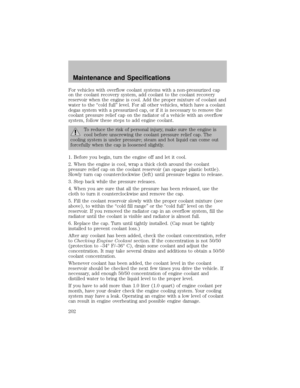
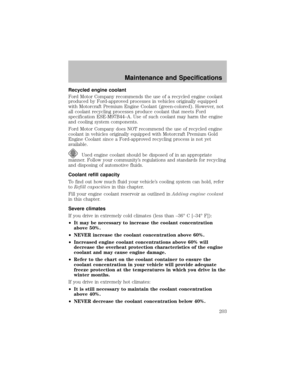
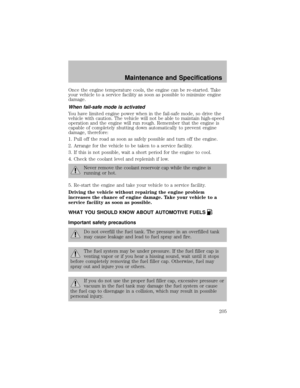
Canadian customers who require roadside assistance, call
1–800–665–2006.
If you need to arrange roadside assistance for yourself, Ford Motor
Companywill reimburse a reasonable amount. To obtain reimbursement
information, U.S. Ford or Mercuryvehicles customers call
1-800-241-3673; Lincoln vehicle customers call 1–800–521–4140.
Canadian customers who need to obtain reimbursement information, call
1–800–665–2006.
ROADSIDE COVERAGE BEYOND BASIC WARRANTY
In the United States, you may purchase additional roadside assistance
coverage beyond this period through the Ford Auto Club by contacting
your Ford or Lincoln Mercury dealer.
Similarlyin Canada, for uninterrupted Roadside Assistance coverage, you
maypurchase extended coverage prior to your Basic Warranty’s Roadside
Assistance expiring. For more information and enrollment, contact
1–877–294–2582 or visit our website at www.ford.ca.
HAZARD FLASHER
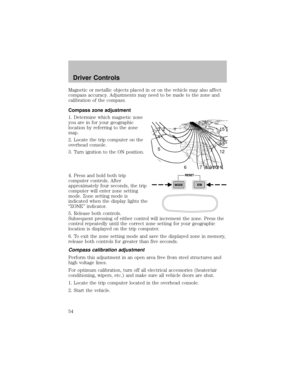
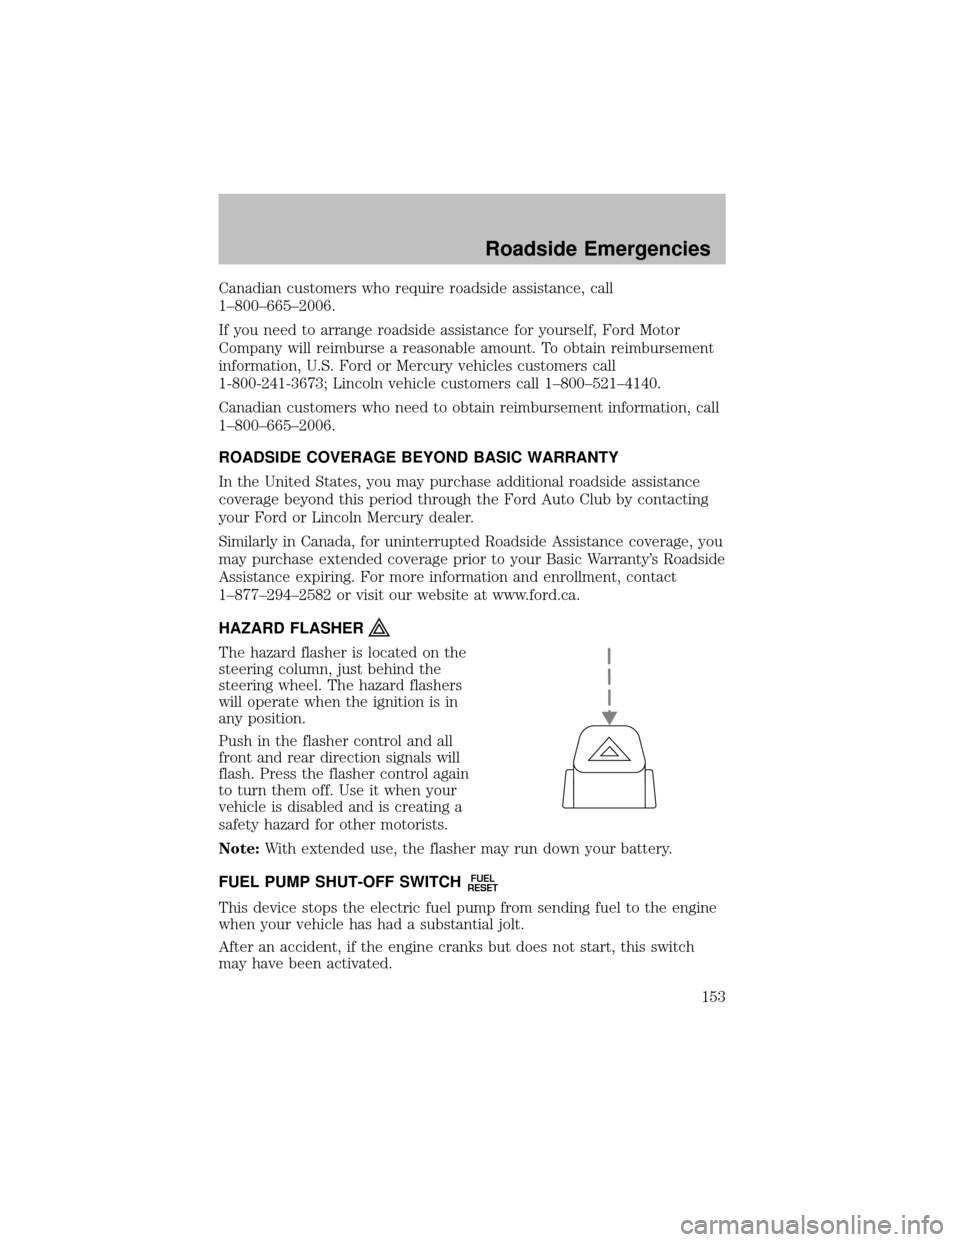
The hazard flasher is located on the
steering column, just behind the
steering wheel. The hazard flashers
will operate when the ignition is in
anyposition.
Push in the flasher control and all
front and rear direction signals will
flash. Press the flasher control again
to turn them off. Use it when your
vehicle is disabled and is creating a
safetyhazard for other motorists.
Note:With extended use, the flasher mayrun down your battery.
FUEL PUMP SHUT-OFF SWITCH
FUEL
RESET
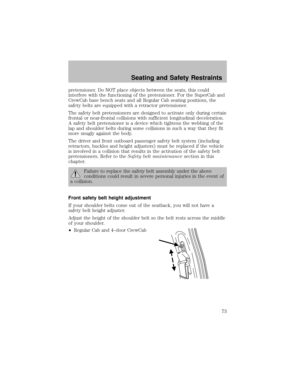
This device stops the electric fuel pump from sending fuel to the engine
when your vehicle has had a substantial jolt.
After an accident, if the engine cranks but does not start, this switch
mayhave been activated.
Roadside Emergencies
153
Page 154 of 256
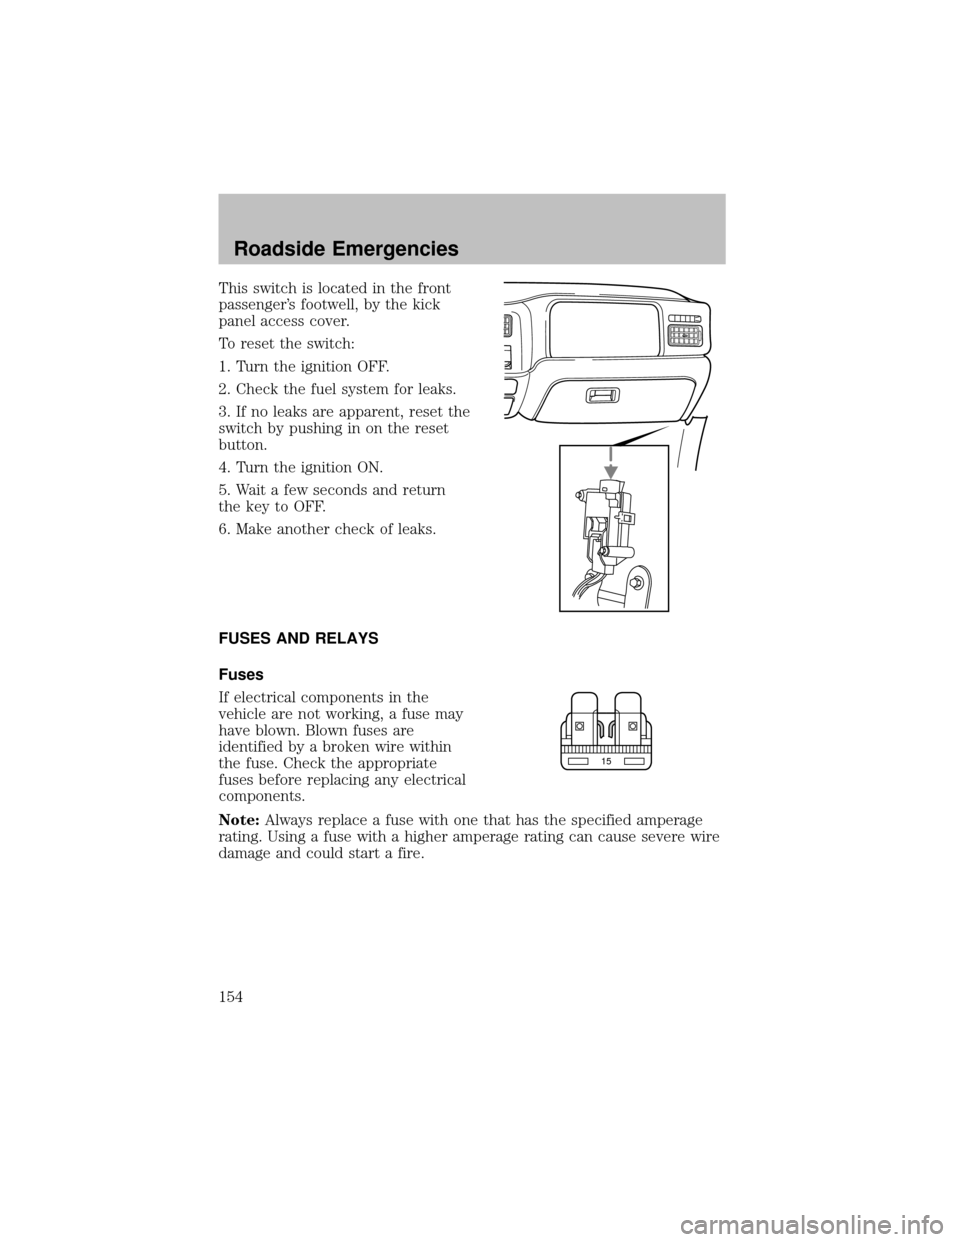
This switch is located in the front
passenger’s footwell, bythe kick
panel access cover.
To reset the switch:
1. Turn the ignition OFF.
2. Check the fuel system for leaks.
3. If no leaks are apparent, reset the
switch bypushing in on the reset
button.
4. Turn the ignition ON.
5. Wait a few seconds and return
the keyto OFF.
6. Make another check of leaks.
FUSES AND RELAYS
Fuses
If electrical components in the
vehicle are not working, a fuse may
have blown. Blown fuses are
identified bya broken wire within
the fuse. Check the appropriate
fuses before replacing anyelectrical
components.
Note:Always replace a fuse with one that has the specified amperage
rating. Using a fuse with a higher amperage rating can cause severe wire
damage and could start a fire.
15
Roadside Emergencies
154
Page 155 of 256
Standard fuse amperage rating and color
COLOR
Fuse
ratingMini
fusesStandard
fusesMaxi
fusesCartridge
maxi
fusesFuse link
cartridge
2A GreyGrey — — —
3A Violet Violet — — —
4A Pink Pink — — —
5A Tan Tan — — —
7.5A Brown Brown — — —
10A Red Red — — —
15A Blue Blue — — —
20A Yellow Yellow Yellow Blue Blue
25A Natural Natural — — —
30A Green Green Green Pink Pink
40A — — Orange Green Green
50A — — Red Red Red
60A — — Blue — Yellow
70A — — Tan — Brown
80A — — Natural — Black
Passenger compartment fuse panel / power distribution box
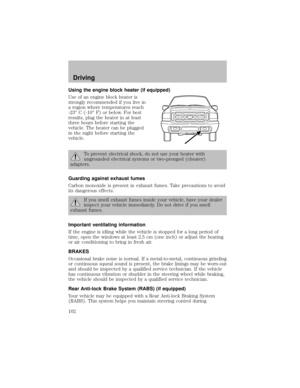
The fuse panel is located below and to the left of the steering wheel by
the brake pedal. Remove the panel cover to access the fuses.
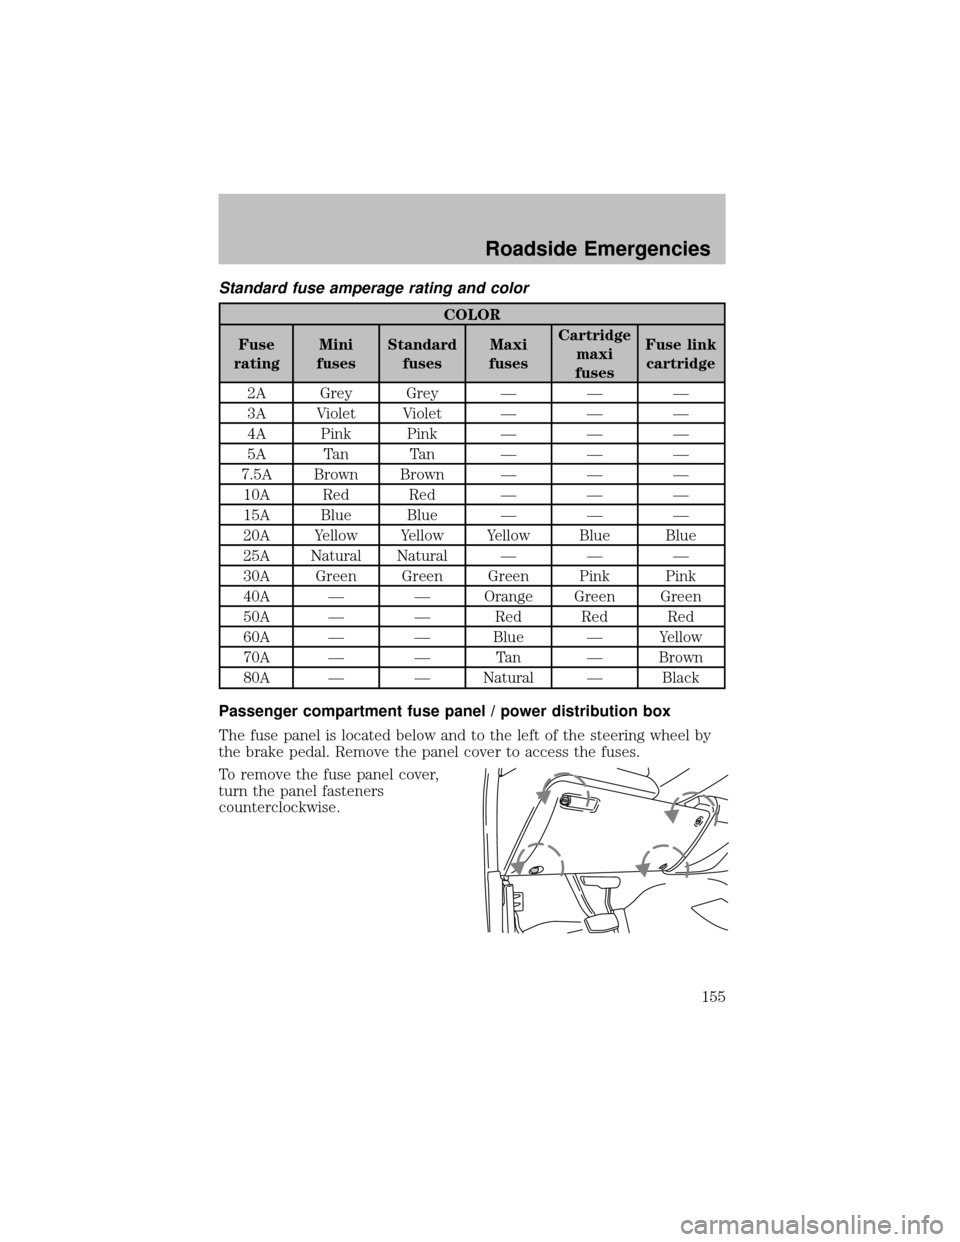
To remove the fuse panel cover,
turn the panel fasteners
counterclockwise.
Roadside Emergencies
155
Page 156 of 256
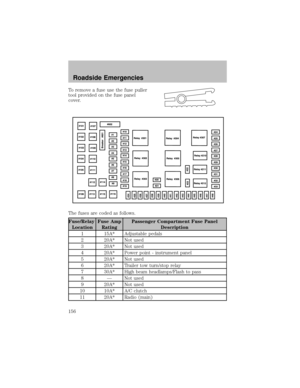
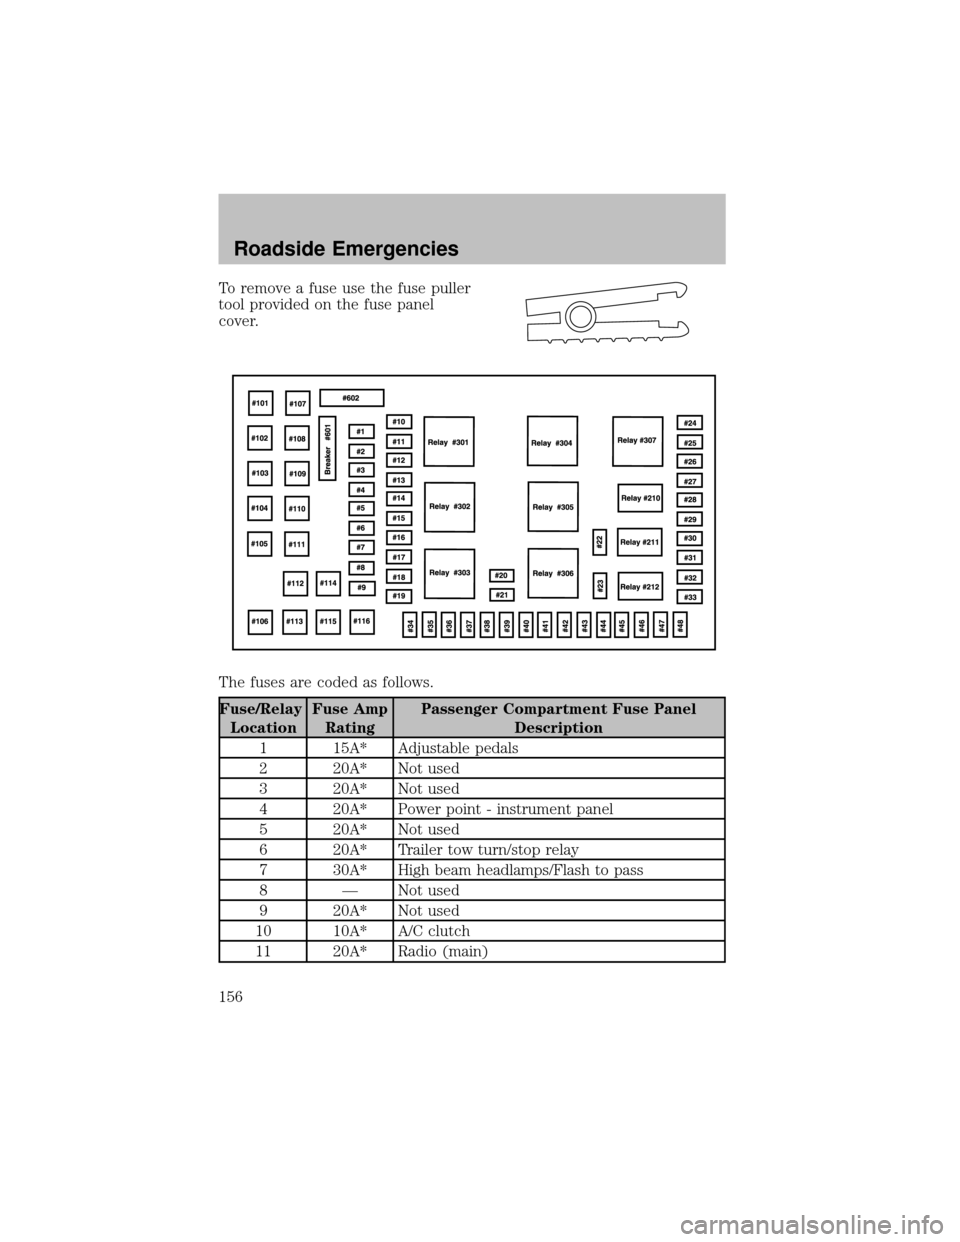
To remove a fuse use the fuse puller
tool provided on the fuse panel
cover.
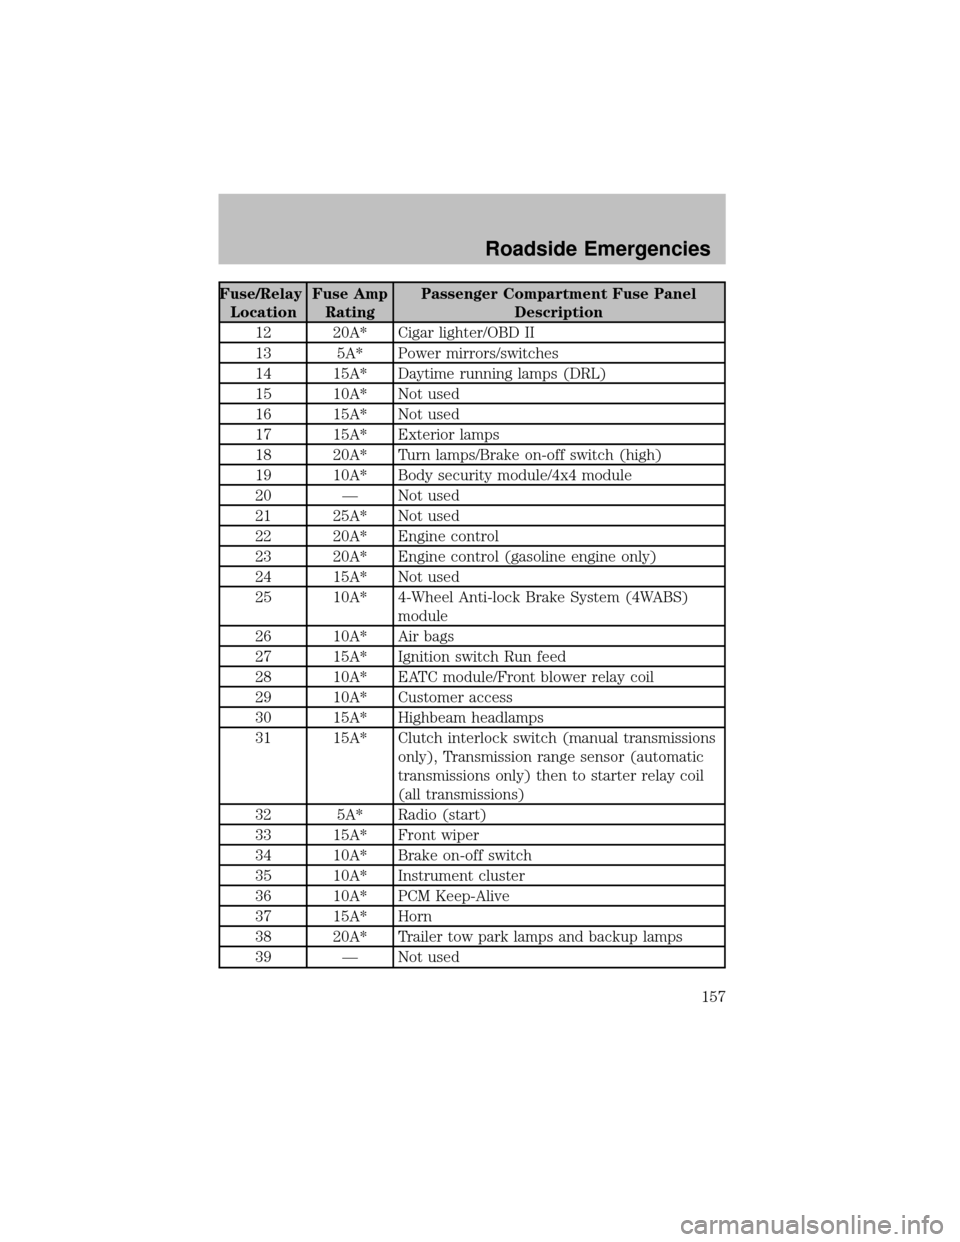
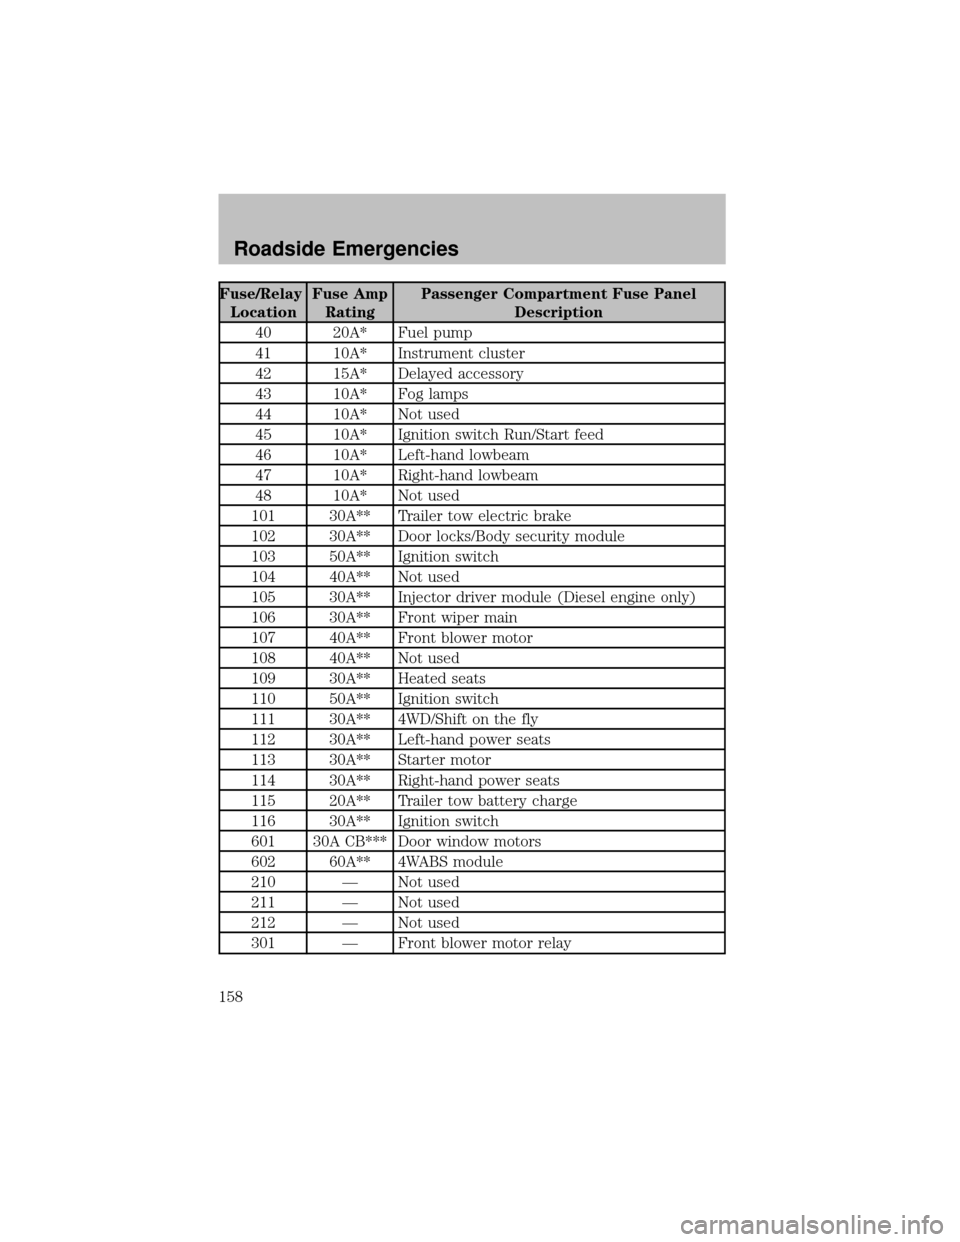
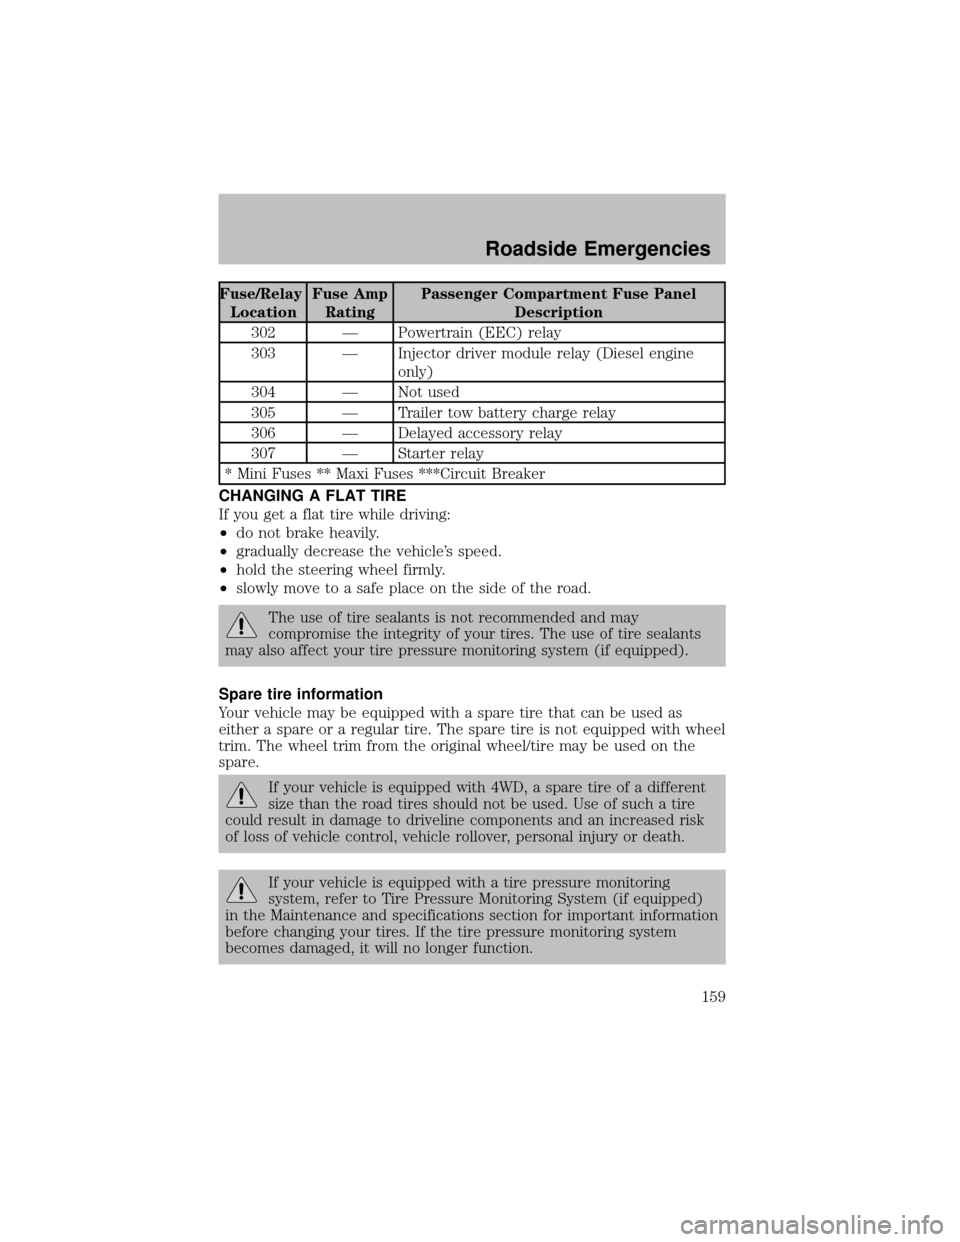
The fuses are coded as follows.
Fuse/Relay
LocationFuse Amp
RatingPassenger Compartment Fuse Panel
Description
1 15A* Adjustable pedals
2 20A* Not used
3 20A* Not used
4 20A* Power point - instrument panel
5 20A* Not used
6 20A* Trailer tow turn/stop relay
7 30A* High beam headlamps/Flash to pass
8 — Not used
9 20A* Not used
10 10A* A/C clutch
11 20A* Radio (main)
Roadside Emergencies
156
Page 157 of 256

Fuse/Relay
LocationFuse Amp
RatingPassenger Compartment Fuse Panel
Description
12 20A* Cigar lighter/OBD II
13 5A* Power mirrors/switches
14 15A* Daytime running lamps (DRL)
15 10A* Not used
16 15A* Not used
17 15A* Exterior lamps
18 20A* Turn lamps/Brake on-off switch (high)
19 10A* Bodysecuritymodule/4x4 module
20 — Not used
21 25A* Not used
22 20A* Engine control
23 20A* Engine control (gasoline engine only)
24 15A* Not used
25 10A* 4-Wheel Anti-lock Brake System (4WABS)
module
26 10A* Air bags
27 15A* Ignition switch Run feed
28 10A* EATC module/Front blower relaycoil
29 10A* Customer access
30 15A* Highbeam headlamps
31 15A* Clutch interlock switch (manual transmissions
only), Transmission range sensor (automatic
transmissions only) then to starter relay coil
(all transmissions)
32 5A* Radio (start)
33 15A* Front wiper
34 10A* Brake on-off switch
35 10A* Instrument cluster
36 10A* PCM Keep-Alive
37 15A* Horn
38 20A* Trailer tow park lamps and backup lamps
39 — Not used
Roadside Emergencies
157
Page 158 of 256
Fuse/Relay
LocationFuse Amp
RatingPassenger Compartment Fuse Panel
Description
40 20A* Fuel pump
41 10A* Instrument cluster
42 15A* Delayed accessory
43 10A* Fog lamps
44 10A* Not used
45 10A* Ignition switch Run/Start feed
46 10A* Left-hand lowbeam
47 10A* Right-hand lowbeam
48 10A* Not used
101 30A** Trailer tow electric brake
102 30A** Door locks/Bodysecuritymodule
103 50A** Ignition switch
104 40A** Not used
105 30A** Injector driver module (Diesel engine only)
106 30A** Front wiper main
107 40A** Front blower motor
108 40A** Not used
109 30A** Heated seats
110 50A** Ignition switch
111 30A** 4WD/Shift on the fly
112 30A** Left-hand power seats
113 30A** Starter motor
114 30A** Right-hand power seats
115 20A** Trailer tow batterycharge
116 30A** Ignition switch
601 30A CB*** Door window motors
602 60A** 4WABS module
210 — Not used
211 — Not used
212 — Not used
301 — Front blower motor relay
Roadside Emergencies
158
Page 159 of 256

Fuse/Relay
LocationFuse Amp
RatingPassenger Compartment Fuse Panel
Description
302 — Powertrain (EEC) relay
303 — Injector driver module relay(Diesel engine
only)
304 — Not used
305 — Trailer tow batterycharge relay
306 — Delayed accessory relay
307 — Starter relay
* Mini Fuses ** Maxi Fuses ***Circuit Breaker
CHANGING A FLAT TIRE
If you get a flat tire while driving:
•do not brake heavily.
•graduallydecrease the vehicle’s speed.
•hold the steering wheel firmly.
•slowlymove to a safe place on the side of the road.
The use of tire sealants is not recommended and may
compromise the integrityof your tires. The use of tire sealants
may also affect your tire pressure monitoring system (if equipped).
Spare tire information
Your vehicle maybe equipped with a spare tire that can be used as
either a spare or a regular tire. The spare tire is not equipped with wheel
trim. The wheel trim from the original wheel/tire maybe used on the
spare.
If your vehicle is equipped with 4WD, a spare tire of a different
size than the road tires should not be used. Use of such a tire
could result in damage to driveline components and an increased risk
of loss of vehicle control, vehicle rollover, personal injuryor death.
If your vehicle is equipped with a tire pressure monitoring
system, refer to Tire Pressure Monitoring System (if equipped)
in the Maintenance and specifications section for important information
before changing your tires. If the tire pressure monitoring system
becomes damaged, it will no longer function.
Roadside Emergencies
159
Page 160 of 256
Location of the spare tire and tools
The spare tire and tools for your vehicle are stowed in the following
locations:
Tool Location
Spare tire (pick-up trucks only) Under the vehicle, just forward of
the rear bumper
Jack, jack handle and lug wrench Regular cab, crew cab and
SuperCab without rear bench seat:
Fastened to floor pan behind
rearmost seat on passenger side
SuperCab with rear bench seat:
Under rear bench on passenger
side
Key, spare tire lock In the glove box
Removing the spare tire (with spare tire carrier only)
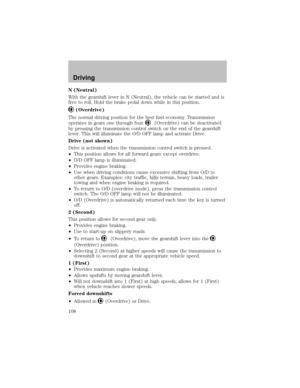
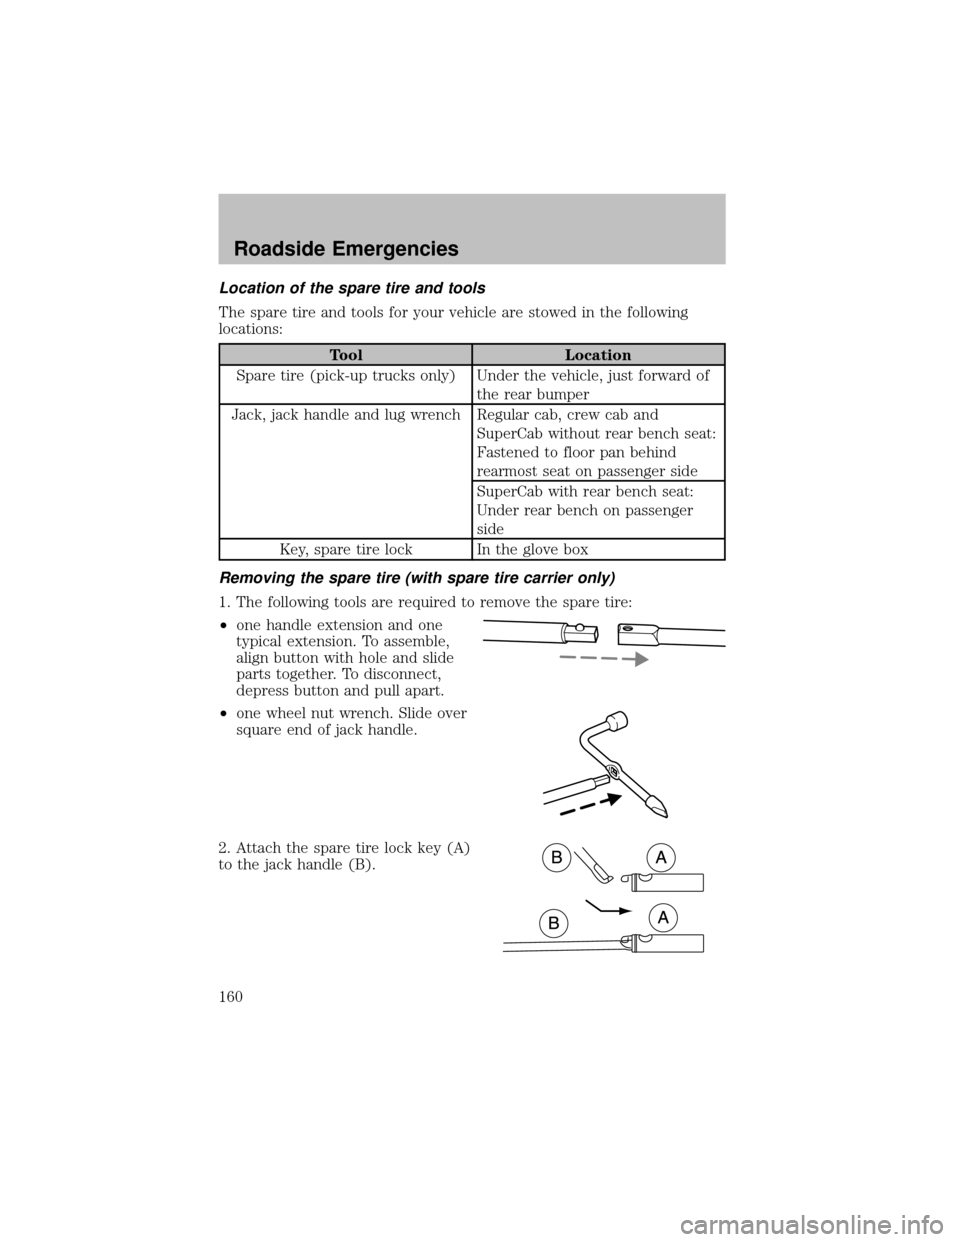
1. The following tools are required to remove the spare tire:
•one handle extension and one
typical extension. To assemble,
align button with hole and slide
parts together. To disconnect,
depress button and pull apart.
•one wheel nut wrench. Slide over
square end of jack handle.
2. Attach the spare tire lock key(A)
to the jack handle (B).
Roadside Emergencies
160