2003 BMW Z4 2.5I light
[x] Cancel search: lightPage 40 of 106
Driving
40 The brake lamps do not come on when the
parking brake is engaged.<
Vehicles with manual transmission:
Always engage the parking brake
when parking on slopes and inclined sur-
faces, since shifting into 1st gear or reverse
may not provide adequate resistance to
rolling. Vehicles with automatic transmis-
sion: place the selector lever in
position P.<
To avoid corrosion and one-sided
braking, apply the parking brake
lightly from time to time when coasting to a
standstill – at a traffic signal, for example –
provided that it is safe to do so.<
Manual transmission
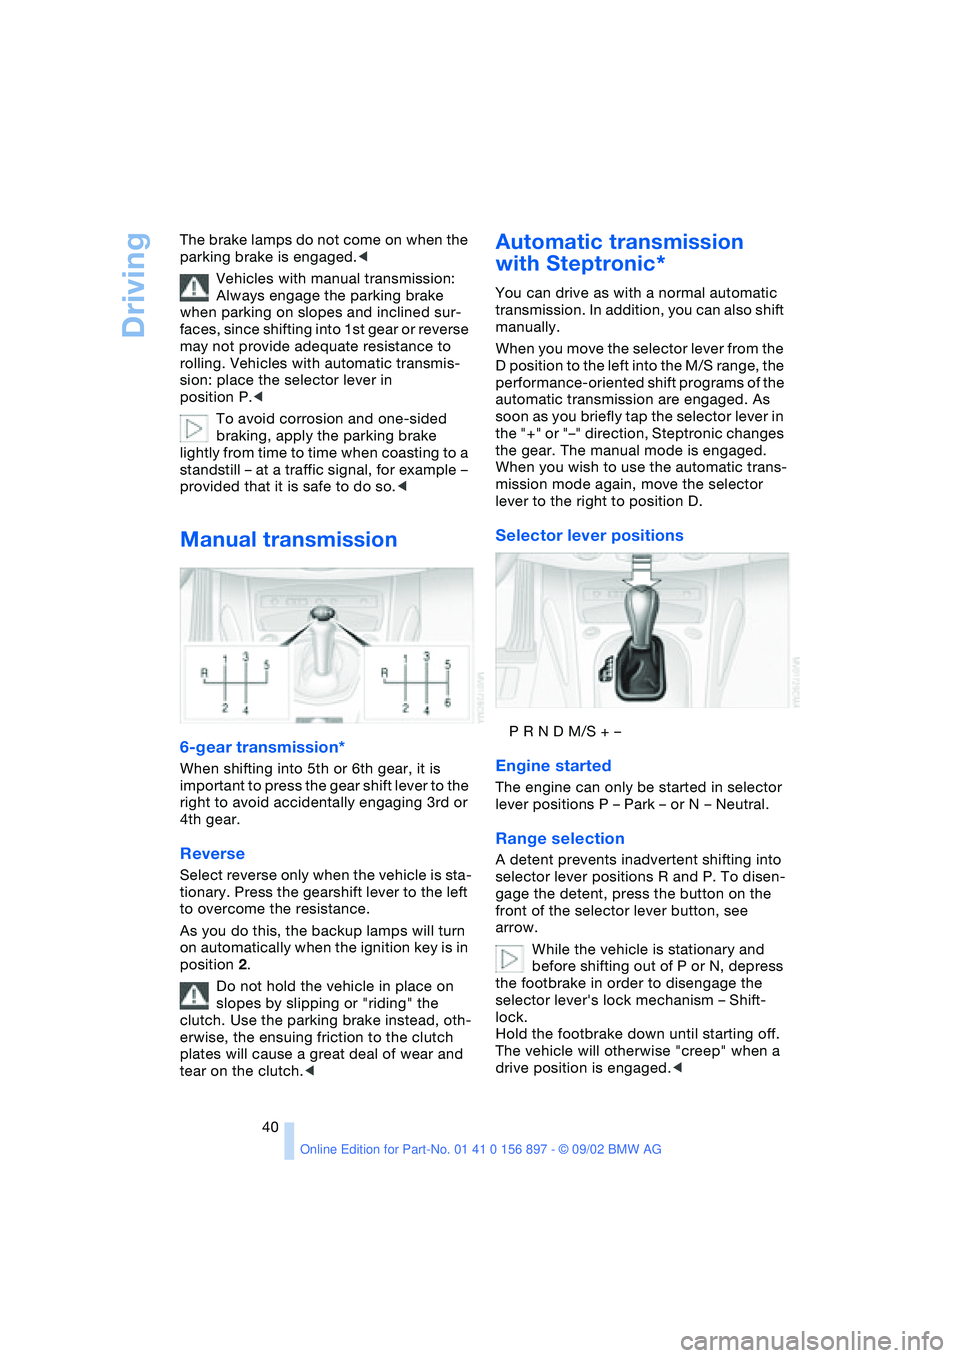
6-gear transmission*
When shifting into 5th or 6th gear, it is
important to press the gear shift lever to the
right to avoid accidentally engaging 3rd or
4th gear.
Reverse
Select reverse only when the vehicle is sta-
tionary. Press the gearshift lever to the left
to overcome the resistance.
As you do this, the backup lamps will turn
on automatically when the ignition key is in
position 2.
Do not hold the vehicle in place on
slopes by slipping or "riding" the
clutch. Use the parking brake instead, oth-
erwise, the ensuing friction to the clutch
plates will cause a great deal of wear and
tear on the clutch.<
Automatic transmission
with Steptronic*
You can drive as with a normal automatic
transmission. In addition, you can also shift
manually.
When you move the selector lever from the
D position to the left into the M/S range, the
performance-oriented shift programs of the
automatic transmission are engaged. As
soon as you briefly tap the selector lever in
the "+" or "–" direction, Steptronic changes
the gear. The manual mode is engaged.
When you wish to use the automatic trans-
mission mode again, move the selector
lever to the right to position D.
Selector lever positions
P R N D M/S + –
Engine started
The engine can only be started in selector
lever positions P – Park – or N – Neutral.
Range selection
A detent prevents inadvertent shifting into
selector lever positions R and P. To disen-
gage the detent, press the button on the
front of the selector lever button, see
arrow.
While the vehicle is stationary and
before shifting out of P or N, depress
the footbrake in order to disengage the
selector lever's lock mechanism – Shift-
lock.
Hold the footbrake down until starting off.
The vehicle will otherwise "creep" when a
drive position is engaged.<
Page 42 of 106
Driving
42 positions, however, the vehicle will be
operating in the fourth gear only.
If this happens, avoid extreme engine loads
and consult the nearest BMW center.
Never work in the engine compart-
ment when a drive gear – forward or
reverse – is engaged. If you do so, the vehi-
cle could move.<
For towing, tow-starting and jump-starting:
refer to the information beginning on
page 89.
Electric Power Steering EPS
The concept
The electric power steering is a direct,
sporting steering system that is speed-sen-
sitive.
Power support is reduced with an increase
in driving speed.
Indicator lamp
Electric Power Steering
The indicator lamp stays lit:
The system has malfunctioned or is
faulty.
Please have the system inspected by the
nearest BMW center.
Steering remains operational.
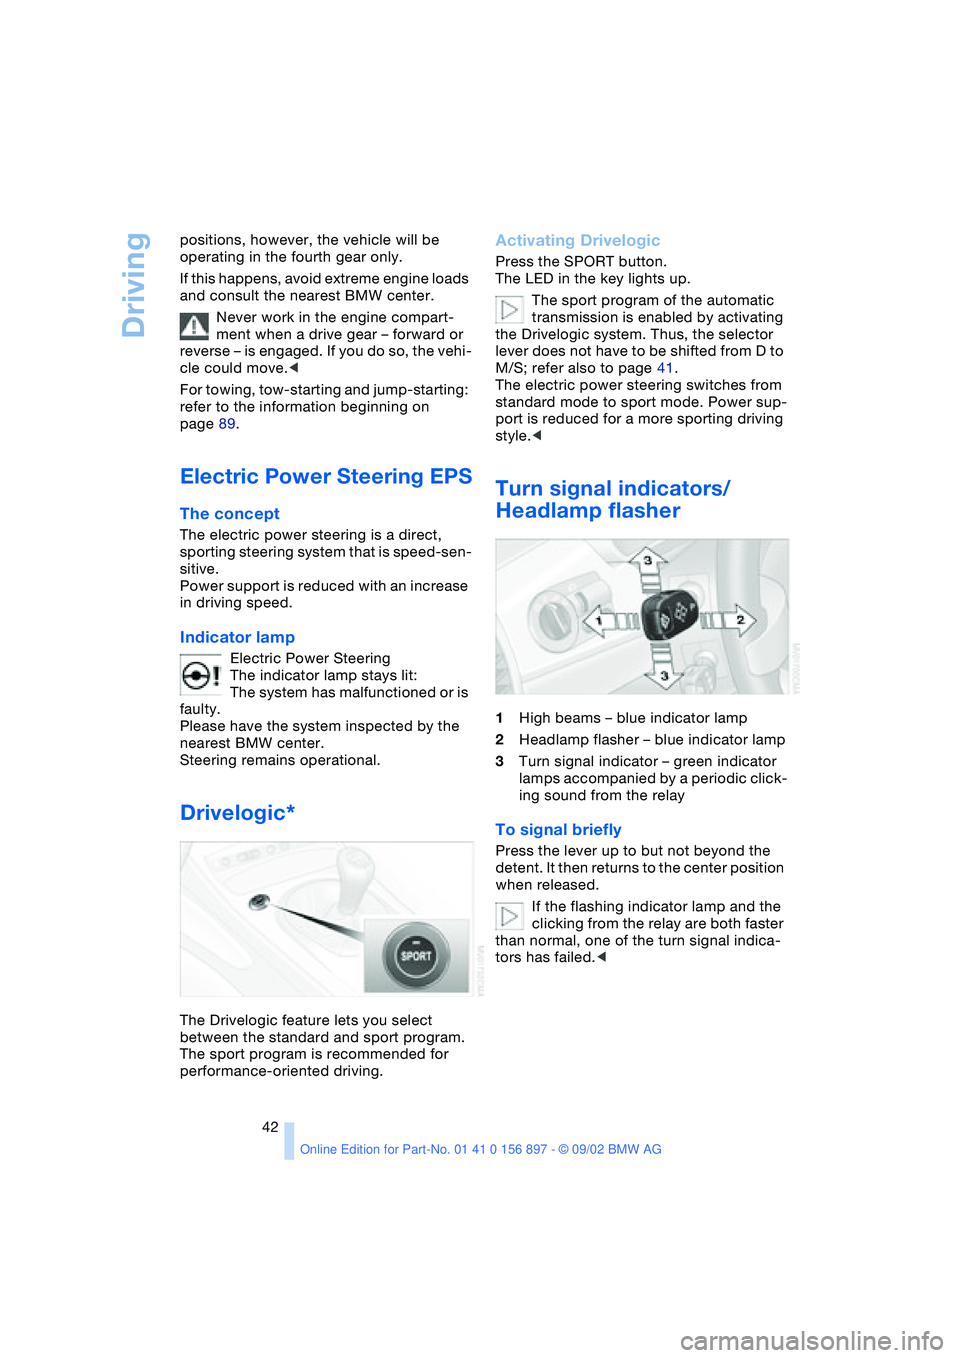
Drivelogic*
The Drivelogic feature lets you select
between the standard and sport program.
The sport program is recommended for
performance-oriented driving.
Activating Drivelogic
Press the SPORT button.
The LED in the key lights up.
The sport program of the automatic
transmission is enabled by activating
the Drivelogic system. Thus, the selector
lever does not have to be shifted from D to
M/S; refer also to page 41.
The electric power steering switches from
standard mode to sport mode. Power sup-
port is reduced for a more sporting driving
style.<
Turn signal indicators/
Headlamp flasher
1High beams – blue indicator lamp
2Headlamp flasher – blue indicator lamp
3Turn signal indicator – green indicator
lamps accompanied by a periodic click-
ing sound from the relay
To signal briefly
Press the lever up to but not beyond the
detent. It then returns to the center position
when released.
If the flashing indicator lamp and the
clicking from the relay are both faster
than normal, one of the turn signal indica-
tors has failed.<
Page 43 of 106

At a glance
Controls
Driving tips
Mobility
Reference
43
Washer/wiper system and
rain sensor*
0Wipers retracted
1Intermittent operation or rain sensor
2Normal wiper speed
3Fast wiper speed
4Brief wipe
5Rotary dial for control of the wipe inter-
val or the sensitivity of the rain sensor
Intermittent operation
Not on vehicles with rain sensor.
You can set the wipe interval over four
stages with rotary dial 5.
In addition, the wipe interval is varied auto-
matically depending on road speed.
Rain sensor
The rain sensor is positioned on the wind-
shield, directly behind the interior rearview
mirror.
To activate the rain sensor:
>With the ignition key in position 1 or
higher, move the lever to position 1. The
wipers travel once across the wind-
shield, regardless of the weather.
You can leave the lever permanently in
position 1. With the ignition key in
position 1 or higher, it is then only neces-
sary to activate the rain sensor. To do this
>turn rotary dial 5 briefly.
To adjust the sensitivity of the rain sensor:
turn rotary dial 5.
To deactivate the rain sensor:
return lever to position 0.Turn the rain sensor off in automatic
car washes. Failure to do so could
result in damage caused by undesired
wiper activation.<
Normal wiper speed
When the vehicle is stationary, the wipers
automatically switch to intermittent wipe –
not on vehicles with rain sensor.
Fast wiper speed
When the vehicle is stationary, the wipers
operate at normal speed – not on vehicles
with rain sensor.
Cleaning windshield and
headlamps
*
0Wipers retracted
1Cleaning windshield and headlamps
*
Do not use the washers if there is any
danger that the fluid will freeze on the
windshield, otherwise vision could be
obscured. For this reason, use an anti-
freeze agent. Refer to page 79.
Do not use the washers when the reservoir
is empty. Otherwise damage to the washer
pump could result.<
Cleaning the windshield
The system sprays washer fluid against the
windshield and activates the wipers for a
brief period.
Cleaning the headlamps
When the vehicle's lighting system is
switched on, the headlamps are cleaned at
reasonable intervals.
Page 45 of 106

At a glance
Controls
Driving tips
Mobility
Reference
45
Lamps
Parking lamps/Low beams
Parking lamps
The front, rear and side vehicle
lighting is switched on. You can use
the parking lamps to signal the
position of the vehicle when it is parked.
For information on lighting on one side of
the vehicle for parking, which is available
as an additional feature, refer to page 46.
Low beams
When you switch off the ignition
with the low beam headlamps on,
only the parking lamps will remain
on.
Follow me home lamps:
When you activate the headlamp flasher
after parking the vehicle and switching off
the lights, the low beams will come on for a
brief period.
You can also have this function acti-
vated/deactivated if you wish.<
Defective bulbs
The defective bulb indicator lamp
lights up:
At least one bulb of the vehicle's
exterior lighting has failed.
For replacing bulbs: refer to page 84.
LIGHTS ON warning
Whenever you open the driver's door after
having turned the ignition key to position 0,
you will hear an acoustic signal for a few seconds to remind you that the lamps have
not been switched off
.
Daytime driving lamps*
If you wish, the light switch can be left in
the second position. When the ignition is
switched off, the external lighting is also
switched off.
You can have the activation settings
for the daytime driving lamps pro-
grammed on your vehicle.<
Automatic headlamp control*
When the switch is set to this posi-
tion, the system automatically
switches the low beams on and off
in response to changes in ambient light – in
tunnels, at dusk, etc. – as well as to rain and
snow.
The vehicle's external lights remain
on constantly when you switch on the
front fog lamps after the headlights have
come on automatically.<
Automatic headlamp control cannot
serve as a substitute for the driver's
judgement in determining when the vehicle
lights should be switched on. For example,
the sensors are not able to detect fog. To
avoid safety risks, you should respond to
these kinds of low-visibility situations by
switching the headlights on manually.<
You can have the sensitivity of your
vehicle's automatic headlamp control
adjusted.<
Page 46 of 106
Lamps
46
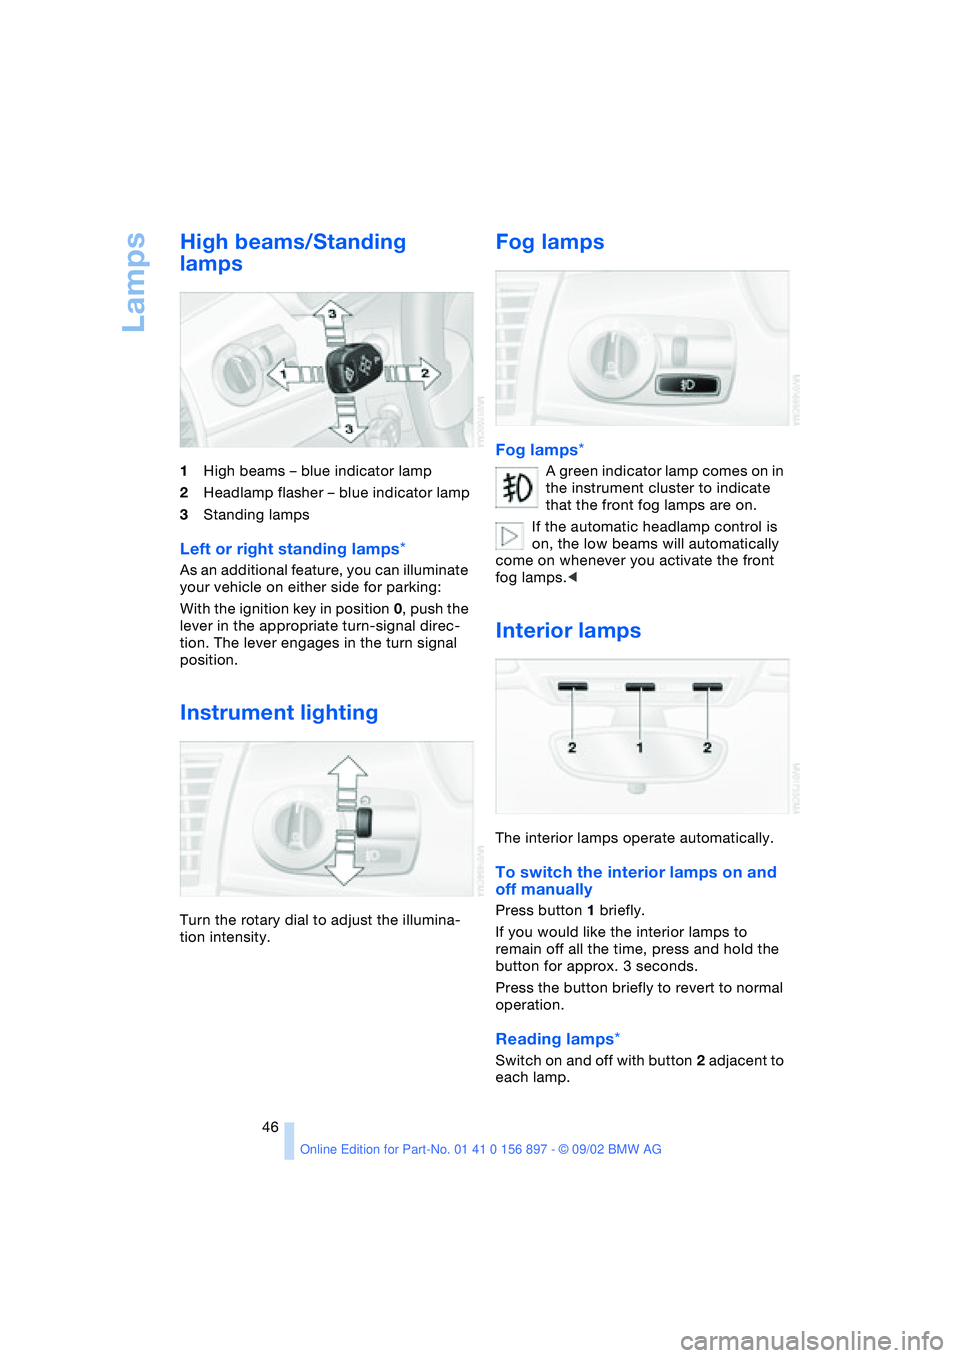
High beams/Standing
lamps
1High beams – blue indicator lamp
2Headlamp flasher – blue indicator lamp
3Standing lamps
Left or right standing lamps*
As an additional feature, you can illuminate
your vehicle on either side for parking:
With the ignition key in position 0, push the
lever in the appropriate turn-signal direc-
tion. The lever engages in the turn signal
position.
Instrument lighting
Turn the rotary dial to adjust the illumina-
tion intensity.
Fog lamps
Fog lamps*
A green indicator lamp comes on in
the instrument cluster to indicate
that the front fog lamps are on.
If the automatic headlamp control is
on, the low beams will automatically
come on whenever you activate the front
fog lamps.<
Interior lamps
The interior lamps operate automatically.
To switch the interior lamps on and
off manually
Press button 1 briefly.
If you would like the interior lamps to
remain off all the time, press and hold the
button for approx. 3 seconds.
Press the button briefly to revert to normal
operation.
Reading lamps*
Switch on and off with button 2 adjacent to
each lamp.
Page 47 of 106
At a glance
Controls
Driving tips
Mobility
Reference
47
Everything under control
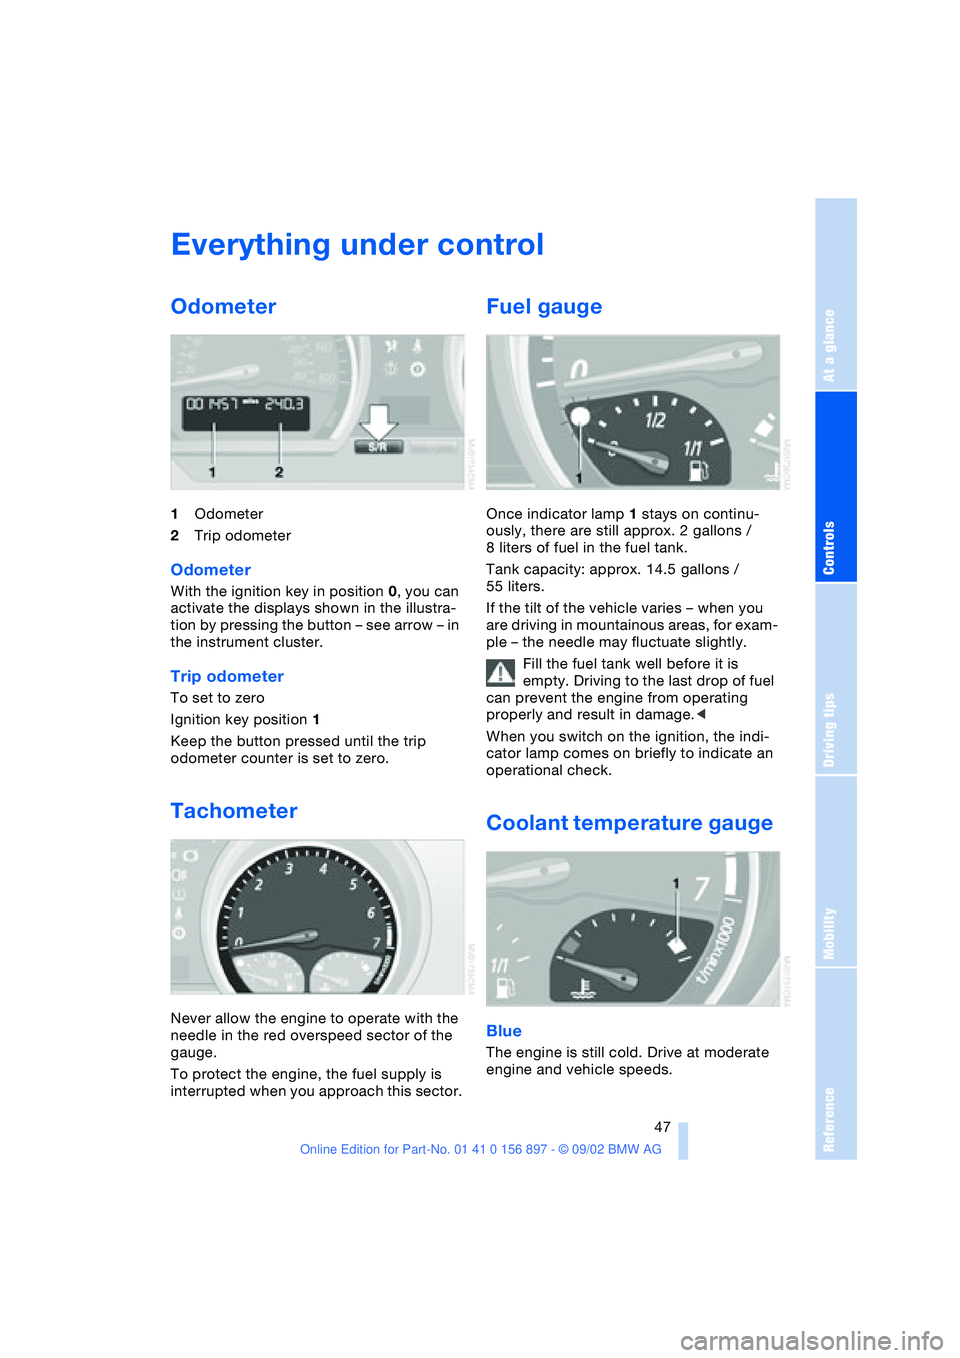
Odometer
1Odometer
2Trip odometer
Odometer
With the ignition key in position 0, you can
activate the displays shown in the illustra-
tion by pressing the button – see arrow – in
the instrument cluster.
Trip odometer
To set to zero
Ignition key position 1
Keep the button pressed until the trip
odometer counter is set to zero.
Tachometer
Never allow the engine to operate with the
needle in the red overspeed sector of the
gauge.
To protect the engine, the fuel supply is
interrupted when you approach this sector.
Fuel gauge
Once indicator lamp 1 stays on continu-
ously, there are still approx. 2 gallons /
8 liters of fuel in the fuel tank.
Tank capacity: approx. 14.5 gallons /
55 liters.
If the tilt of the vehicle varies – when you
are driving in mountainous areas, for exam-
ple – the needle may fluctuate slightly.
Fill the fuel tank well before it is
empty. Driving to the last drop of fuel
can prevent the engine from operating
properly and result in damage.<
When you switch on the ignition, the indi-
cator lamp comes on briefly to indicate an
operational check.
Coolant temperature gauge
Blue
The engine is still cold. Drive at moderate
engine and vehicle speeds.
Page 51 of 106
At a glance
Controls
Driving tips
Mobility
Reference
51
Technology for safety and driving
convenience
Dynamic Stability Control
DSC
The concept
DSC maintains vehicle stability, even in
critical driving situations.
The DSC is operational every time you start
the engine.
For additional details on the system
and the various functions, please
refer to the "Technology" brochure.<
Indicator lamps
The indicator lamps in the instrument clus-
ter go out shortly after you switch on the
ignition.
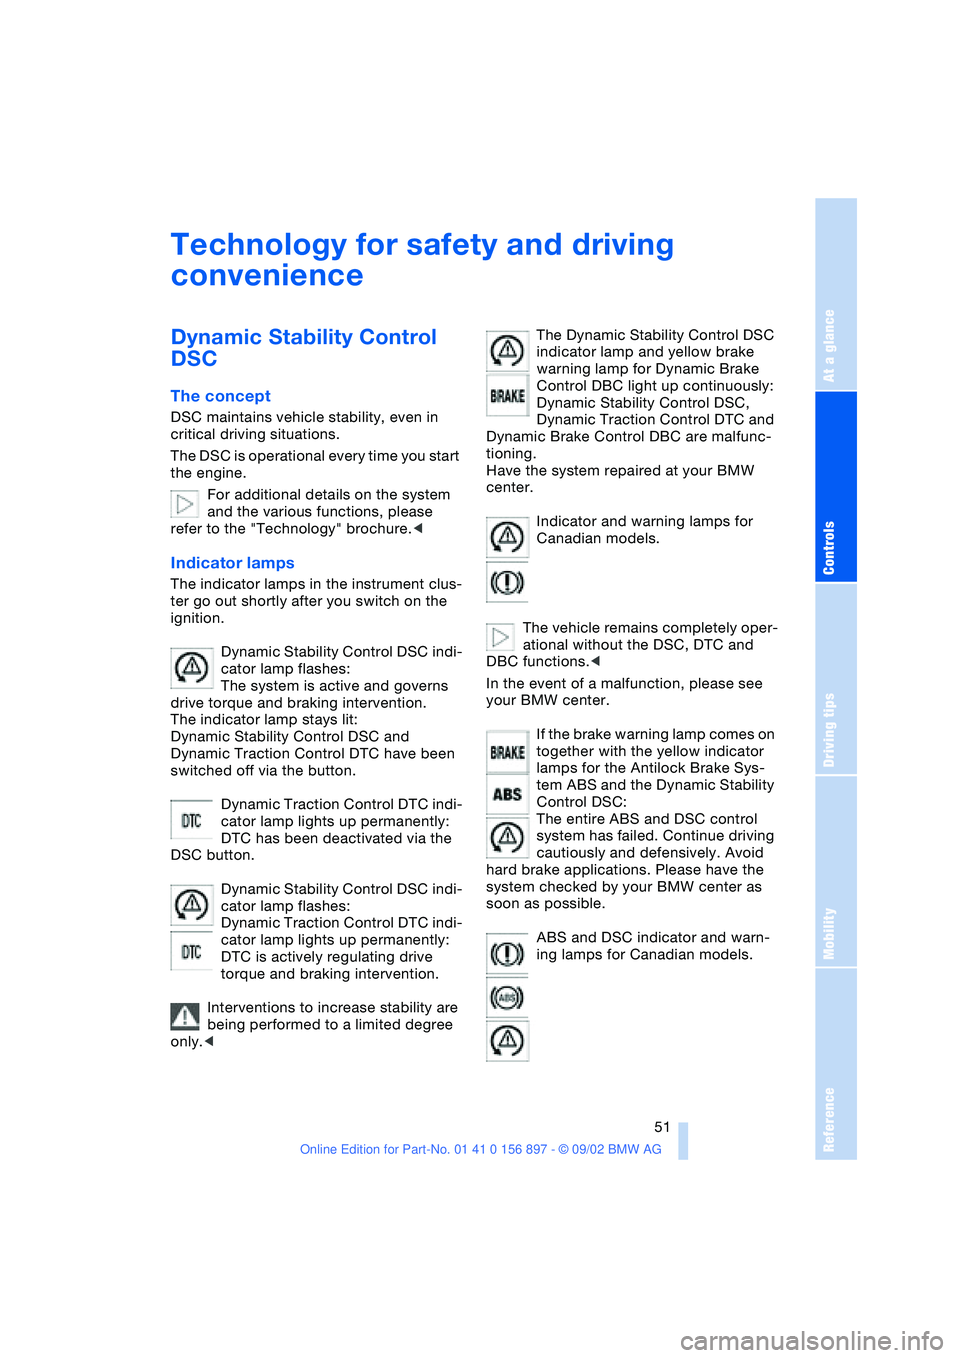
Dynamic Stability Control DSC indi-
cator lamp flashes:
The system is active and governs
drive torque and braking intervention.
The indicator lamp stays lit:
Dynamic Stability Control DSC and
Dynamic Traction Control DTC have been
switched off via the button.
Dynamic Traction Control DTC indi-
cator lamp lights up permanently:
DTC has been deactivated via the
DSC button.
Dynamic Stability Control DSC indi-
cator lamp flashes:
Dynamic Traction Control DTC indi-
cator lamp lights up permanently:
DTC is actively regulating drive
torque and braking intervention.
Interventions to increase stability are
being performed to a limited degree
only.
warning lamp for Dynamic Brake
Control DBC light up continuously:
Dynamic Stability Control DSC,
Dynamic Traction Control DTC and
Dynamic Brake Control DBC are malfunc-
tioning.
Have the system repaired at your BMW
center.
Indicator and warning lamps for
Canadian models.
The vehicle remains completely oper-
ational without the DSC, DTC and
DBC functions.<
In the event of a malfunction, please see
your BMW center.
If the brake warning lamp comes on
together with the yellow indicator
lamps for the Antilock Brake Sys-
tem ABS and the Dynamic Stability
Control DSC:
The entire ABS and DSC control
system has failed. Continue driving
cautiously and defensively. Avoid
hard brake applications. Please have the
system checked by your BMW center as
soon as possible.
ABS and DSC indicator and warn-
ing lamps for Canadian models.
Page 52 of 106
Technology for safety and driving convenience
52 For more information on the various
systems, refer to the "Technology"
brochure.<
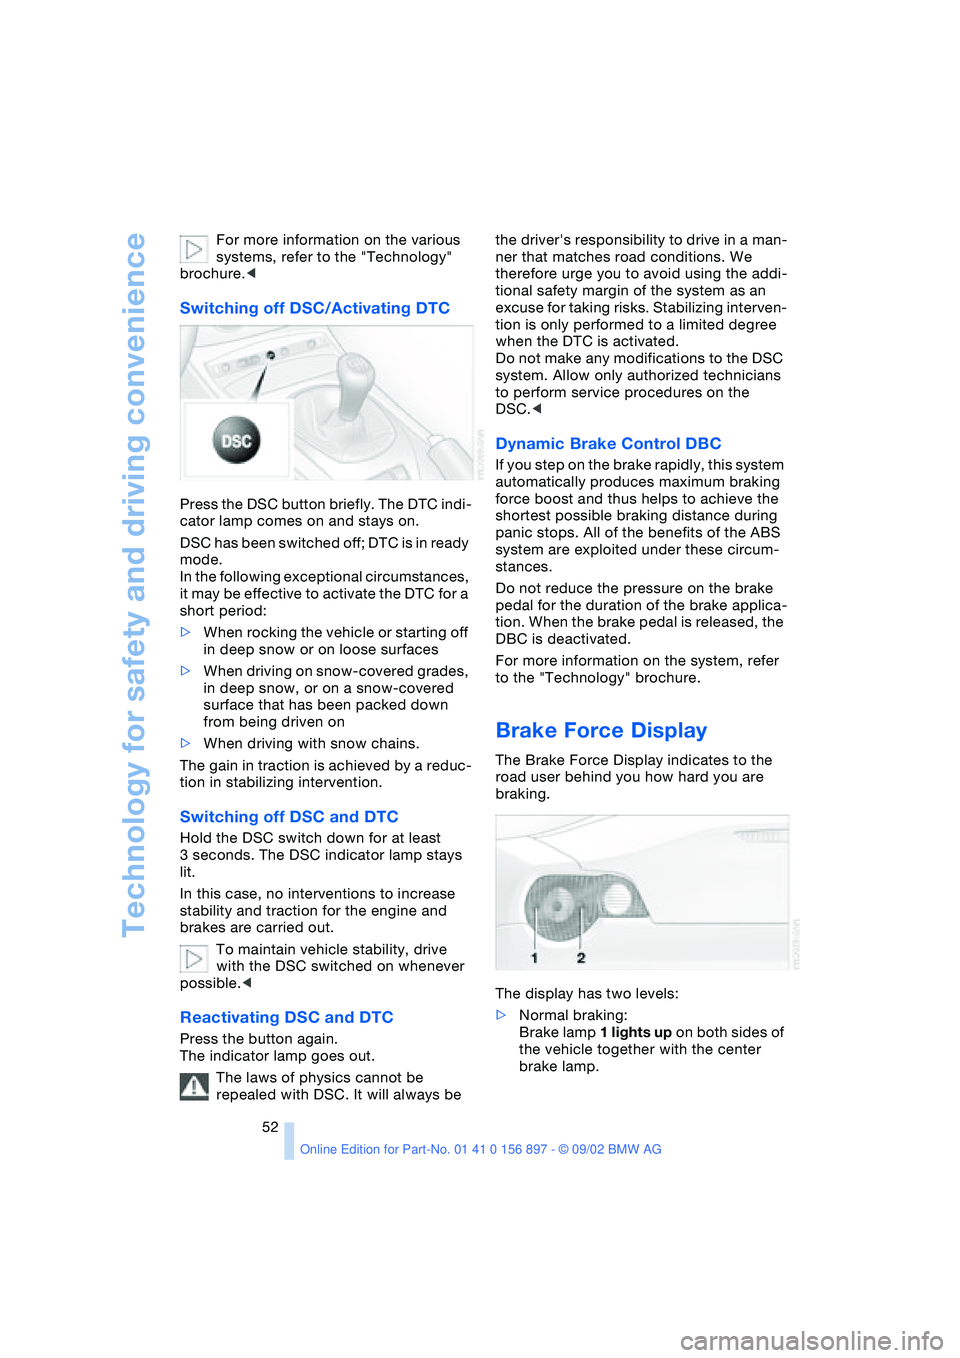
Switching off DSC/Activating DTC
Press the DSC button briefly. The DTC indi-
cator lamp comes on and stays on.
DSC has been switched off; DTC is in ready
mode.
In the following exceptional circumstances,
it may be effective to activate the DTC for a
short period:
>When rocking the vehicle or starting off
in deep snow or on loose surfaces
>When driving on snow-covered grades,
in deep snow, or on a snow-covered
surface that has been packed down
from being driven on
>When driving with snow chains.
The gain in traction is achieved by a reduc-
tion in stabilizing intervention.
Switching off DSC and DTC
Hold the DSC switch down for at least
3 seconds. The DSC indicator lamp stays
lit.
In this case, no interventions to increase
stability and traction for the engine and
brakes are carried out.
To maintain vehicle stability, drive
with the DSC switched on whenever
possible.<
Reactivating DSC and DTC
Press the button again.
The indicator lamp goes out.
The laws of physics cannot be
repealed with DSC. It will always be the driver's responsibility to drive in a man-
ner that matches road conditions. We
therefore urge you to avoid using the addi-
tional safety margin of the system as an
excuse for taking risks. Stabilizing interven-
tion is only performed to a limited degree
when the DTC is activated.
Do not make any modifications to the DSC
system. Allow only authorized technicians
to perform service procedures on the
DSC.<
Dynamic Brake Control DBC
If you step on the brake rapidly, this system
automatically produces maximum braking
force boost and thus helps to achieve the
shortest possible braking distance during
panic stops. All of the benefits of the ABS
system are exploited under these circum-
stances.
Do not reduce the pressure on the brake
pedal for the duration of the brake applica-
tion. When the brake pedal is released, the
DBC is deactivated.
For more information on the system, refer
to the "Technology" brochure.
Brake Force Display
The Brake Force Display indicates to the
road user behind you how hard you are
braking.
The display has two levels:
>Normal braking:
Brake lamp 1 lights up on both sides of
the vehicle together with the center
brake lamp.