2003 BMW Z4 2.5I light
[x] Cancel search: lightPage 26 of 106
Opening and closing
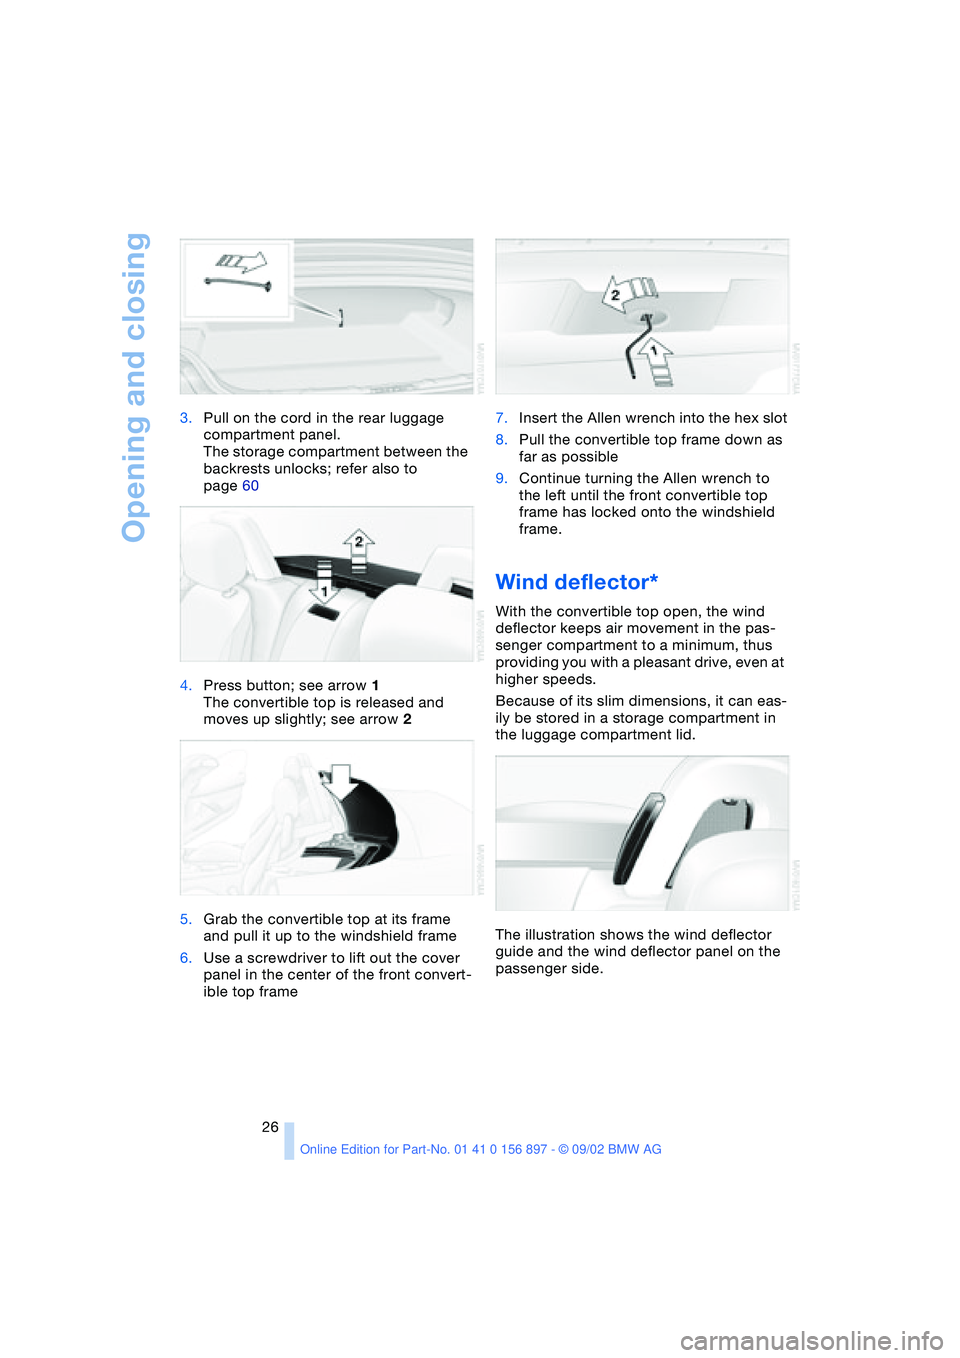
26 3.Pull on the cord in the rear luggage
compartment panel.
The storage compartment between the
backrests unlocks; refer also to
page 60
4.Press button; see arrow 1
The convertible top is released and
moves up slightly; see arrow 2
5.Grab the convertible top at its frame
and pull it up to the windshield frame
6.Use a screwdriver to lift out the cover
panel in the center of the front convert-
ible top frame7.Insert the Allen wrench into the hex slot
8.Pull the convertible top frame down as
far as possible
9.Continue turning the Allen wrench to
the left until the front convertible top
frame has locked onto the windshield
frame.
Wind deflector*
With the convertible top open, the wind
deflector keeps air movement in the pas-
senger compartment to a minimum, thus
providing you with a pleasant drive, even at
higher speeds.
Because of its slim dimensions, it can eas-
ily be stored in a storage compartment in
the luggage compartment lid.
The illustration shows the wind deflector
guide and the wind deflector panel on the
passenger side.
Page 28 of 106

Opening and closing
28 >If the indicator lamp goes out as soon
as the system is disarmed:
No manipulation or attempted intru-
sions have been detected in the period
since the system was armed
>If the indicator lamp flashes for
10 seconds when the system is being
disarmed:
An attempted entry has been detected
in the period since the system was
armed.
After an alarm has been triggered, the indi-
cator lamp will flash continuously.
Interior motion sensor*
The system monitors the footwells and the
seating areas of the driver and passenger.
Deactivate the interior motion sensor
– refer to Avoiding unintentional
alarms – if children or animals are to remain
in the vehicle.<
Avoiding unintentional alarms
The tilt alarm sensor and interior motion
sensor can be deactivated at the same
time. You can do this to prevent a false
alarm from being triggered, for instance in
garages with elevator ramps or when the
vehicle is transported by train.
Lock the vehicle twice = arm the system:
Press the button on the remote control
twice in succession,
or
lock the vehicle twice with the key. Refer to
page 20.
The indicator lamp lights up briefly and
then flashes continuously. The tilt alarm
sensor and the interior motion sensor are
deactivated as long as the system is
armed.
Page 30 of 106

Adjustments
30 After releasing the lever, move the seat
backwards or forwards slightly to ensure
that the latch engages securely
2Height
Pull lever 2 and apply weight to or remove
weight from the seat as required
3Backrest
Pull lever 3 and apply weight to or remove
weight from the backrest as required.
Head restraints#
Adjustments
Height: pull or push.
In order to move to the lowest positions,
press button 1.
Adjust the head restraint so that its
center is approximately at the height
of your ears. Otherwise, there is a higher
risk of injury to the cervical vertebra in the
event of an accident.<
Removal
Pull the head restraint upward until it stops.
Press button 1 and remove the head
restraint.
Installation
Insert the head restraint into the guides.
Power seat adjustment
1Tilt angle
2Backward/forward adjustment
3Height
4Backrest angle
The head restraints are adjusted manually.
Refer to preceding section.
Read and comply with the adjustment
instructions on page 29. Failure to
do so can result in diminished personal
safety.<
Seat memory*
You can store and recall three different
driver's seat positions.
To store
1.Ignition key position 1 or 2
2.Adjust seat to desired position
3.Press the
MEMORY button: the indica-
tor lamp in the button lights up
Page 31 of 106
At a glance
Controls
Driving tips
Mobility
Reference
31
4.Press memory button 1, 2 or 3, as
desired. The indicator lamp goes out.
To select a stored setting
Do not select a memory position while
the vehicle is moving. If you do so,
there is a risk of accident due to unex-
pected seat movement.<
Ignition key position 1:
>Briefly press memory button 1, 2 or 3,
as desired.
Movement stops immediately when one
of the seat adjustment or memory but-
tons is operated during the adjustment
process.
With the driver's door closed and the igni-
tion key either removed or in position 0
or 2:
>Press and hold the desired memory
button – 1, 2 or 3 – until the adjustment
process is completed.
If you press the
MEMORY button
accidentally: press the button again;
the indicator lamp goes out.<
You can have your vehicle adjusted in
such a way that your personal set-
tings are automatically set for the seat
positions when you unlock the vehicle with
your personal remote control.<
If you make use of this method of
adjustment, be sure that the space
behind the driver's seat is unobstructed
before unlocking the vehicle. If you fail to
do so, objects behind the seat could be
damaged by a rearward movement of the
seat.<
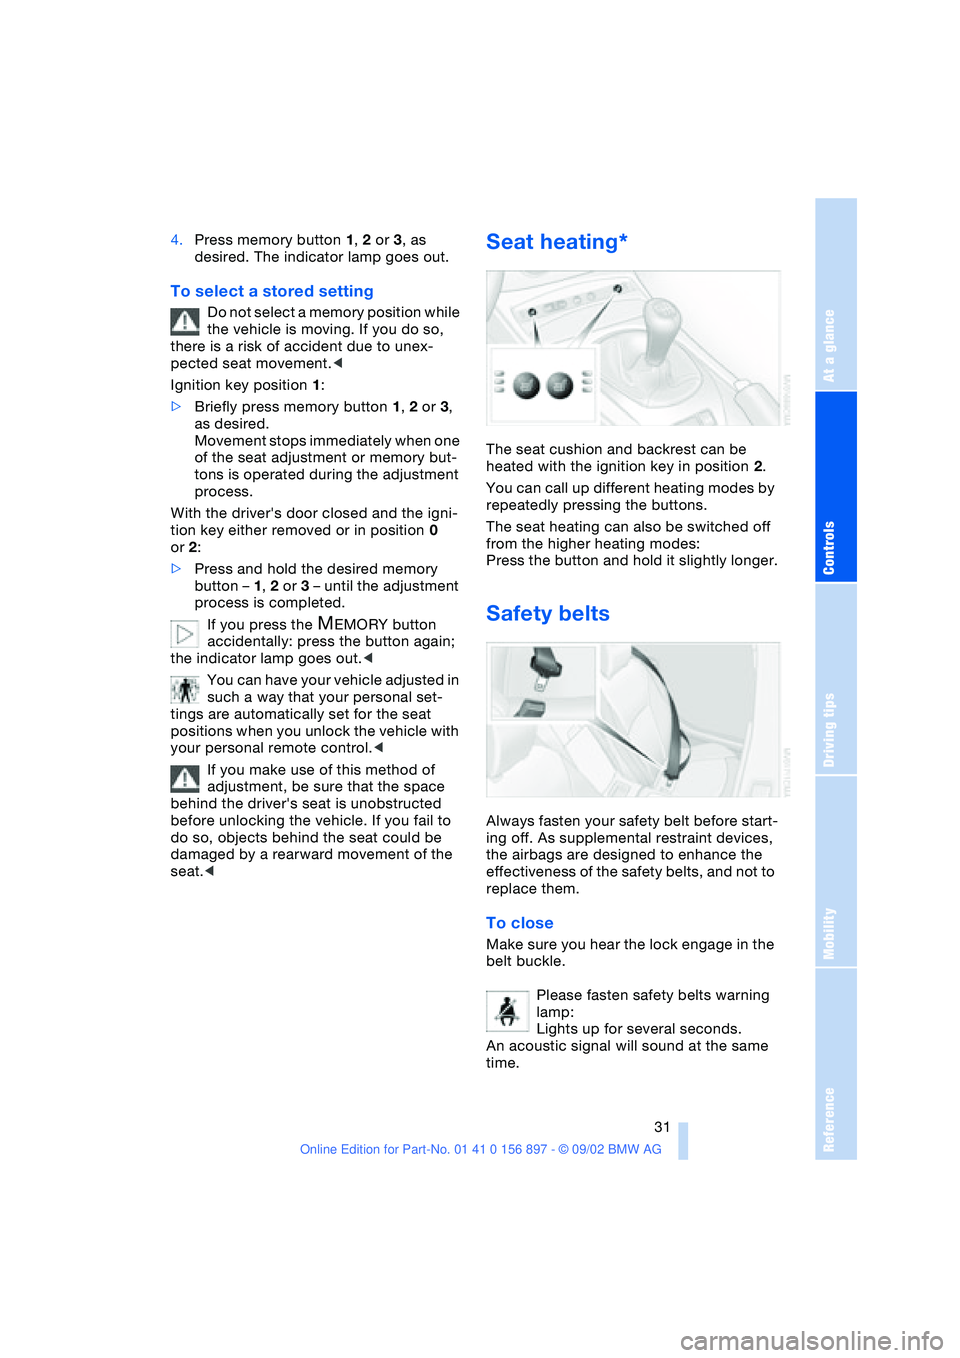
Seat heating*
The seat cushion and backrest can be
heated with the ignition key in position 2.
You can call up different heating modes by
repeatedly pressing the buttons.
The seat heating can also be switched off
from the higher heating modes:
Press the button and hold it slightly longer.
Safety belts
Always fasten your safety belt before start-
ing off. As supplemental restraint devices,
the airbags are designed to enhance the
effectiveness of the safety belts, and not to
replace them.
To close
Make sure you hear the lock engage in the
belt buckle.
Please fasten safety belts warning
lamp:
Lights up for several seconds.
An acoustic signal will sound at the same
time.
Page 33 of 106
At a glance
Controls
Driving tips
Mobility
Reference
33
For vehicles without an alarm system:
Tilt the small lever forward.
Interior and exterior mirrors with
automatic dimming feature*
This mirror automatically dims through an
infinitely variable range and switches auto-
matically to its clear, undimmed mode
whenever you engage reverse gear or
place the selector lever in position R.
To ensure that the mirror continues to
operate properly, keep the two photocells
clean and unobstructed. One photocell is
positioned in the mirror's lens, see arrow,
while the other is slightly offset on the
opposite side of the mirror. Do not obstruct
the area between the interior rearview mir-
ror and the windshield; do not apply stick-
ers to the area of the windshield in front of
the mirror.
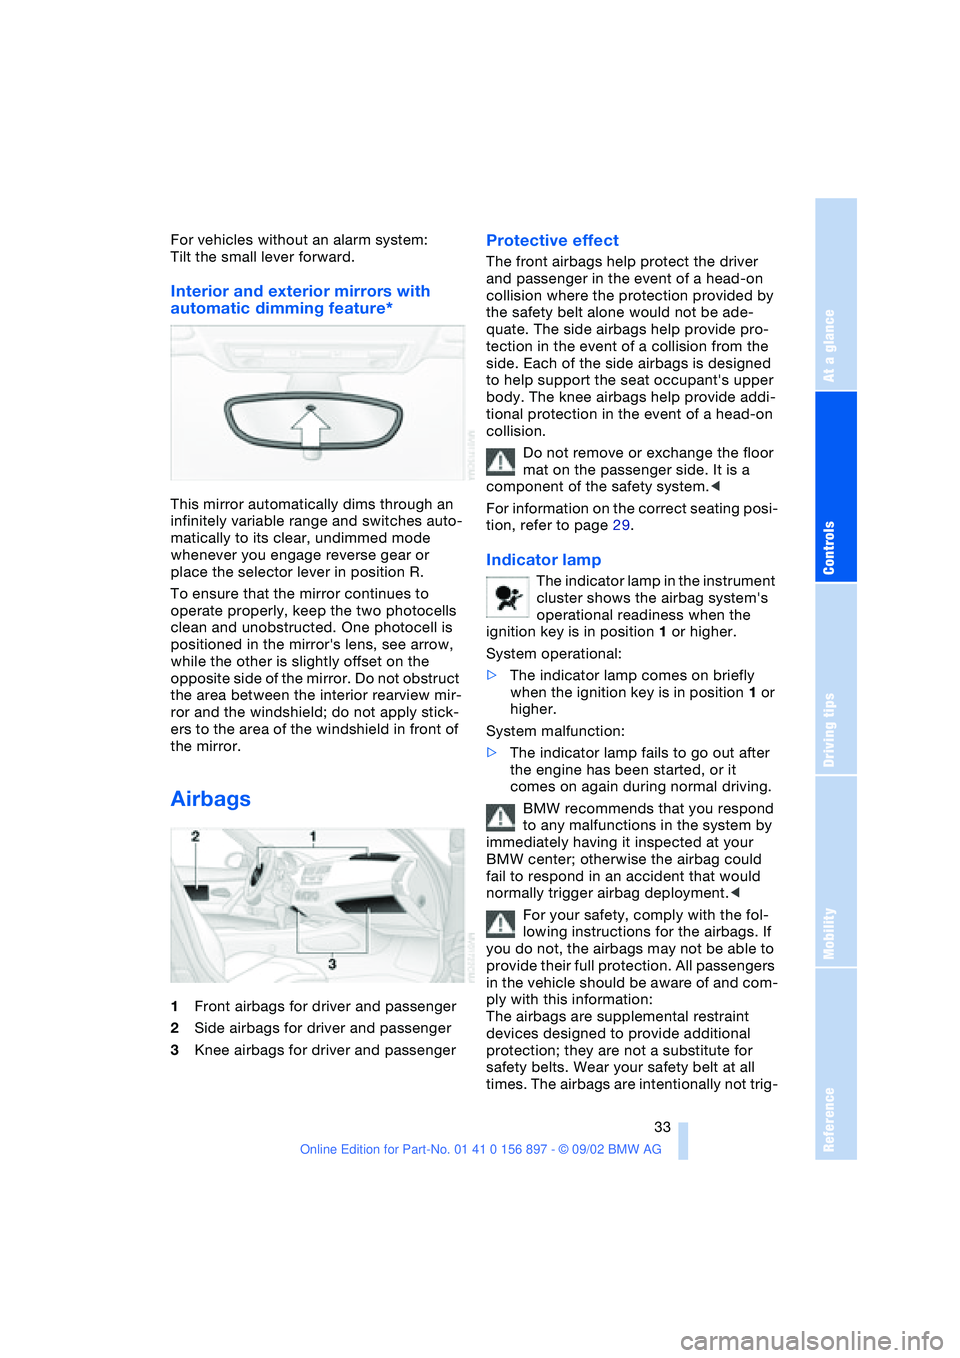
Airbags
1Front airbags for driver and passenger
2Side airbags for driver and passenger
3Knee airbags for driver and passenger
Protective effect
The front airbags help protect the driver
and passenger in the event of a head-on
collision where the protection provided by
the safety belt alone would not be ade-
quate. The side airbags help provide pro-
tection in the event of a collision from the
side. Each of the side airbags is designed
to help support the seat occupant's upper
body. The knee airbags help provide addi-
tional protection in the event of a head-on
collision.
Do not remove or exchange the floor
mat on the passenger side. It is a
component of the safety system.<
For information on the correct seating posi-
tion, refer to page 29.
Indicator lamp
The indicator lamp in the instrument
cluster shows the airbag system's
operational readiness when the
ignition key is in position 1 or higher.
System operational:
>The indicator lamp comes on briefly
when the ignition key is in position 1 or
higher.
System malfunction:
>The indicator lamp fails to go out after
the engine has been started, or it
comes on again during normal driving.
BMW recommends that you respond
to any malfunctions in the system by
immediately having it inspected at your
BMW center; otherwise the airbag could
fail to respond in an accident that would
normally trigger airbag deployment.<
For your safety, comply with the fol-
lowing instructions for the airbags. If
you do not, the airbags may not be able to
provide their full protection. All passengers
in the vehicle should be aware of and com-
ply with this information:
The airbags are supplemental restraint
devices designed to provide additional
protection; they are not a substitute for
safety belts. Wear your safety belt at all
times. The airbags are intentionally not trig-
Page 35 of 106
At a glance
Controls
Driving tips
Mobility
Reference
35
The concept
Passenger airbags can be deactivated/
reactivated with the vehicle ignition key.
The key switch is located on the outer pas-
senger's side of the instrument panel.
The passenger airbags can only be deacti-
vated or reactivated with the vehicle stand-
ing still, ignition off and the passenger door
open.
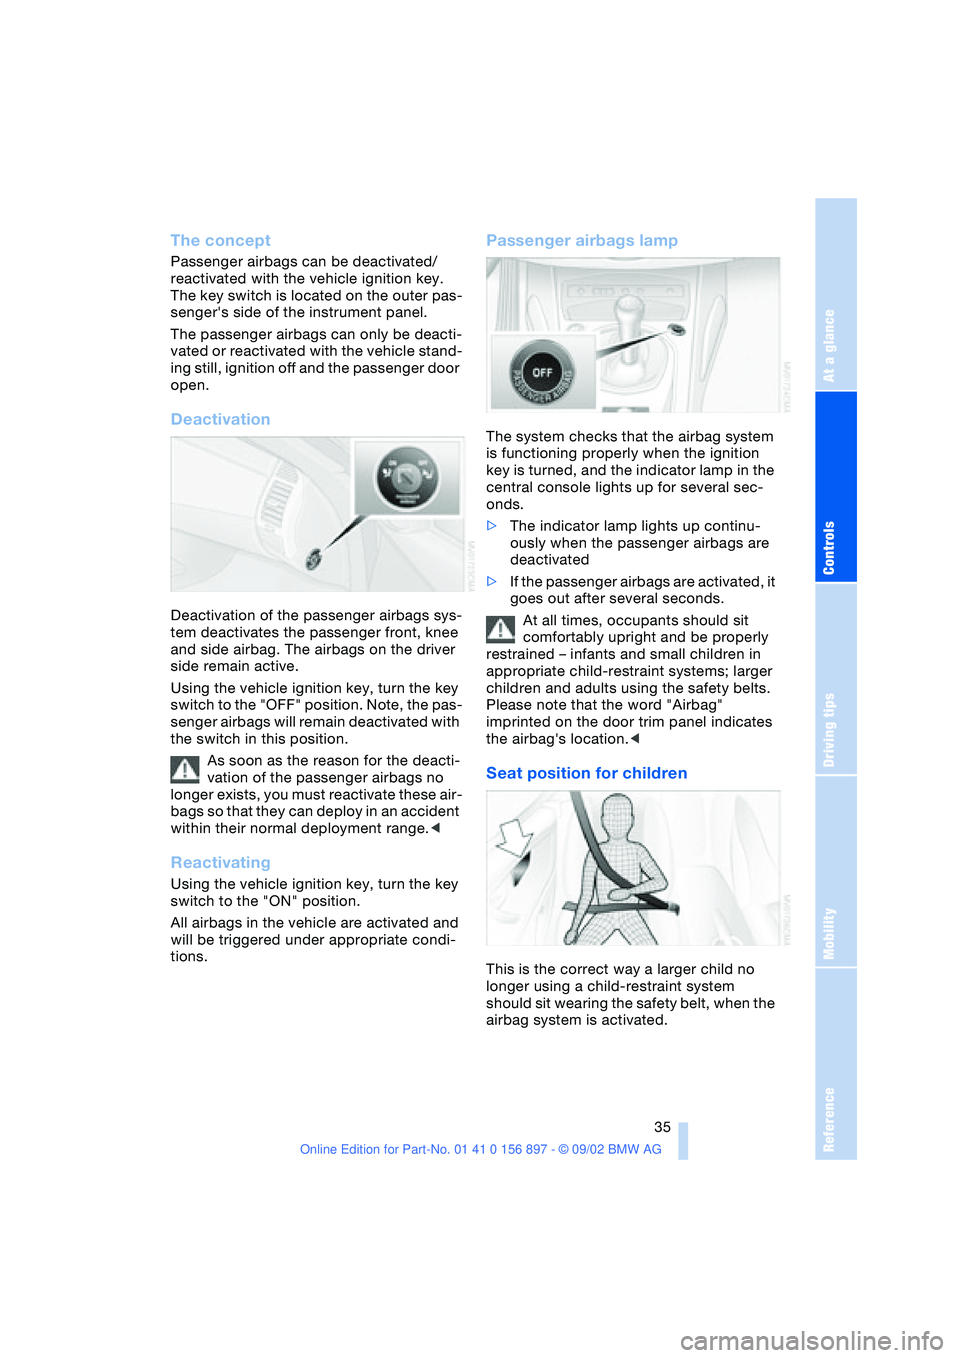
Deactivation
Deactivation of the passenger airbags sys-
tem deactivates the passenger front, knee
and side airbag. The airbags on the driver
side remain active.
Using the vehicle ignition key, turn the key
switch to the "OFF" position. Note, the pas-
senger airbags will remain deactivated with
the switch in this position.
As soon as the reason for the deacti-
vation of the passenger airbags no
longer exists, you must reactivate these air-
bags so that they can deploy in an accident
within their normal deployment range.<
Reactivating
Using the vehicle ignition key, turn the key
switch to the "ON" position.
All airbags in the vehicle are activated and
will be triggered under appropriate condi-
tions.
Passenger airbags lamp
The system checks that the airbag system
is functioning properly when the ignition
key is turned, and the indicator lamp in the
central console lights up for several sec-
onds.
>The indicator lamp lights up continu-
ously when the passenger airbags are
deactivated
>If the passenger airbags are activated, it
goes out after several seconds.
At all times, occupants should sit
comfortably upright and be properly
restrained – infants and small children in
appropriate child-restraint systems; larger
children and adults using the safety belts.
Please note that the word "Airbag"
imprinted on the door trim panel indicates
the airbag's location.<
Seat position for children
This is the correct way a larger child no
longer using a child-restraint system
should sit wearing the safety belt, when the
airbag system is activated.
Page 38 of 106
Driving
38
Driving
Ignition lock
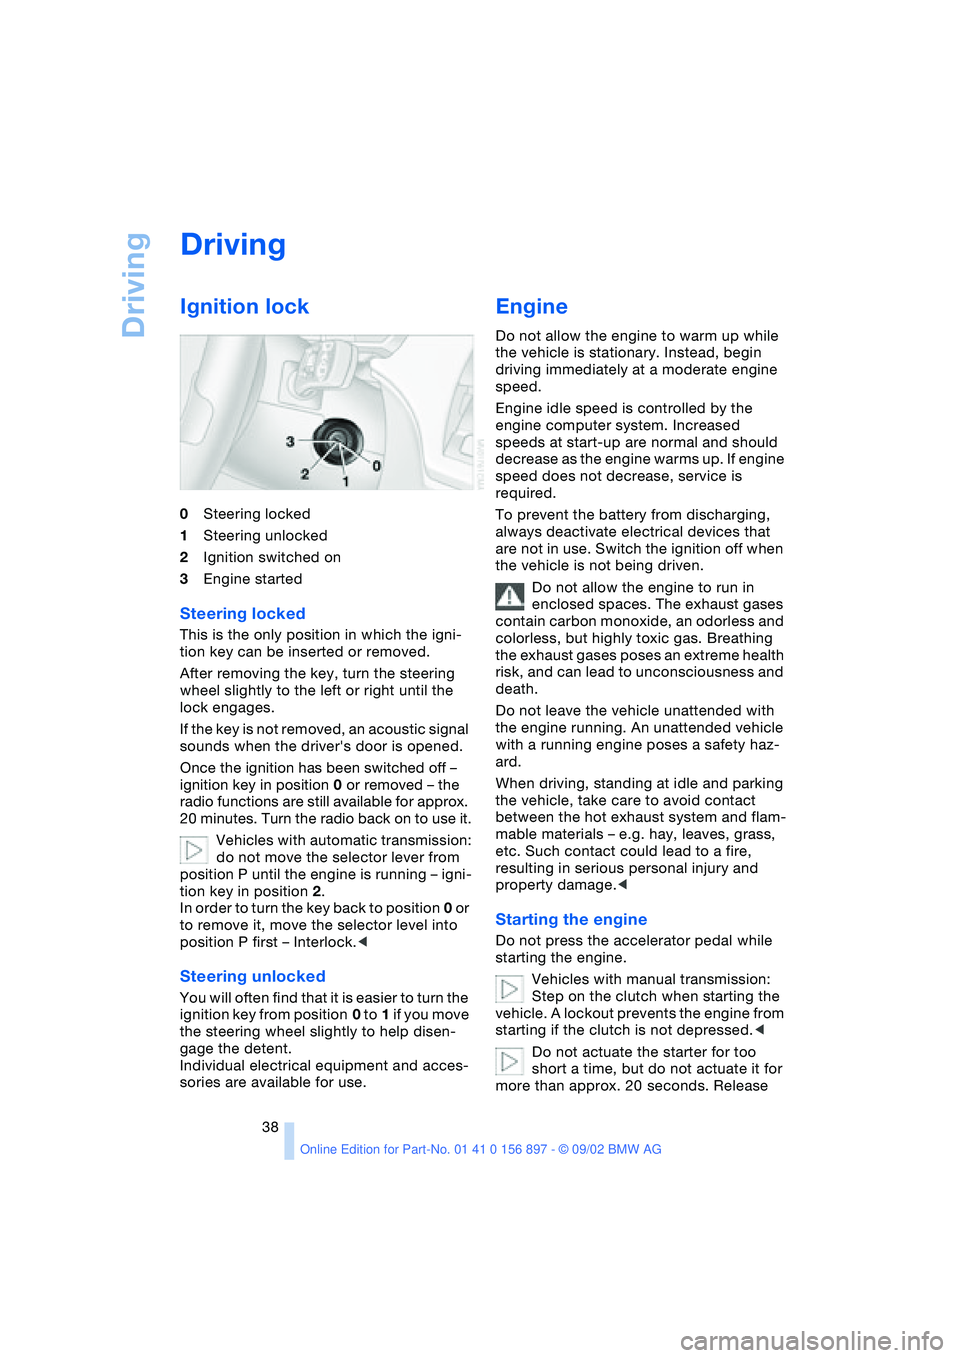
0Steering locked
1Steering unlocked
2Ignition switched on
3Engine started
Steering locked
This is the only position in which the igni-
tion key can be inserted or removed.
After removing the key, turn the steering
wheel slightly to the left or right until the
lock engages.
If the key is not removed, an acoustic signal
sounds when the driver's door is opened.
Once the ignition has been switched off –
ignition key in position 0 or removed – the
radio functions are still available for approx.
20 minutes. Turn the radio back on to use it.
Vehicles with automatic transmission:
do not move the selector lever from
position P until the engine is running – igni-
tion key in position 2.
In order to turn the key back to position 0 or
to remove it, move the selector level into
position P first – Interlock.<
Steering unlocked
You will often find that it is easier to turn the
ignition key from position 0 to 1 if you move
the steering wheel slightly to help disen-
gage the detent.
Individual electrical equipment and acces-
sories are available for use.
Engine
Do not allow the engine to warm up while
the vehicle is stationary. Instead, begin
driving immediately at a moderate engine
speed.
Engine idle speed is controlled by the
engine computer system. Increased
speeds at start-up are normal and should
decrease as the engine warms up. If engine
speed does not decrease, service is
required.
To prevent the battery from discharging,
always deactivate electrical devices that
are not in use. Switch the ignition off when
the vehicle is not being driven.
Do not allow the engine to run in
enclosed spaces. The exhaust gases
contain carbon monoxide, an odorless and
colorless, but highly toxic gas. Breathing
the exhaust gases poses an extreme health
risk, and can lead to unconsciousness and
death.
Do not leave the vehicle unattended with
the engine running. An unattended vehicle
with a running engine poses a safety haz-
ard.
When driving, standing at idle and parking
the vehicle, take care to avoid contact
between the hot exhaust system and flam-
mable materials – e.g. hay, leaves, grass,
etc. Such contact could lead to a fire,
resulting in serious personal injury and
property damage.<
Starting the engine
Do not press the accelerator pedal while
starting the engine.
Vehicles with manual transmission:
Step on the clutch when starting the
vehicle. A lockout prevents the engine from
starting if the clutch is not depressed.<
Do not actuate the starter for too
short a time, but do not actuate it for
more than approx. 20 seconds. Release
Page 39 of 106
At a glance
Controls
Driving tips
Mobility
Reference
39
the ignition key immediately when the
engine starts.<
Extended starting attempts, charac-
terized by excessively frequent or
long periods with the starter engaged, can
damage the catalytic converter.<
If the engine fails to start on the first
attempt – if it is very hot or cold, for
instance:
>Press the accelerator pedal halfway
down.
Cold starts at very low temperatures –
starting at approx. +57 / –156
>Press the accelerator pedal halfway
down while engaging the starter
>On the first start attempt, engage the
starter for a longer period –
approx. 10 seconds.
Manual transmission
1.Engage the parking brake
2.Gearshift lever in idling position
3.Depress clutch pedal
4.Start the engine.
Automatic transmission
1.Depress footbrake
2.Place selector lever in position P or N
3.Start the engine.
Before leaving the vehicle with the
engine running, place the selector
lever in position P and pull the parking
brake.
Do not leave the vehicle unattended with
the engine running. An unattended vehicle
with a running engine poses a safety haz-
ard.<
Switching off the engine
Do not remove the ignition key while
the vehicle is still moving. If you did so,
the steering lock would engage when the
steering wheel is turned.
When you leave the vehicle, always remove
the ignition key and engage the steering lock.
Always engage the parking brake when park-
ing on downhill roads.<
Manual transmission
Turn the ignition key to position 1 or 0.
Automatic transmission
Place the selector lever in position P and
turn the ignition key to position 1 or 0.
Parking brake
The parking brake is designed primarily to
prevent the vehicle from rolling when
parked. It operates against the rear wheels.
The brake warning lamp lights up
when the parking brake is engaged;
if you start driving, an acoustic sig-
nal is heard as well.
Brake warning lamp for Canadian
models
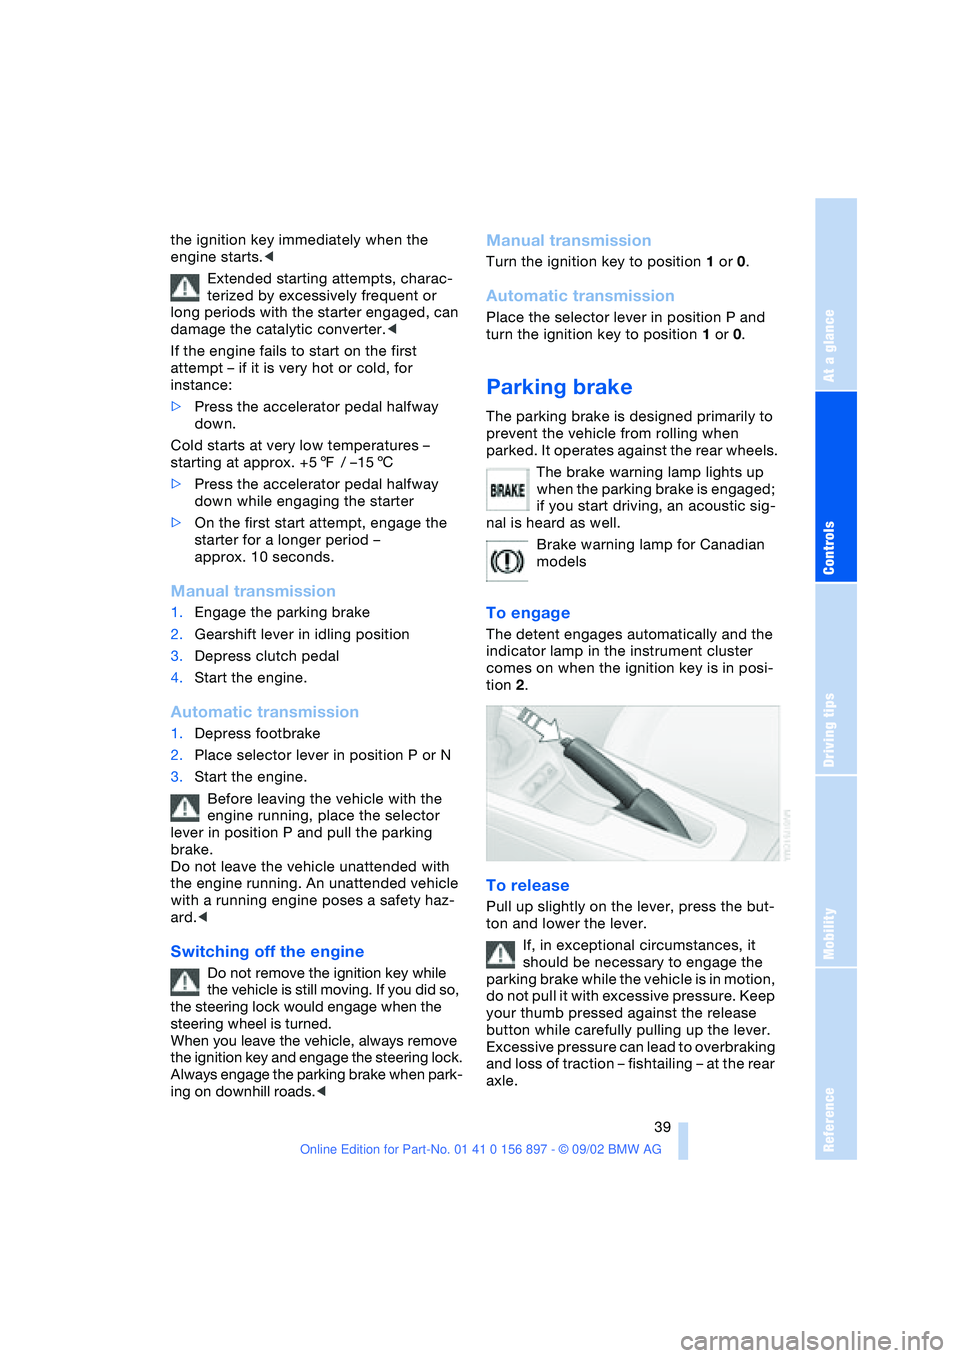
To engage
The detent engages automatically and the
indicator lamp in the instrument cluster
comes on when the ignition key is in posi-
tion 2.
To release
Pull up slightly on the lever, press the but-
ton and lower the lever.
If, in exceptional circumstances, it
should be necessary to engage the
parking brake while the vehicle is in motion,
do not pull it with excessive pressure. Keep
your thumb pressed against the release
button while carefully pulling up the lever.
Excessive pressure can lead to overbraking
and loss of traction – fishtailing – at the rear
axle.