2003 BMW Z4 2.5I radio
[x] Cancel search: radioPage 6 of 106
Notes
6
Notes
About this Owner's Manual
We have made every effort to ensure that
you are able to find what you need in this
Owner's Manual as quickly as possible.
The fastest way to find certain topics is by
using the detailed index at the end. If you
wish to gain an initial overview of your vehi-
cle, you will find what you are looking for in
the first chapter.
Should you wish to sell your BMW at some
time in the future, please remember to pass
the Owner's Manual on to the new owner.
The manual represents an important com-
ponent of the vehicle.
If you have additional questions, your BMW
center will be glad to advise you.
Symbols used
Indicates precautions that must be
followed precisely in order to avoid
the possibility of personal injury and seri-
ous damage to the vehicle.
Contains information that will assist
you in gaining the optimum benefit
from your vehicle and enable you to care
more effectively for your vehicle.
Refers to measures that can be taken
to help protect the environment.
< Marks the end of a specific item of infor-
mation.
* Indicates special equipment, country-
specific equipment and optional extras.
Identifies systems or components
which can be activated or adapted to
suit an individual driver's requirements –
Vehicle Memory, Key Memory. Refer to
page 37. Activation and adjustments on
some of these systems can be performed
at your BMW center.
Symbol on vehicle parts
Indicates that you should consult the
relevant section of this Owner's Man-
ual for information on a particular part or
assembly.
Your individual vehicle
On buying your BMW, you have decided in
favor of a model with individualized equip-
ment and features. This Owner's Manual
describes all models and equipment that
BMW offers within the same group.
We hope you will understand that equip-
ment and features are included which you
might not have chosen for your vehicle. Any
differences can easily be identified since all
optional accessories and special equip-
ment are marked with an asterisk
*.
If your BMW features equipment not
described in this Owner's Manual – a car
radio or telephone, for instance – supple-
mentary Owner's Manuals are enclosed.
We ask that you read these manuals as
well.
Status at time of printing
BMW pursues a policy of continuous,
ongoing development that is conceived
to ensure that our vehicles continue to
embody the highest quality and safety
standards combined with advanced, state-
of-the-art technology. For this reason, the
features described in this Owner's Manual
could differ from those on your vehicle. Nor
can errors and omissions be entirely ruled
out. You are therefore asked to appreciate
that no claims can be entertained on the
basis of the data, illustrations or descrip-
tions in this manual.
Page 7 of 106
At a glance
Controls
Driving tips
Mobility
Reference
7
For your own safety
Use unleaded gasoline only. Fuels
containing up to and including 10 %
ethanol or other oxygenates with up to
2.8 % oxygen by weight – i.e. 15 % MTBE or
3% methanol plus an equivalent amount of
co-solvent – will not void the applicable
warranties respecting defects in materials
or workmanship. Field experience has indi-
cated significant differences in fuel quality –
i.e. volatility, composition, additives, etc. –
among gasolines offered for sale in the
United States and Canada. The use of poor
quality fuels may result in drivability, start-
ing and stalling problems especially under
certain environmental conditions, such as
high ambient temperature and high alti-
tude.
Should you encounter driveability prob-
lems that you suspect could be related to
the fuel you are using, we recommend that
you respond by switching to a recognized
high-quality brand.
Failure to comply with these recommenda-
tions may result in unscheduled mainte-
nance.
Follow the relevant safety rules when you
are handling gasoline.<
Important safety information!
For your own safety, use parts and
accessories approved by BMW.
When you purchase accessories tested
and approved by BMW and Original BMW
Parts, you simultaneously acquire the
assurance that they have been thoroughly
tested by BMW to ensure optimum perfor-
mance when installed on your vehicle.
BMW warrants these parts to be free from
defects in material and workmanship.
BMW will not accept any liability for dam-
age resulting from installation of parts and
accessories not approved by BMW.
BMW cannot test every product made by
other manufacturers to verify if it can be
used on a BMW safely and without risk to
either the vehicle, its operation, or its occu-
pants.Original BMW Parts, BMW Accessories
and other products approved by BMW,
together with professional advice on using
these items, are available from all BMW
retailers.
Installation and operation of non-BMW
approved accessories such as alarms,
radios, amplifiers, radar detectors, wheels,
suspension components, brake dust
shields, telephones – including operation of
any portable cellular phone from within the
vehicle without using an externally mounted
antenna – or transceiver equipment – e.g.
C.B., walkie-talkie, ham radio or similar –
may cause extensive damage to the vehicle,
compromise its safety, interfere with the
vehicle's electrical system or affect the
validity of the BMW Limited Warranty. See
your BMW center for additional information.
Do not use key or remote control to lock
doors or luggage compartment with any-
one inside the car. Refer to the Owner's
Manual for more details.<
Maintenance, replacement or repair
of the emission control devices and
systems may be performed by any automo-
tive repair establishment or individual using
any certified automotive part.
and Warranty Information Booklet for US
models or a Warranty and Service Guide
Booklet for Canadian models.
We recommend that you read this publica-
tion thoroughly.
Your BMW is covered by the following war-
ranties:
>New Vehicle Limited Warranty
>Rust Perforation Limited Warranty
>Federal Emissions System Defect
Warranty
>Federal Emissions Performance
Warranty
>California Emission Control System
Limited Warranty.
Page 38 of 106
Driving
38
Driving
Ignition lock
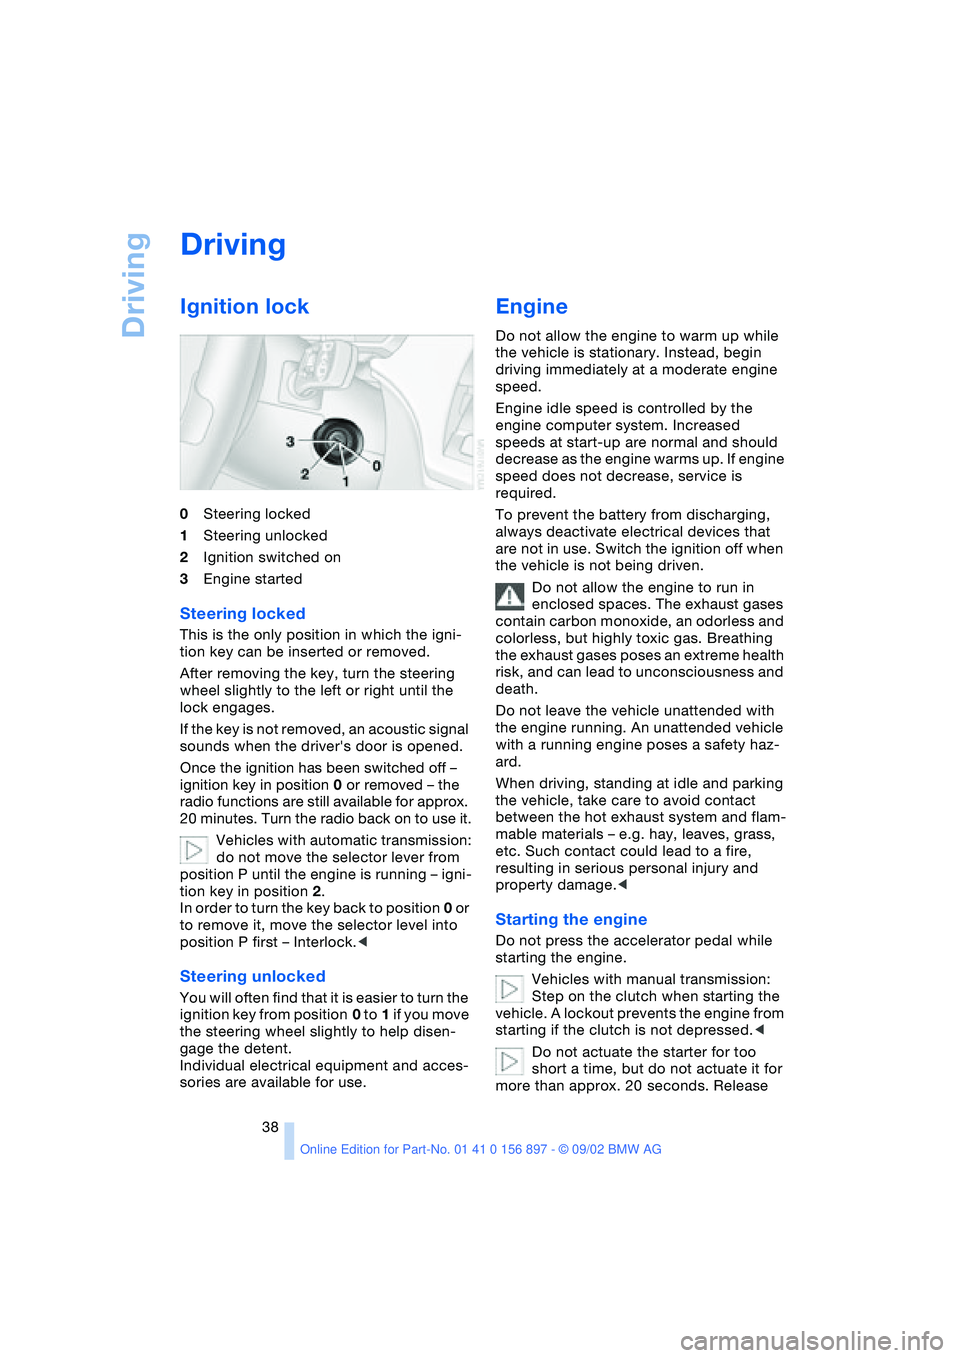
0Steering locked
1Steering unlocked
2Ignition switched on
3Engine started
Steering locked
This is the only position in which the igni-
tion key can be inserted or removed.
After removing the key, turn the steering
wheel slightly to the left or right until the
lock engages.
If the key is not removed, an acoustic signal
sounds when the driver's door is opened.
Once the ignition has been switched off –
ignition key in position 0 or removed – the
radio functions are still available for approx.
20 minutes. Turn the radio back on to use it.
Vehicles with automatic transmission:
do not move the selector lever from
position P until the engine is running – igni-
tion key in position 2.
In order to turn the key back to position 0 or
to remove it, move the selector level into
position P first – Interlock.<
Steering unlocked
You will often find that it is easier to turn the
ignition key from position 0 to 1 if you move
the steering wheel slightly to help disen-
gage the detent.
Individual electrical equipment and acces-
sories are available for use.
Engine
Do not allow the engine to warm up while
the vehicle is stationary. Instead, begin
driving immediately at a moderate engine
speed.
Engine idle speed is controlled by the
engine computer system. Increased
speeds at start-up are normal and should
decrease as the engine warms up. If engine
speed does not decrease, service is
required.
To prevent the battery from discharging,
always deactivate electrical devices that
are not in use. Switch the ignition off when
the vehicle is not being driven.
Do not allow the engine to run in
enclosed spaces. The exhaust gases
contain carbon monoxide, an odorless and
colorless, but highly toxic gas. Breathing
the exhaust gases poses an extreme health
risk, and can lead to unconsciousness and
death.
Do not leave the vehicle unattended with
the engine running. An unattended vehicle
with a running engine poses a safety haz-
ard.
When driving, standing at idle and parking
the vehicle, take care to avoid contact
between the hot exhaust system and flam-
mable materials – e.g. hay, leaves, grass,
etc. Such contact could lead to a fire,
resulting in serious personal injury and
property damage.<
Starting the engine
Do not press the accelerator pedal while
starting the engine.
Vehicles with manual transmission:
Step on the clutch when starting the
vehicle. A lockout prevents the engine from
starting if the clutch is not depressed.<
Do not actuate the starter for too
short a time, but do not actuate it for
more than approx. 20 seconds. Release
Page 48 of 106
Everything under control
48
Between the blue and red zones
Normal operating range. The needle may
rise as far as the edge of the red sector dur-
ing normal operation.
Red
When you switch on the ignition, warning
lamp 1 comes on briefly to indicate an
operational check.
Comes on while driving:
The engine has overheated. Switch off the
engine immediately and allow it to cool
down.
For checking the coolant level, refer to
page 80.
Service interval display
Remaining distance to next service
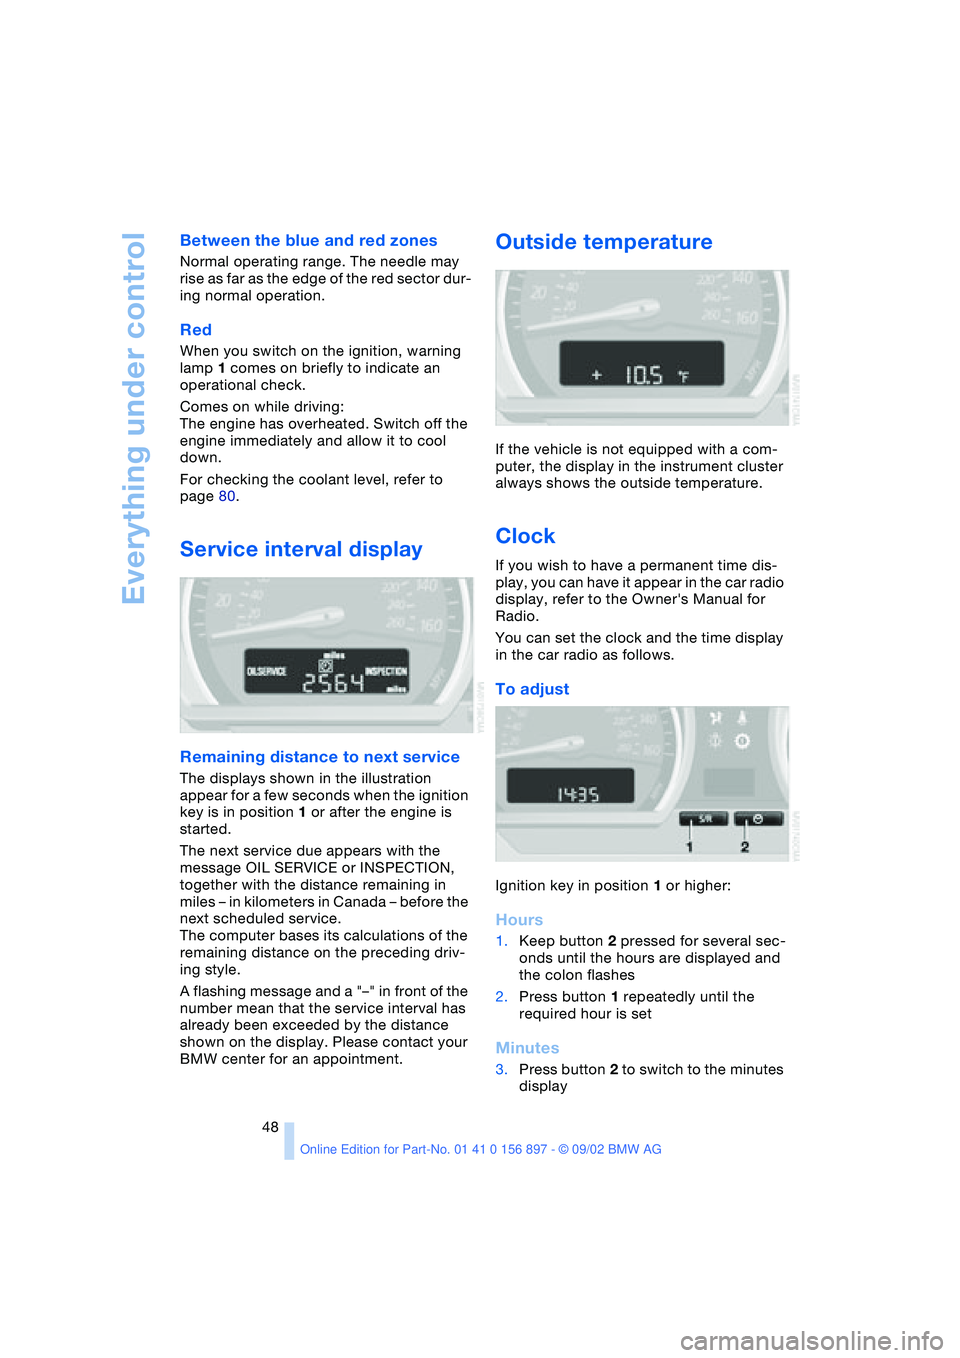
The displays shown in the illustration
appear for a few seconds when the ignition
key is in position 1 or after the engine is
started.
The next service due appears with the
message OIL SERVICE or INSPECTION,
together with the distance remaining in
miles – in kilometers in Canada – before the
next scheduled service.
The computer bases its calculations of the
remaining distance on the preceding driv-
ing style.
A flashing message and a "–" in front of the
number mean that the service interval has
already been exceeded by the distance
shown on the display. Please contact your
BMW center for an appointment.
Outside temperature
If the vehicle is not equipped with a com-
puter, the display in the instrument cluster
always shows the outside temperature.
Clock
If you wish to have a permanent time dis-
play, you can have it appear in the car radio
display, refer to the Owner's Manual for
Radio.
You can set the clock and the time display
in the car radio as follows.
To adjust
Ignition key in position 1 or higher:
Hours
1.Keep button 2 pressed for several sec-
onds until the hours are displayed and
the colon flashes
2.Press button 1 repeatedly until the
required hour is set
Minutes
3.Press button 2 to switch to the minutes
display
Page 49 of 106
At a glance
Controls
Driving tips
Mobility
Reference
49
4.Press button 1 repeatedly until the
required minutes are set
5.Press button 2 to confirm the settings.
The set time of day is transferred to the car
radio display or appears in the instrument
cluster display.
Display mode
In ignition key position 0:
Press button 1.
The time of day is displayed for several
seconds.
Computer*
Mode selection
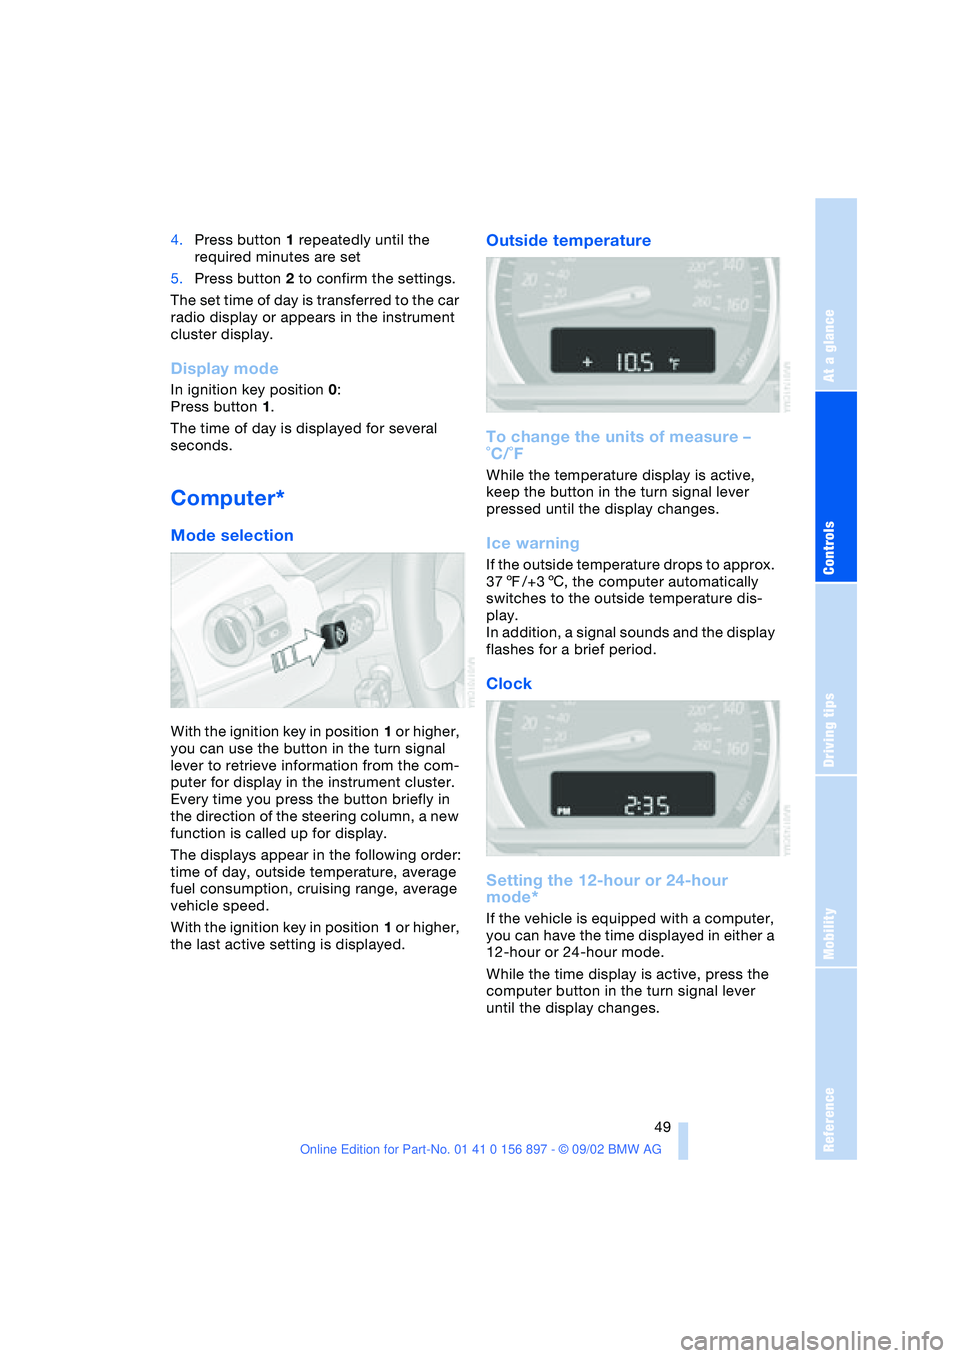
With the ignition key in position 1 or higher,
you can use the button in the turn signal
lever to retrieve information from the com-
puter for display in the instrument cluster.
Every time you press the button briefly in
the direction of the steering column, a new
function is called up for display.
The displays appear in the following order:
time of day, outside temperature, average
fuel consumption, cruising range, average
vehicle speed.
With the ignition key in position 1 or higher,
the last active setting is displayed.
Outside temperature
To change the units of measure –
˚C/˚F
While the temperature display is active,
keep the button in the turn signal lever
pressed until the display changes.
Ice warning
If the outside temperature drops to approx.
377/+36, the computer automatically
switches to the outside temperature dis-
play.
In addition, a signal sounds and the display
flashes for a brief period.
Clock
Setting the 12-hour or 24-hour
mode*
If the vehicle is equipped with a computer,
you can have the time displayed in either a
12-hour or 24-hour mode.
While the time display is active, press the
computer button in the turn signal lever
until the display changes.
Page 98 of 106
Everything from A - Z
98 Brake system 65
– brake fluid level 81
– brake pads 66
– break-in procedures 64
– disc brakes 65
Brakes
– driving notes 65
Break-in procedures 64
– brake system 64
– clutch 64
– differential 64
– engine 64
– tires 64
Bulb
– defective 45
– replacement 84
C
California Proposition 65
warning 83
Can holder 61
Capacities 94, 96
– luggage
compartment 22, 94
Car battery 87
Car radio, refer to the
Owner's Manual for Radio
Car wash, refer to the Car-
ing for your vehicle bro-
chure
Cargo loading 66
Cassette player operation,
refer to the Owner's Man-
ual for Radio
Catalytic converter, refer to
High temperatures 65
CD player operation, refer
to the Owner's Manual for
Radio
Cellular phone
preparation 61
Cellular phone, refer to the
separate Owner's Manual
Center high-mount brake
lamp 87
Central locking system 18
– button 20
– interior 20
Charge indicator
lamp 14, 88Check gas cap 70
– indicator lamp 14
Child seat 34
Child-restraint mounting
system (LATCH) 36
Child-restraint systems 34
Cigarette lighter 61
Cleaning the headlamps 43
Cleaning the windshield 43
Clock
– 12/24-hour mode 49
– adjusting, refer also to the
radio or onboard com-
puter Owner's Manual
Clothes hooks 27
Cluster 13
Clutch
– break-in procedure 64
Cockpit 12
Code, refer to the Owner's
Manual for Radio
Combination switch, refer
to Turn signal indicators/
Headlamp flasher 42
Compartments 60
Compression ratio 94
Computer 49
– average fuel
consumption 50
– average speed 50
– clock, 12/24-hour
mode 49
– cruising range 50
– outside temperature 49
Condensation
– removing from
windows 56, 58
Configuring adjustments,
refer to Vehicle Memory,
Key Memory 37
Consumption 50
Convenience operation
– convertible top 20
– windows 20
Convertible top 23
– convenience operation 20
– electrical fault 25
– emergency operation 25
– malfunction 25
– manual operation 23
– mechanical 23Convertible top compart-
ment panel 22
Coolant 80, 96
– indicator lamp 14
Coolant thermometer 47
Cooling system 96
Cooling, maximum 58
Copyright 4, 6
Cruise control 44
Cruising range 50
Cup holder, refer to Bever-
age holder 61
Curb weight 94
Cylinders 94
D
Data 94
– engine 94
– filling capacities 96
– weights 94
Daytime driving lamps 45
DBC Dynamic Brake
Control 52
Defects 8
Deflector for wind 26
Defrost setting 56, 58
Defroster, rear window
– air conditioning 56
– automatic climate
control 59
Defrosting
– windows 56, 58
Differential
– break-in procedures 64
Digital clock
Dimensions 95
Dimming mirror 33
Dipstick, engine oil 79
Disc brakes 65
Displacement 94
Displays, refer to Instru-
ment cluster 13
Door lock 20
Door lock buttons 21
Doors
– emergency operation 20
– locking 19
– unlocking 19
DOT quality grades 73
Drivelogic 42
Page 100 of 106

Everything from A - Z
100 Indicator lamps
– airbag 33
– alarm system 27
– brake fluid 81
– engine temperature 47
– flat tire 75
– Flat Tire Monitor 53
– reserve tank 47
Inflation pressure 71
– monitor 53
INSPECTION 48
Instrument cluster 13
Instrument lighting 46
Instrument panel 12
Interior
– central locking system 20
Interior lamps 19, 46
– remote control 19
Interior mirror
– automatic dimming
feature 33
Interior motion sensor 19
– deactivating 28
Interior rearview mirror 32
Interlock 38
Intermittent operation,
windshield wipers 43
J
Jack 87
– jacking points 87
Jets, refer to
Ventilation 56, 59
Jump-starting 89
K
Key Memory 37
Keys 18
– spare 18
– with remote control 18
Knee airbags 33
L
Lamp
– passenger airbags 35
Lamp control 45
Lamp replacement 84Lamps
– backup lamp 86
– brake lamp 86
– bulb replacement 84
– center high-mount brake
lamp 87
– daytime driving lamps 45
– defective bulbs 45
– fog lamps 46
– headlamp flasher 46
– headlamps 84
– high beams 46, 85
– indicator lamp, defective
bulb 14
– instrument lighting 46
– interior lamps 46
– lamp replacement 84
– license plate lamps 87
– LIGHTS ON warning 45
– low beams 45, 85
– low beams, automatic 45
– parking lamps 45
– reading lamps 46
– rear lamp 86
– standing lamps 46
– turn signal indicators 86
– xenon lamps 85
LATCH child-restraint
mounting system 36
Length 95
License plate lamps
– bulb replacement 87
Light switch 45
Lighter 61
LIGHTS ON warning 45
Loads, securing 66
Lock
– door 20
Locking 19
Longlife oils 80
Low beams 45
– automatic 45
– bulb replacement 85
– indicator lamp, defective
bulb 14
Luggage
compartment 22, 94
– capacity 94
– enlarging 22
– remote control 19Luggage compartment
lid 21
– emergency release from
luggage compartment's
interior 22
– opening from the
inside 21
– opening from the
outside 21
– opening/closing 21
– remote control 19
M
M+S tires 76
Maintenance system 82
Malfunction
– door lock 20
– fuel filler door 70
– remote control 19
– storage compartment 60
Malfunction of electrical
accessory 88
Manual convertible top 23
Manual operation
– door lock 20
– electrical convertible
top 25
– fuel filler door 70
– storage compartment 60
Manual transmission 40
Master key 18
Maximum cooling 58
MC operation, refer to the
Owner's Manual for Radio
MD operation, refer to the
Owner's Manual for Radio
Mechanical convertible
top 23
Mechanical seat 29
Memory
– seats 30
Memory, refer to Key Mem-
ory, Vehicle Memory 37
Microfilter 59
Microphone, cellular
phone 61
Mirrors 32
– heating 32
Modifications,
technical 7
Page 101 of 106

At a glance
Controls
Driving tips
Mobility
Reference
101
N
Navigation system, refer to
the separate Owner's
Manual
Nets 60
O
OBD socket 83
Odometer 47
Oil 79
– additives 80
– capacity 96
– quality 80
Oil change interval, refer to
the Service and Warranty
Information Booklet for
US models/Warranty and
Service Guide Booklet for
Canadian models
Oil consumption 79
Oil dipstick 79
Oil filter change 96
Oil level 79
– checking 79
– indicator lamp 14
Oil pressure 79
– indicator lamp 14
Oil sensor 79
– indicator lamp 14
OIL SERVICE 48
Oil types 80
Onboard computer, refer to
Computer or to the sepa-
rate Owner's Manual for
Onboard Computer
Onboard tool kit 84
Operating elements 12
Outlets, refer to
Ventilation 56, 59
Output 94
Outside air mode
– air conditioning 56
Outside temperature
display 48
– changing units 49
– in computer 49
P
Paintwork, refer to the Car-
ing for your vehicle bro-
chure
Panel lighting 46
Panic mode 19
Parking brake 39
– indicator lamp 14
Parking lamps 45
Particle filter
– automatic climate
control 56
Passenger airbags
– activation/deactivation 34
Pollen, refer to
– Microfilter/activated-
charcoal filter 59
– Particle filter 56
Power seat 30
Power steering, electric 42
Power windows 22
Preparations for the cellular
phone 61
Pressure monitor, tires 53
Pressure, tires 71
R
Radiator 96
Radio, refer to the Owner's
Manual for Radio
Rain sensor 43
Reading lamps 46
Rear lamps 86
– bulb replacement 86
Rear window defroster
– air conditioning 56
– automatic climate
control 59
Rearview mirror 32
Recirculated air mode
– air conditioning 56
– automatic climate
control 58
Refueling 70
Remote control 18
– interior motion sensor 19
– luggage compartment
lid 19
– malfunction 19Remote control keys 18
Replacement key 18
Replacement of tires 73
Reserve tank indicator
lamp 47
Restraint systems 34
Reverse 40
Run Flat tires 73, 75, 87
– flat tire 75
S
Safety belts 31
Safety defects 8
Seat adjustment
– storing 30
Seat heating 31
Seat memory 30
Seats 29
– adjustment,
mechanical 29
– adjustment, power 30
Securing loads 66
Securing, locking the
vehicle 19
Selector lever
– automatic
transmission 40
– position, automatic
transmission 40
Service 48
Service and warranty 7
Service and Warranty Infor-
mation Booklet 82
Service Engine Soon 83
– indicator lamp 14
Service interval
display 48, 82
Shiftlock 40
Side airbags 33
Snow chains 76
Socket
– for Onboard
Diagnostics 83
– refer to Cigarette lighter
socket 61
Spare fuses 88
Spare key 18
Special oils 80
Speed control, refer to
Cruise control 44