2003 BMW Z4 2.5I heating
[x] Cancel search: heatingPage 4 of 106

Contents
Contents
Notes
6About this Owner's Manual
6Symbols used
6Symbol on vehicle parts
6Your individual vehicle
6Status at time of printing
7For your own safety
7Service and warranty
8Reporting safety defects
Overview
12Cockpit
13Instrument cluster
14Indicator and warning lamps
Opening and closing
18Keys
18Central locking system
18Remote control
20Door lock
20Interior
21Luggage compartment lid
22Luggage compartment
22Electric power windows
23Manual convertible top
24Fully automatic convertible top*
26Wind deflector*
27Alarm system*
Adjustments
29Safe seating position
29Seats
30Seat memory*
31Seat heating*
31Safety belts
32Steering wheel
32Mirrors
33Airbags
34Transporting children safely
37Vehicle Memory, Key Memory
Driving
38Ignition lock
38Engine
39Parking brake
40Manual transmission
40Automatic transmission with
Steptronic*
42Electric Power Steering EPS
42Drivelogic*
42Turn signal indicators/Headlamp
flasher
43Washer/wiper system and
rain sensor*
44Cruise control*
Lamps
45Parking lamps/Low beams
46High beams/Standing lamps
46Instrument lighting
46Fog lamps
46Interior lamps
© 2002 Bayerische Motoren Werke
Aktiengesellschaft
Munich, Germany
Reprinting, including excerpts, only with the
written consent of BMW AG, Munich.
Order No. 01 41 0 156 897
US English VIII/02
Printed in Germany
Printed on environmentally friendly paper –
bleached without chlorine, suitable for recycling.
Page 31 of 106
At a glance
Controls
Driving tips
Mobility
Reference
31
4.Press memory button 1, 2 or 3, as
desired. The indicator lamp goes out.
To select a stored setting
Do not select a memory position while
the vehicle is moving. If you do so,
there is a risk of accident due to unex-
pected seat movement.<
Ignition key position 1:
>Briefly press memory button 1, 2 or 3,
as desired.
Movement stops immediately when one
of the seat adjustment or memory but-
tons is operated during the adjustment
process.
With the driver's door closed and the igni-
tion key either removed or in position 0
or 2:
>Press and hold the desired memory
button – 1, 2 or 3 – until the adjustment
process is completed.
If you press the
MEMORY button
accidentally: press the button again;
the indicator lamp goes out.<
You can have your vehicle adjusted in
such a way that your personal set-
tings are automatically set for the seat
positions when you unlock the vehicle with
your personal remote control.<
If you make use of this method of
adjustment, be sure that the space
behind the driver's seat is unobstructed
before unlocking the vehicle. If you fail to
do so, objects behind the seat could be
damaged by a rearward movement of the
seat.<
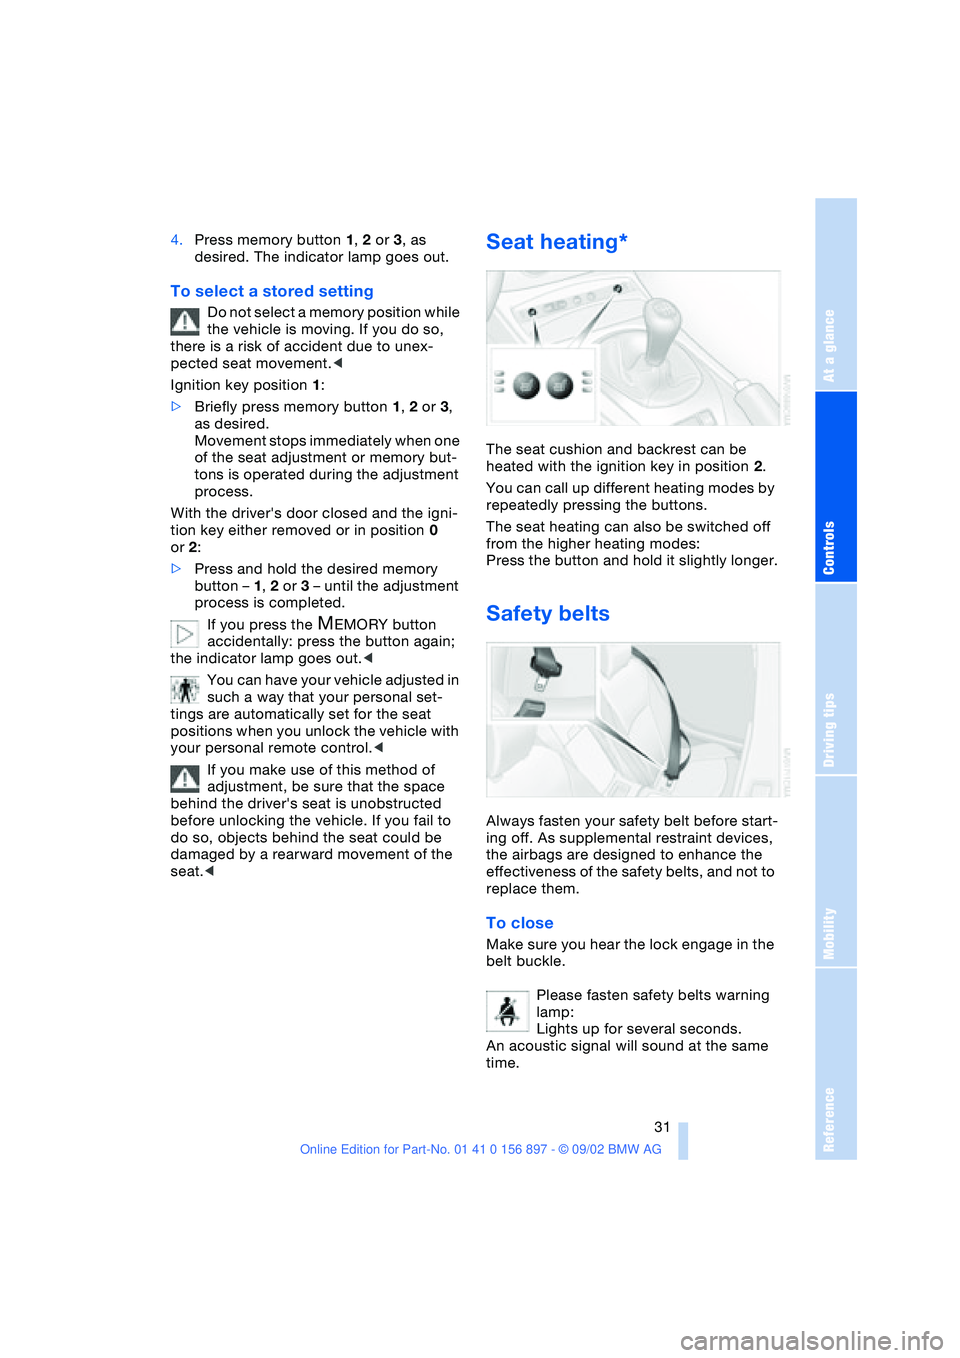
Seat heating*
The seat cushion and backrest can be
heated with the ignition key in position 2.
You can call up different heating modes by
repeatedly pressing the buttons.
The seat heating can also be switched off
from the higher heating modes:
Press the button and hold it slightly longer.
Safety belts
Always fasten your safety belt before start-
ing off. As supplemental restraint devices,
the airbags are designed to enhance the
effectiveness of the safety belts, and not to
replace them.
To close
Make sure you hear the lock engage in the
belt buckle.
Please fasten safety belts warning
lamp:
Lights up for several seconds.
An acoustic signal will sound at the same
time.
Page 56 of 106
Controlling the climate for pleasant driving
56
Air distribution
You can direct airflow onto the
windows , toward the upper
body and into the footwell .
All intermediate settings are pos-
sible.
Air supply/blower
You can set the blower to 8 differ-
ent levels. Both heating and ven-
tilation become more effective as
the air supply rate is increased.
Temperature
In order to increase the tempera-
ture of the passenger compart-
ment, turn to the right – red zone.
Air conditioning
The air is cooled and dehumidi-
fied and – depending on the tem-
perature setting – rewarmed.
Depending on the weather, the
windshield may fog over briefly when the
engine is started.
Condensation forms during operation
of the air conditioning system, which
then exits under the vehicle. Traces of con-
densed water on the ground underneath
the vehicle are thus normal.<
Outside-air/recirculated-air mode
If there are unpleasant odors in
the outside air, you can tempo-
rarily block the supply of incom-
ing air. The system then recircu-
lates the air currently within the vehicle.
If the windows fog over in the recircu-
lated air mode, switch this mode off
and increase the air supply as required.<
Rear window defroster
The indicator lamp lights up when
the rear window defroster is
active. The rear window defroster
switches off automatically.
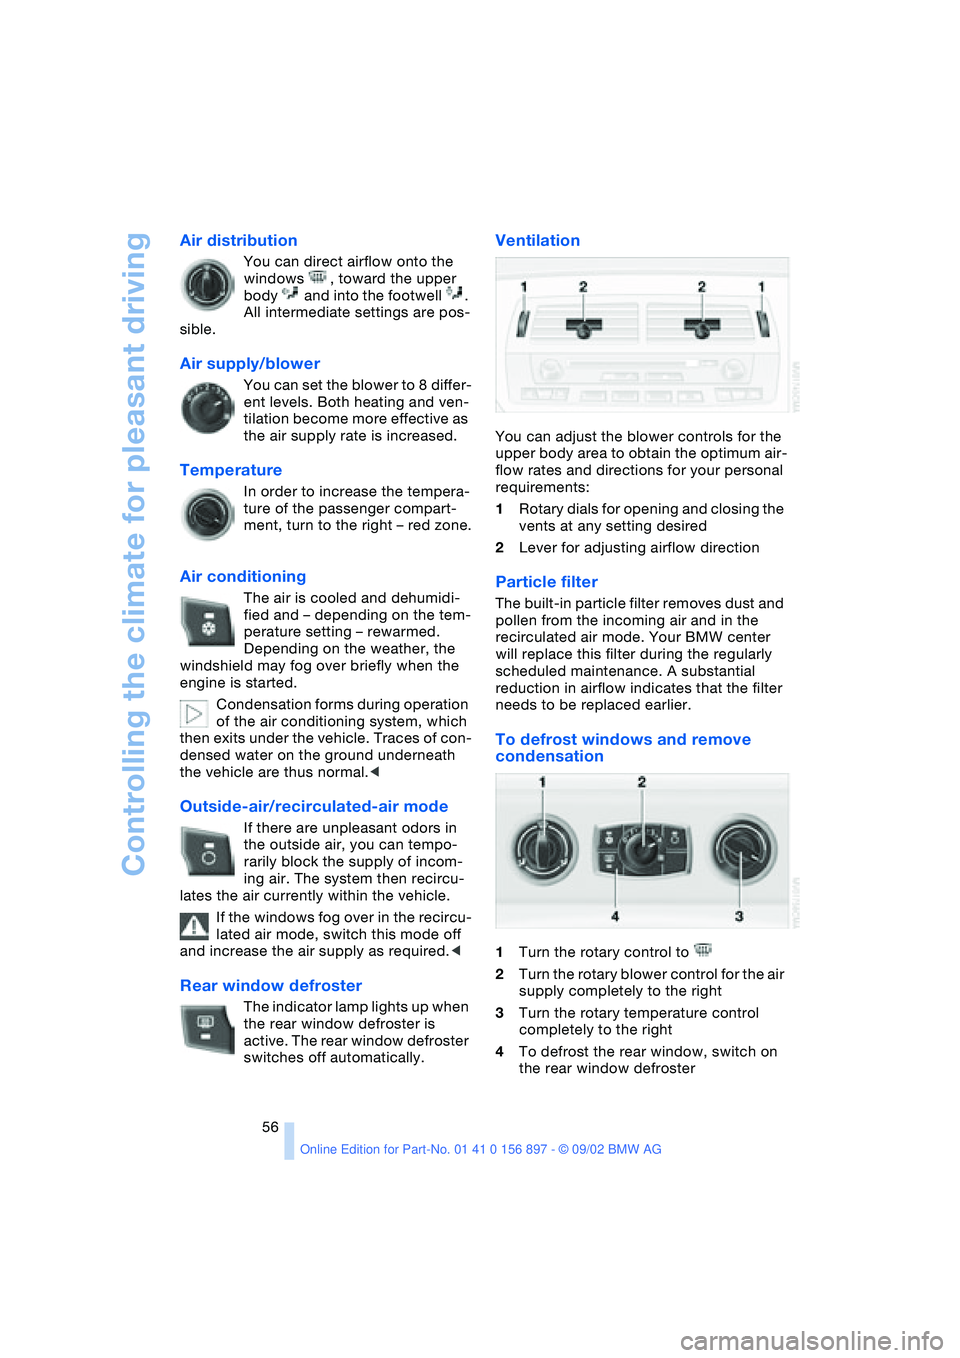
Ventilation
You can adjust the blower controls for the
upper body area to obtain the optimum air-
flow rates and directions for your personal
requirements:
1Rotary dials for opening and closing the
vents at any setting desired
2Lever for adjusting airflow direction
Particle filter
The built-in particle filter removes dust and
pollen from the incoming air and in the
recirculated air mode. Your BMW center
will replace this filter during the regularly
scheduled maintenance. A substantial
reduction in airflow indicates that the filter
needs to be replaced earlier.
To defrost windows and remove
condensation
1Turn the rotary control to
2Turn the rotary blower control for the air
supply completely to the right
3Turn the rotary temperature control
completely to the right
4To defrost the rear window, switch on
the rear window defroster
Page 58 of 106
Controlling the climate for pleasant driving
58
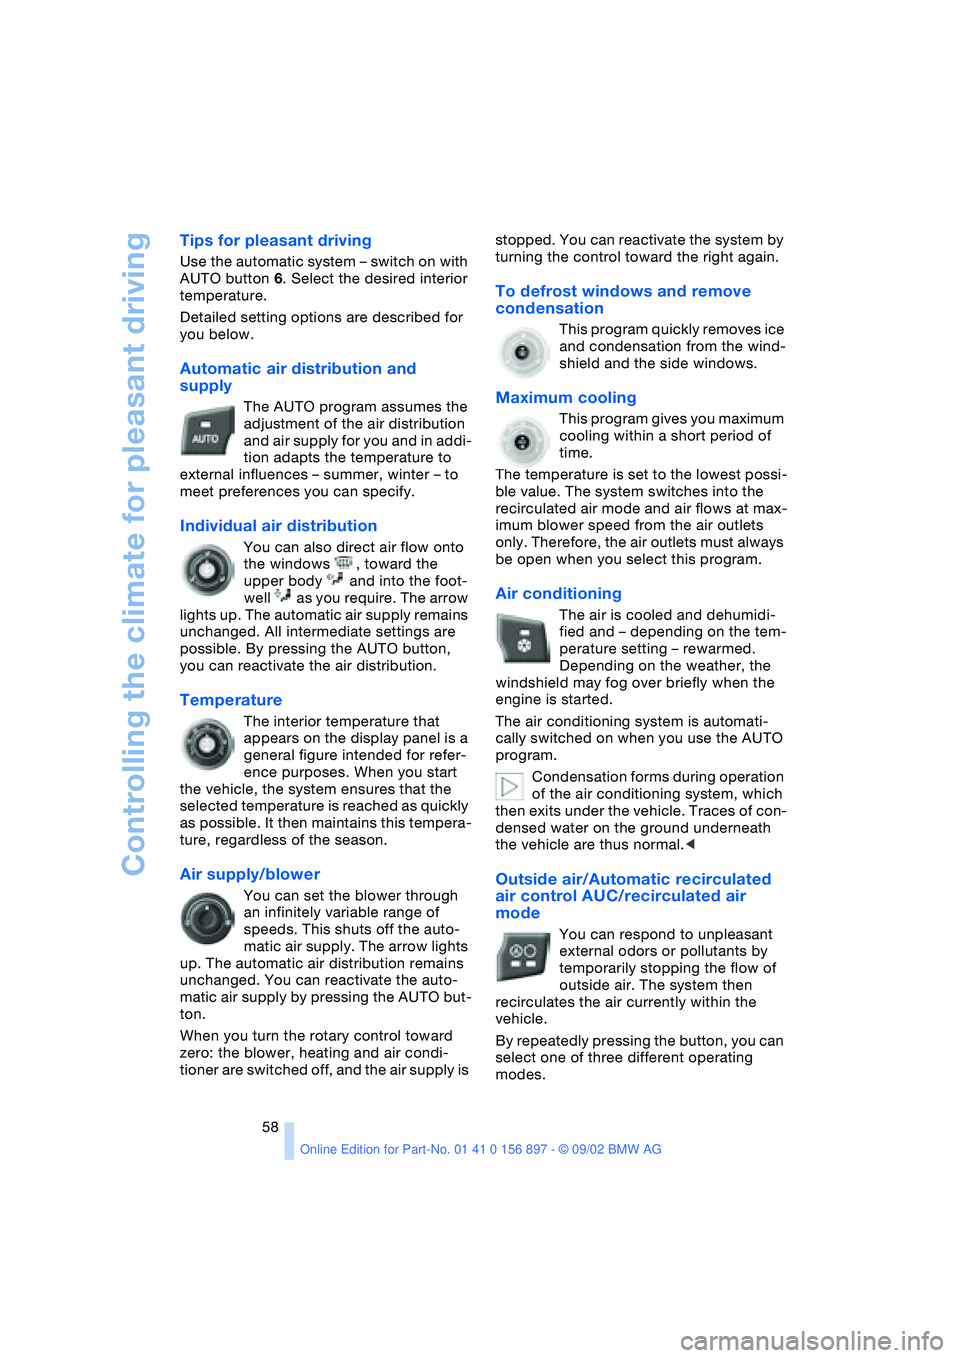
Tips for pleasant driving
Use the automatic system – switch on with
AUTO button 6. Select the desired interior
temperature.
Detailed setting options are described for
you below.
Automatic air distribution and
supply
The AUTO program assumes the
adjustment of the air distribution
and air supply for you and in addi-
tion adapts the temperature to
external influences – summer, winter – to
meet preferences you can specify.
Individual air distribution
You can also direct air flow onto
the windows , toward the
upper body and into the foot-
well as you require. The arrow
lights up. The automatic air supply remains
unchanged. All intermediate settings are
possible. By pressing the AUTO button,
you can reactivate the air distribution.
Temperature
The interior temperature that
appears on the display panel is a
general figure intended for refer-
ence purposes. When you start
the vehicle, the system ensures that the
selected temperature is reached as quickly
as possible. It then maintains this tempera-
ture, regardless of the season.
Air supply/blower
You can set the blower through
an infinitely variable range of
speeds. This shuts off the auto-
matic air supply. The arrow lights
up. The automatic air distribution remains
unchanged. You can reactivate the auto-
matic air supply by pressing the AUTO but-
ton.
When you turn the rotary control toward
zero: the blower, heating and air condi-
tioner are switched off, and the air supply is stopped. You can reactivate the system by
turning the control toward the right again.
To defrost windows and remove
condensation
This program quickly removes ice
and condensation from the wind-
shield and the side windows.
Maximum cooling
This program gives you maximum
cooling within a short period of
time.
The temperature is set to the lowest possi-
ble value. The system switches into the
recirculated air mode and air flows at max-
imum blower speed from the air outlets
only. Therefore, the air outlets must always
be open when you select this program.
Air conditioning
The air is cooled and dehumidi-
fied and – depending on the tem-
perature setting – rewarmed.
Depending on the weather, the
windshield may fog over briefly when the
engine is started.
The air conditioning system is automati-
cally switched on when you use the AUTO
program.
Condensation forms during operation
of the air conditioning system, which
then exits under the vehicle. Traces of con-
densed water on the ground underneath
the vehicle are thus normal.<
Outside air/Automatic recirculated
air control AUC/recirculated air
mode
You can respond to unpleasant
external odors or pollutants by
temporarily stopping the flow of
outside air. The system then
recirculates the air currently within the
vehicle.
By repeatedly pressing the button, you can
select one of three different operating
modes.
Page 73 of 106
At a glance
Controls
Driving tips
Mobility
Reference
73
Tire condition
Tire tread – Tire damage
Inspect your tires frequently for tread wear,
signs of damage and for foreign objects
lodged in the tread. Check the tread depth.
Tread depth should not be allowed to go
below
1/8 in / 3 mm, even though in
Europe, for example, the legally specified
minimum tread depth is only
1/16 in /
1.6 mm.
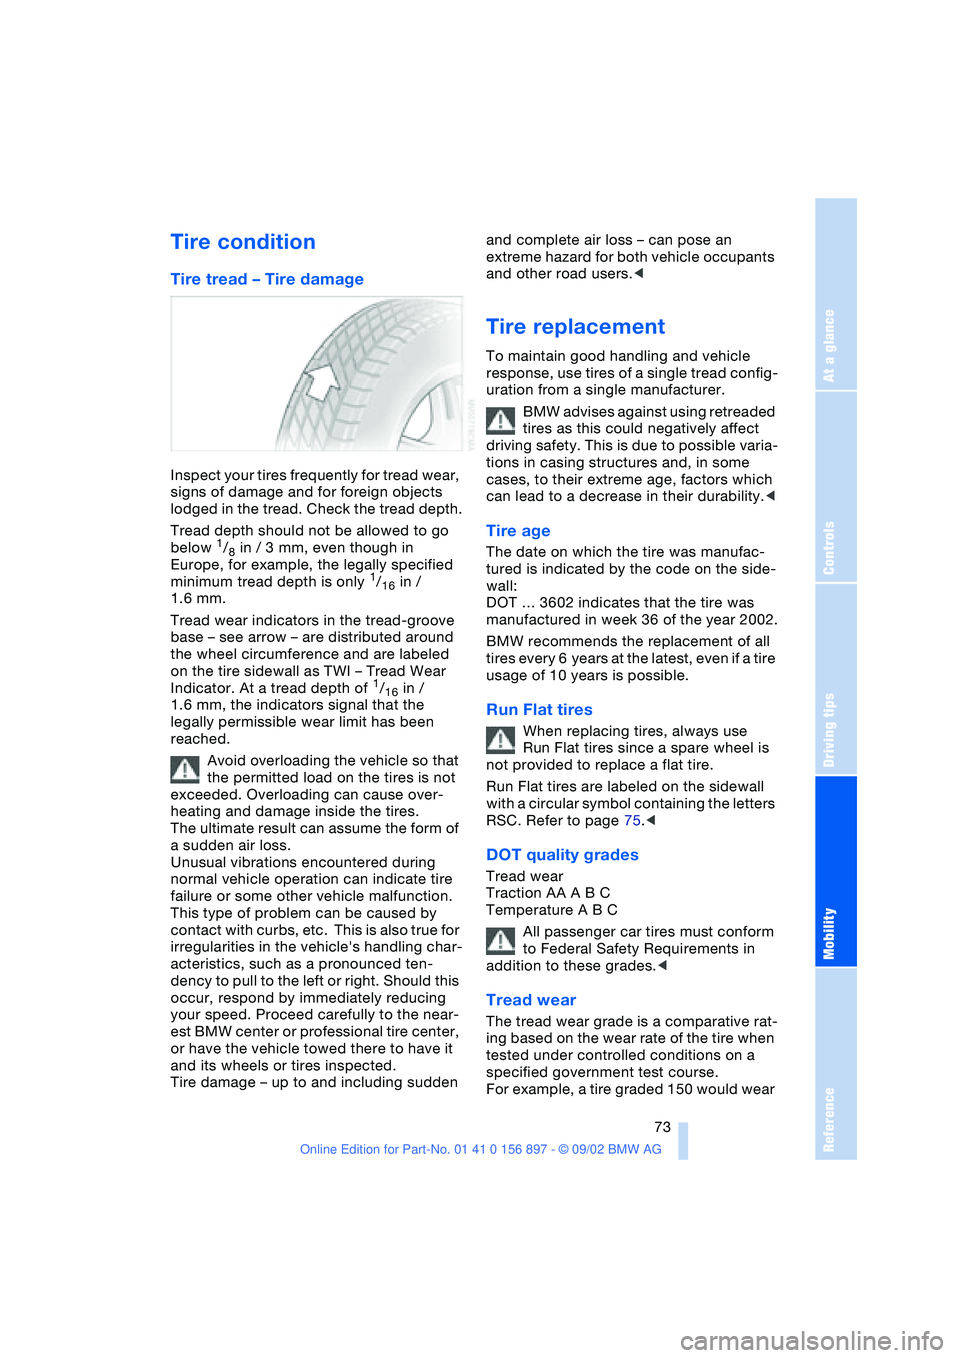
Tread wear indicators in the tread-groove
base – see arrow – are distributed around
the wheel circumference and are labeled
on the tire sidewall as TWI – Tread Wear
Indicator. At a tread depth of
1/16 in /
1.6 mm, the indicators signal that the
legally permissible wear limit has been
reached.
Avoid overloading the vehicle so that
the permitted load on the tires is not
exceeded. Overloading can cause over-
heating and damage inside the tires.
The ultimate result can assume the form of
a sudden air loss.
Unusual vibrations encountered during
normal vehicle operation can indicate tire
failure or some other vehicle malfunction.
This type of problem can be caused by
contact with curbs, etc. This is also true for
irregularities in the vehicle's handling char-
acteristics, such as a pronounced ten-
dency to pull to the left or right. Should this
occur, respond by immediately reducing
your speed. Proceed carefully to the near-
est BMW center or professional tire center,
or have the vehicle towed there to have it
and its wheels or tires inspected.
Tire damage – up to and including sudden and complete air loss – can pose an
extreme hazard for both vehicle occupants
and other road users.<
Tire replacement
To maintain good handling and vehicle
response, use tires of a single tread config-
uration from a single manufacturer.
BMW advises against using retreaded
tires as this could negatively affect
driving safety. This is due to possible varia-
tions in casing structures and, in some
cases, to their extreme age, factors which
can lead to a decrease in their durability.<
Tire age
The date on which the tire was manufac-
tured is indicated by the code on the side-
wall:
DOT … 3602 indicates that the tire was
manufactured in week 36 of the year 2002.
BMW recommends the replacement of all
tires every 6 years at the latest, even if a tire
usage of 10 years is possible.
Run Flat tires
When replacing tires, always use
Run Flat tires since a spare wheel is
not provided to replace a flat tire.
Run Flat tires are labeled on the sidewall
with a circular symbol containing the letters
RSC. Refer to page 75.<
DOT quality grades
Tread wear
Traction AA A B C
Temperature A B C
All passenger car tires must conform
to Federal Safety Requirements in
addition to these grades.<
Tread wear
The tread wear grade is a comparative rat-
ing based on the wear rate of the tire when
tested under controlled conditions on a
specified government test course.
For example, a tire graded 150 would wear
Page 88 of 106
Replacement procedures
88 Please consult your BMW center
whenever you have any questions
concerning the battery. Since the battery is
absolutely maintenance-free, the following
statements are for your information only.<
Do not disconnect the battery cables
when the engine is running. Discon-
necting the battery cables when the engine
is running will cause a voltage surge which
will damage the vehicle's onboard elec-
tronics.<
Indicator lamp
The indicator lamp for the battery
charge current lights up:
The battery is no longer being
charged. The alternator drive belt is defec-
tive or there is a malfunction in the charging
circuit of the alternator. Please contact the
nearest BMW center.
If the drive belt is defective, pull over
and switch off the engine immediately
to prevent overheating and serious engine
damage.
If the onboard supply voltage drops to a
very low level, increased steering effort
may also be necessary.<
Charging the battery
Charge the battery in the vehicle only when
the engine is not running. Use the terminals
provided in the engine compartment. For
information on connections, refer to Jump-
Starting on page 89.
Battery disposal
Return used batteries to a recycling
point or to your BMW center. Maintain
the battery in an upright position for trans-
port and storage. Secure the battery
against tilting when transporting.<
Fuses
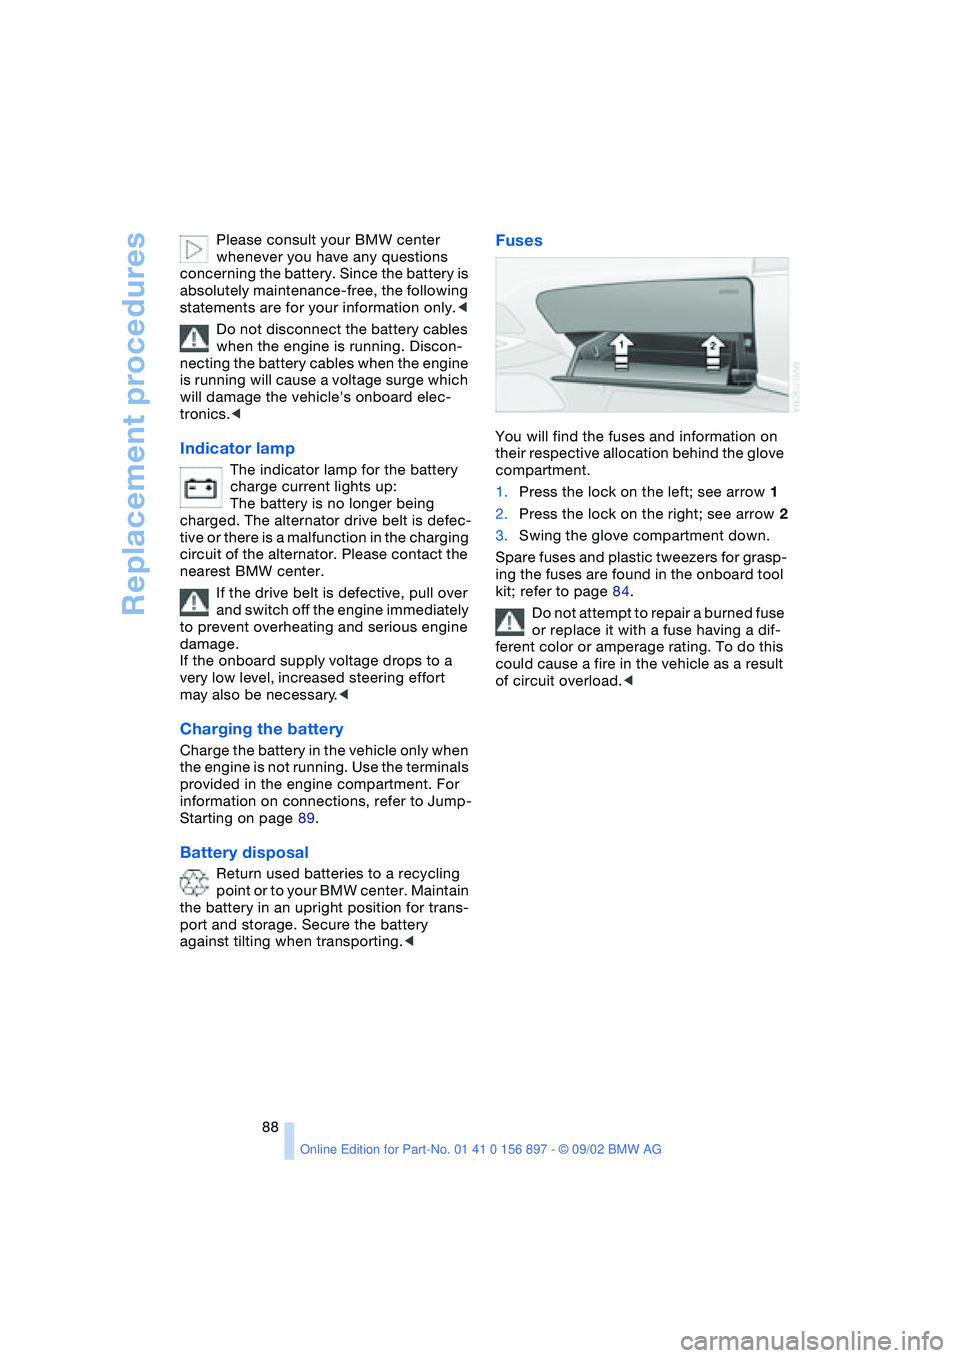
You will find the fuses and information on
their respective allocation behind the glove
compartment.
1.Press the lock on the left; see arrow 1
2.Press the lock on the right; see arrow 2
3.Swing the glove compartment down.
Spare fuses and plastic tweezers for grasp-
ing the fuses are found in the onboard tool
kit; refer to page 84.
Do not attempt to repair a burned fuse
or replace it with a fuse having a dif-
ferent color or amperage rating. To do this
could cause a fire in the vehicle as a result
of circuit overload.<
Page 96 of 106
Technical data
96
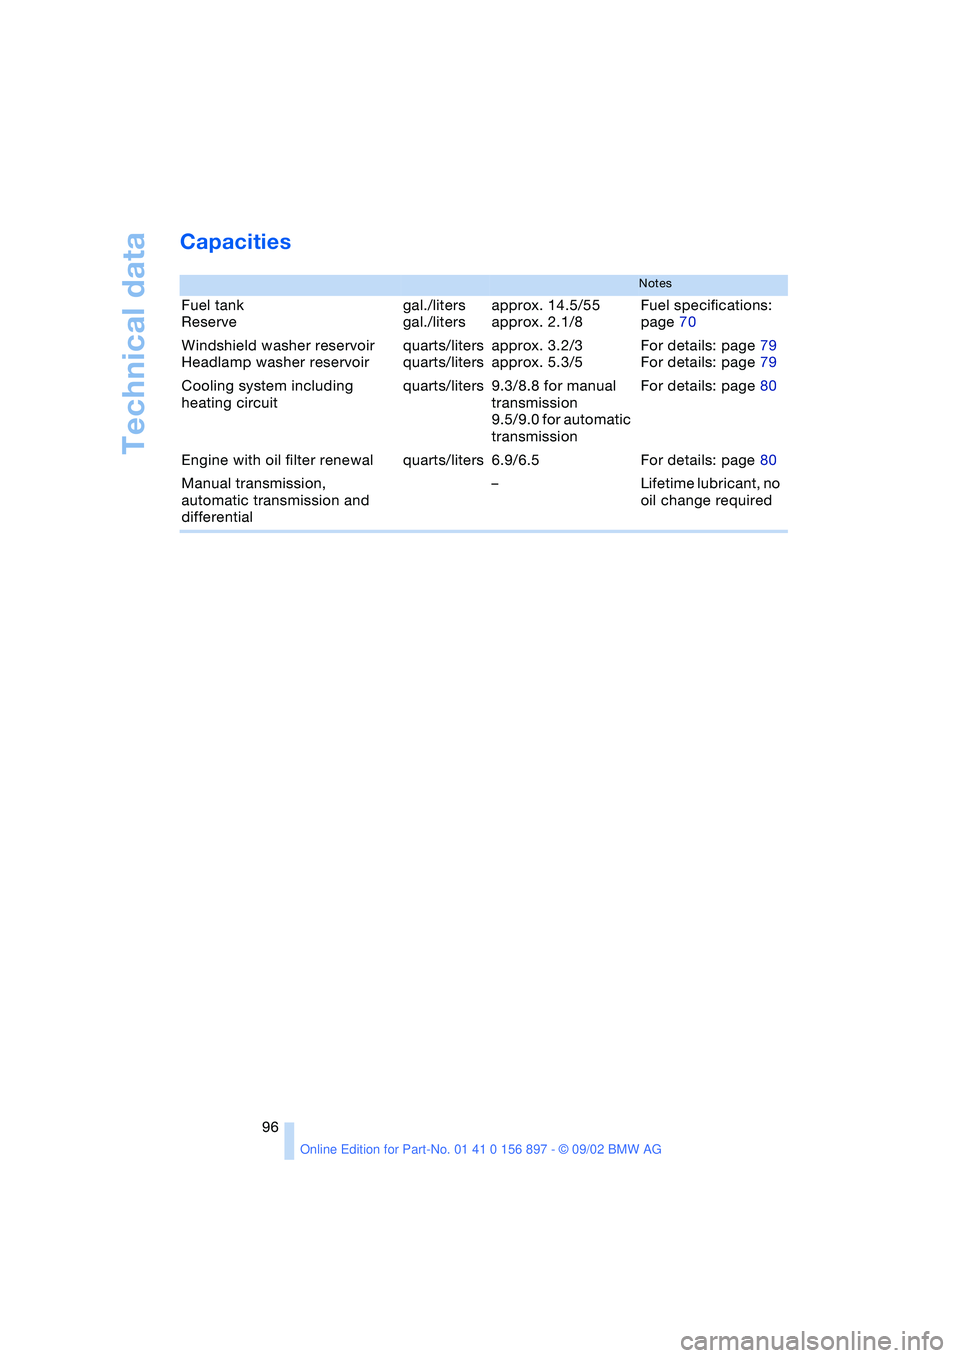
Capacities
Notes
Fuel tank
Reserve gal./liters
gal./litersapprox. 14.5/55
approx. 2.1/8Fuel specifications:
page 70
Windshield washer reservoir
Headlamp washer reservoirquarts/liters
quarts/litersapprox. 3.2/3
approx. 5.3/5For details: page 79
For details: page 79
Cooling system including
heating circuitquarts/liters 9.3/8.8 for manual
transmission
9.5/9.0 for automatic
transmissionFor details: page 80
Engine with oil filter renewal quarts/liters 6.9/6.5 For details: page 80
Manual transmission,
automatic transmission and
differential–Lifetime lubricant, no
oil change required
Page 100 of 106

Everything from A - Z
100 Indicator lamps
– airbag 33
– alarm system 27
– brake fluid 81
– engine temperature 47
– flat tire 75
– Flat Tire Monitor 53
– reserve tank 47
Inflation pressure 71
– monitor 53
INSPECTION 48
Instrument cluster 13
Instrument lighting 46
Instrument panel 12
Interior
– central locking system 20
Interior lamps 19, 46
– remote control 19
Interior mirror
– automatic dimming
feature 33
Interior motion sensor 19
– deactivating 28
Interior rearview mirror 32
Interlock 38
Intermittent operation,
windshield wipers 43
J
Jack 87
– jacking points 87
Jets, refer to
Ventilation 56, 59
Jump-starting 89
K
Key Memory 37
Keys 18
– spare 18
– with remote control 18
Knee airbags 33
L
Lamp
– passenger airbags 35
Lamp control 45
Lamp replacement 84Lamps
– backup lamp 86
– brake lamp 86
– bulb replacement 84
– center high-mount brake
lamp 87
– daytime driving lamps 45
– defective bulbs 45
– fog lamps 46
– headlamp flasher 46
– headlamps 84
– high beams 46, 85
– indicator lamp, defective
bulb 14
– instrument lighting 46
– interior lamps 46
– lamp replacement 84
– license plate lamps 87
– LIGHTS ON warning 45
– low beams 45, 85
– low beams, automatic 45
– parking lamps 45
– reading lamps 46
– rear lamp 86
– standing lamps 46
– turn signal indicators 86
– xenon lamps 85
LATCH child-restraint
mounting system 36
Length 95
License plate lamps
– bulb replacement 87
Light switch 45
Lighter 61
LIGHTS ON warning 45
Loads, securing 66
Lock
– door 20
Locking 19
Longlife oils 80
Low beams 45
– automatic 45
– bulb replacement 85
– indicator lamp, defective
bulb 14
Luggage
compartment 22, 94
– capacity 94
– enlarging 22
– remote control 19Luggage compartment
lid 21
– emergency release from
luggage compartment's
interior 22
– opening from the
inside 21
– opening from the
outside 21
– opening/closing 21
– remote control 19
M
M+S tires 76
Maintenance system 82
Malfunction
– door lock 20
– fuel filler door 70
– remote control 19
– storage compartment 60
Malfunction of electrical
accessory 88
Manual convertible top 23
Manual operation
– door lock 20
– electrical convertible
top 25
– fuel filler door 70
– storage compartment 60
Manual transmission 40
Master key 18
Maximum cooling 58
MC operation, refer to the
Owner's Manual for Radio
MD operation, refer to the
Owner's Manual for Radio
Mechanical convertible
top 23
Mechanical seat 29
Memory
– seats 30
Memory, refer to Key Mem-
ory, Vehicle Memory 37
Microfilter 59
Microphone, cellular
phone 61
Mirrors 32
– heating 32
Modifications,
technical 7