2003 BMW 760LI SEDAN height
[x] Cancel search: heightPage 48 of 229
Adjustments
46 Please observe the information on using
safety belts provided on page 50 and the
notice on the active head restraints on
page 48.
The concept
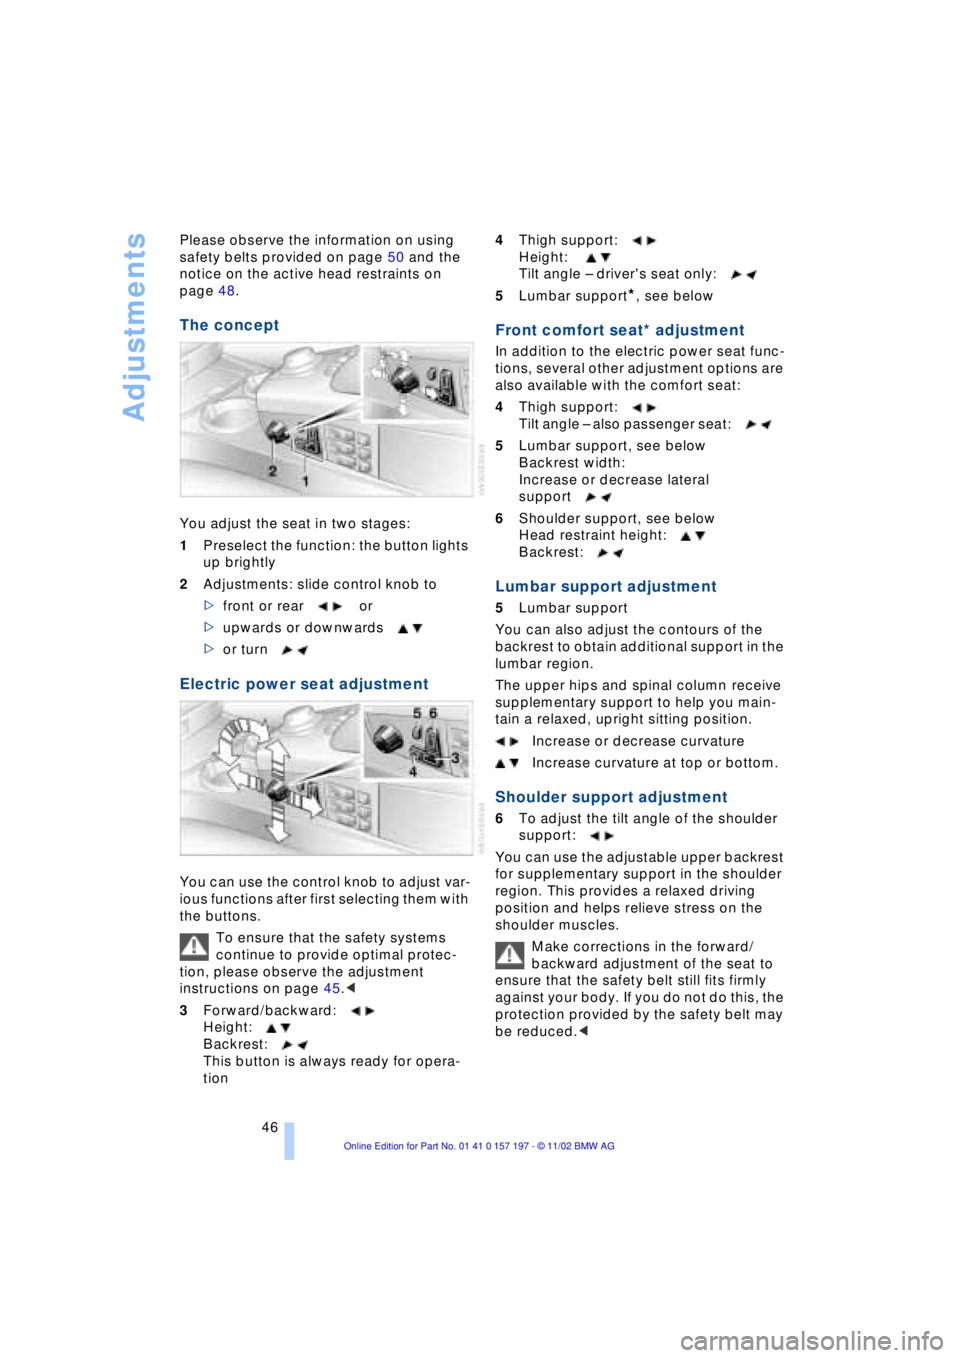
You adjust the seat in two stages:
1Preselect the function: the button lights
up brightly
2Adjustments: slide control knob to
>front or rear or
>upwards or downwards
>or turn
Electric power seat adjustment
You can use the control knob to adjust var-
ious functions after first selecting them with
the buttons.
To ensure that the safety systems
continue to provide optimal protec-
tion, please observe the adjustment
instructions on page 45.<
3Forward/backward:
Height:
Backrest:
This button is always ready for opera-
tion4Thigh support:
Height:
Tilt angle Ð driver's seat only:
5Lumbar support
*, see below
Front comfort seat* adjustment
In addition to the electric power seat func-
tions, several other adjustment options are
also available with the comfort seat:
4Thigh support:
Tilt angle Ð also passenger seat:
5Lumbar support, see below
Backrest width:
Increase or decrease lateral
support
6Shoulder support, see below
Head restraint height:
Backrest:
Lumbar support adjustment
5Lumbar support
You can also adjust the contours of the
backrest to obtain additional support in the
lumbar region.
The upper hips and spinal column receive
supplementary support to help you main-
tain a relaxed, upright sitting position.
Increase or decrease curvature
Increase curvature at top or bottom.
Shoulder support adjustment
6To adjust the tilt angle of the shoulder
support:
You can use the adjustable upper backrest
for supplementary support in the shoulder
region. This provides a relaxed driving
position and helps relieve stress on the
shoulder muscles.
Make corrections in the forward/
backward adjustment of the seat to
ensure that the safety belt still fits firmly
against your body. If you do not do this, the
protection provided by the safety belt may
be reduced.<
Page 49 of 229
At a glance
Controls
Driving tips
Communications
Navigation
Entertainment
Mobility
Reference
47
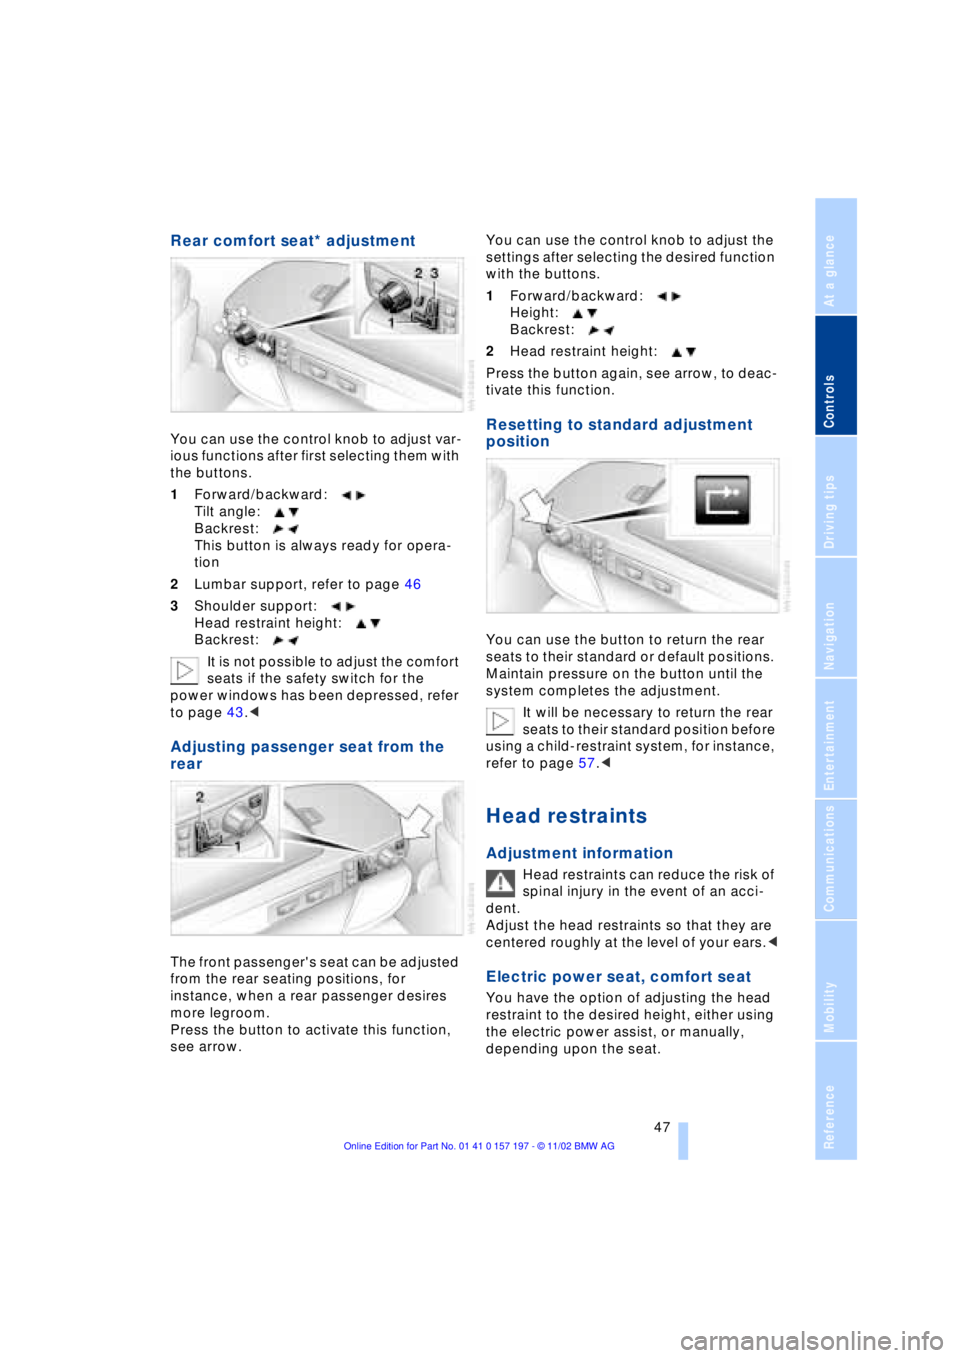
Rear comfort seat* adjustment
You can use the control knob to adjust var-
ious functions after first selecting them with
the buttons.
1Forward/backward:
Tilt angle:
Backrest:
This button is always ready for opera-
tion
2Lumbar support, refer to page 46
3Shoulder support:
Head restraint height:
Backrest:
It is not possible to adjust the comfort
seats if the safety switch for the
power windows has been depressed, refer
to page 43.<
Adjusting passenger seat from the
rear
The front passenger's seat can be adjusted
from the rear seating positions, for
instance, when a rear passenger desires
more legroom.
Press the button to activate this function,
see arrow. You can use the control knob to adjust the
settings after selecting the desired function
with the buttons.
1Forward/backward:
Height:
Backrest:
2Head restraint height:
Press the button again, see arrow, to deac-
tivate this function.
Resetting to standard adjustment
position
You can use the button to return the rear
seats to their standard or default positions.
Maintain pressure on the button until the
system completes the adjustment.
It will be necessary to return the rear
seats to their standard position before
using a child-restraint system, for instance,
refer to page 57.<
Head restraints
Adjustment information
Head restraints can reduce the risk of
spinal injury in the event of an acci-
dent.
Adjust the head restraints so that they are
centered roughly at the level of your ears.<
Electric power seat, comfort seat
You have the option of adjusting the head
restraint to the desired height, either using
the electric power assist, or manually,
depending upon the seat.
Page 50 of 229
Adjustments
48
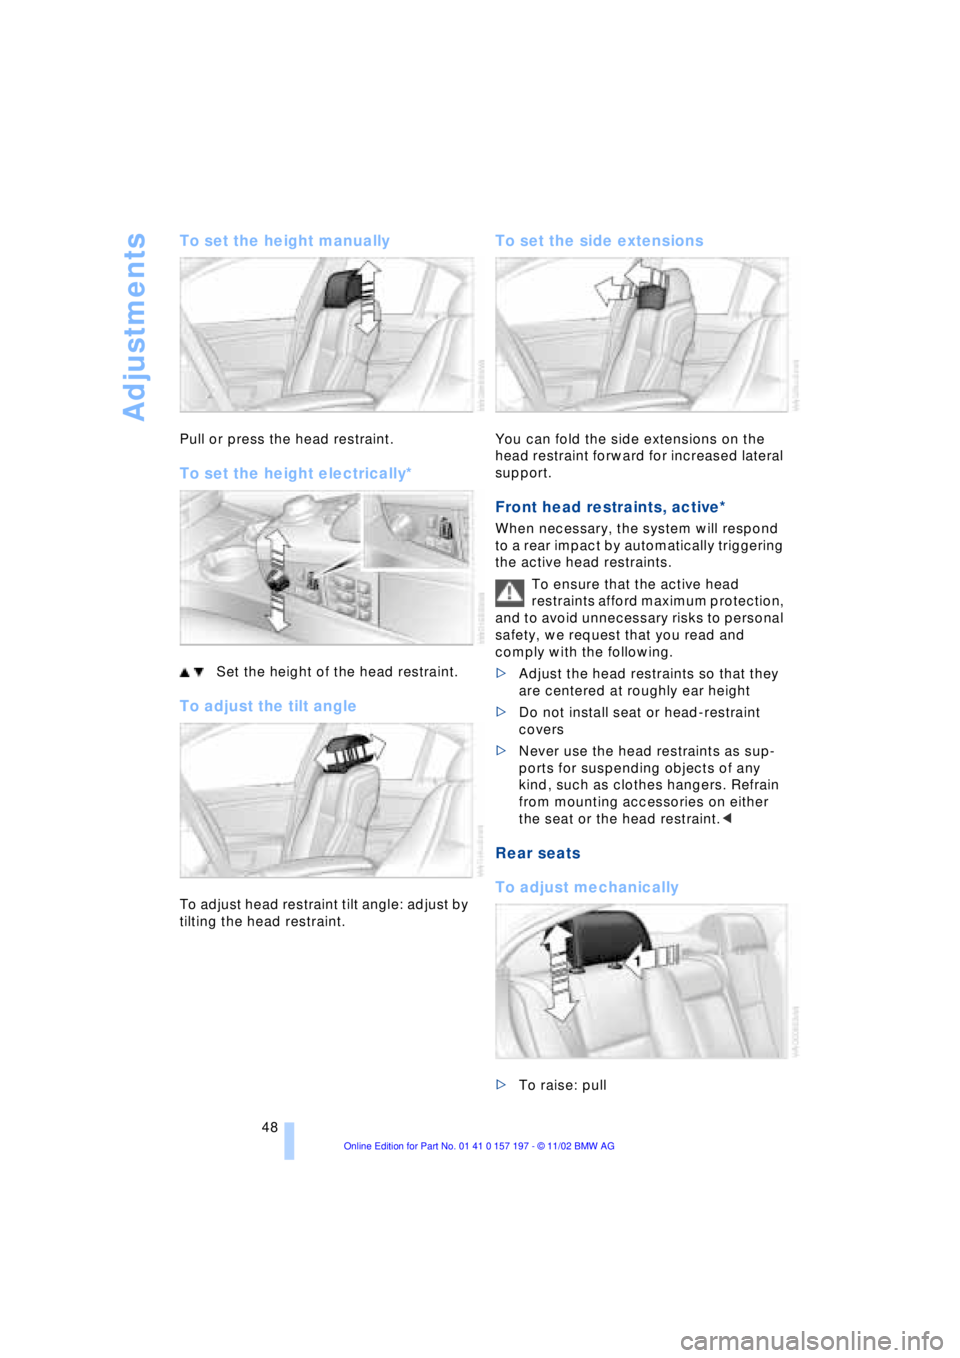
To set the height manually
Pull or press the head restraint.
To set the height electrically*
Set the height of the head restraint.
To adjust the tilt angle
To adjust head restraint tilt angle: adjust by
tilting the head restraint.
To set the side extensions
You can fold the side extensions on the
head restraint forward for increased lateral
support.
Front head restraints, active*
When necessary, the system will respond
to a rear impact by automatically triggering
the active head restraints.
To ensure that the active head
restraints afford maximum protection,
and to avoid unnecessary risks to personal
safety, we request that you read and
comply with the following.
>Adjust the head restraints so that they
are centered at roughly ear height
>Do not install seat or head-restraint
covers
>Never use the head restraints as sup-
ports for suspending objects of any
kind, such as clothes hangers. Refrain
from mounting accessories on either
the seat or the head restraint.<
Rear seats
To adjust mechanically
>To raise: pull
Page 51 of 229
At a glance
Controls
Driving tips
Communications
Navigation
Entertainment
Mobility
Reference
49
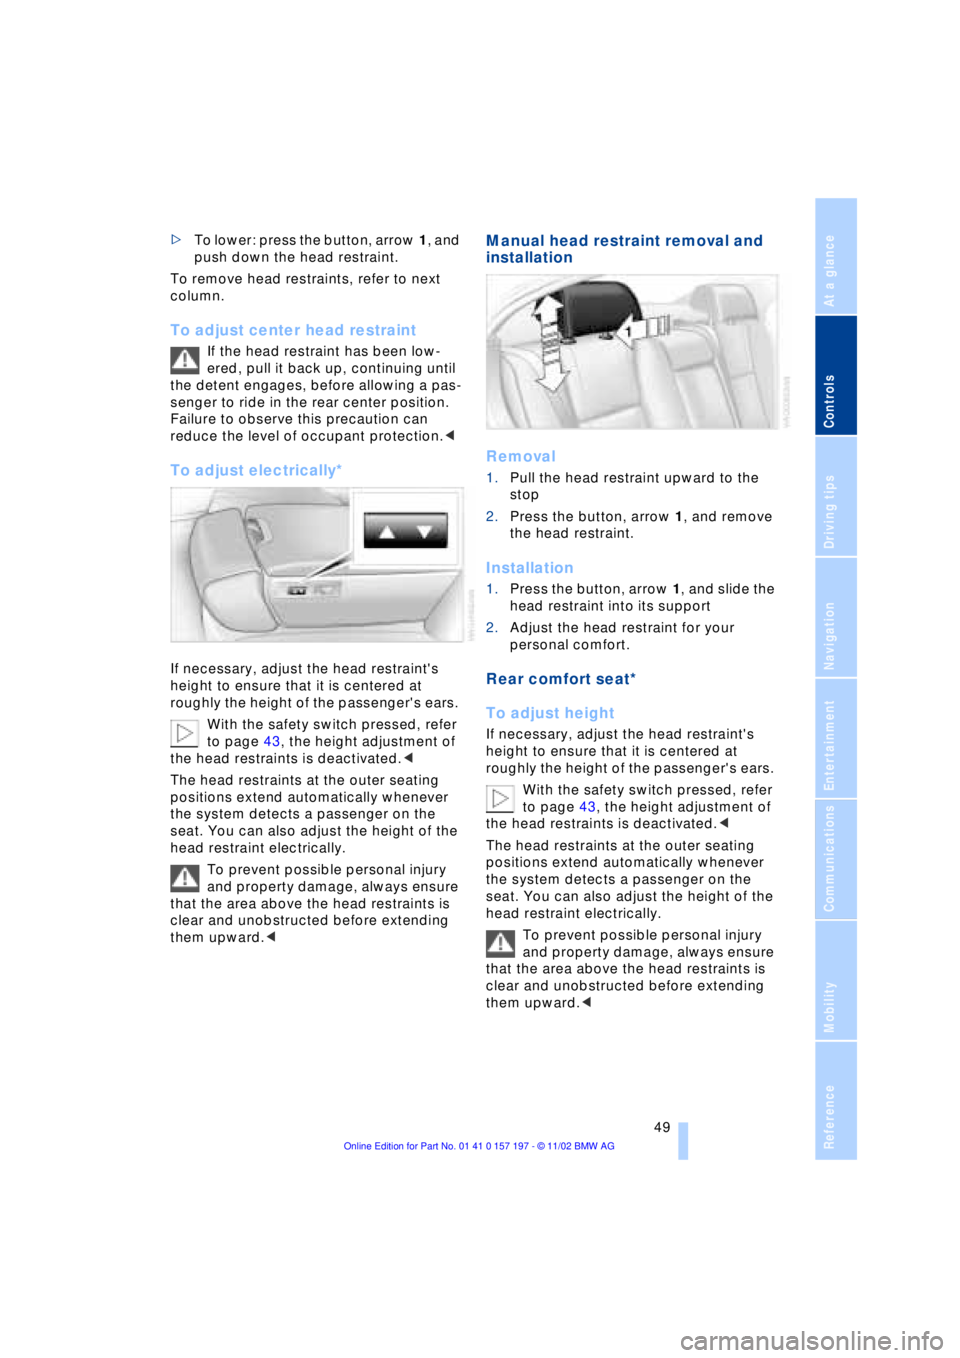
>To lower: press the button, arrow 1, and
push down the head restraint.
To remove head restraints, refer to next
column.
To adjust center head restraint
If the head restraint has been low-
ered, pull it back up, continuing until
the detent engages, before allowing a pas-
senger to ride in the rear center position.
Failure to observe this precaution can
reduce the level of occupant protection.<
To adjust electrically*
If necessary, adjust the head restraint's
height to ensure that it is centered at
roughly the height of the passenger's ears.
With the safety switch pressed, refer
to page 43, the height adjustment of
the head restraints is deactivated.<
The head restraints at the outer seating
positions extend automatically whenever
the system detects a passenger on the
seat. You can also adjust the height of the
head restraint electrically.
To prevent possible personal injury
and property damage, always ensure
that the area above the head restraints is
clear and unobstructed before extending
them upward.<
Manual head restraint removal and
installation
Removal
1.Pull the head restraint upward to the
stop
2.Press the button, arrow 1, and remove
the head restraint.
Installation
1.Press the button, arrow 1, and slide the
head restraint into its support
2.Adjust the head restraint for your
personal comfort.
Rear comfort seat*
To adjust height
If necessary, adjust the head restraint's
height to ensure that it is centered at
roughly the height of the passenger's ears.
With the safety switch pressed, refer
to page 43, the height adjustment of
the head restraints is deactivated.<
The head restraints at the outer seating
positions extend automatically whenever
the system detects a passenger on the
seat. You can also adjust the height of the
head restraint electrically.
To prevent possible personal injury
and property damage, always ensure
that the area above the head restraints is
clear and unobstructed before extending
them upward.<
Page 60 of 229
Adjustments
58 Adjust the tether strap according to the
child-restraint manufacturer's instructions.
Before installing any child-restraint
system or child seat, please read the
following:
Never install a rearward-facing child-
restraint system in the front passenger seat
of this vehicle.
Your vehicle is equipped with an airbag
supplemental restraint system for the front
passenger. Because the backrest on any
rearward-facing child-restraint system Ð of
the kind designed for infants under 1 year
and 20 Ibs. (9 kg) Ð would be within the
airbag's deployment range, you should
never mount such a system in the front
passenger seat, since the impact of the
airbag against the child restraint's backrest
could lead to serious or fatal injuries.
If it is necessary for a child Ð not an infant Ð
to ride in the front seat, certain precautions
should be taken. First, move the passenger
seat as far away from the instrument panel
as possible. This important precaution is
intended to maximize the distance
between the airbag and the child. Older
children should be tightly secured with a
safety belt, after they have outgrown a
booster seat that is appropriate for their
age, height and weight. Younger children
should be secured in an appropriate for-
ward-facing child-restraint system that has
first been properly secured with a safety
belt. Never install a rearward-facing child-
restraint system in the front passenger
seat.
We strongly urge you to carefully read and
comply with the instructions for installation
and use provided by the child-restraint's
manufacturer whenever you use such a
system.
Be sure that all occupants Ð of all ages Ð
remain properly and securely restrained at
all times. If your vehicle is equipped with
electric power seats at the rear, these will
need to be returned to their standard
adjustment setting position before a child-
restraint system is used, refer to page 47.
Always press the safety switch for the
power windows before transporting chil-
dren in the rear seats, refer to page 43. This switch also disables the power rear seat
adjustment. Incorrect or unsupervised
adjustment of the electric power seats
could lead to injuries or damage to the
child-restraint system(s) installed in the
rear.<
All rear seating positions in your vehicle
meet the recommendations of SAE J1819,
an industry-recommended practice for
securing child-restraint systems in motor
vehicles.
Child seat security
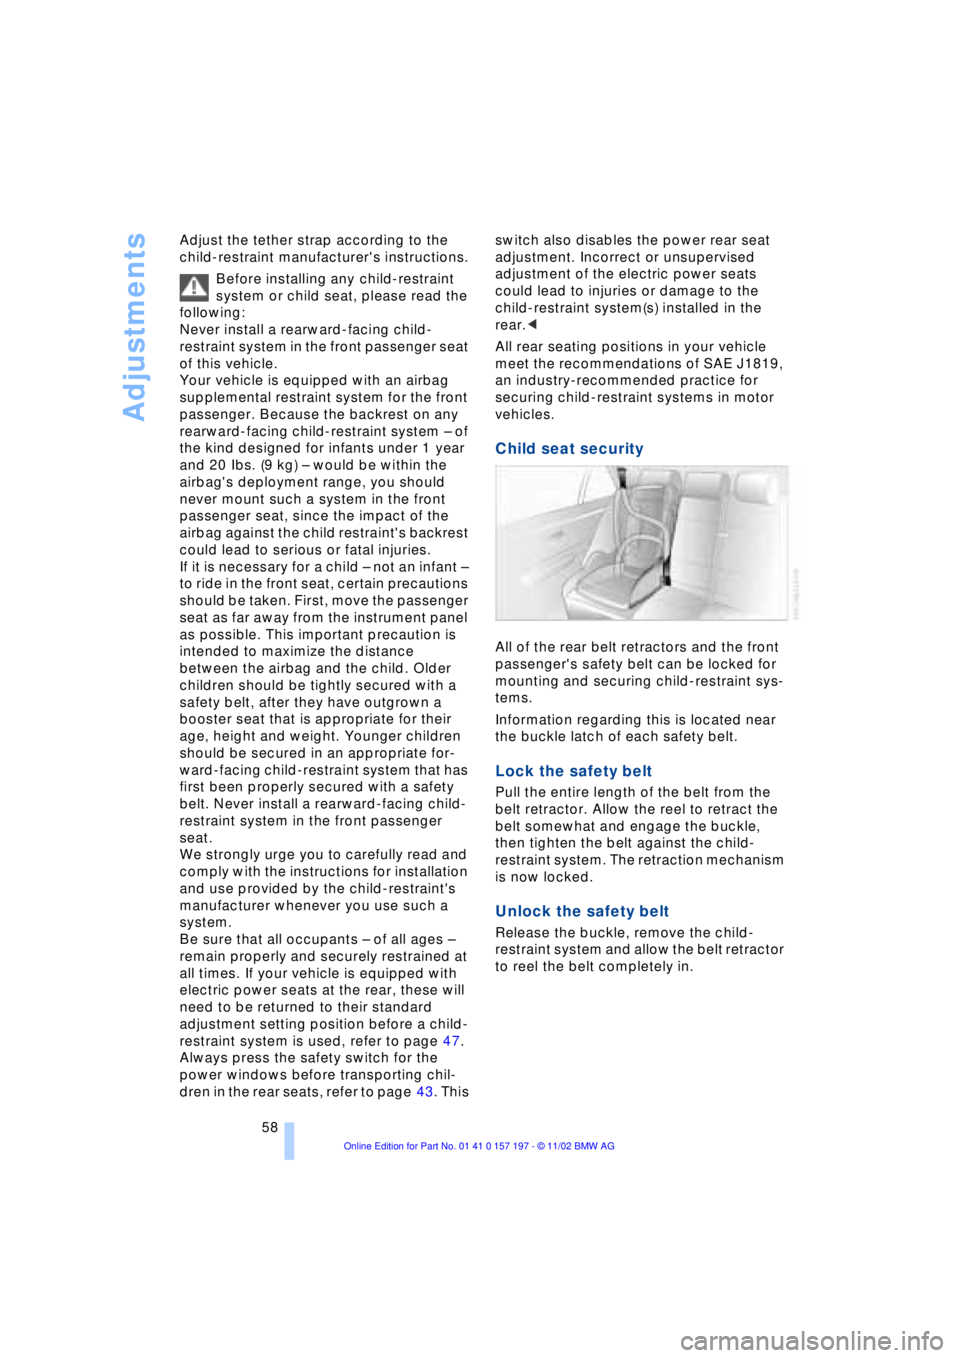
All of the rear belt retractors and the front
passenger's safety belt can be locked for
mounting and securing child-restraint sys-
tems.
Information regarding this is located near
the buckle latch of each safety belt.
Lock the safety belt
Pull the entire length of the belt from the
belt retractor. Allow the reel to retract the
belt somewhat and engage the buckle,
then tighten the belt against the child-
restraint system. The retraction mechanism
is now locked.
Unlock the safety belt
Release the buckle, remove the child-
restraint system and allow the belt retractor
to reel the belt completely in.
Page 81 of 229
At a glance
Controls
Driving tips
Communications
Navigation
Entertainment
Mobility
Reference
79
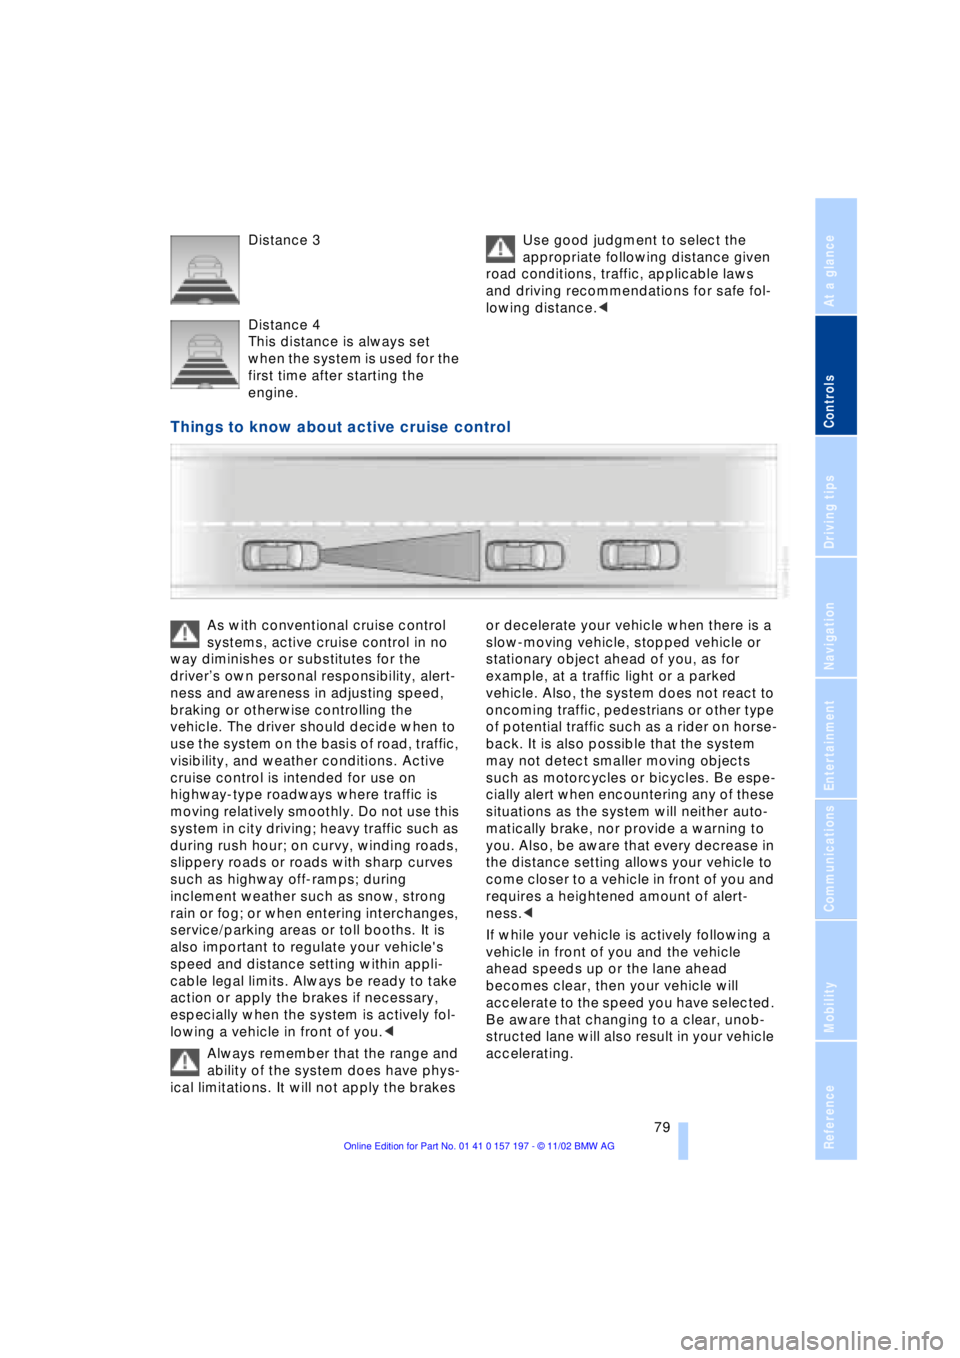
Distance 3
Distance 4
This distance is always set
when the system is used for the
first time after starting the
engine. Use good judgment to select the
appropriate following distance given
road conditions, traffic, applicable laws
and driving recommendations for safe fol-
lowing distance.<
Things to know about active cruise control
As with conventional cruise control
systems, active cruise control in no
way diminishes or substitutes for the
driverÕs own personal responsibility, alert-
ness and awareness in adjusting speed,
braking or otherwise controlling the
vehicle. The driver should decide when to
use the system on the basis of road, traffic,
visibility, and weather conditions. Active
cruise control is intended for use on
highway-type roadways where traffic is
moving relatively smoothly. Do not use this
system in city driving; heavy traffic such as
during rush hour; on curvy, winding roads,
slippery roads or roads with sharp curves
such as highway off-ramps; during
inclement weather such as snow, strong
rain or fog; or when entering interchanges,
service/parking areas or toll booths. It is
also important to regulate your vehicle's
speed and distance setting within appli-
cable legal limits. Always be ready to take
action or apply the brakes if necessary,
especially when the system is actively fol-
lowing a vehicle in front of you.<
Always remember that the range and
ability of the system does have phys-
ical limitations. It will not apply the brakes or decelerate your vehicle when there is a
slow-moving vehicle, stopped vehicle or
stationary object ahead of you, as for
example, at a traffic light or a parked
vehicle. Also, the system does not react to
oncoming traffic, pedestrians or other type
of potential traffic such as a rider on horse-
back. It is also possible that the system
may not detect smaller moving objects
such as motorcycles or bicycles. Be espe-
cially alert when encountering any of these
situations as the system will neither auto-
matically brake, nor provide a warning to
you. Also, be aware that every decrease in
the distance setting allows your vehicle to
come closer to a vehicle in front of you and
requires a heightened amount of alert-
ness.<
If while your vehicle is actively following a
vehicle in front of you and the vehicle
ahead speeds up or the lane ahead
becomes clear, then your vehicle will
accelerate to the speed you have selected.
Be aware that changing to a clear, unob-
structed lane will also result in your vehicle
accelerating.
Page 191 of 229
At a glance
Controls
Driving tips
Communications
Navigation
Entertainment
Mobility
Reference
189
Under the hood
Hood
Releasing
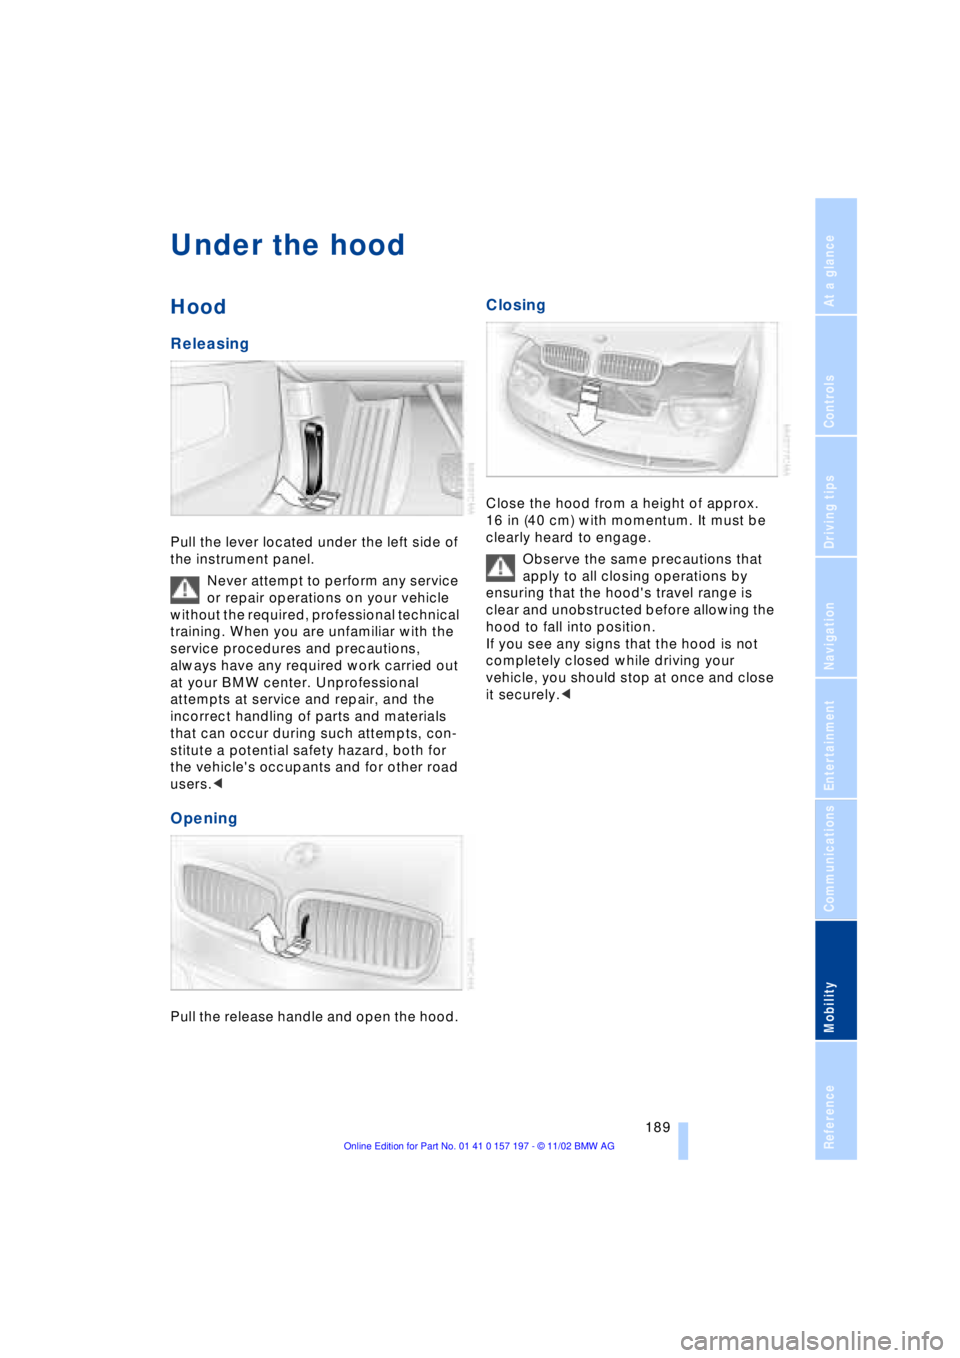
Pull the lever located under the left side of
the instrument panel.
Never attempt to perform any service
or repair operations on your vehicle
without the required, professional technical
training. When you are unfamiliar with the
service procedures and precautions,
always have any required work carried out
at your BMW center. Unprofessional
attempts at service and repair, and the
incorrect handling of parts and materials
that can occur during such attempts, con-
stitute a potential safety hazard, both for
the vehicle's occupants and for other road
users.<
Opening
Pull the release handle and open the hood.
Closing
Close the hood from a height of approx.
16 in (40 cm) with momentum. It must be
clearly heard to engage.
Observe the same precautions that
apply to all closing operations by
ensuring that the hood's travel range is
clear and unobstructed before allowing the
hood to fall into position.
If you see any signs that the hood is not
completely closed while driving your
vehicle, you should stop at once and close
it securely.<
Page 200 of 229
Replacing components
198 behind a guardrail.
If a warning triangle or portable hazard
warning lamp is required, set it up on the
roadside at an appropriate distance from
the rear of the vehicle. Comply with all
safety guidelines and regulations.
Change the wheel only on a level, firm sur-
face which is not slippery. The vehicle or
the jack could slip to the side if you attempt
to raise the vehicle on a soft or slippery sur-
face such as snow, ice, tiles, etc.
Position the jack on a firm support surface.
Do not use a wooden block or similar
object as a support base for the jack, as
this would prevent it from extending to its
full support height and reduce its load-
carrying capacity.
To avoid serious or fatal injury: never lie
under the vehicle, and never start the
engine while it is supported by the jack.<
What you will need
To avoid rattling noises, note the positions
of the tools before removing them, then
return them to their initial positions after
completing work.
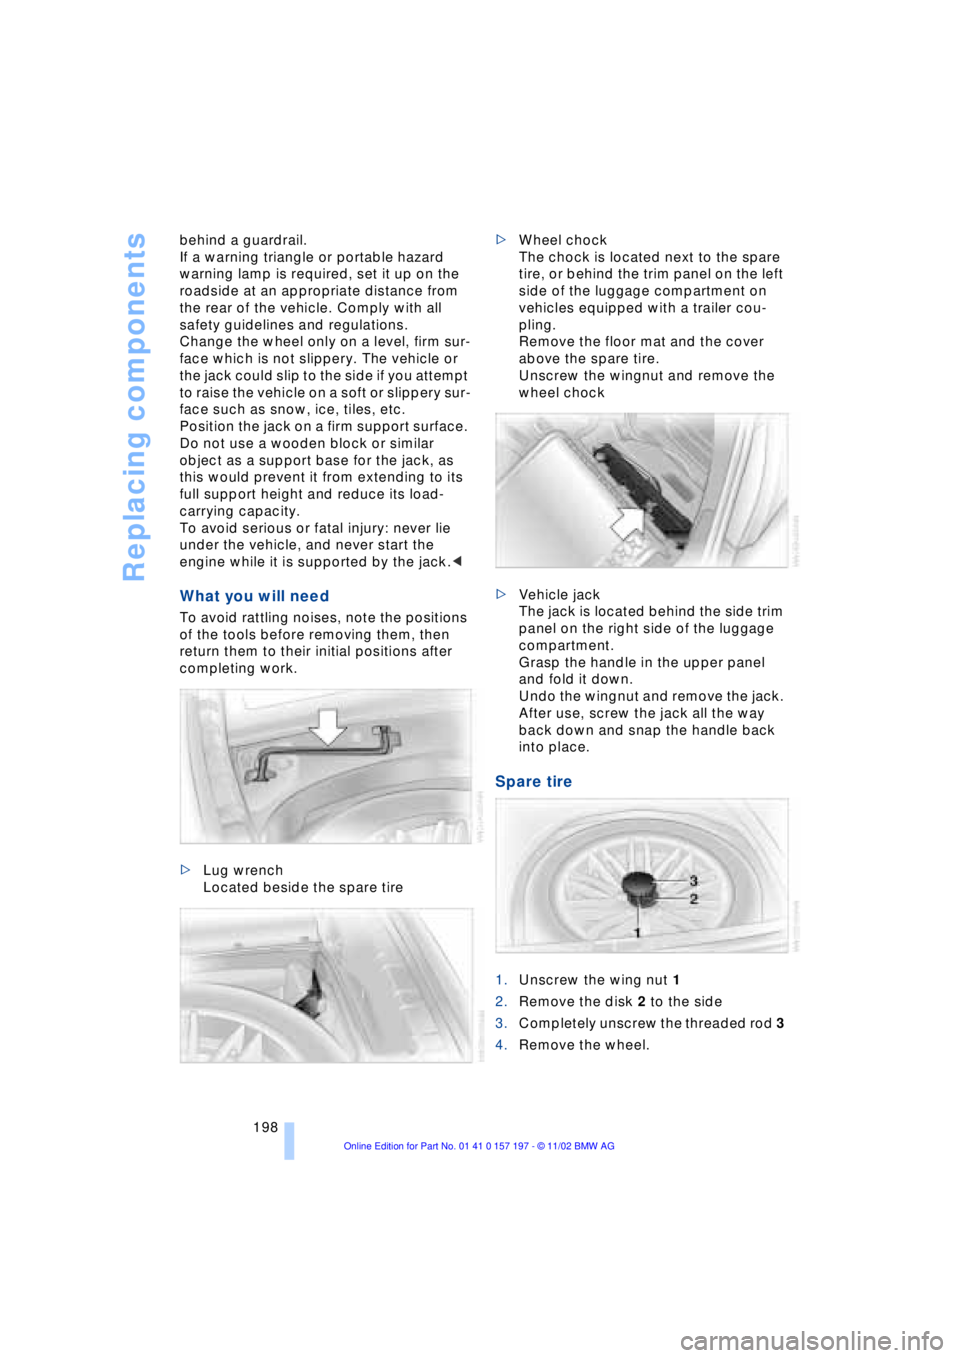
>Lug wrench
Located beside the spare tire >Wheel chock
The chock is located next to the spare
tire, or behind the trim panel on the left
side of the luggage compartment on
vehicles equipped with a trailer cou-
pling.
Remove the floor mat and the cover
above the spare tire.
Unscrew the wingnut and remove the
wheel chock
>Vehicle jack
The jack is located behind the side trim
panel on the right side of the luggage
compartment.
Grasp the handle in the upper panel
and fold it down.
Undo the wingnut and remove the jack.
After use, screw the jack all the way
back down and snap the handle back
into place.
Spare tire
1.Unscrew the wing nut 1
2.Remove the disk 2 to the side
3.Completely unscrew the threaded rod 3
4.Remove the wheel.