2003 BMW 760LI SEDAN light
[x] Cancel search: lightPage 5 of 229
At a glance
Operation
Driving tips
Communications
Navigation
Entertainment
Mobility
Reference
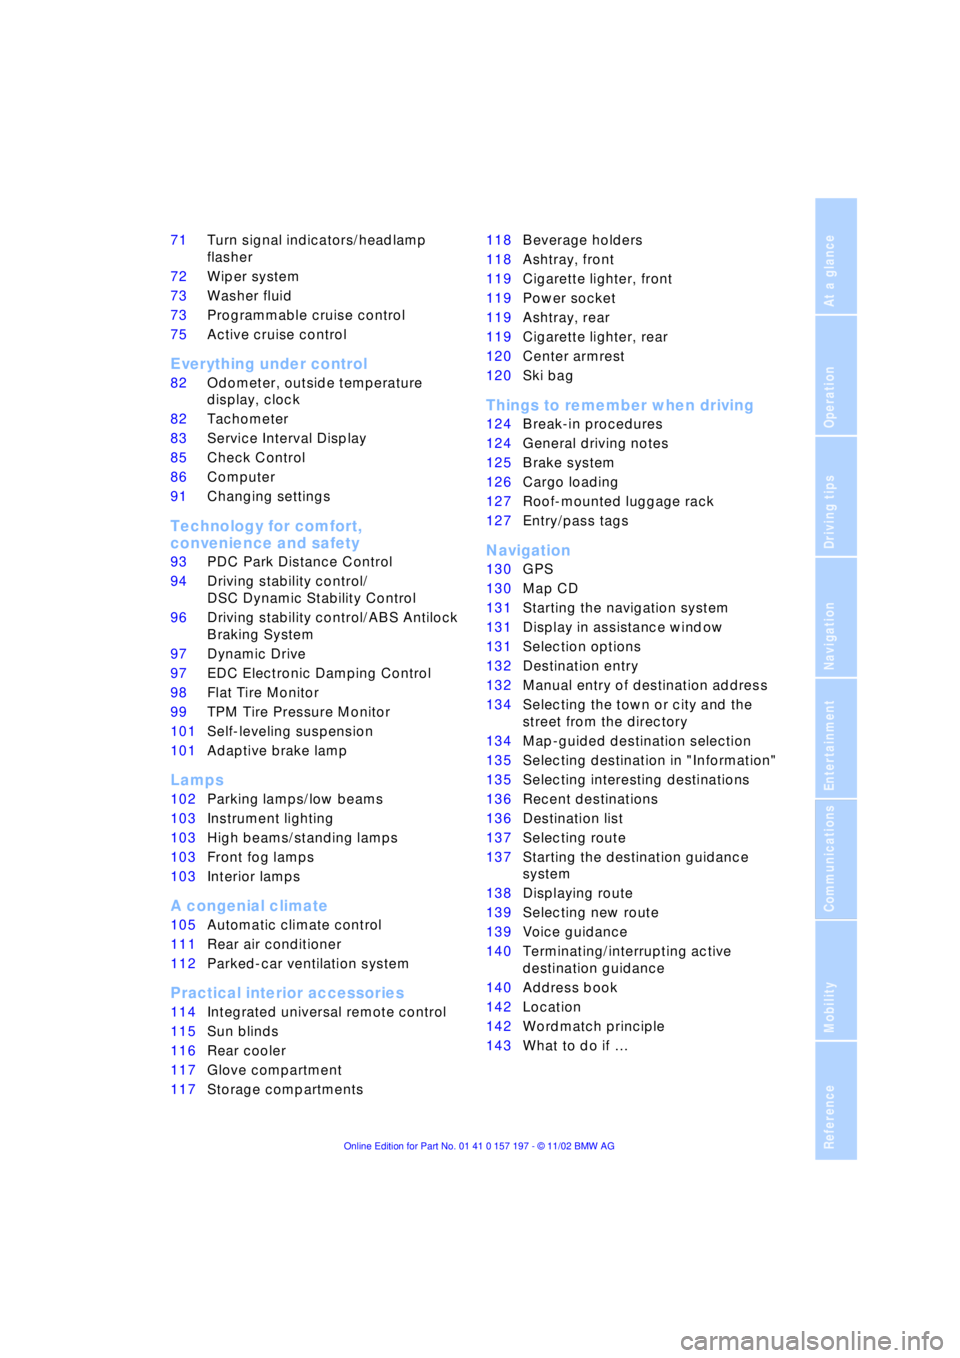
71Turn signal indicators/headlamp
flasher
72Wiper system
73Washer fluid
73Programmable cruise control
75Active cruise control
*
Everything under control
82Odometer, outside temperature
display, clock
82Tachometer
83Service Interval Display
85Check Control
86Computer
91Changing settings
Technology for comfort,
convenience and safety
93PDC Park Distance Control
*
94Driving stability control/
DSC Dynamic Stability Control
96Driving stability control/ABS Antilock
Braking System
97Dynamic Drive
97EDC Electronic Damping Control
*
98Flat Tire Monitor
*
99TPM Tire Pressure Monitor
*
101Self-leveling suspension
*
101Adaptive brake lamp
Lamps
102Parking lamps/low beams
103Instrument lighting
103High beams/standing lamps
103Front fog lamps
103Interior lamps
A congenial climate
105Automatic climate control
111Rear air conditioner
*
112Parked-car ventilation system
Practical interior accessories
114Integrated universal remote control
*
115Sun blinds
*
116Rear cooler
*
117Glove compartment
117Storage compartments118Beverage holders
118Ashtray, front
119Cigarette lighter, front
119Power socket
119Ashtray, rear
119Cigarette lighter, rear
120Center armrest
120Ski bag
*
Things to remember when driving
124Break-in procedures
124General driving notes
125Brake system
126Cargo loading
127Roof-mounted luggage rack
*
127Entry/pass tags
Navigation
130GPS
130Map CD
131Starting the navigation system
131Display in assistance window
*
131Selection options
132Destination entry
132Manual entry of destination address
134Selecting the town or city and the
street from the directory
134Map-guided destination selection
135Selecting destination in "Information"
135Selecting interesting destinations
136Recent destinations
136Destination list
137Selecting route
137Starting the destination guidance
system
138Displaying route
139Selecting new route
139Voice guidance
140Terminating/interrupting active
destination guidance
140Address book
142Location
142Wordmatch principle
143What to do if É
Page 14 of 229
Cockpit
12
Cockpit
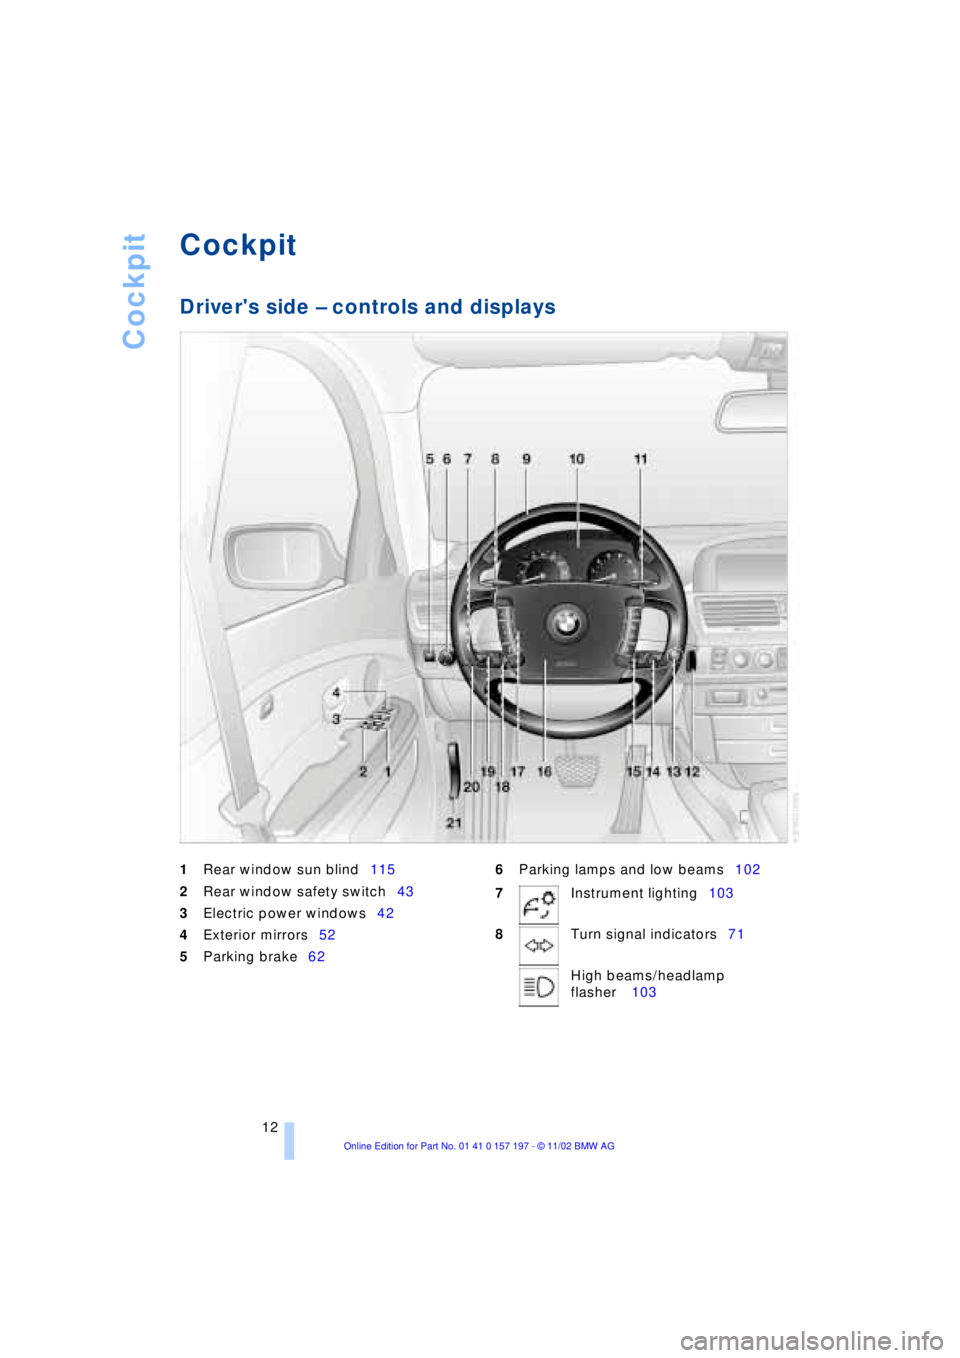
Driver's side Ð controls and displays
1
Rear window sun blind115
2
Rear window safety switch43
3Electric power windows42
4Exterior mirrors52
5Parking brake626Parking lamps and low beams102
7Instrument lighting103
8Turn signal indicators71
High beams/headlamp
flasher 103
Page 17 of 229
At a glance
Controls
Driving tips
Communications
Navigation
Entertainment
Mobility
Reference
15
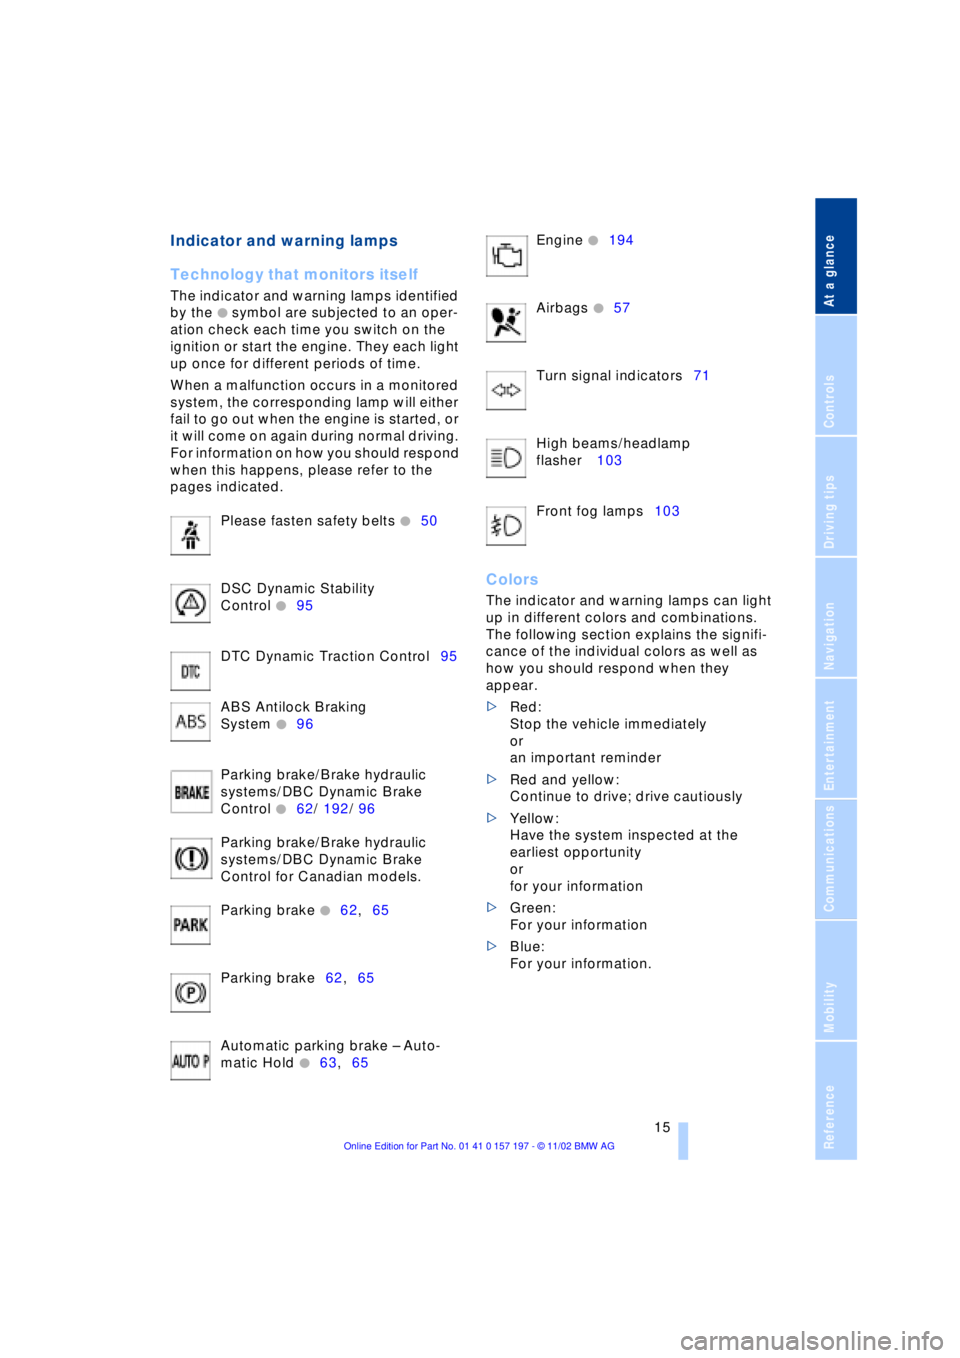
Indicator and warning lamps
Technology that monitors itself
The indicator and warning lamps identified
by the
+ symbol are subjected to an oper-
ation check each time you switch on the
ignition or start the engine. They each light
up once for different periods of time.
When a malfunction occurs in a monitored
system, the corresponding lamp will either
fail to go out when the engine is started, or
it will come on again during normal driving.
For information on how you should respond
when this happens, please refer to the
pages indicated.
Please fasten safety belts
+50
DSC Dynamic Stability
Control
+95
DTC Dynamic Traction Control95
ABS Antilock Braking
System
+96
Parking brake/Brake hydraulic
systems/DBC Dynamic Brake
Control
+62/ 192/ 96
Parking brake/Brake hydraulic
systems/DBC Dynamic Brake
Control for Canadian models.
Parking brake
+62,65
Parking brake62,65
Automatic parking brake Ð Auto-
matic Hold
+63,65 Engine
+194
Airbags
+57
Turn signal indicators71
High beams/headlamp
flasher 103
Front fog lamps103
Colors
The indicator and warning lamps can light
up in different colors and combinations.
The following section explains the signifi-
cance of the individual colors as well as
how you should respond when they
appear.
>Red:
Stop the vehicle immediately
or
an important reminder
>Red and yellow:
Continue to drive; drive cautiously
>Yellow:
Have the system inspected at the
earliest opportunity
or
for your information
>Green:
For your information
>Blue:
For your information.
Page 22 of 229
Control Center
20
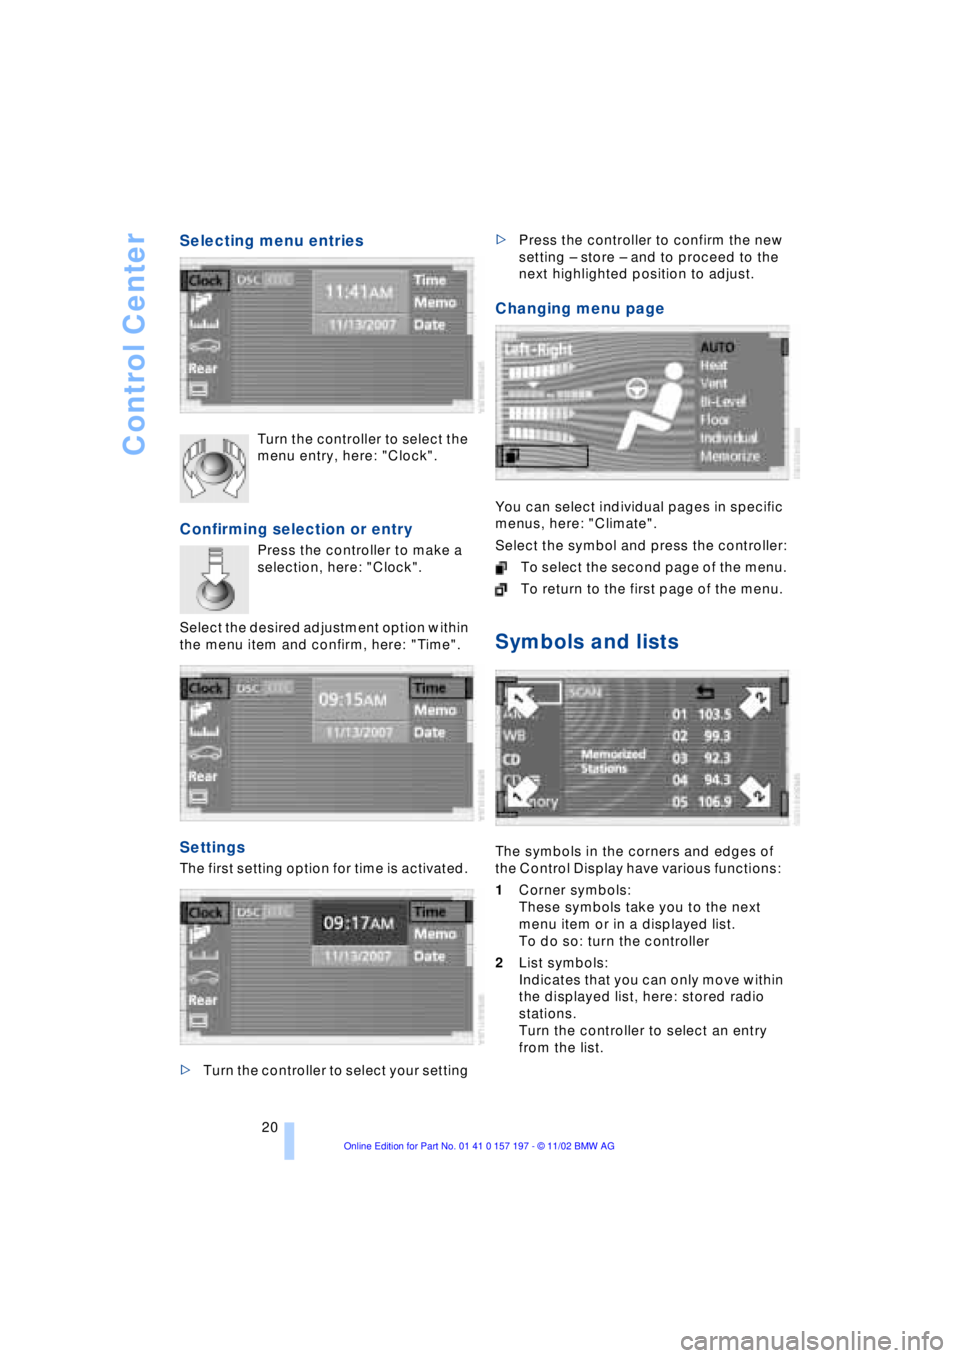
Selecting menu entries
Turn the controller to select the
menu entry, here: "Clock".
Confirming selection or entry
Press the controller to make a
selection, here: "Clock".
Select the desired adjustment option within
the menu item and confirm, here: "Time".
Settings
The first setting option for time is activated.
>Turn the controller to select your setting >Press the controller to confirm the new
setting Ð store Ð and to proceed to the
next highlighted position to adjust.
Changing menu page
You can select individual pages in specific
menus, here: "Climate".
Select the symbol and press the controller:
To select the second page of the menu.
To return to the first page of the menu.
Symbols and lists
The symbols in the corners and edges of
the Control Display have various functions:
1Corner symbols:
These symbols take you to the next
menu item or in a displayed list.
To do so: turn the controller
2List symbols:
Indicates that you can only move within
the displayed list, here: stored radio
stations.
Turn the controller to select an entry
from the list.
Page 40 of 229
Opening and closing
38 You can also have the system pro-
grammed to activate the central
locking system automatically whenever the
vehicle is set in motion, or when a specific
interval elapses after it is unlocked, pro-
vided that neither the doors nor the lug-
gage compartment lid are opened in the
meantime. This can be adjusted to be key-
specific.<
Unlocking and opening the doors
>Either unlock the doors together with
the button for the central locking
system and then pull the release handle
above the armrest or
>pull the release handle for each door
twice: the first pull unlocks the door,
and the second one opens it.
When the low beams are switched on,
the interior door handles are also
lighted. The intensity of the lighting is
adjusted using the instrument lighting, refer
to page 103.<
Engaging the locks
>Use the central locking button to lock all
of the doors simultaneously,
or
>press the individual safety lock buttons
down. To prevent the driver from being
inadvertently locked out of the vehicle,
the lock button on the driver's door
automatically extends again after a brief
period if the door remains open.
Do not use the safety lock buttons to
engage the locks during driving, as
they would then fail to disengage automat-
ically in the event of an accident.
Because any persons or animals left unat-
tended in a parked vehicle could lock the
doors from the inside, you should always
keep the remote control unit with you; this
precaution ensures that you will remain
able to unlock the vehicle from the outside
at all times. <
Doors
Soft Close Automatic*
Apply gentle pressure to the door to close
it. The closing process will then be carried
out automatically.
To avoid injuries, ensure that the
door's travel path is completely free
and clear before closing.<
Luggage compartment lid
Opening from outside
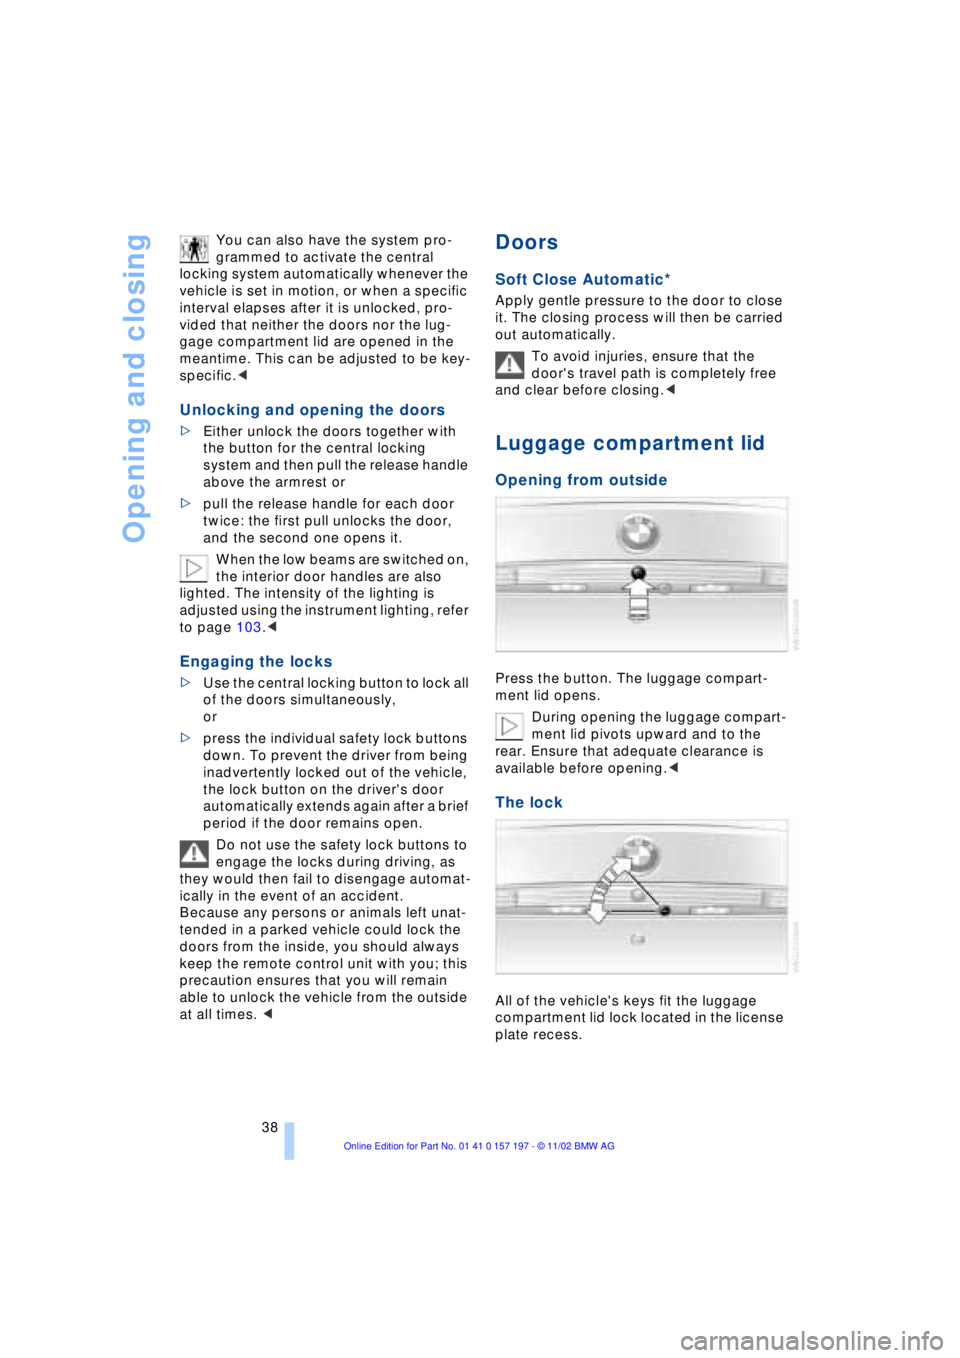
Press the button. The luggage compart-
ment lid opens.
During opening the luggage compart-
ment lid pivots upward and to the
rear. Ensure that adequate clearance is
available before opening.<
The lock
All of the vehicle's keys fit the luggage
compartment lid lock located in the license
plate recess.
Page 44 of 229
Opening and closing
42 Lock, i.e. arm by pressing twice; press
button 2of the remote control
twice in succession, refer to page 36, or
lock twice with the key, refer to page 37.
The indicator lamp lights up briefly and
then flashes continuously. The tilt alarm
sensor and the interior motion sensor are
switched off as long as the system is
armed.
If you desire, the
>tilt alarm sensor
>interior motion sensor
can be switched off permanently. Please
contact your BMW center for assistance.<
Interior motion sensor
In order for the interior motion sensor to
function properly, the windows and sliding/
tilt sunroof must be completely closed.
Be sure to deactivate the interior motion
sensor, refer to section on Avoiding unin-
tentional alarms, when you wish to leave
the windows or sliding/tilt sunroof open.
Electric power windows
Opening and closing windows
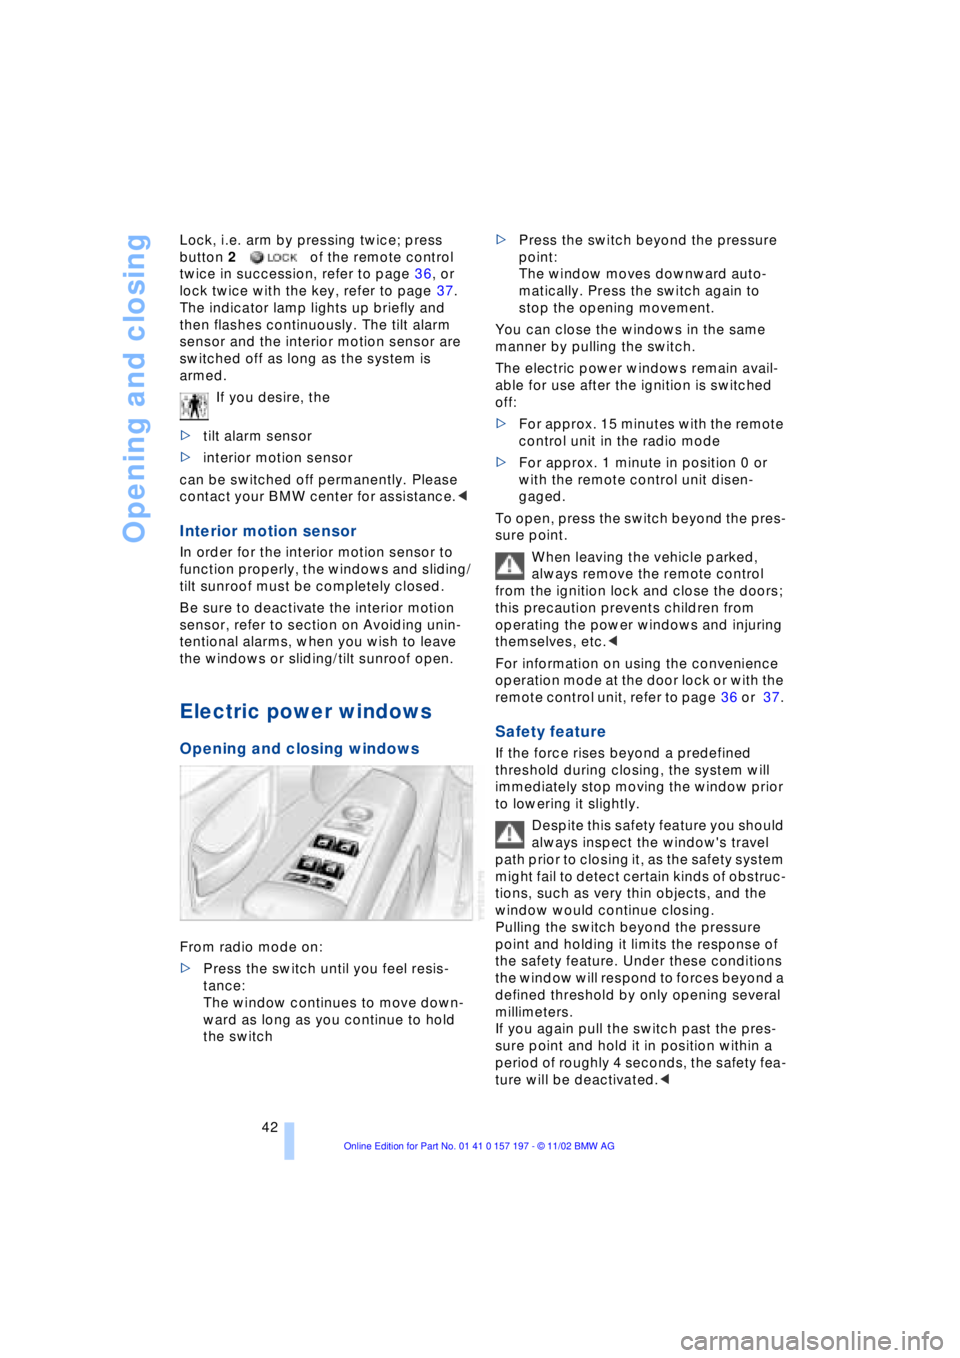
From radio mode on:
>Press the switch until you feel resis-
tance:
The window continues to move down-
ward as long as you continue to hold
the switch >Press the switch beyond the pressure
point:
The window moves downward auto-
matically. Press the switch again to
stop the opening movement.
You can close the windows in the same
manner by pulling the switch.
The electric power windows remain avail-
able for use after the ignition is switched
off:
>For approx. 15 minutes with the remote
control unit in the radio mode
>For approx. 1 minute in position 0 or
with the remote control unit disen-
gaged.
To open, press the switch beyond the pres-
sure point.
When leaving the vehicle parked,
always remove the remote control
from the ignition lock and close the doors;
this precaution prevents children from
operating the power windows and injuring
themselves, etc.<
For information on using the convenience
operation mode at the door lock or with the
remote control unit, refer to page 36 or 37.
Safety feature
If the force rises beyond a predefined
threshold during closing, the system will
immediately stop moving the window prior
to lowering it slightly.
Despite this safety feature you should
always inspect the window's travel
path prior to closing it, as the safety system
might fail to detect certain kinds of obstruc-
tions, such as very thin objects, and the
window would continue closing.
Pulling the switch beyond the pressure
point and holding it limits the response of
the safety feature. Under these conditions
the window will respond to forces beyond a
defined threshold by only opening several
millimeters.
If you again pull the switch past the pres-
sure point and hold it in position within a
period of roughly 4 seconds, the safety fea-
ture will be deactivated.<
Page 45 of 229
At a glance
Controls
Driving tips
Communications
Navigation
Entertainment
Mobility
Reference
43
When you close the windows they will
slow down as they approach the end
of their travel; this is to allow the safety fea-
ture to respond more precisely to any
obstructions encountered in this critical
range.<
Safety switch
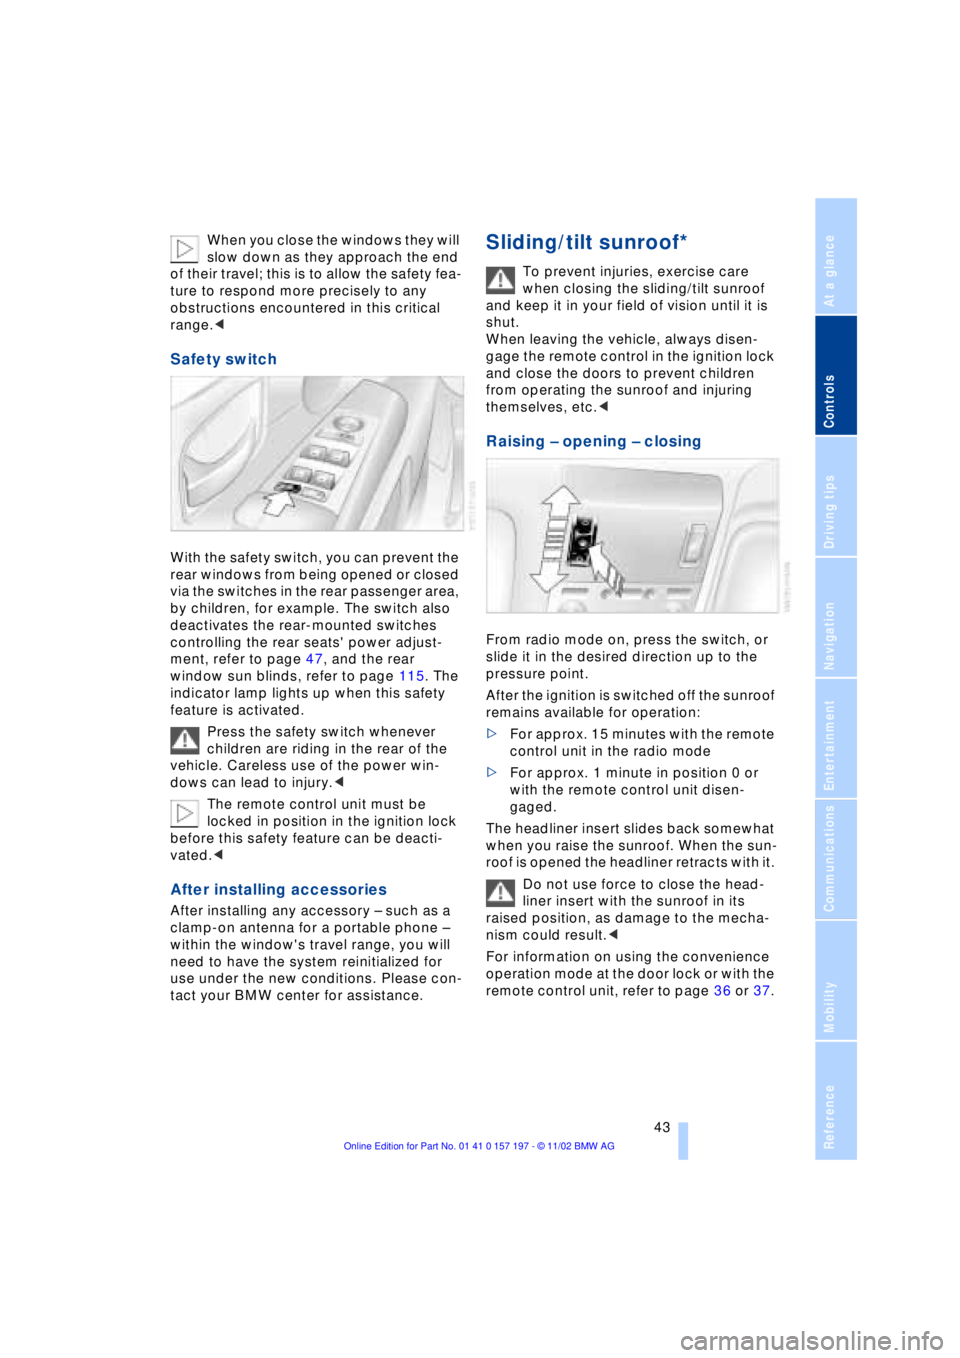
With the safety switch, you can prevent the
rear windows from being opened or closed
via the switches in the rear passenger area,
by children, for example. The switch also
deactivates the rear-mounted switches
controlling the rear seats' power adjust-
ment, refer to page 47, and the rear
window sun blinds, refer to page 115. The
indicator lamp lights up when this safety
feature is activated.
Press the safety switch whenever
children are riding in the rear of the
vehicle. Careless use of the power win-
dows can lead to injury.<
The remote control unit must be
locked in position in the ignition lock
before this safety feature can be deacti-
vated.<
After installing accessories
After installing any accessory Ð such as a
clamp-on antenna for a portable phone Ð
within the window's travel range, you will
need to have the system reinitialized for
use under the new conditions. Please con-
tact your BMW center for assistance.
Sliding/tilt sunroof*
To prevent injuries, exercise care
when closing the sliding/tilt sunroof
and keep it in your field of vision until it is
shut.
When leaving the vehicle, always disen-
gage the remote control in the ignition lock
and close the doors to prevent children
from operating the sunroof and injuring
themselves, etc.<
Raising Ð opening Ð closing
From radio mode on, press the switch, or
slide it in the desired direction up to the
pressure point.
After the ignition is switched off the sunroof
remains available for operation:
>For approx. 15 minutes with the remote
control unit in the radio mode
>For approx. 1 minute in position 0 or
with the remote control unit disen-
gaged.
The headliner insert slides back somewhat
when you raise the sunroof. When the sun-
roof is opened the headliner retracts with it.
Do not use force to close the head-
liner insert with the sunroof in its
raised position, as damage to the mecha-
nism could result.<
For information on using the convenience
operation mode at the door lock or with the
remote control unit, refer to page 36 or 37.
Page 46 of 229
Opening and closing
44
Automatic* opening and closing
Press the switch past the pressure point
and then release it.
In addition, the following response is also
automatic:
With the sunroof open, press the switch in
the Raise direction: the sunroof rises to its
tilt-up end position.
Press the switch again in any direction to
stop the sunroof.
The automatic opening feature in the
Raise direction can be deactivated.
Please contact your BMW center for assis-
tance.<
Safety feature
If the sliding/tilt sunroof encounters resis-
tance
>when it is closing from the raised posi-
tion
>when it is closing from a point roughly
past the middle of its travel,
the closing cycle is interrupted and the
sliding/tilt sunroof will open again slightly.
Despite this safety feature you should
always inspect the sunroof's travel
range prior to closing it, as the safety fea-
ture might fail to detect certain kinds of
obstructions, such as very thin objects, and
the sunroof would continue closing.
Pressing the switch beyond the pressure
point and holding it limits the response of
the safety feature. The sunroof only opens
a short distance.
If you again press the switch past the pres-
sure point and hold it in position within
about 1.5 seconds, the safety feature will
be deactivated.<
When you close the sliding/tilt sun-
roof it will slow down as it approaches
the end of its travel path; this is to allow the
safety feature to respond more precisely to
any obstructions encountered in this crit-
ical range.<
Following interruptions in electrical
power supply
Following interruptions in electrical power,
for instance, when the battery is discon-
nected, it is possible that the sliding/tilt
sunroof will extend to its tilt-up position,
but fail to respond to other commands.
Should this occur, please have the sunroof
reinitialized at your BMW center.
Malfunctions
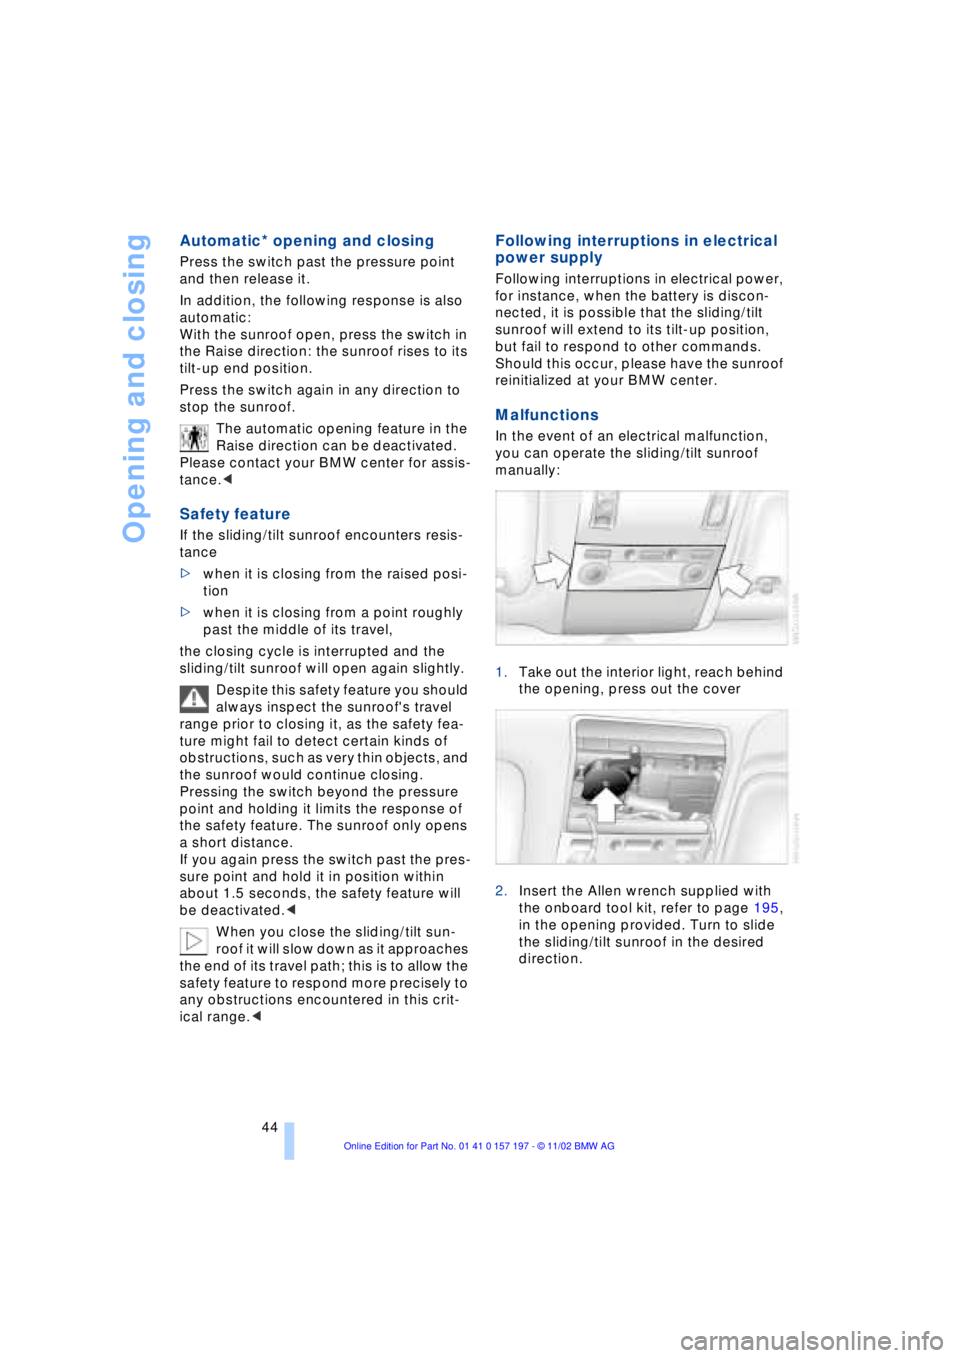
In the event of an electrical malfunction,
you can operate the sliding/tilt sunroof
manually:
1.Take out the interior light, reach behind
the opening, press out the cover
2.Insert the Allen wrench supplied with
the onboard tool kit, refer to page 195,
in the opening provided. Turn to slide
the sliding/tilt sunroof in the desired
direction.