2003 BMW 760LI SEDAN buttons
[x] Cancel search: buttonsPage 4 of 229
Contents
Contents
Notes
6Using this Owner's Manual
6Symbols used
7The individual vehicle
7Editorial notice
8For your own safety
9Service and warranty
9Reporting safety defects
Cockpit
12Driver's side Ð controls and displays
16Comfort and convenience Ð controls
and displays
18Buttons in steering wheel
Control Center
19The concept
19Controller
19Control Display
20Symbols and lists
22Menus in Control Display
23Assistance window
*
24Top and bottom status lines
24Control Center in rear
*
Voice command
26Voice command system
26Voice commands
28Notices
28The notebook
29Short commands
Opening and closing
34Key/remote control
35Central locking system
35Opening and closing Ð from outside 37Opening and closing Ð from inside
38Doors
38Luggage compartment lid
40Luggage compartment
41Alarm system
42Electric power windows
43Sliding/tilt sunroof
*
Adjustments
45Sit safely
45Seats
47Head restraints
50Safety belts
51Heated seats
*
51Active seat ventilation
*
52Active seat
*
52Mirrors
53Steering wheel adjustment
54Seat, mirror and steering wheel
memory
55Airbags
57Transporting children safely
59LATCH
*
child-restraint system
59Child-safety locks
60Vehicle Memory, Key Memory
Driving
61Ignition lock
62Starting the engine
62Switching off the engine
62Parking brake
67Automatic transmission with L mode
69Automatic transmission with
Steptronic
*
© 2002 Bayerische Motoren Werke
Aktiengesellschaft
Munich, Germany
Reprinting, including excerpts, only with
the written consent of BMW AG, Munich.
Order No. 01 41 0 157 197
US English XII/2002, 6 096
Printed in Germany
Printed on environmentally friendly paper
Ð bleached without chlorine, suitable for
recycling.
Page 6 of 229
Contents
Entertainment
146Controls
146Care instructions
147Switching on/off
147Using with ignition off
147Volume adjustment
147Tone control
Radio
149Starting
149Stopping
149Selecting frequency band
150Selecting a station
150Storing and retrieving a station
151Weather Band
CD Compact Disc
153Starting
153Stopping
154Searching for music tracks in the
Control Display
154Using the buttons to search for music
tracks
CD changer
156Starting
156Stopping
156Status displays
157Searching for music tracks in the
Control Display
157Using the buttons to search for music
tracks
Cassette
158Starting
158Stopping
158Selecting side A or B
158Switching "Booktape" on/off
158Noise suppression
159Searching for music tracks
TV
160Starting
160Stopping
160Storing programs
160Selecting programs
161Adjusting the picture
*
161Selecting standard
DVD changer
164Care instructions
164Starting
164Stopping
164Status displays
164DVD control
165Selecting a track
166Chapter search
166Adjusting picture
166Freezing frame
166Selecting picture format
166Selecting language, subtitles and
viewing angle
167Opening DVD-specific menu
Using the phone in your vehicle
170Safety notice
171Care instructions
171Controls
172Telephone keypad, folding
173Hands-free system
173Making an SOS call
174Telephoning with the
car phone
174Using the BMW portable phone
174Getting started
175Telephone directory
176Selecting a number from the Top 8 list
176Redialing
176Missed calls
BMW Assist
178Requirements
178Roadside Assistance of the BMW
Group
Refueling
182Fuel filler door
183Fuel specifications
Wheels and tires
184Tire inflation pressure
186Tire condition
186Tire replacement
187Wheel and tire combinations
Page 13 of 229
At a glance
This overview of buttons, switches and
displays is intended to serve as a source
of orientation in your vehicle's operating
environment. The section will also assist
you in becoming acquainted with the
control concepts and options available for
operating the various systems.
Page 20 of 229
Cockpit
18
Buttons in steering wheel
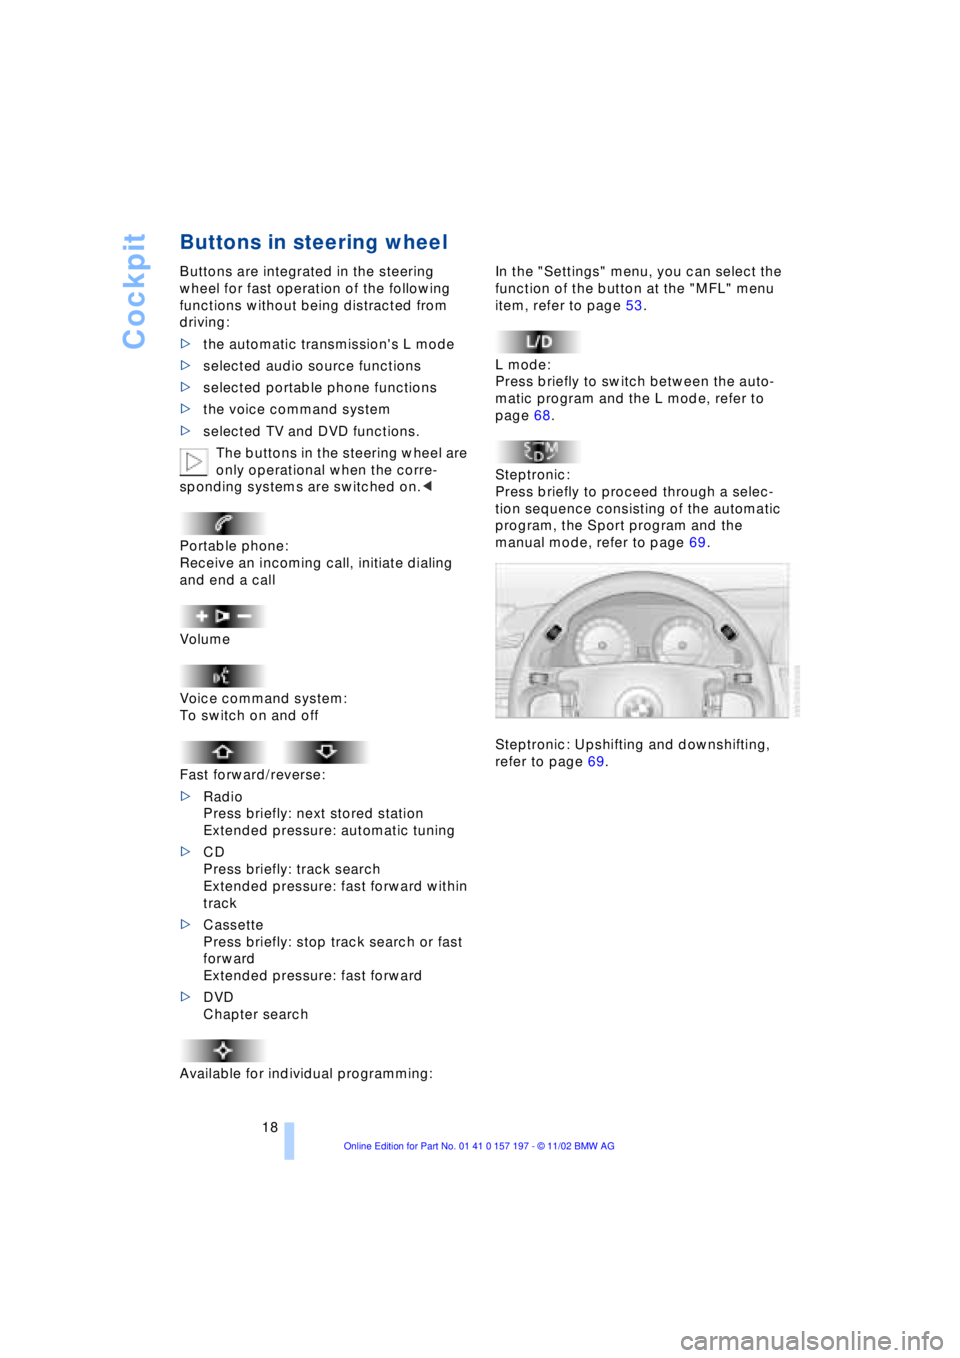
Buttons are integrated in the steering
wheel for fast operation of the following
functions without being distracted from
driving:
>the automatic transmission's L mode
>selected audio source functions
>selected portable phone functions
>the voice command system
>selected TV and DVD functions.
The buttons in the steering wheel are
only operational when the corre-
sponding systems are switched on.<
Portable phone:
Receive an incoming call, initiate dialing
and end a call
Volume
Voice command system:
To switch on and off
Fast forward/reverse:
>Radio
Press briefly: next stored station
Extended pressure: automatic tuning
>CD
Press briefly: track search
Extended pressure: fast forward within
track
>Cassette
Press briefly: stop track search or fast
forward
Extended pressure: fast forward
>DVD
Chapter search
Available for individual programming:
In the "Settings" menu, you can select the
function of the button at the "MFL" menu
item, refer to page 53.
L mode:
Press briefly to switch between the auto-
matic program and the L mode, refer to
page 68.
Steptronic:
Press briefly to proceed through a selec-
tion sequence consisting of the automatic
program, the Sport program and the
manual mode, refer to page 69.
Steptronic: Upshifting and downshifting,
refer to page 69.
Page 37 of 229

At a glance
Controls
Driving tips
Communications
Navigation
Entertainment
Mobility
Reference
35
Press lock button 1, slide up the cover and
insert the spare key 2 in the adapter. Close
the cover and insert the adapter in the igni-
tion lock.
Central locking system
The concept
The central locking system is ready for
operation whenever the driver's door is
closed. This simultaneously engages and
releases the locks on the following:
>Doors
>Luggage compartment lid
>Fuel filler door.
The central locking system can be oper-
ated from the outside
>via the remote control
>via the driver's door lock
and from inside via the button for the
central locking system.
When the system is locked from inside, the
fuel filler door remains unlocked. Refer to
page 37.
The anti-theft system is automatically acti-
vated whenever you activate the central
locking system from outside the vehicle.
The alarm system is armed/disarmed at the
same time.
In the event of an accident, the central
locking system unlocks automatically Ð only
those doors which were not locked sepa-
rately with the safety lock buttons, refer to
page 38. In addition, the hazard warning
flashers and interior lamps come on.
Opening and closing Ð from
outside
Using the remote control
When you engage/release the vehicle's
locks, you simultaneously activate/deacti-
vate the anti-theft system, arm/disarm the
alarm system
and switch the interior lamps
on/off. In addition, the remote control offers you
another function:
>Panic mode
In case of danger, you can trigger an
alarm.
You can have various confirmation
signals programmed into the system
to verify that the vehicle has been locked
securely.<
Remote control
1To unlock, convenience opening mode
and alarm system
2To lock and secure, switch off tilt alarm
sensor and interior motion sensor,
switch on interior lamps and door-
mounted proximity lamps
3To open the luggage compartment lid
4To switch on interior lamps, activate
panic mode
Because any persons or animals left
unattended in a parked vehicle could
lock the doors from the inside, you should
always keep the remote control unit with
you; this precaution ensures that you will
remain able to unlock the vehicle from the
outside at all times.<
When it is no longer possible to lock
the vehicle via the remote control, the
battery is discharged. Use this remote con-
trol unit during an extended drive; this will
recharge the battery, refer to page 34.
In the event of a system malfunction,
please contact your BMW center, which is
also your source for replacement keys.<
Page 38 of 229
Opening and closing
36
Unlocking the vehicle
Press button 1.
The interior lamps and the door-mounted
proximity lamps come on.
Press the button once to unlock the driver's
door only; press a second time to unlock all
remaining doors as well as the luggage
compartment lid and the fuel filler door.
Convenience opening mode
Hold button 1pressed. The windows
and the sliding/tilt sunroof open. The
sliding/tilt sunroof will not be retracted if it
is already in its raised position.
Locking and securing
Press button 2.
Switching off the tilt alarm sensor
and interior motion sensor
Press button 2once again
directly after locking. For more detailed
information, refer to page 41.
Switching on interior lamps and
door-mounted proximity lamps
If the vehicle is locked, press
button 2.
Switching on the interior lamps
Press button 4.
You can also use this function to locate
your vehicle in parking garages etc.
Panic mode
By pressing and holding button 4for
more than approx. two seconds, you can
trigger the alarm system in response to any
impending danger.
To switch off the alarm: press any of the
buttons.
Opening the luggage compartment
lid
Maintain pressure on button 3for
approx. 1 second. The luggage compartment lid opens,
regardless of whether it was previously
locked or unlocked.
During opening the luggage compart-
ment lid pivots upward and to the
rear. Ensure that adequate clearance is
available before opening.
To avoid being inadvertently locked out,
never lay the remote control unit down in
the luggage compartment. If the luggage
compartment lid was locked earlier, it will
relock automatically when closed.<
Automatic luggage compartment lid
operation*
Opening the luggage compartment
lid
Maintain pressure on button 3for
approx. 1 second.
The luggage compartment lid opens all the
way, regardless of whether it was previ-
ously locked or unlocked.
To interrupt the opening process:
Press the button again while opening is in
progress.
During opening the luggage compart-
ment lid pivots upward and to the
rear. Ensure that adequate clearance is
available before opening.
To avoid being inadvertently locked out,
never lay the remote control unit down in
the luggage compartment. If the vehicle is
locked, the luggage compartment lid is also
locked again when closed.<
External systems
External systems or devices may cause
local interference in the functions of the
remote control.
Should the remote control unit fail to
operate owing to interference of this kind,
you can respond by using the key to unlock
your vehicle at one of the doors.
Page 40 of 229
Opening and closing
38 You can also have the system pro-
grammed to activate the central
locking system automatically whenever the
vehicle is set in motion, or when a specific
interval elapses after it is unlocked, pro-
vided that neither the doors nor the lug-
gage compartment lid are opened in the
meantime. This can be adjusted to be key-
specific.<
Unlocking and opening the doors
>Either unlock the doors together with
the button for the central locking
system and then pull the release handle
above the armrest or
>pull the release handle for each door
twice: the first pull unlocks the door,
and the second one opens it.
When the low beams are switched on,
the interior door handles are also
lighted. The intensity of the lighting is
adjusted using the instrument lighting, refer
to page 103.<
Engaging the locks
>Use the central locking button to lock all
of the doors simultaneously,
or
>press the individual safety lock buttons
down. To prevent the driver from being
inadvertently locked out of the vehicle,
the lock button on the driver's door
automatically extends again after a brief
period if the door remains open.
Do not use the safety lock buttons to
engage the locks during driving, as
they would then fail to disengage automat-
ically in the event of an accident.
Because any persons or animals left unat-
tended in a parked vehicle could lock the
doors from the inside, you should always
keep the remote control unit with you; this
precaution ensures that you will remain
able to unlock the vehicle from the outside
at all times. <
Doors
Soft Close Automatic*
Apply gentle pressure to the door to close
it. The closing process will then be carried
out automatically.
To avoid injuries, ensure that the
door's travel path is completely free
and clear before closing.<
Luggage compartment lid
Opening from outside
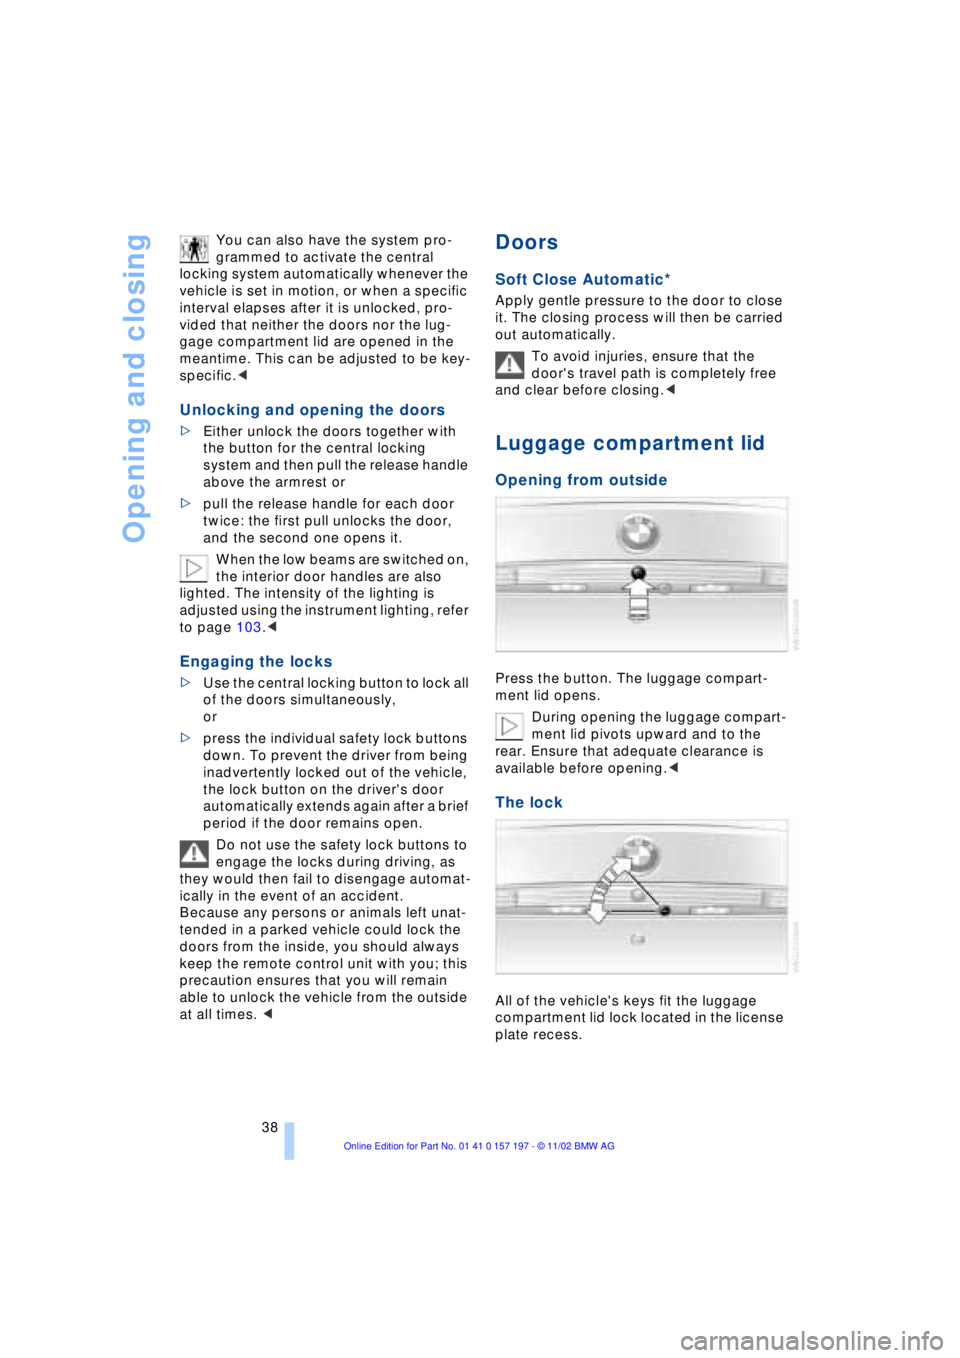
Press the button. The luggage compart-
ment lid opens.
During opening the luggage compart-
ment lid pivots upward and to the
rear. Ensure that adequate clearance is
available before opening.<
The lock
All of the vehicle's keys fit the luggage
compartment lid lock located in the license
plate recess.
Page 48 of 229
Adjustments
46 Please observe the information on using
safety belts provided on page 50 and the
notice on the active head restraints on
page 48.
The concept
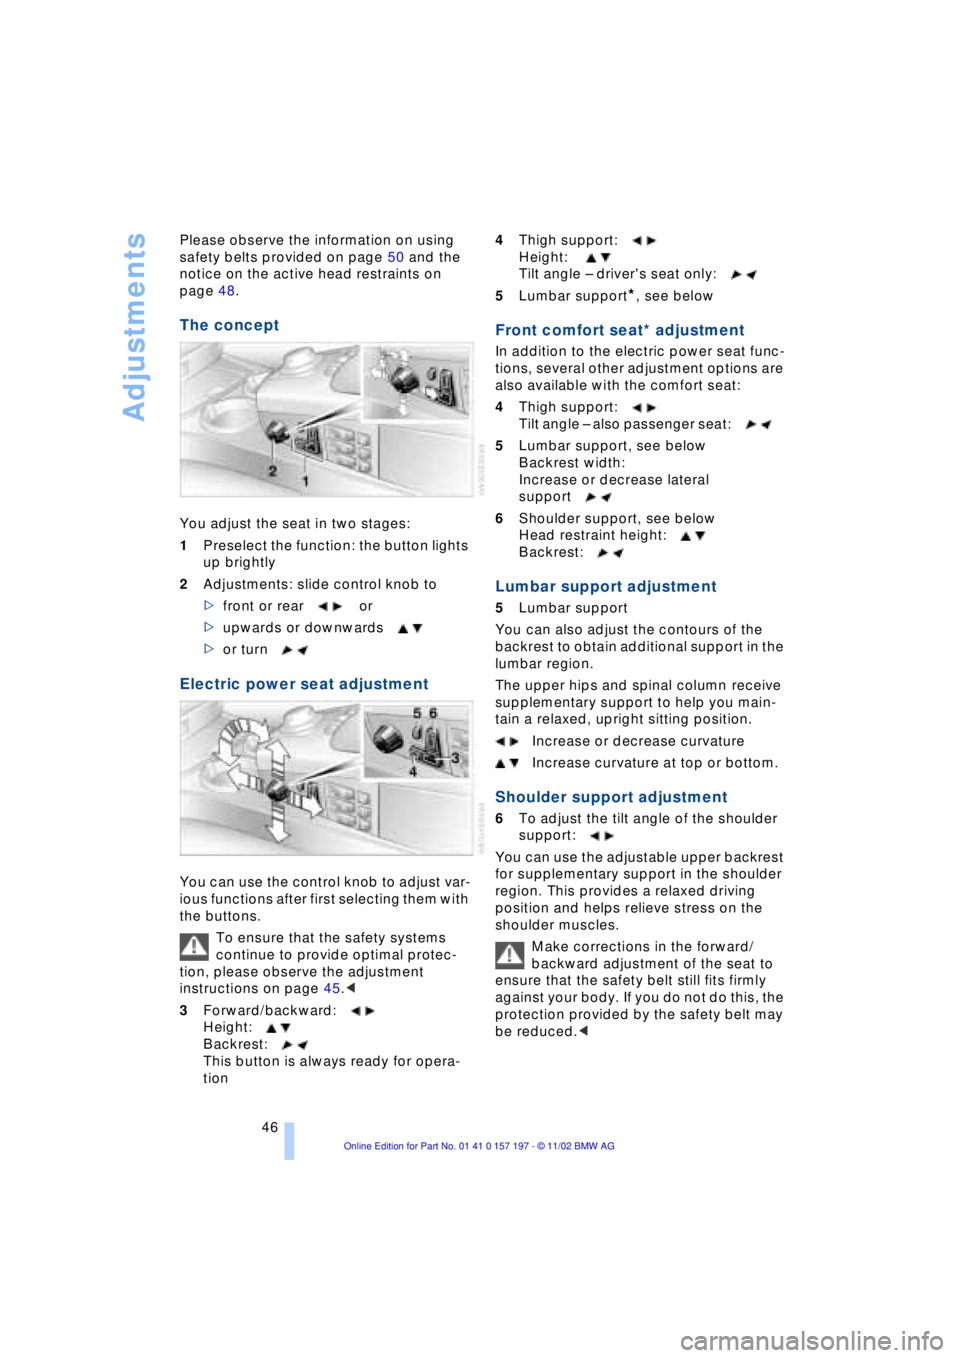
You adjust the seat in two stages:
1Preselect the function: the button lights
up brightly
2Adjustments: slide control knob to
>front or rear or
>upwards or downwards
>or turn
Electric power seat adjustment
You can use the control knob to adjust var-
ious functions after first selecting them with
the buttons.
To ensure that the safety systems
continue to provide optimal protec-
tion, please observe the adjustment
instructions on page 45.<
3Forward/backward:
Height:
Backrest:
This button is always ready for opera-
tion4Thigh support:
Height:
Tilt angle Ð driver's seat only:
5Lumbar support
*, see below
Front comfort seat* adjustment
In addition to the electric power seat func-
tions, several other adjustment options are
also available with the comfort seat:
4Thigh support:
Tilt angle Ð also passenger seat:
5Lumbar support, see below
Backrest width:
Increase or decrease lateral
support
6Shoulder support, see below
Head restraint height:
Backrest:
Lumbar support adjustment
5Lumbar support
You can also adjust the contours of the
backrest to obtain additional support in the
lumbar region.
The upper hips and spinal column receive
supplementary support to help you main-
tain a relaxed, upright sitting position.
Increase or decrease curvature
Increase curvature at top or bottom.
Shoulder support adjustment
6To adjust the tilt angle of the shoulder
support:
You can use the adjustable upper backrest
for supplementary support in the shoulder
region. This provides a relaxed driving
position and helps relieve stress on the
shoulder muscles.
Make corrections in the forward/
backward adjustment of the seat to
ensure that the safety belt still fits firmly
against your body. If you do not do this, the
protection provided by the safety belt may
be reduced.<