2003 BMW 760LI SEDAN buttons
[x] Cancel search: buttonsPage 49 of 229
At a glance
Controls
Driving tips
Communications
Navigation
Entertainment
Mobility
Reference
47
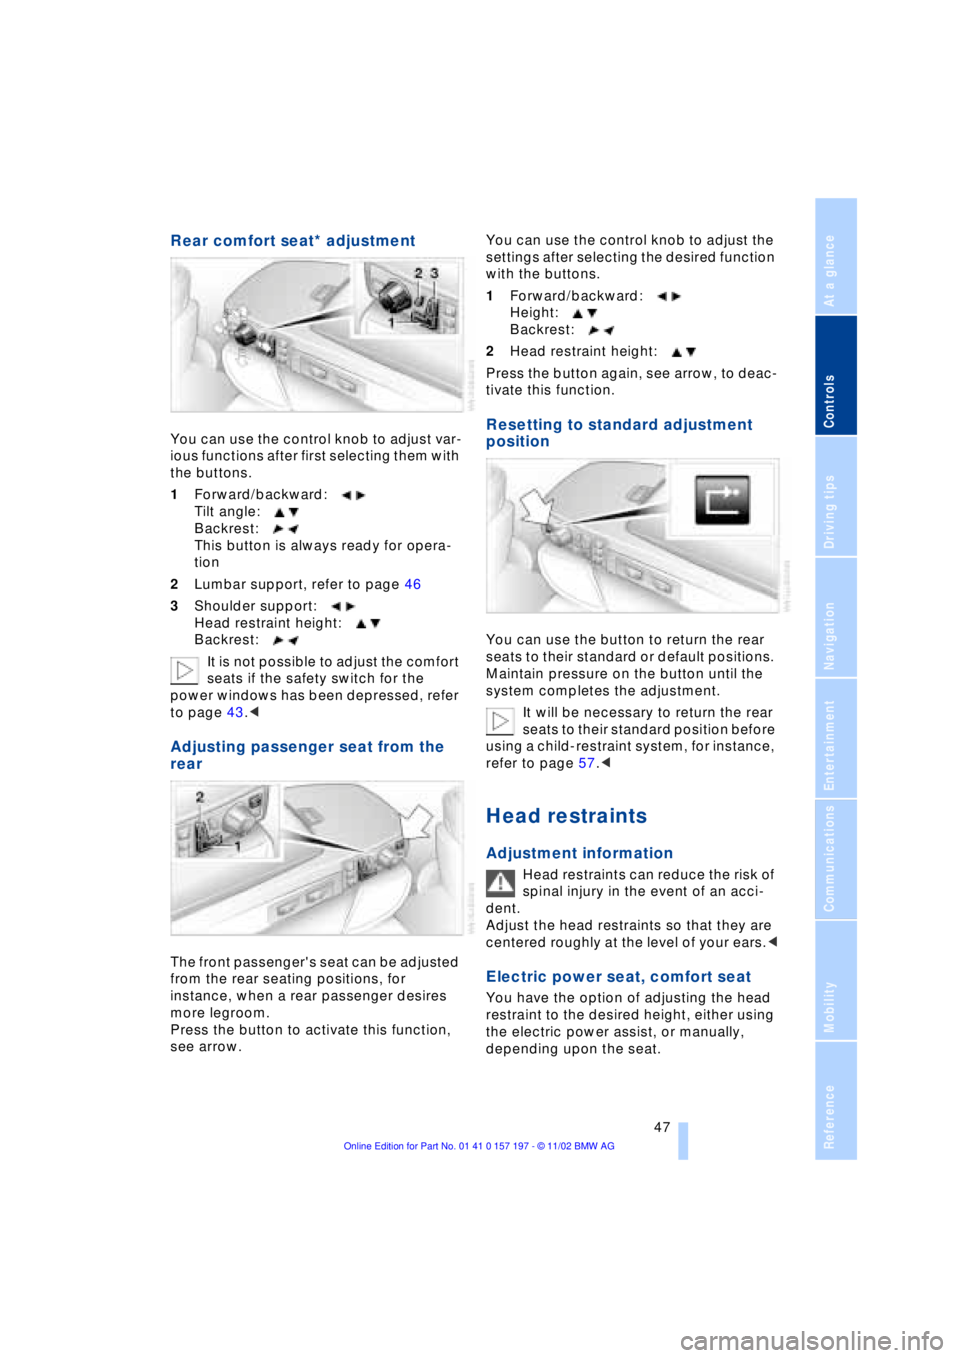
Rear comfort seat* adjustment
You can use the control knob to adjust var-
ious functions after first selecting them with
the buttons.
1Forward/backward:
Tilt angle:
Backrest:
This button is always ready for opera-
tion
2Lumbar support, refer to page 46
3Shoulder support:
Head restraint height:
Backrest:
It is not possible to adjust the comfort
seats if the safety switch for the
power windows has been depressed, refer
to page 43.<
Adjusting passenger seat from the
rear
The front passenger's seat can be adjusted
from the rear seating positions, for
instance, when a rear passenger desires
more legroom.
Press the button to activate this function,
see arrow. You can use the control knob to adjust the
settings after selecting the desired function
with the buttons.
1Forward/backward:
Height:
Backrest:
2Head restraint height:
Press the button again, see arrow, to deac-
tivate this function.
Resetting to standard adjustment
position
You can use the button to return the rear
seats to their standard or default positions.
Maintain pressure on the button until the
system completes the adjustment.
It will be necessary to return the rear
seats to their standard position before
using a child-restraint system, for instance,
refer to page 57.<
Head restraints
Adjustment information
Head restraints can reduce the risk of
spinal injury in the event of an acci-
dent.
Adjust the head restraints so that they are
centered roughly at the level of your ears.<
Electric power seat, comfort seat
You have the option of adjusting the head
restraint to the desired height, either using
the electric power assist, or manually,
depending upon the seat.
Page 56 of 229
Adjustments
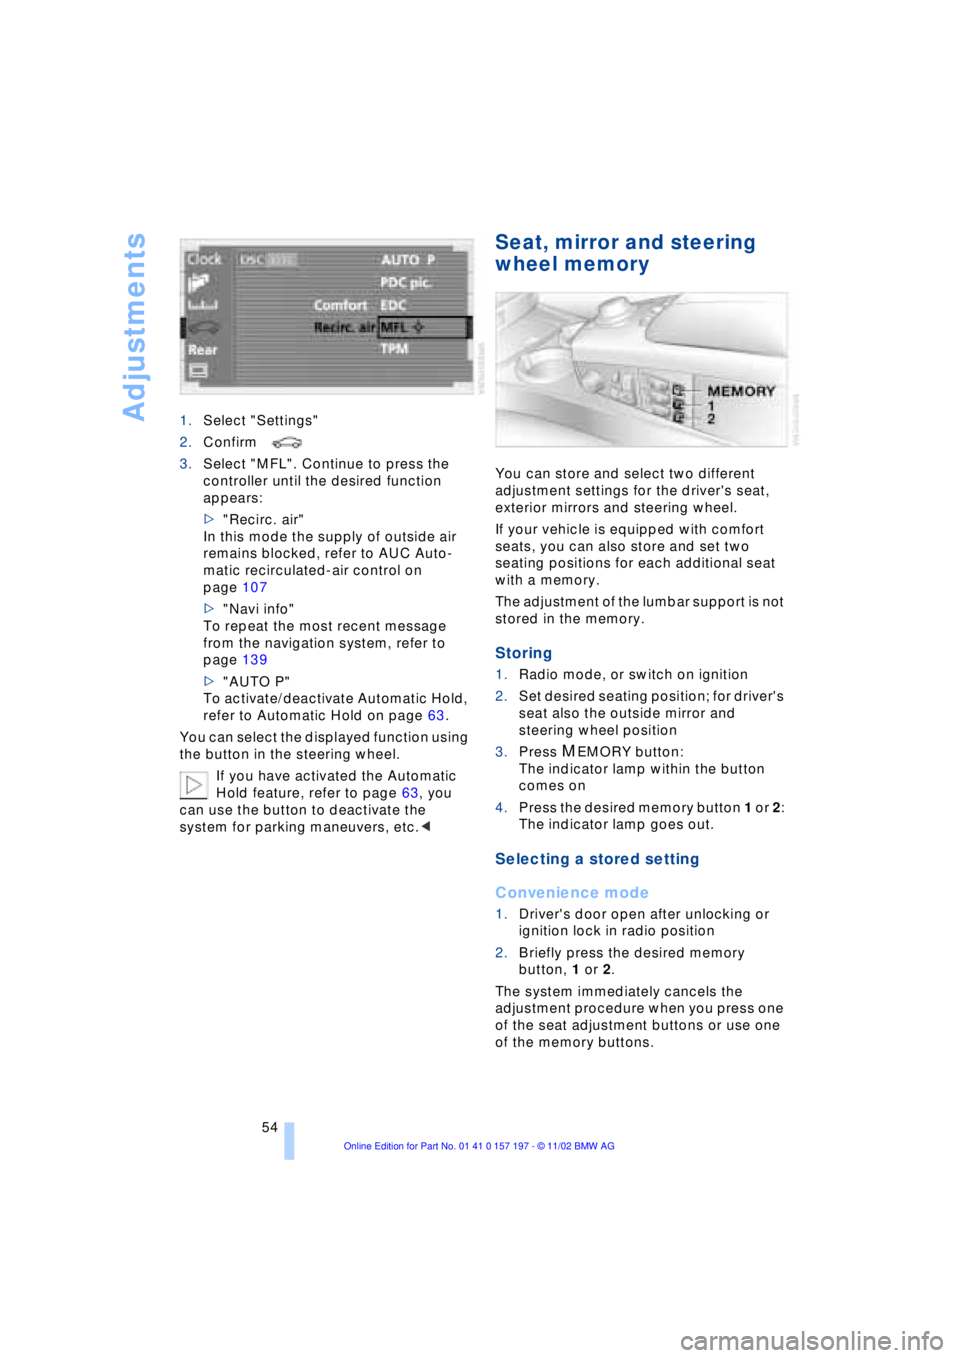
54 1.Select "Settings"
2.Confirm
3.Select "MFL". Continue to press the
controller until the desired function
appears:
>"Recirc. air"
In this mode the supply of outside air
remains blocked, refer to AUC Auto-
matic recirculated-air control on
page 107
>"Navi info"
To repeat the most recent message
from the navigation system, refer to
page 139
>"AUTO P"
To activate/deactivate Automatic Hold,
refer to Automatic Hold on page 63.
You can select the displayed function using
the button in the steering wheel.
If you have activated the Automatic
Hold feature, refer to page 63, you
can use the button to deactivate the
system for parking maneuvers, etc.<
Seat, mirror and steering
wheel memory
You can store and select two different
adjustment settings for the driver's seat,
exterior mirrors and steering wheel.
If your vehicle is equipped with comfort
seats, you can also store and set two
seating positions for each additional seat
with a memory.
The adjustment of the lumbar support is not
stored in the memory.
Storing
1.Radio mode, or switch on ignition
2.Set desired seating position; for driver's
seat also the outside mirror and
steering wheel position
3.Press
MEMORY button:
The indicator lamp within the button
comes on
4.Press the desired memory button 1 or 2:
The indicator lamp goes out.
Selecting a stored setting
Convenience mode
1.Driver's door open after unlocking or
ignition lock in radio position
2.Briefly press the desired memory
button, 1 or 2.
The system immediately cancels the
adjustment procedure when you press one
of the seat adjustment buttons or use one
of the memory buttons.
Page 61 of 229
At a glance
Controls
Driving tips
Communications
Navigation
Entertainment
Mobility
Reference
59
LATCH* child-restraint
system
LATCH: Lower Anchor and Tethers for
CHildren.
If the vehicle is equipped with electric
power seats, these must be returned
to their standard adjustment setting before
a LATCH child-restraint system can be
used, refer to page 47.<
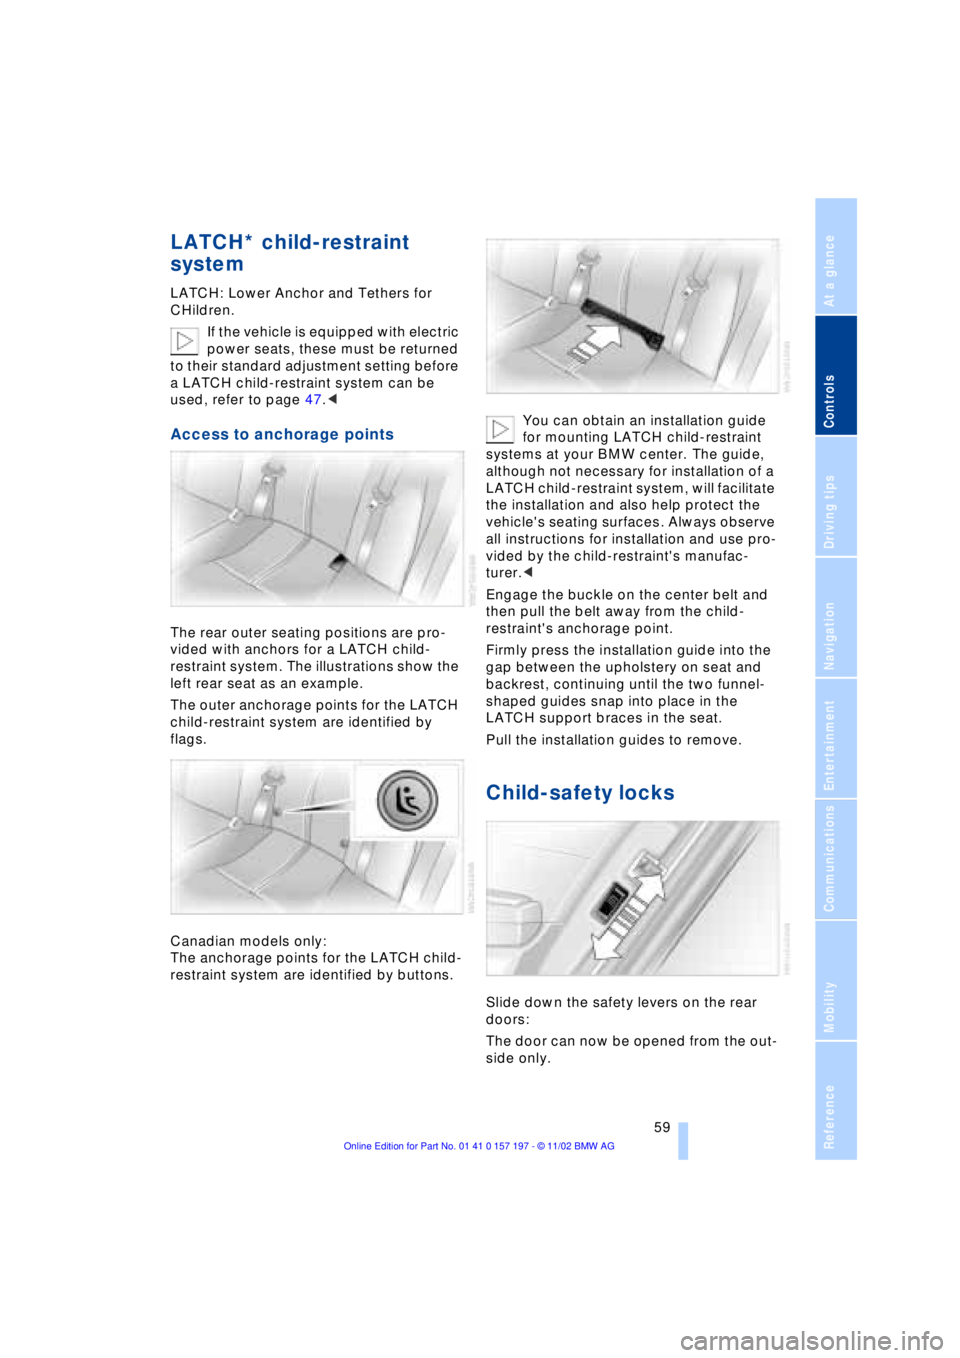
Access to anchorage points
The rear outer seating positions are pro-
vided with anchors for a LATCH child-
restraint system. The illustrations show the
left rear seat as an example.
The outer anchorage points for the LATCH
child-restraint system are identified by
flags.
Canadian models only:
The anchorage points for the LATCH child-
restraint system are identified by buttons.You can obtain an installation guide
for mounting LATCH child-restraint
systems at your BMW center. The guide,
although not necessary for installation of a
LATCH child-restraint system, will facilitate
the installation and also help protect the
vehicle's seating surfaces. Always observe
all instructions for installation and use pro-
vided by the child-restraint's manufac-
turer.<
Engage the buckle on the center belt and
then pull the belt away from the child-
restraint's anchorage point.
Firmly press the installation guide into the
gap between the upholstery on seat and
backrest, continuing until the two funnel-
shaped guides snap into place in the
LATCH support braces in the seat.
Pull the installation guides to remove.
Child-safety locks
Slide down the safety levers on the rear
doors:
The door can now be opened from the out-
side only.
Page 69 of 229
At a glance
Controls
Driving tips
Communications
Navigation
Entertainment
Mobility
Reference
67
Automatic transmission
with L mode
While you can drive as with a conventional
automatic transmission, you also have the
option of retaining your current gear selec-
tion with the L/D button on the steering
wheel, refer to page 68.
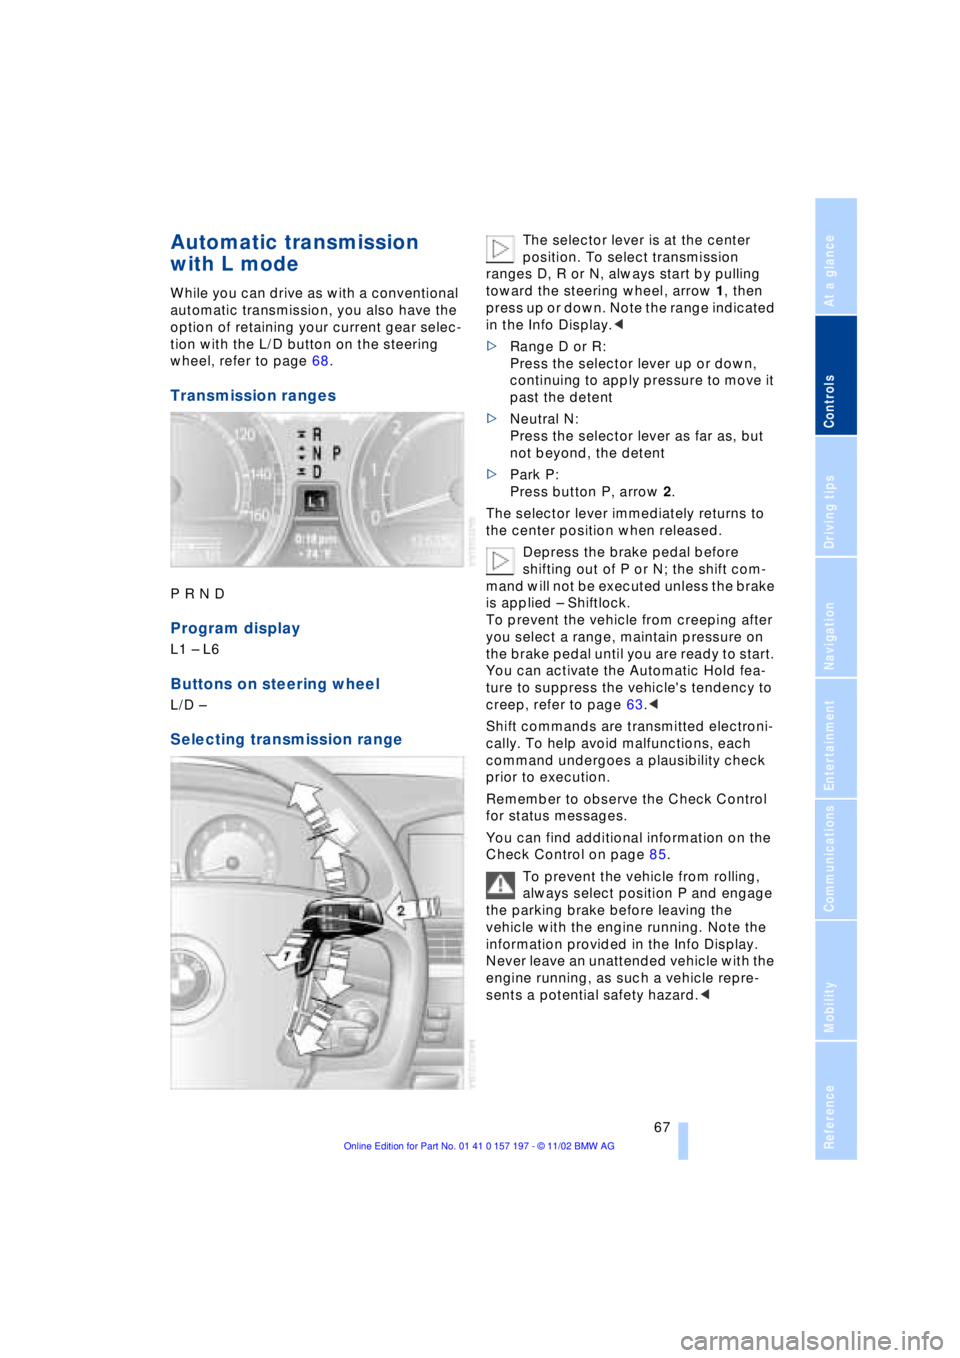
Transmission ranges
P R N D
Program display
L1 Ð L6
Buttons on steering wheel
L/D Ð
Selecting transmission range
The selector lever is at the center
position. To select transmission
ranges D, R or N, always start by pulling
toward the steering wheel, arrow 1, then
press up or down. Note the range indicated
in the Info Display.<
>Range D or R:
Press the selector lever up or down,
continuing to apply pressure to move it
past the detent
>Neutral N:
Press the selector lever as far as, but
not beyond, the detent
>Park P:
Press button P, arrow 2.
The selector lever immediately returns to
the center position when released.
Depress the brake pedal before
shifting out of P or N; the shift com-
mand will not be executed unless the brake
is applied Ð Shiftlock.
To prevent the vehicle from creeping after
you select a range, maintain pressure on
the brake pedal until you are ready to start.
You can activate the Automatic Hold fea-
ture to suppress the vehicle's tendency to
creep, refer to page 63.<
Shift commands are transmitted electroni-
cally. To help avoid malfunctions, each
command undergoes a plausibility check
prior to execution.
Remember to observe the Check Control
for status messages.
You can find additional information on the
Check Control on page 85.
To prevent the vehicle from rolling,
always select position P and engage
the parking brake before leaving the
vehicle with the engine running. Note the
information provided in the Info Display.
Never leave an unattended vehicle with the
engine running, as such a vehicle repre-
sents a potential safety hazard.<
Page 70 of 229
Driving
68
P Ñ Park
Press the button.
Select only when the vehicle is stationary.
The transmission lockout prevents the rear
wheels from turning. The lockout disen-
gages when you press the selector lever
toward D, N or R while the engine is run-
ning.
P is automatically engaged when you
remove the remote control unit from
the ignition lock after parking the vehicle.<
R Ñ Reverse
Press the selector lever upward, con-
tinuing to apply pressure to move it past
the detent. Select R only when the vehicle
is stationary.
N Ð Neutral
Press the selector lever as far as the
detent, but no further. Select N only if your
journey is interrupted for a long period.
>From D press the selector lever up
>From R press the selector lever down.
Note the arrows indicating direction in the
range display.
N is selected automatically whenever
the remote control unit remains
locked in the ignition lock after the ignition
is switched off. This function is useful in
automatic car washes, etc.
After approx. 30 minutes the system auto-
matically engages P. Remember to
observe the Check Control for status mes-
sages.<
D Drive Ð Automatic
Press the selector lever down, con-
tinuing beyond the detent. This is the range
recommended for normal vehicle opera-
tion. All forward gears are available.
Under normal operating conditions, fuel
consumption is lowest when driving in
position D.
Kickdown
The kickdown mode provides maximum
acceleration.
Press the accelerator pedal beyond full-
throttle detent point.
L mode
We recommend the L mode for times when
you wish to suppress certain shifts, for
instance, when ascending or descending
steep grades.
When the L mode is activated the transmis-
sion remains in your current gear, which
also appears in the Info Display, refer to
page 67. The transmission continues to
shift through the available ratios, but does
not proceed beyond the gear in the display.
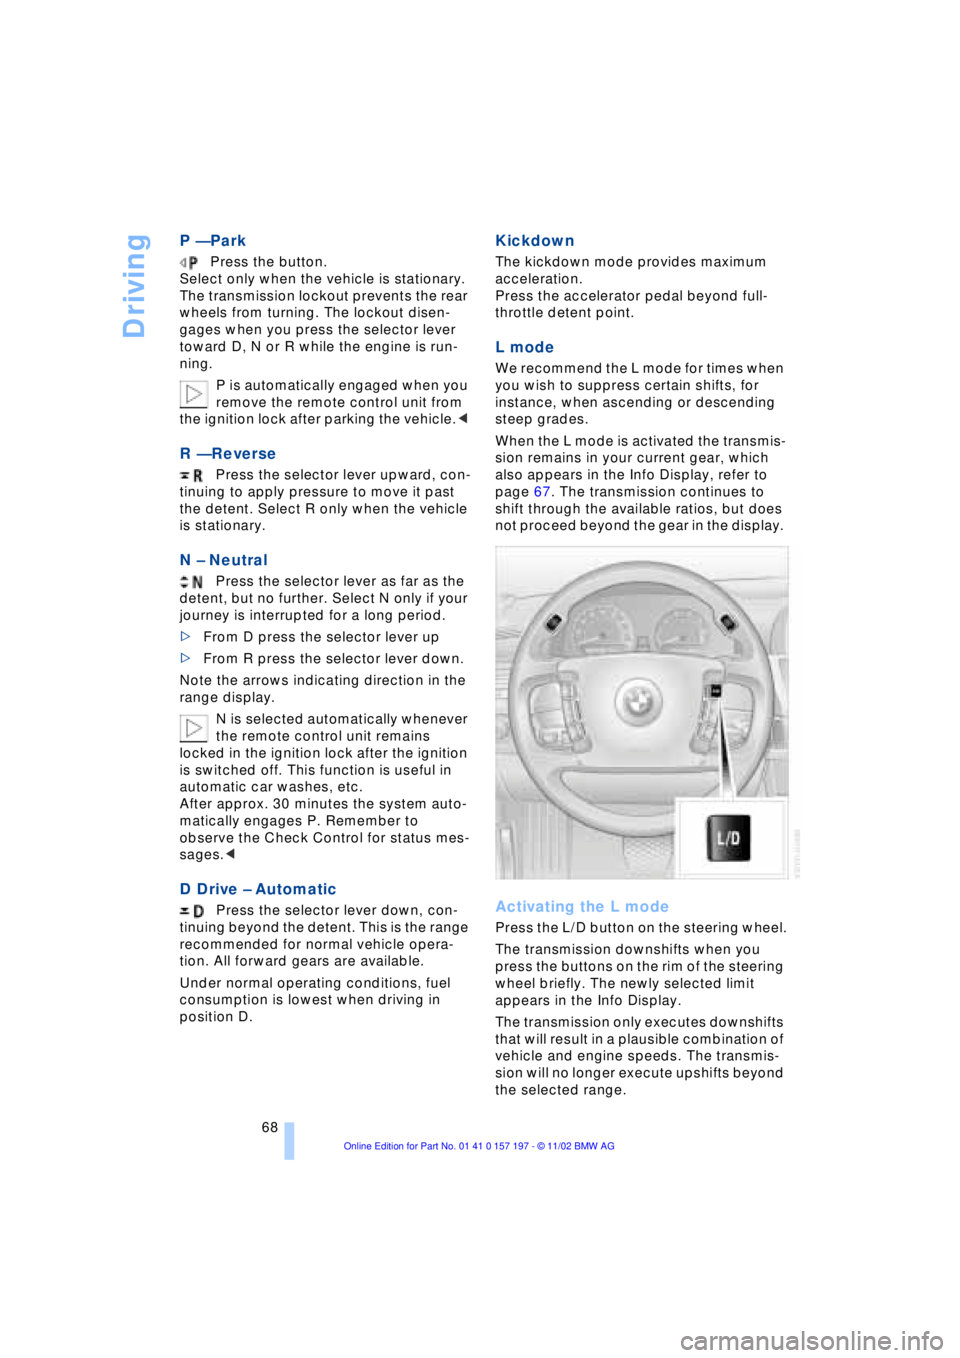
Activating the L mode
Press the L/D button on the steering wheel.
The transmission downshifts when you
press the buttons on the rim of the steering
wheel briefly. The newly selected limit
appears in the Info Display.
The transmission only executes downshifts
that will result in a plausible combination of
vehicle and engine speeds. The transmis-
sion will no longer execute upshifts beyond
the selected range.
Page 71 of 229
At a glance
Controls
Driving tips
Communications
Navigation
Entertainment
Mobility
Reference
69
Deactivate the L mode to obtain max-
imum acceleration for overtaking
maneuvers, etc.<
Deactivating the L mode
>Press the L/D button or
>press the selector lever into position D
once again.
Automatic transmission
with Steptronic*
While you can drive as with any conven-
tional automatic transmission, you also
enjoy the option of shifting manually at the
steering wheel, refer to the next column.
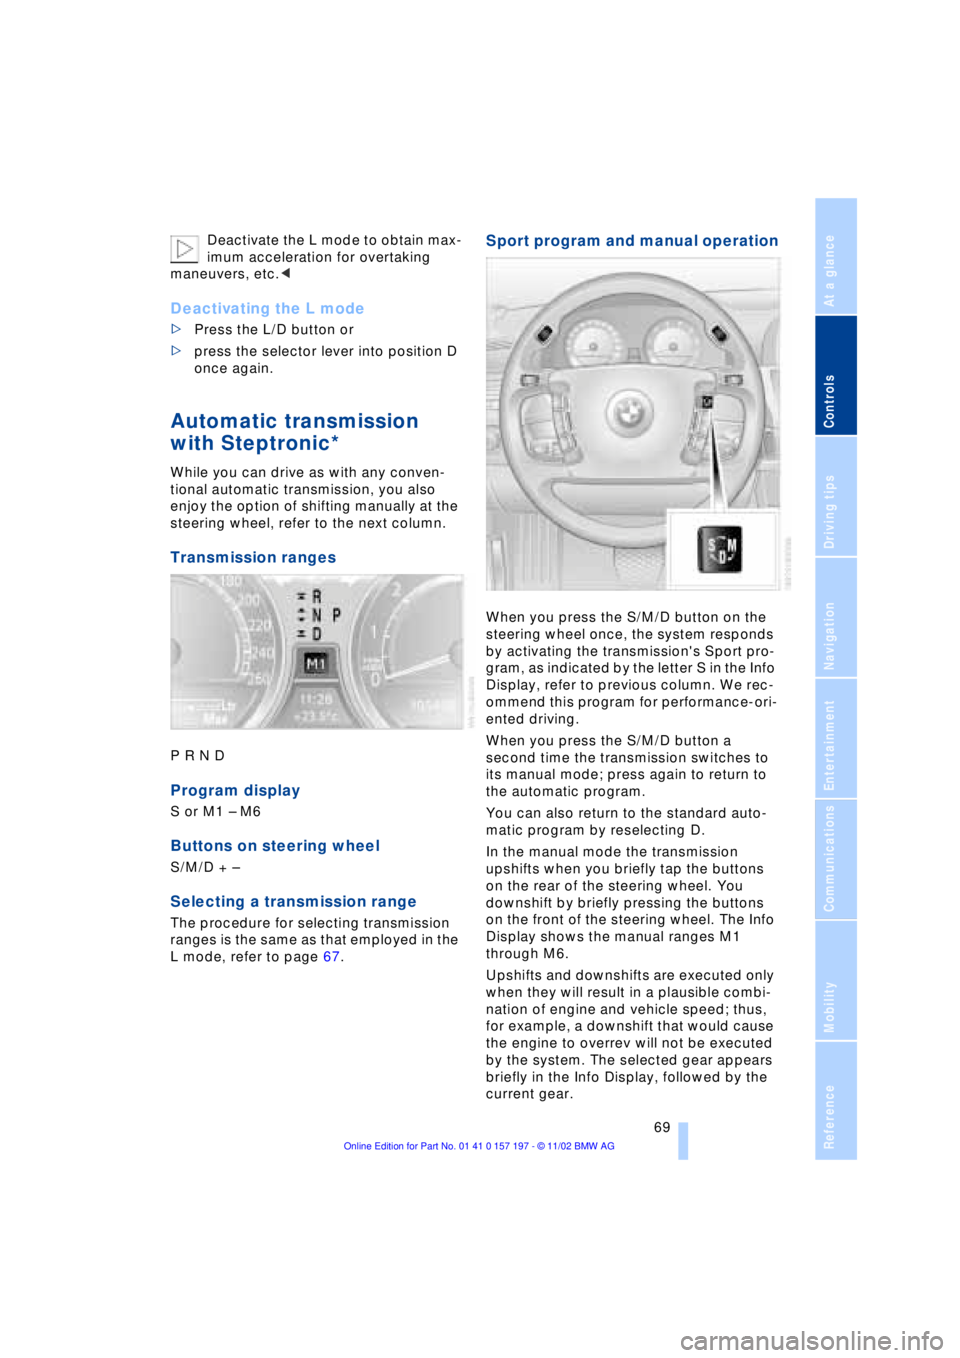
Transmission ranges
P R N D
Program display
S or M1 Ð M6
Buttons on steering wheel
S/M/D + Ð
Selecting a transmission range
The procedure for selecting transmission
ranges is the same as that employed in the
L mode, refer to page 67.
Sport program and manual operation
When you press the S/M/D button on the
steering wheel once, the system responds
by activating the transmission's Sport pro-
gram, as indicated by the letter S in the Info
Display, refer to previous column. We rec-
ommend this program for performance-ori-
ented driving.
When you press the S/M/D button a
second time the transmission switches to
its manual mode; press again to return to
the automatic program.
You can also return to the standard auto-
matic program by reselecting D.
In the manual mode the transmission
upshifts when you briefly tap the buttons
on the rear of the steering wheel. You
downshift by briefly pressing the buttons
on the front of the steering wheel. The Info
Display shows the manual ranges M1
through M6.
Upshifts and downshifts are executed only
when they will result in a plausible combi-
nation of engine and vehicle speed; thus,
for example, a downshift that would cause
the engine to overrev will not be executed
by the system. The selected gear appears
briefly in the Info Display, followed by the
current gear.
Page 85 of 229
At a glance
Controls
Driving tips
Communications
Navigation
Entertainment
Mobility
Reference
83
normal operating temperature. The seg-
ments disappear in sequence as the engine
warms to its normal operating temperature.
Avoid allowing the engine speed to rise as
far as the orange warning sector whenever
possible.
Service Interval Display
Info Display screen contents
The distance/period remaining until your
next service briefly appears when you
switch on the ignition.
The Info Display immediately
switches to its computer mode when
you press one of the two buttons in the turn
signal lever, refer to page 86.<
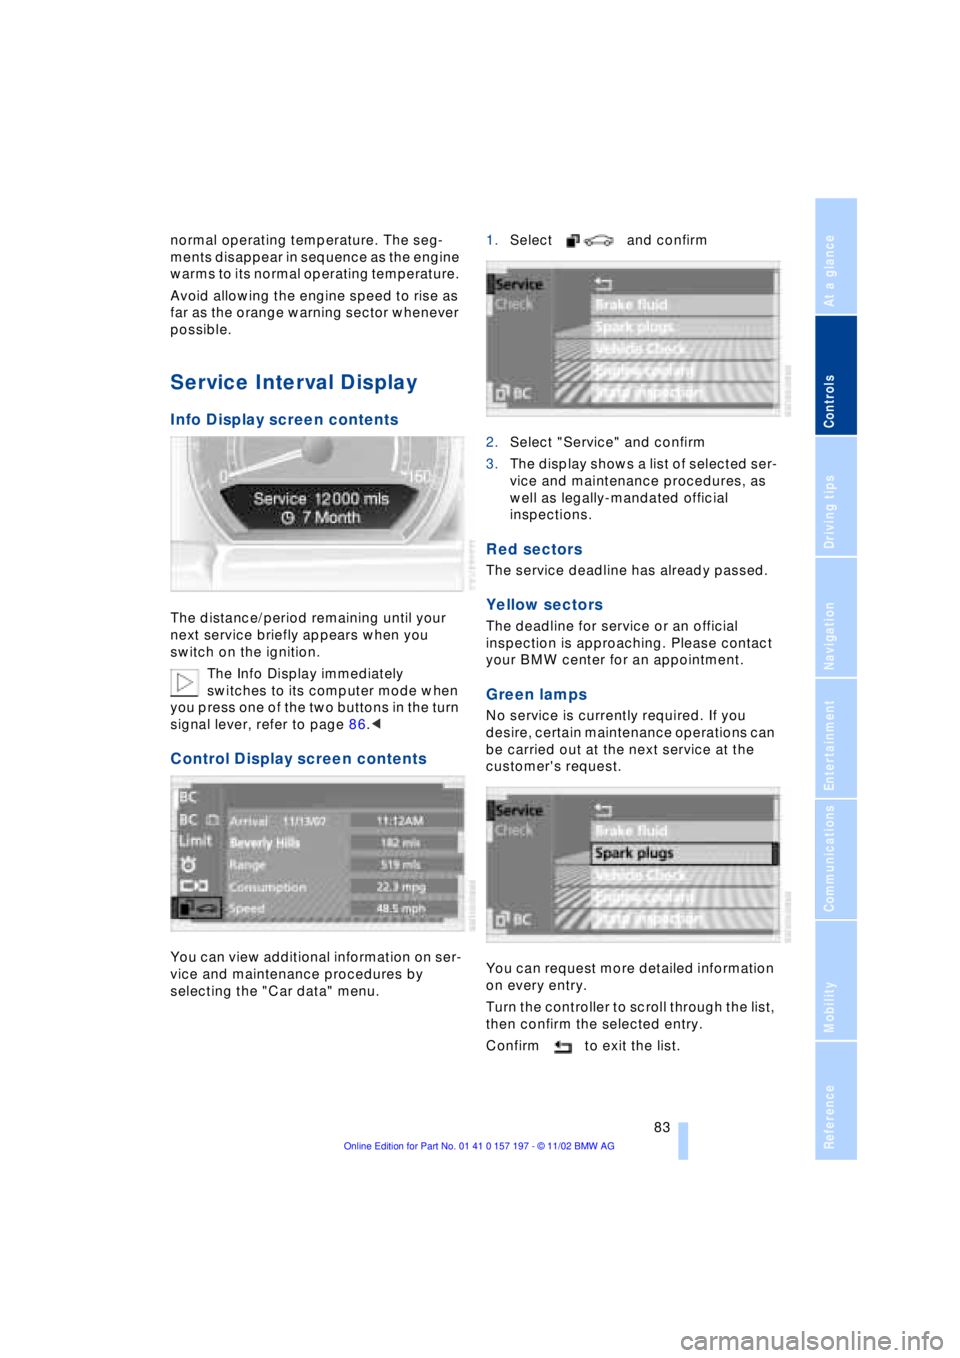
Control Display screen contents
You can view additional information on ser-
vice and maintenance procedures by
selecting the "Car data" menu. 1.Select and confirm
2.Select "Service" and confirm
3.The display shows a list of selected ser-
vice and maintenance procedures, as
well as legally-mandated official
inspections.
Red sectors
The service deadline has already passed.
Yellow sectors
The deadline for service or an official
inspection is approaching. Please contact
your BMW center for an appointment.
Green lamps
No service is currently required. If you
desire, certain maintenance operations can
be carried out at the next service at the
customer's request.
You can request more detailed information
on every entry.
Turn the controller to scroll through the list,
then confirm the selected entry.
Confirm to exit the list.
Page 88 of 229
Everything under control
86
Selecting stored status reports for
viewing in the Control Display
1.Select "Car data"
2.Select and confirm
3.Select "Check" and confirm
4.The stored status reports appear in the
display. Select the desired report and
confirm your selection.
The display disappears when
the symbol is acknowledged.
Displays after completion of trip
Selected malfunction reports generated
during the trip are shown consecutively
when you switch off the ignition.
If indicated, the following message may
also appear:
"Parking lamps on!"
This message appears when you open the
driver's door after parking. A supplemen-
tary gong is also heard.
Even with the ignition and Info Display off,
you can reactivate the screen and display
the messages.
Press the CHECK button for approx.
8 seconds, refer to page 85. The stored
status reports appear again in the display. If several messages are present, you can
continue to press the CHECK button to
view them in succession.
The Check Control function
>cancels itself automatically after a brief
period
>can be canceled by again pressing the
CHECK button for approximately
8 seconds.
You can select the language in which
Check Control status reports and
messages from the computer will appear,
refer to page 91.<
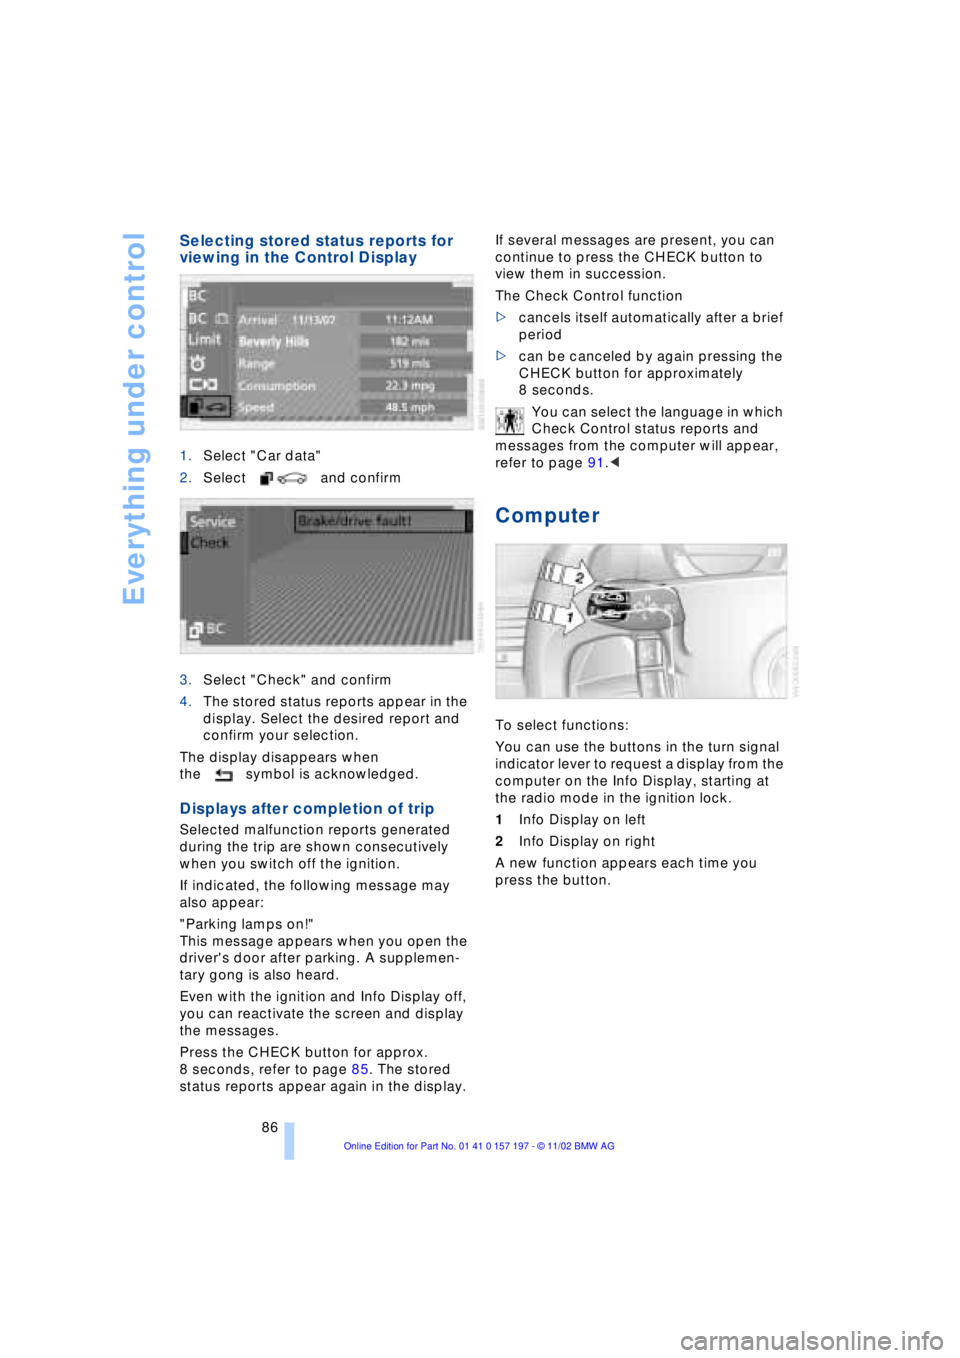
Computer
To select functions:
You can use the buttons in the turn signal
indicator lever to request a display from the
computer on the Info Display, starting at
the radio mode in the ignition lock.
1Info Display on left
2Info Display on right
A new function appears each time you
press the button.