2003 BMW 760LI SEDAN navigation system
[x] Cancel search: navigation systemPage 63 of 229
At a glance
Controls
Driving tips
Communications
Navigation
Entertainment
Mobility
Reference
61
Driving
Ignition lock
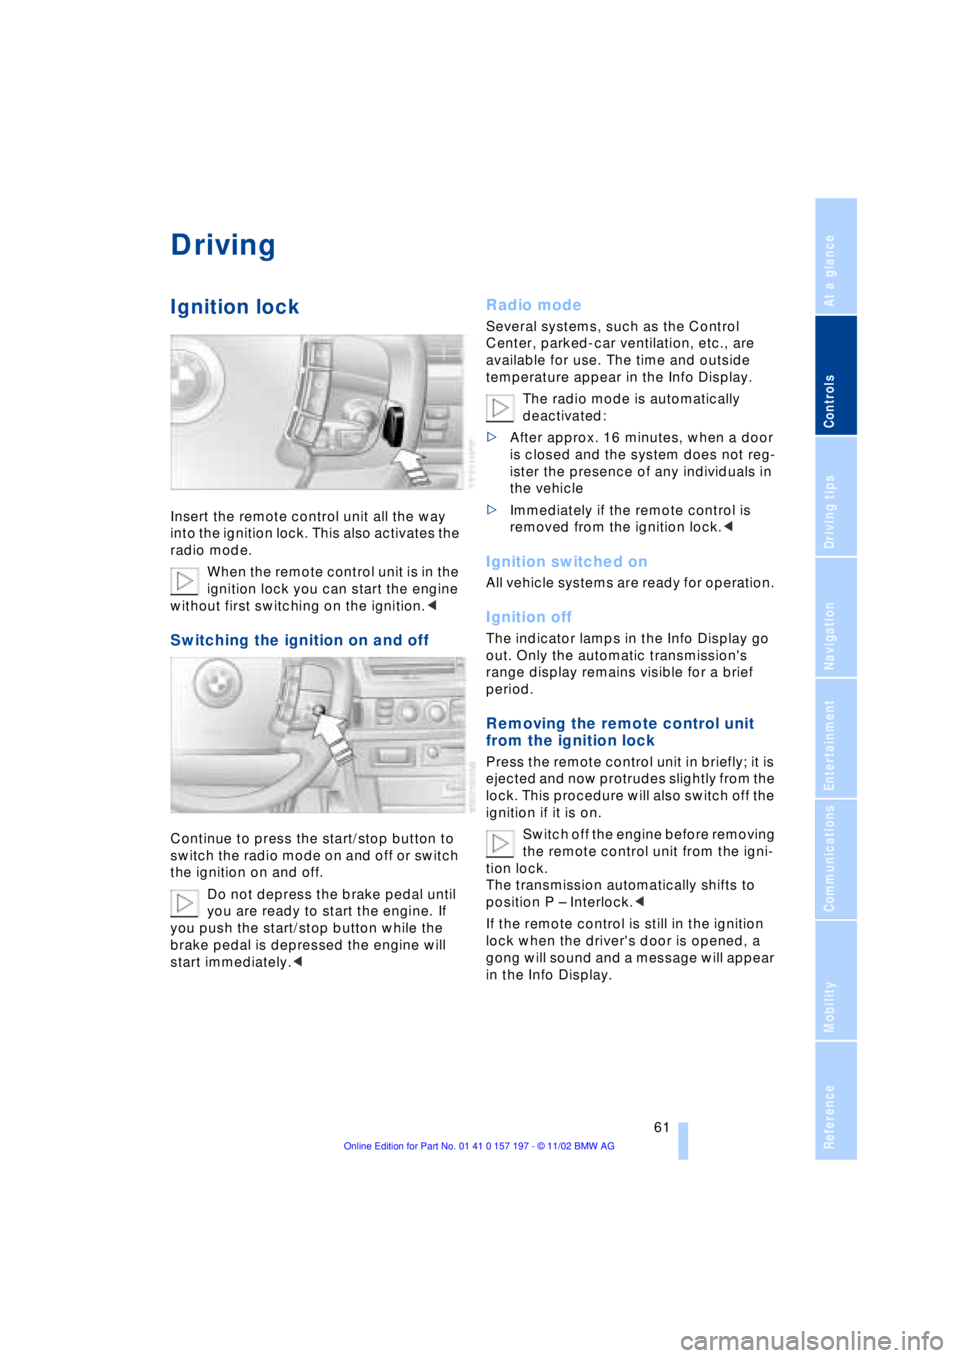
Insert the remote control unit all the way
into the ignition lock. This also activates the
radio mode.
When the remote control unit is in the
ignition lock you can start the engine
without first switching on the ignition.<
Switching the ignition on and off
Continue to press the start/stop button to
switch the radio mode on and off or switch
the ignition on and off.
Do not depress the brake pedal until
you are ready to start the engine. If
you push the start/stop button while the
brake pedal is depressed the engine will
start immediately.<
Radio mode
Several systems, such as the Control
Center, parked-car ventilation, etc., are
available for use. The time and outside
temperature appear in the Info Display.
The radio mode is automatically
deactivated:
>After approx. 16 minutes, when a door
is closed and the system does not reg-
ister the presence of any individuals in
the vehicle
>Immediately if the remote control is
removed from the ignition lock.<
Ignition switched on
All vehicle systems are ready for operation.
Ignition off
The indicator lamps in the Info Display go
out. Only the automatic transmission's
range display remains visible for a brief
period.
Removing the remote control unit
from the ignition lock
Press the remote control unit in briefly; it is
ejected and now protrudes slightly from the
lock. This procedure will also switch off the
ignition if it is on.
Switch off the engine before removing
the remote control unit from the igni-
tion lock.
The transmission automatically shifts to
position P Ð Interlock.<
If the remote control is still in the ignition
lock when the driver's door is opened, a
gong will sound and a message will appear
in the Info Display.
Page 65 of 229
At a glance
Controls
Driving tips
Communications
Navigation
Entertainment
Mobility
Reference
63
You have two separate options for
engaging the parking brake:
>Manually, by briefly pressing the button
>Automatically, through activation of the
Automatic Hold mode, refer to page 64.
An electrohydraulic mechanism then
engages the parking brake to prevent the
rear wheels from turning whenever you
switch off the engine.
When the engine is running, parking brake
engagement is controlled by the brake
system's hydraulic circuits, which act on
the disc brakes at the front and rear
wheels.
Brake pedal feel
Because this function is activated using the
brake system's hydraulic circuits, the
response of the brake pedal may change
slightly. Engagement may also be accom-
panied by activation noise Ð this is normal.
Manual engagement
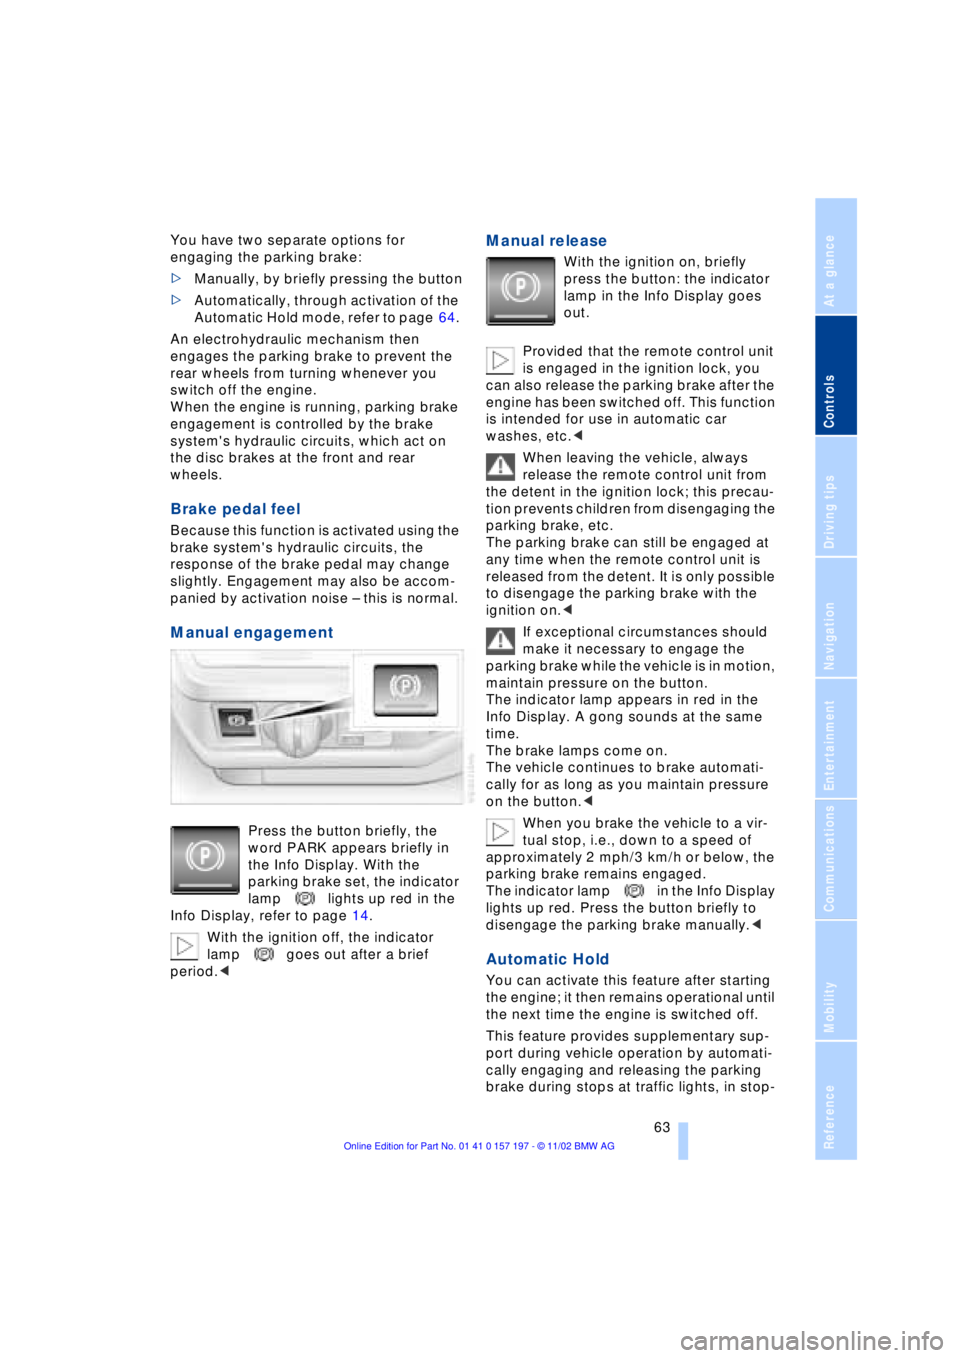
Press the button briefly, the
word PARK appears briefly in
the Info Display. With the
parking brake set, the indicator
lamp lights up red in the
Info Display, refer to page 14.
With the ignition off, the indicator
lamp goes out after a brief
period.<
Manual release
With the ignition on, briefly
press the button: the indicator
lamp in the Info Display goes
out.
Provided that the remote control unit
is engaged in the ignition lock, you
can also release the parking brake after the
engine has been switched off. This function
is intended for use in automatic car
washes, etc.<
When leaving the vehicle, always
release the remote control unit from
the detent in the ignition lock; this precau-
tion prevents children from disengaging the
parking brake, etc.
The parking brake can still be engaged at
any time when the remote control unit is
released from the detent. It is only possible
to disengage the parking brake with the
ignition on.<
If exceptional circumstances should
make it necessary to engage the
parking brake while the vehicle is in motion,
maintain pressure on the button.
The indicator lamp appears in red in the
Info Display. A gong sounds at the same
time.
The brake lamps come on.
The vehicle continues to brake automati-
cally for as long as you maintain pressure
on the button.<
When you brake the vehicle to a vir-
tual stop, i.e., down to a speed of
approximately 2 mph/3 km/h or below, the
parking brake remains engaged.
The indicator lamp in the Info Display
lights up red. Press the button briefly to
disengage the parking brake manually.<
Automatic Hold
You can activate this feature after starting
the engine; it then remains operational until
the next time the engine is switched off.
This feature provides supplementary sup-
port during vehicle operation by automati-
cally engaging and releasing the parking
brake during stops at traffic lights, in stop-
Page 67 of 229
At a glance
Controls
Driving tips
Communications
Navigation
Entertainment
Mobility
Reference
65
For your safety
Automatic Hold is automatically deacti-
vated when
>the engine is switched off
>the system detects that the driver's seat
is not occupied while the engine is run-
ning
>the hood is opened while the engine is
running
>the luggage compartment is opened
with the transmission in reverse while
the engine is running, and
>when the parking brake is used to bring
the vehicle to a stop.
The indicator lamp changes from
green to red, and the AUTO P letters in the
Info Display disappear.
Before starting off again, briefly press the
button to disengage the parking brake
manually, refer to page 63, or reactivate
Automatic Hold, refer to page 64.
Before leaving the vehicle with the
engine running, always move the
automatic transmission's selector lever to
position P and ensure that the parking
brake is engaged. The vehicle could start to
roll if you fail to observe these precautions.
Never leave an unattended vehicle with the
engine running, as such a vehicle repre-
sents a potential safety hazard.<
Automatic Hold is automatically
deactivated whenever the system
detects any tendency for the wheels to spin
in response to slippery road surfaces. Note
the status reports in the Check Control.
You can find more detailed information on
Check Control on page 85.<
Malfunctions
If a malfunction occurs, the indicator
lamp lights up yellow in the Info Dis-
play and a status report will appear in the
Check Control. Please note any supple-
mentary information that appears in the
Control Display.
Releasing the parking brake
manually
You can respond to any interruptions in the
supply of electrical power, for instance, if
the battery is discharged or disconnected,
by releasing the parking brake manually.
Before proceeding to release the
parking brake manually, and each
time you park the vehicle without engaging
the parking brake, always ensure that the
automatic transmission's selector lever is
in position P, refer to page 67. Note the
range indicated in the Info Display.
If it is not possible to avoid parking on an
extremely steep slope, use some supple-
mentary means, such as a wheel chock, to
make certain that the vehicle will not roll,
refer to page 198. Otherwise the danger
exists that the vehicle could roll when
parked on a very steep hill.<
Should it also be necessary to release the
automatic transmission's lockout manually,
for instance, if the battery is discharged,
always adhere to the following sequence:
1.If necessary, start by manually releasing
the parking brake
2.Then release the automatic transmis-
sion's lockout manually, refer to
page 70.
Jump-starting and towing, refer to
pages 202 and 203.
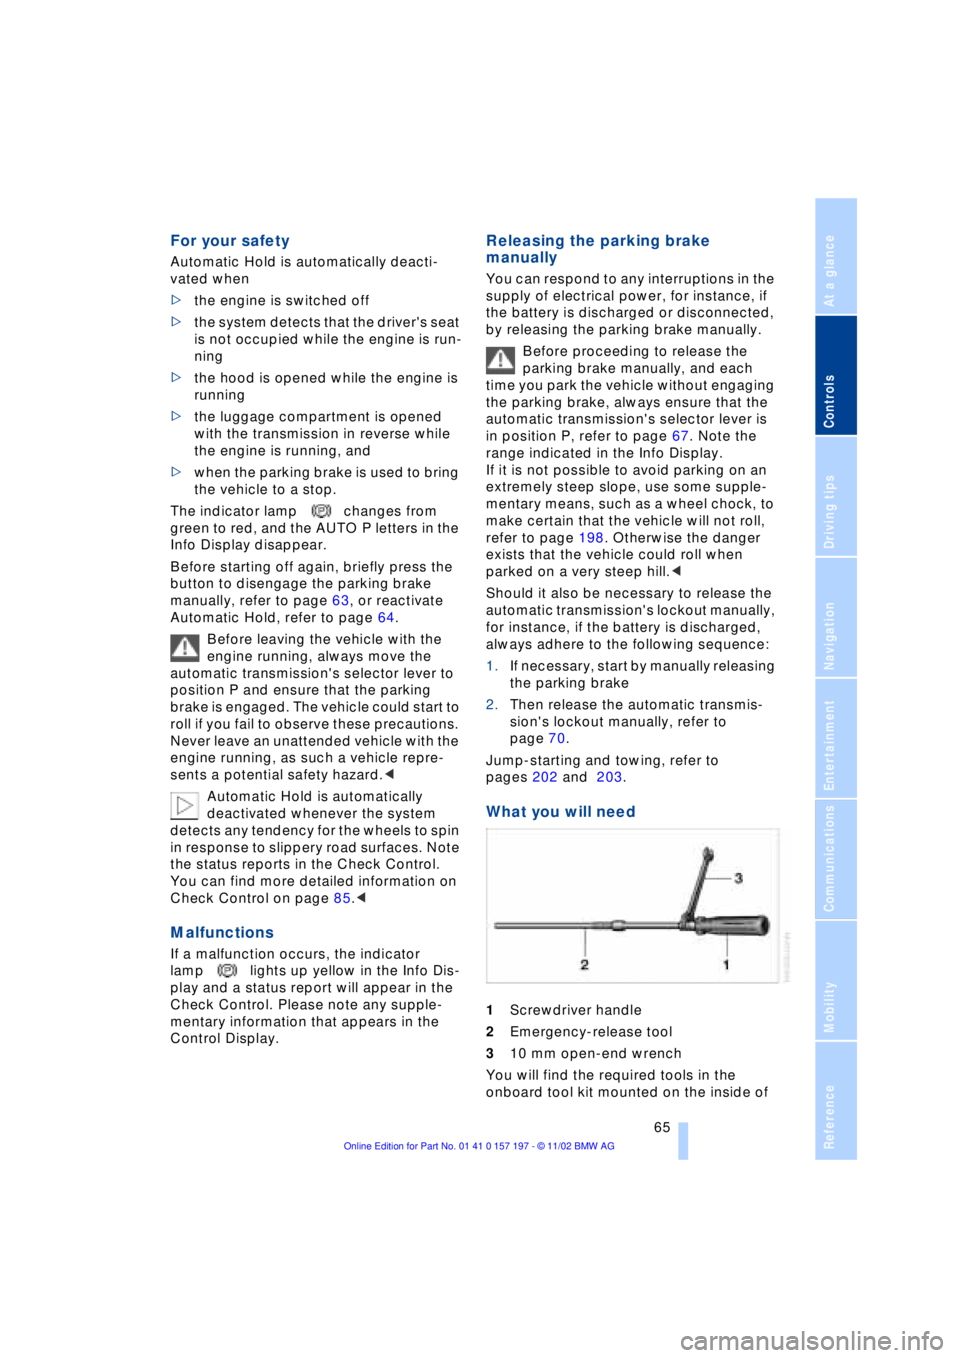
What you will need
1Screwdriver handle
2Emergency-release tool
310 mm open-end wrench
You will find the required tools in the
onboard tool kit mounted on the inside of
Page 71 of 229
At a glance
Controls
Driving tips
Communications
Navigation
Entertainment
Mobility
Reference
69
Deactivate the L mode to obtain max-
imum acceleration for overtaking
maneuvers, etc.<
Deactivating the L mode
>Press the L/D button or
>press the selector lever into position D
once again.
Automatic transmission
with Steptronic*
While you can drive as with any conven-
tional automatic transmission, you also
enjoy the option of shifting manually at the
steering wheel, refer to the next column.
Transmission ranges
P R N D
Program display
S or M1 Ð M6
Buttons on steering wheel
S/M/D + Ð
Selecting a transmission range
The procedure for selecting transmission
ranges is the same as that employed in the
L mode, refer to page 67.
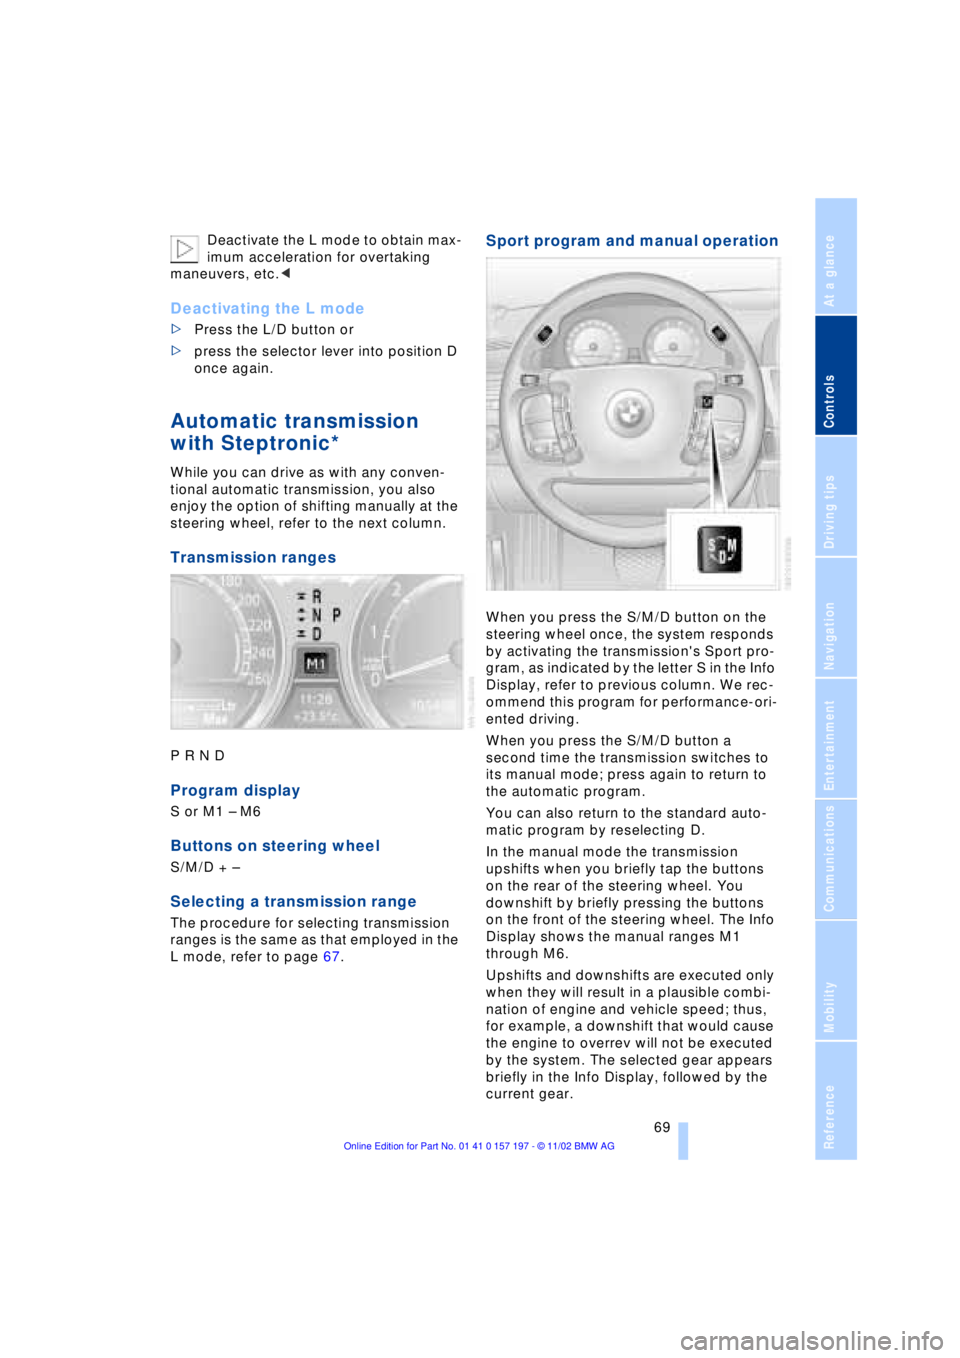
Sport program and manual operation
When you press the S/M/D button on the
steering wheel once, the system responds
by activating the transmission's Sport pro-
gram, as indicated by the letter S in the Info
Display, refer to previous column. We rec-
ommend this program for performance-ori-
ented driving.
When you press the S/M/D button a
second time the transmission switches to
its manual mode; press again to return to
the automatic program.
You can also return to the standard auto-
matic program by reselecting D.
In the manual mode the transmission
upshifts when you briefly tap the buttons
on the rear of the steering wheel. You
downshift by briefly pressing the buttons
on the front of the steering wheel. The Info
Display shows the manual ranges M1
through M6.
Upshifts and downshifts are executed only
when they will result in a plausible combi-
nation of engine and vehicle speed; thus,
for example, a downshift that would cause
the engine to overrev will not be executed
by the system. The selected gear appears
briefly in the Info Display, followed by the
current gear.
Page 75 of 229
At a glance
Controls
Driving tips
Communications
Navigation
Entertainment
Mobility
Reference
73
Selecting wiper fold-out position
Important for changing wiper blades, when
folding away from windshield to prevent
blades from sticking when ice forms, etc.
1.Switch off the engine and remove the
remote control unit from the ignition
lock
2.Press the wiper lever up and maintain
pressure for about 3 seconds until the
wipers are roughly vertical Ð this is the
fold-out position.
After folding the wipers back against the
windshield you will need to reactivate the
wiper system:
1.Insert the remote control unit to activate
the radio mode in the ignition lock
2.Apply brief upward pressure to the
wiper lever. The wipers return to their
retracted position and are ready for
normal operation.
To prevent damage to the wipers,
always fold them back against the
windshield before switching on either the
radio mode or the ignition.<
Washer fluid
Windshield and headlamp washer
system
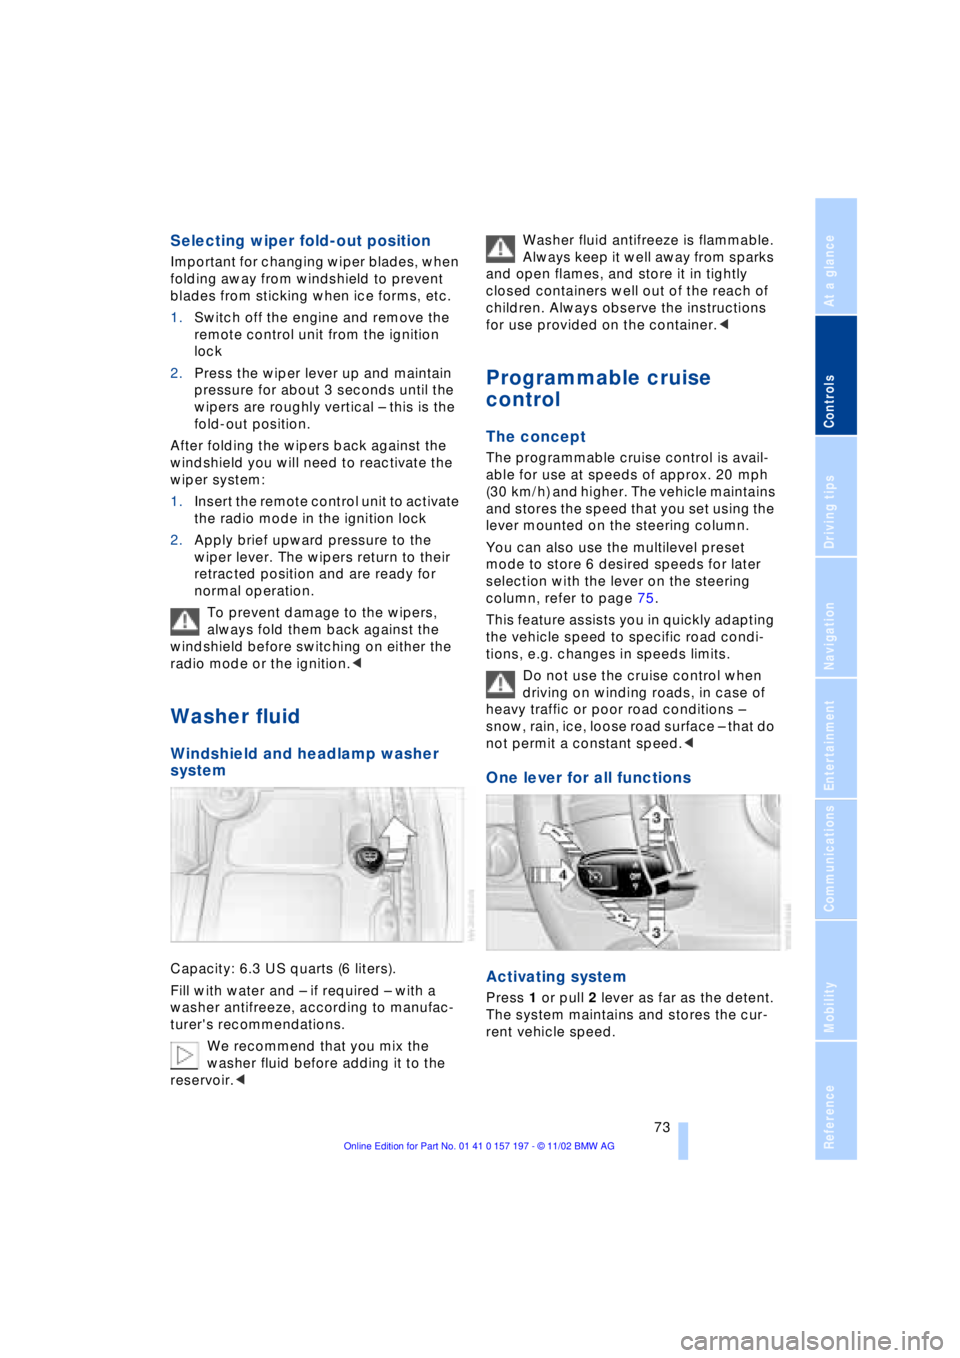
Capacity: 6.3 US quarts (6 liters).
Fill with water and Ð if required Ð with a
washer antifreeze, according to manufac-
turer's recommendations.
We recommend that you mix the
washer fluid before adding it to the
reservoir.< Washer fluid antifreeze is flammable.
Always keep it well away from sparks
and open flames, and store it in tightly
closed containers well out of the reach of
children. Always observe the instructions
for use provided on the container.<
Programmable cruise
control
The concept
The programmable cruise control is avail-
able for use at speeds of approx. 20 mph
(30 km/h) and higher. The vehicle maintains
and stores the speed that you set using the
lever mounted on the steering column.
You can also use the multilevel preset
mode to store 6 desired speeds for later
selection with the lever on the steering
column, refer to page 75.
This feature assists you in quickly adapting
the vehicle speed to specific road condi-
tions, e.g. changes in speeds limits.
Do not use the cruise control when
driving on winding roads, in case of
heavy traffic or poor road conditions Ð
snow, rain, ice, loose road surface Ð that do
not permit a constant speed.<
One lever for all functions
Activating system
Press 1 or pull 2 lever as far as the detent.
The system maintains and stores the cur-
rent vehicle speed.
Page 79 of 229
At a glance
Controls
Driving tips
Communications
Navigation
Entertainment
Mobility
Reference
77
The system requests you to
intervene by braking or with an
evasive maneuver. The display
flashes. The active cruise con-
trol cannot automatically
restore the distance to the vehicle driving
ahead. You will find more detailed informa-
tion on page 80.
Automatic intervention by ABS
or DSC, or you actuate the
parking brake while driving. The
active cruise control now only
intervenes by braking.
Operating the active cruise control
1Activate system,
store and increase desired speed
2Activate system,
store and decrease desired speed
3Deactivate system
4With system deactivated:
Briefly press the button to recall the
stored speed and distance
4With system activated:
Increase desired speed by 1 mph
(1 km/h) with each press of the button
5Select distance to vehicle driving
ahead. You can choose from four avail-
able distance settings. You will find
more detailed information on page 78
Adjust your desired speed to the
traffic conditions and remain ready to
brake at all times. Great differences in
speed to the vehicles driving ahead, e.g.
when quickly approaching a truck or when
another vehicle swerves into your lane,
cannot be compensated for by the
system.<
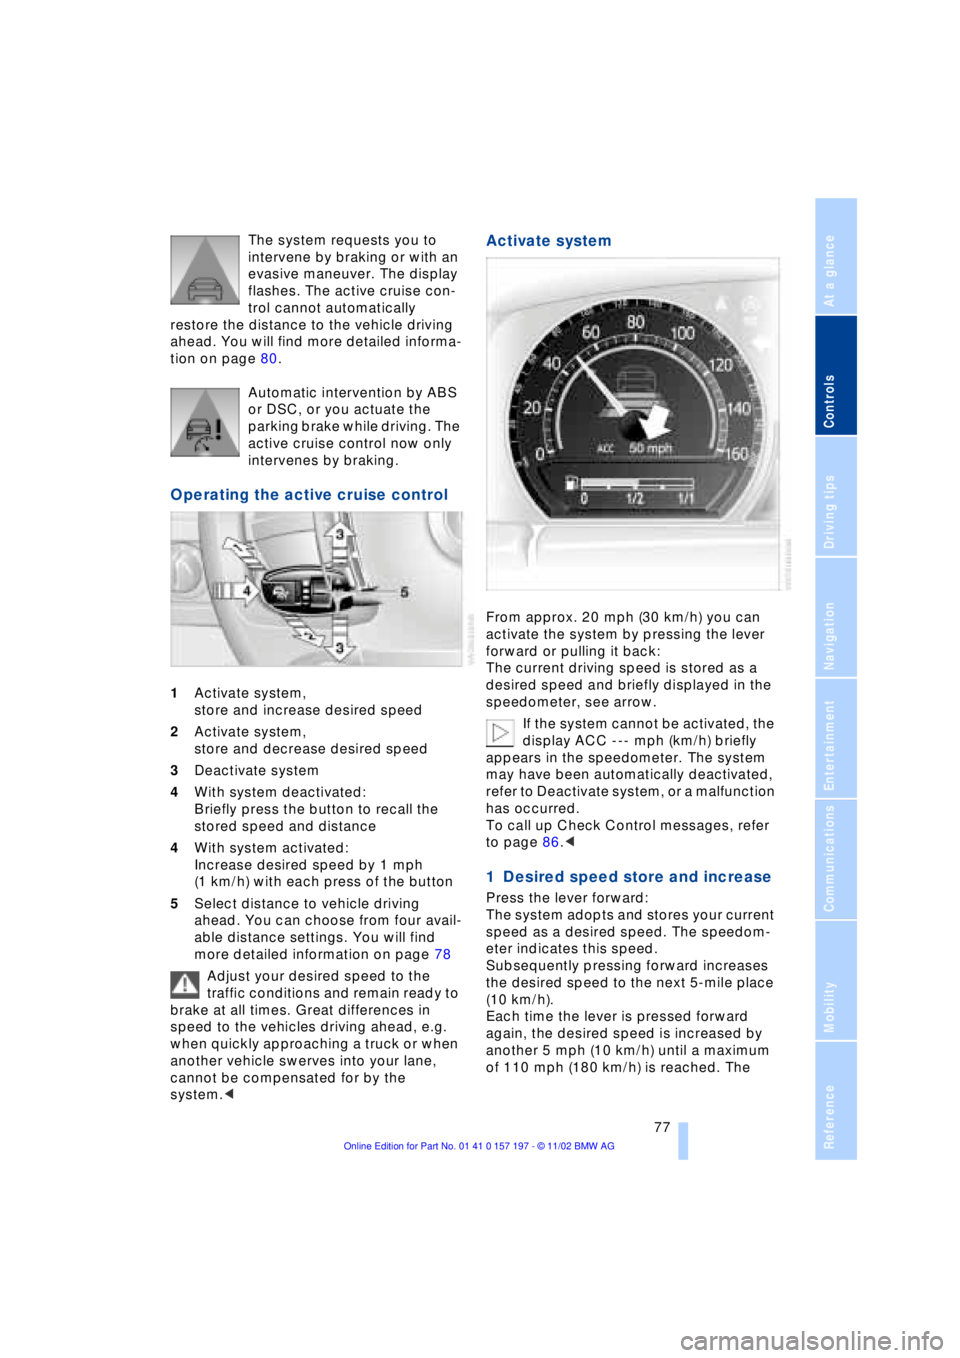
Activate system
From approx. 20 mph (30 km/h) you can
activate the system by pressing the lever
forward or pulling it back:
The current driving speed is stored as a
desired speed and briefly displayed in the
speedometer, see arrow.
If the system cannot be activated, the
display ACC --- mph (km/h) briefly
appears in the speedometer. The system
may have been automatically deactivated,
refer to Deactivate system, or a malfunction
has occurred.
To call up Check Control messages, refer
to page 86.<
1 Desired speed store and increase
Press the lever forward:
The system adopts and stores your current
speed as a desired speed. The speedom-
eter indicates this speed.
Subsequently pressing forward increases
the desired speed to the next 5-mile place
(10 km/h).
Each time the lever is pressed forward
again, the desired speed is increased by
another 5 mph (10 km/h) until a maximum
of 110 mph (180 km/h) is reached. The
Page 80 of 229
Driving
78 speed then displayed is stored and
reached on a clear road.
2 Desired speed store and decrease
Pull back the lever:
The current driving speed is rounded off to
the next 5-mile place (10 km/h), displayed
and stored.
Each time the lever is pulled back again,
the desired speed is decreased by another
5 mph (10 km/h) until the minimum speed
of 20 mph (30 km/h) is reached. The speed
then displayed is stored and reached on a
clear road.
3 Deactivate system
Press the lever up or down while the
system is active. The displays in the speed-
ometer disappear. You can use the system
again as required.
In addition, the system is deactivated auto-
matically:
>when you apply pressure to the brake
pedal
>when you select the automatic trans-
missionÕs neutral range N
>when you deactivate the Dynamic Sta-
bility Control DSC
>when you actuate the parking brake
during driving
>when the system reduces the speed to
below 20 mph (30 km/h) due to a traffic
situation.
The system deactivates automatically
when the speed is set to below
20 mph (30 km/h). A gong sounds and a
message appears in the Check Control.
The active intervention of the driver is
required.<
Background lighting
You can switch off the background lighting
of the speedometer and tachometer
>when you have deactivated the system
>when the prewarning field in the
tachometer has gone out, refer to
page 82 >when the destination guidance system
of the navigation system is deactivated.
Press the lever up or down for approx.
1 second.
4 Resume to stored desired speed
and distance setting
Press button 4:
The displays appear in the speedometer.
The system is reactivated and uses the last
stored desired speed and distance setting.
4 Fine adjustment of desired speed
In the activated state, the desired speed
increases by 1 mph (1 km/h) each time
button 4 is pressed briefly.
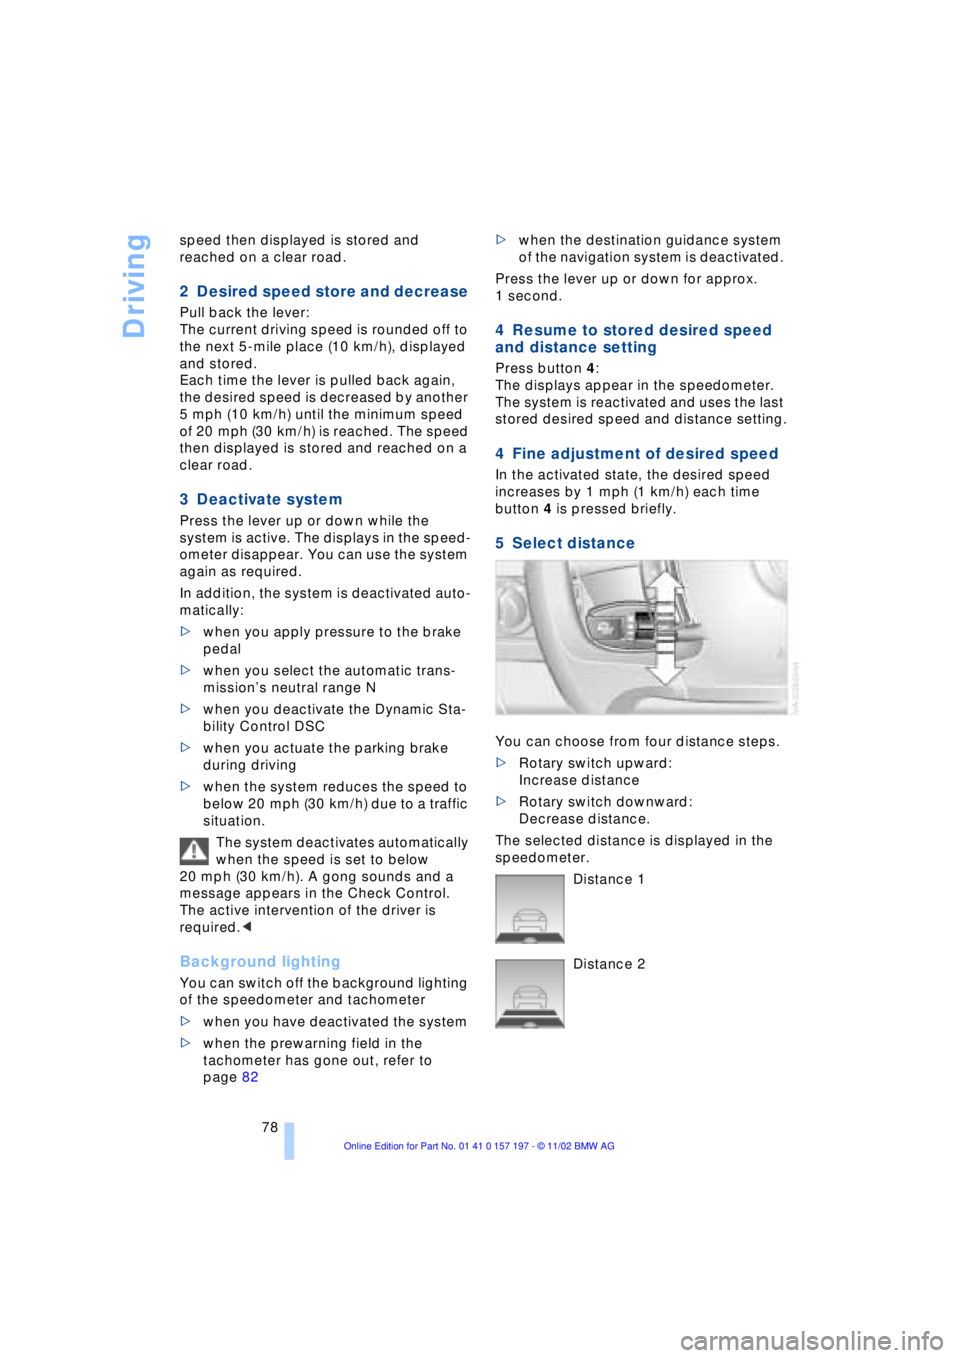
5 Select distance
You can choose from four distance steps.
>Rotary switch upward:
Increase distance
>Rotary switch downward:
Decrease distance.
The selected distance is displayed in the
speedometer.
Distance 1
Distance 2
Page 81 of 229
At a glance
Controls
Driving tips
Communications
Navigation
Entertainment
Mobility
Reference
79
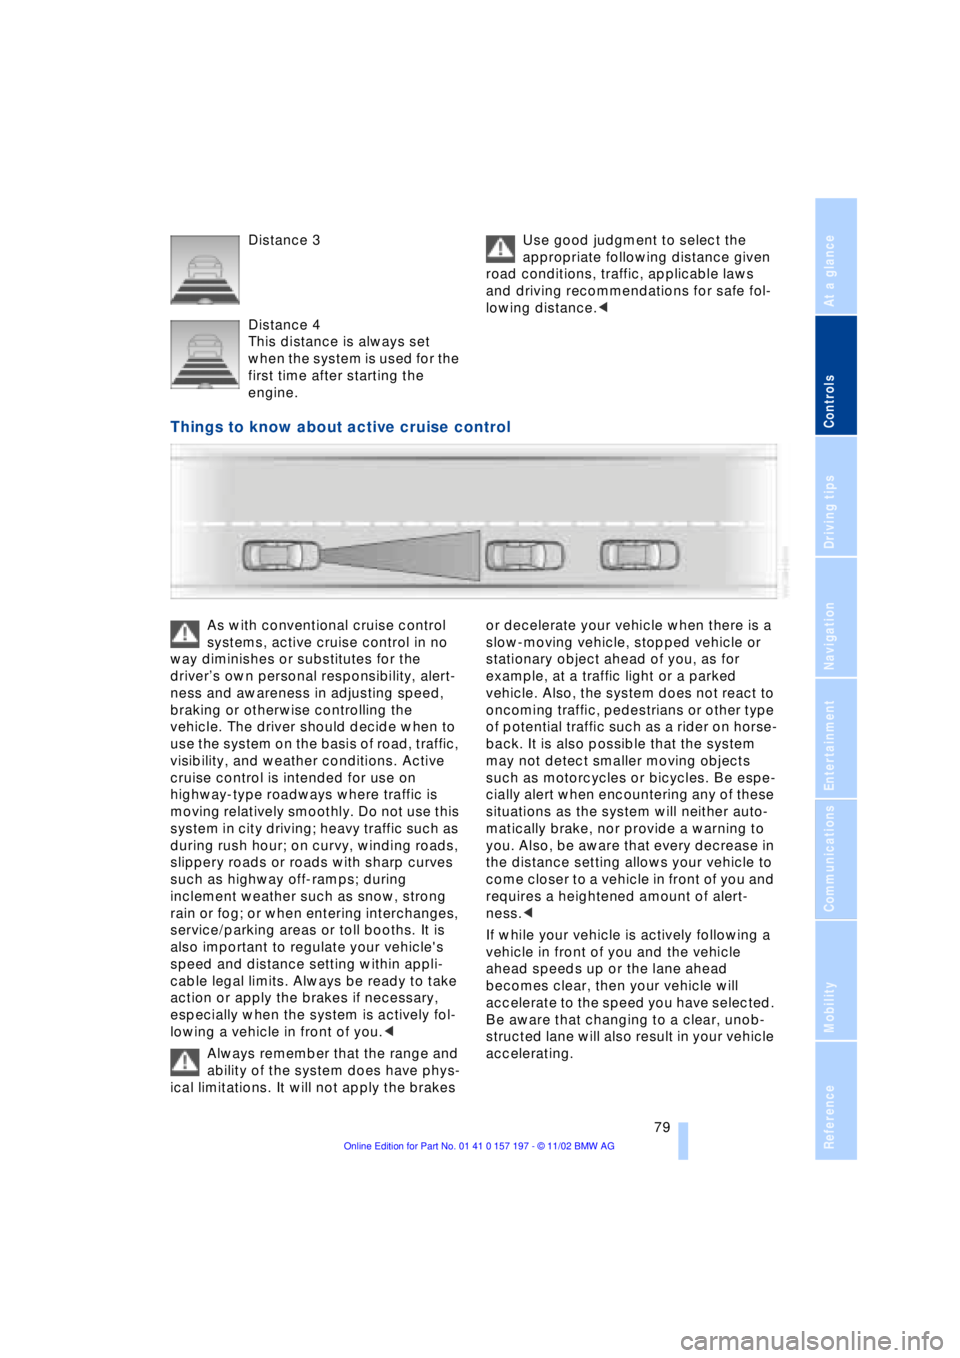
Distance 3
Distance 4
This distance is always set
when the system is used for the
first time after starting the
engine. Use good judgment to select the
appropriate following distance given
road conditions, traffic, applicable laws
and driving recommendations for safe fol-
lowing distance.<
Things to know about active cruise control
As with conventional cruise control
systems, active cruise control in no
way diminishes or substitutes for the
driverÕs own personal responsibility, alert-
ness and awareness in adjusting speed,
braking or otherwise controlling the
vehicle. The driver should decide when to
use the system on the basis of road, traffic,
visibility, and weather conditions. Active
cruise control is intended for use on
highway-type roadways where traffic is
moving relatively smoothly. Do not use this
system in city driving; heavy traffic such as
during rush hour; on curvy, winding roads,
slippery roads or roads with sharp curves
such as highway off-ramps; during
inclement weather such as snow, strong
rain or fog; or when entering interchanges,
service/parking areas or toll booths. It is
also important to regulate your vehicle's
speed and distance setting within appli-
cable legal limits. Always be ready to take
action or apply the brakes if necessary,
especially when the system is actively fol-
lowing a vehicle in front of you.<
Always remember that the range and
ability of the system does have phys-
ical limitations. It will not apply the brakes or decelerate your vehicle when there is a
slow-moving vehicle, stopped vehicle or
stationary object ahead of you, as for
example, at a traffic light or a parked
vehicle. Also, the system does not react to
oncoming traffic, pedestrians or other type
of potential traffic such as a rider on horse-
back. It is also possible that the system
may not detect smaller moving objects
such as motorcycles or bicycles. Be espe-
cially alert when encountering any of these
situations as the system will neither auto-
matically brake, nor provide a warning to
you. Also, be aware that every decrease in
the distance setting allows your vehicle to
come closer to a vehicle in front of you and
requires a heightened amount of alert-
ness.<
If while your vehicle is actively following a
vehicle in front of you and the vehicle
ahead speeds up or the lane ahead
becomes clear, then your vehicle will
accelerate to the speed you have selected.
Be aware that changing to a clear, unob-
structed lane will also result in your vehicle
accelerating.