Page 1672 of 2100

2. Install the J±38555 inner installer on the drum (14).
�Pre±install piston assembly into J±38555 outer
installer.
�Install overrun clutch piston assembly (")
7A±88
AUTOMATIC TRANSMISSION (4L30±E)
2. Install the J±38555 inner installer on the drum (14).
�Pre±install piston assembly into J±38555 outer
installer.
�Install overrun clutch piston assembly (13). Use the
outer installer while pushing piston into drum (14).
�Remove the installer.
252RS012
252RS013
3. Install diaphragm spring (12).
4. Install overrun clutch release spring retainer (11) (lip
faces upwards), overrun roller clutch assembly (10),
and cam (9).
5. Place snap ring loosely on spring retainer.
�Hold the J±23327±91 compressor in a vise and
compress piston return spring with compressor.
�Set snap ring (8) in ring groove.
�Remove the compressor.
6. Install clutch plates (7), start with steel plate and
alternate with lined plates.
7. Install backing plate (6).
8. Install snap ring (5).
9. Install overdrive sun gear with countersink pointing
downwards.
10. Install the overdrive carrier assembly (2).
NOTE: Tu r n t h e a s sembly in a counter±clockwise
direction only until roller clutch enters the outer race.
After installation, rotate the assembly and listen for loose
rollers.
11. Install turbine shaft (4) and snap ring (1).
Page 1779 of 2100
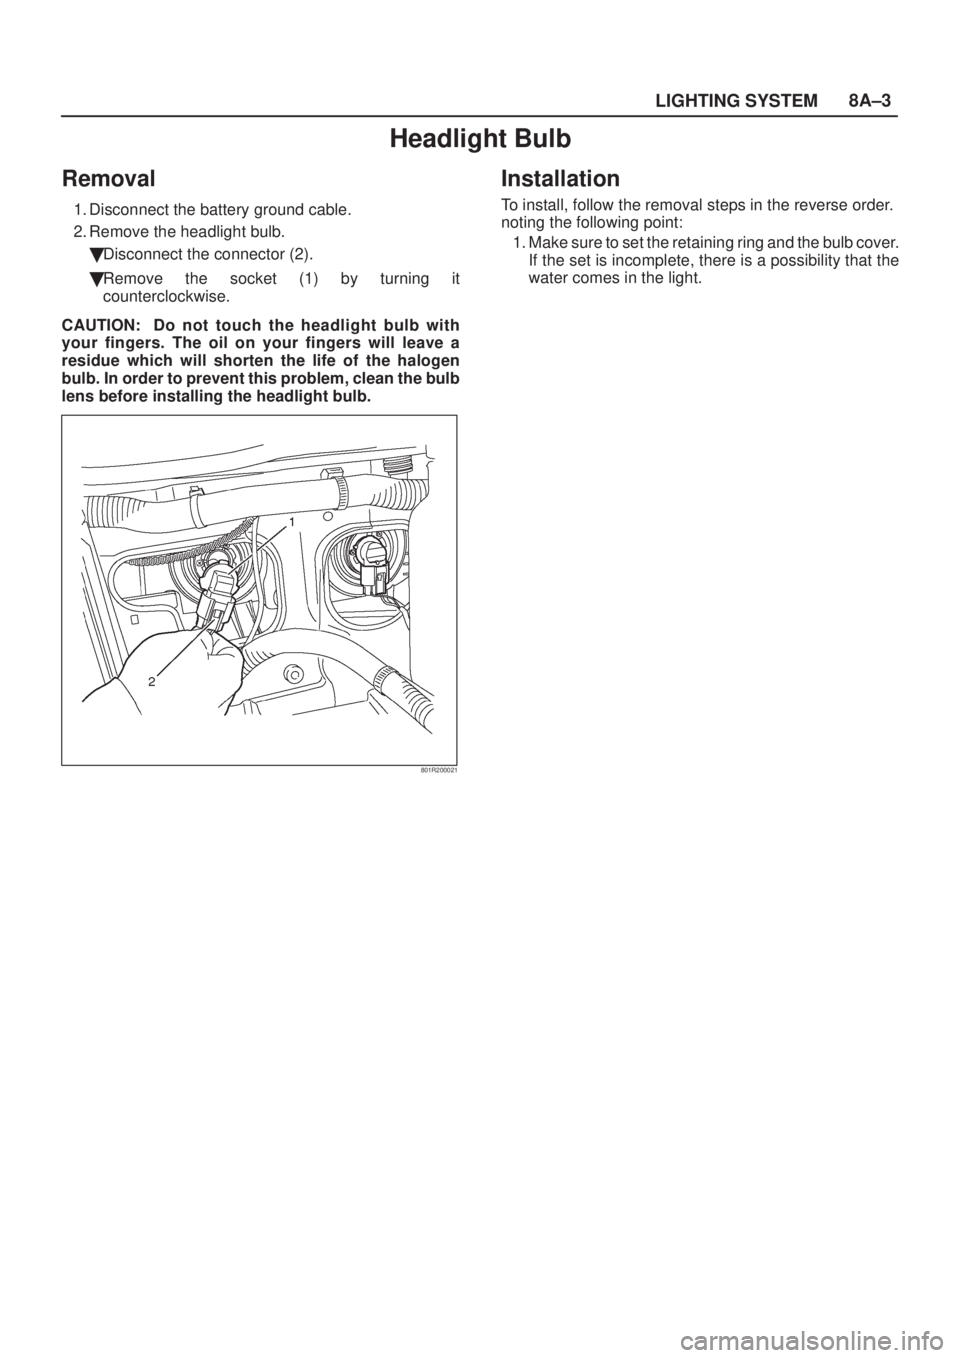
LIGHTING SYSTEM8A±3
Headlight Bulb
Removal
1. Disconnect the battery ground cable.
2. Remove the headlight bulb.
�Disconnect the connector (2).
�Remove the socket (1) by turning it
counterclockwise.
CAUTION: Do not touch the headlight bulb with
your fingers. The oil on your fingers will leave a
residue which will shorten the life of the halogen
bulb. In order to prevent this problem, clean the bulb
lens before installing the headlight bulb.
801R200021
Installation
To install, follow the removal steps in the reverse order.
noting the following point:
1. Make sure to set the retaining ring and the bulb cover.
If the set is incomplete, there is a possibility that the
water comes in the light.
Page 1782 of 2100
8A±6LIGHTING SYSTEM
Side Marker Light Bulb
Removal
1. Disconnect the battery ground cable.
2. Remove the front combination light (1).
�Remove the screw.
3. Remove the bulb (2).
�Remove the side marker light socket (3) by turning it
counterclockwise.
�Remove the bulb by turning it counterclockwise
while pushing it at the same time.
801R200013
Installation
To install, follow the removal steps in the reverse order.
Page 1783 of 2100
LIGHTING SYSTEM8A±7
Taillight Bulb
Removal
1. Disconnect the battery ground cable.
2. Remove the rear combination light assembly (1).
�Remove two screws.
�Pull out the rear combination light assembly
outside.
803R200011
3. Remove the bulb (1).
�Remove the taillight socket by turning it
counterclockwise.
�Remove the bulb by turning it counterclockwise
while pushing it at the same time.
803R200002
Installation
To install, follow the removal steps in the reverse order.
Page 1784 of 2100
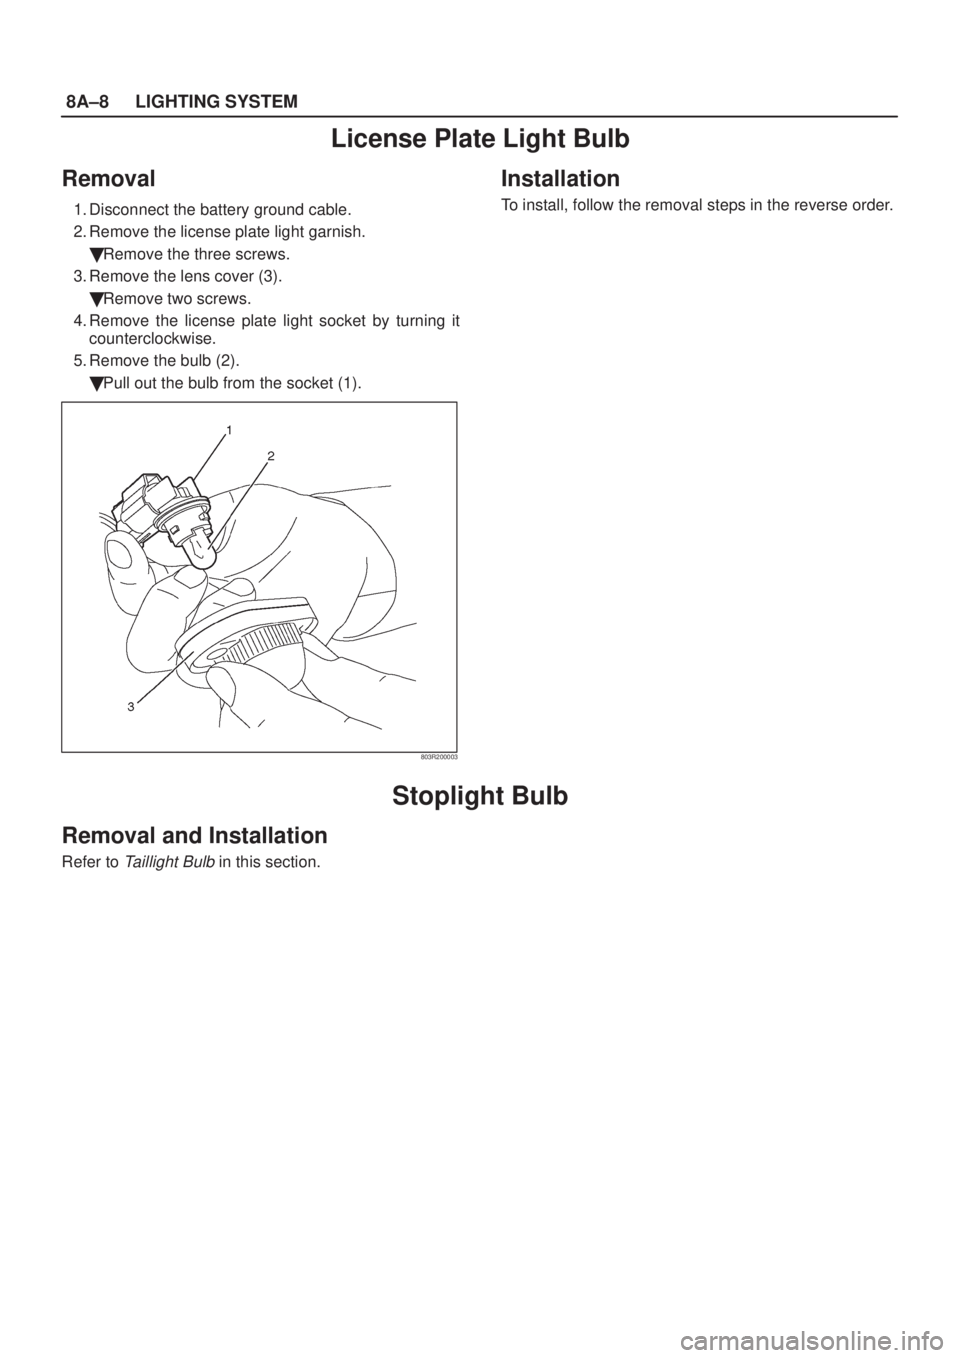
8A±8LIGHTING SYSTEM
License Plate Light Bulb
Removal
1. Disconnect the battery ground cable.
2. Remove the license plate light garnish.
�Remove the three screws.
3. Remove the lens cover (3).
�Remove two screws.
4. Remove the license plate light socket by turning it
counterclockwise.
5. Remove the bulb (2).
�Pull out the bulb from the socket (1).
803R200003
Installation
To install, follow the removal steps in the reverse order.
Stoplight Bulb
Removal and Installation
Refer to Taillight Bulb in this section.
Page 1785 of 2100
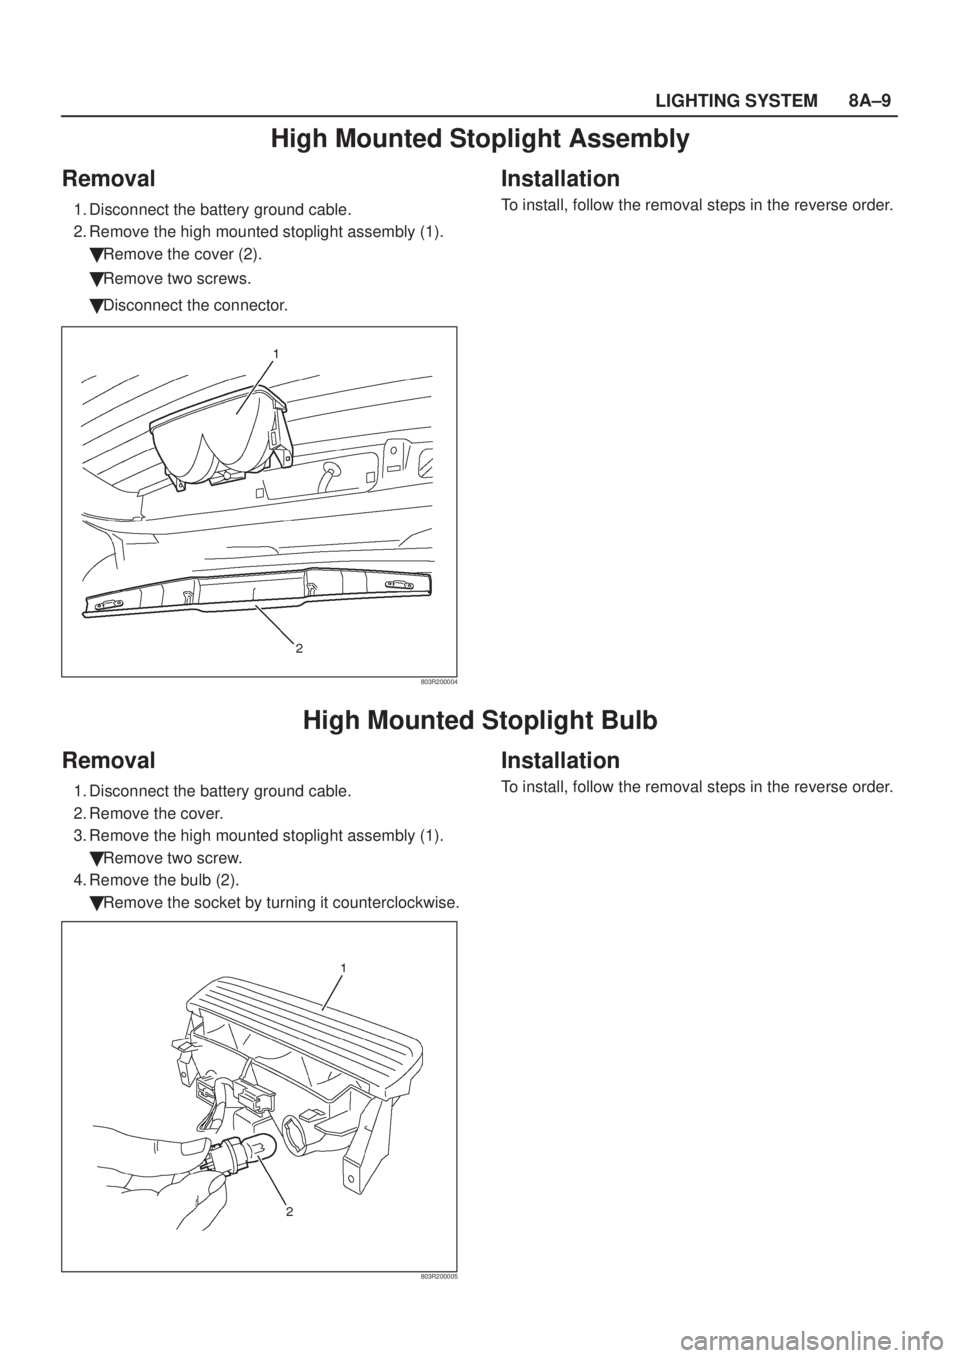
LIGHTING SYSTEM8A±9
High Mounted Stoplight Assembly
Removal
1. Disconnect the battery ground cable.
2. Remove the high mounted stoplight assembly (1).
�Remove the cover (2).
�Remove two screws.
�Disconnect the connector.
803R200004
Installation
To install, follow the removal steps in the reverse order.
High Mounted Stoplight Bulb
Removal
1. Disconnect the battery ground cable.
2. Remove the cover.
3. Remove the high mounted stoplight assembly (1).
�Remove two screw.
4. Remove the bulb (2).
�Remove the socket by turning it counterclockwise.
803R200005
Installation
To install, follow the removal steps in the reverse order.
Page 1786 of 2100
8A±10LIGHTING SYSTEM
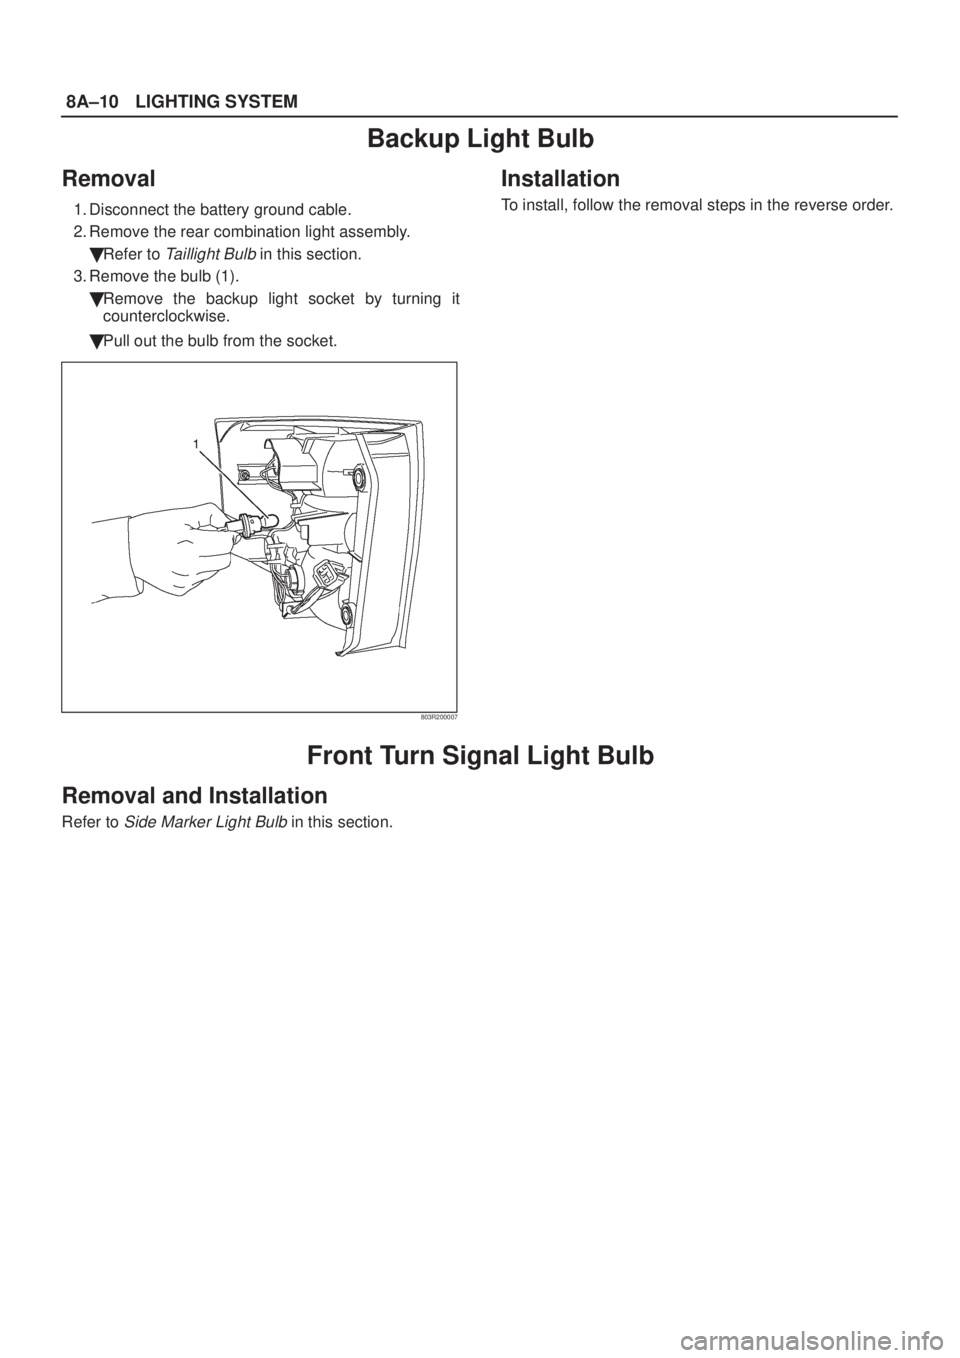
Backup Light Bulb
Removal
1. Disconnect the battery ground cable.
2. Remove the rear combination light assembly.
�Refer to
Taillight Bulb in this section.
3. Remove the bulb (1).
�Remove the backup light socket by turning it
counterclockwise.
�Pull out the bulb from the socket.
803R200007
Installation
To install, follow the removal steps in the reverse order.
Front Turn Signal Light Bulb
Removal and Installation
Refer to Side Marker Light Bulb in this section.
Page 1787 of 2100
LIGHTING SYSTEM8A±11
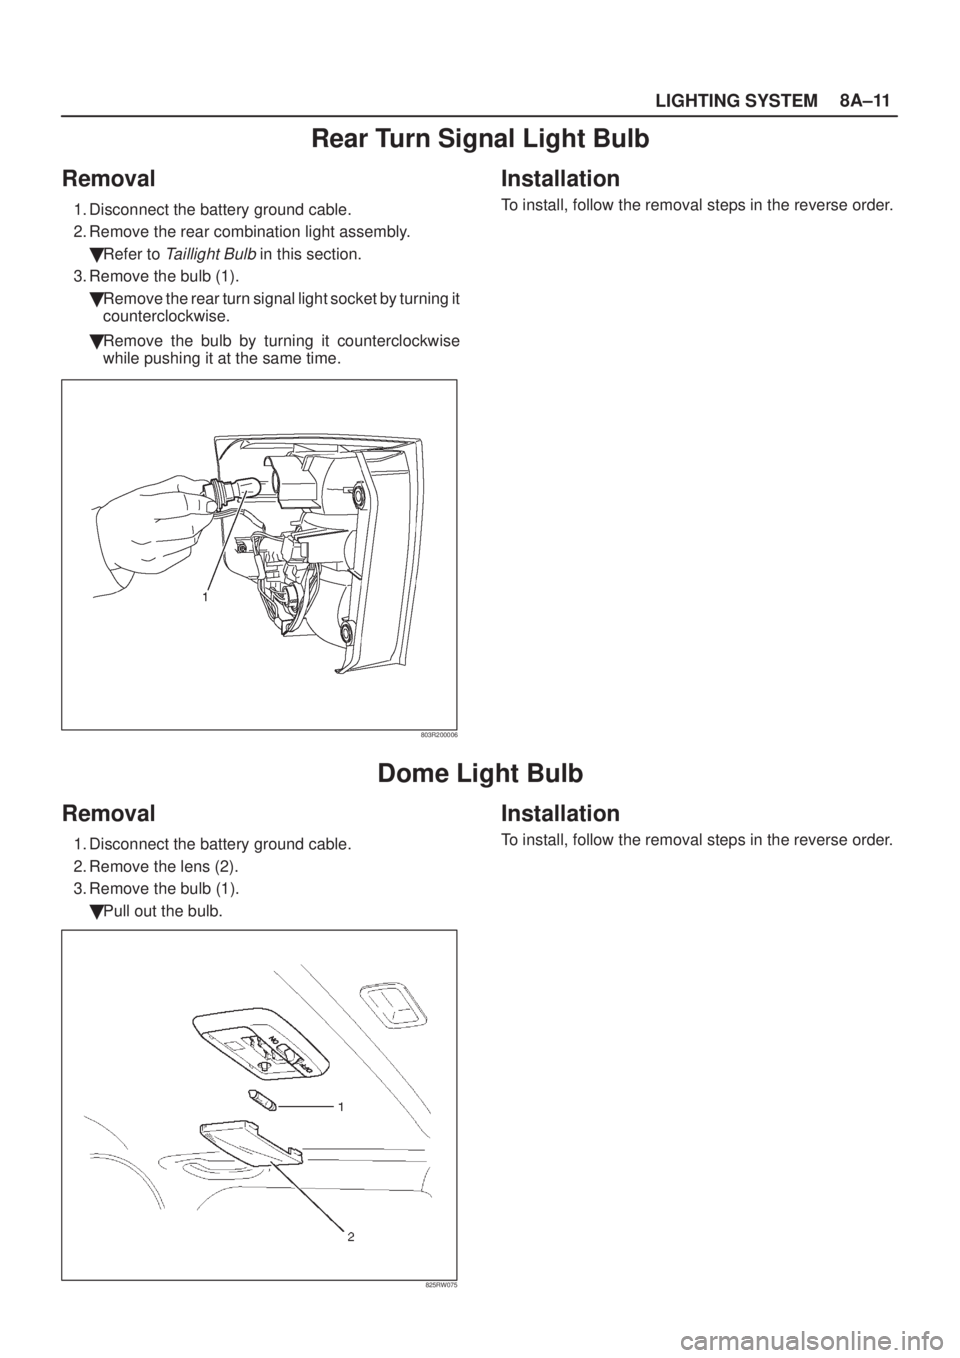
Rear Turn Signal Light Bulb
Removal
1. Disconnect the battery ground cable.
2. Remove the rear combination light assembly.
�Refer to
Taillight Bulb in this section.
3. Remove the bulb (1).
�Remove the rear turn signal light socket by turning it
counterclockwise.
�Remove the bulb by turning it counterclockwise
while pushing it at the same time.
803R200006
Installation
To install, follow the removal steps in the reverse order.
Dome Light Bulb
Removal
1. Disconnect the battery ground cable.
2. Remove the lens (2).
3. Remove the bulb (1).
�Pull out the bulb.
825RW075
Installation
To install, follow the removal steps in the reverse order.