2002 BMW 745LI SEDAN radio controls
[x] Cancel search: radio controlsPage 82 of 208
At a glanceControlsDriving tipsCommunicationsNavigationEntertainmentMobilityReference
81
Select and confirm to cancel the
display.
Selecting stored status reports for
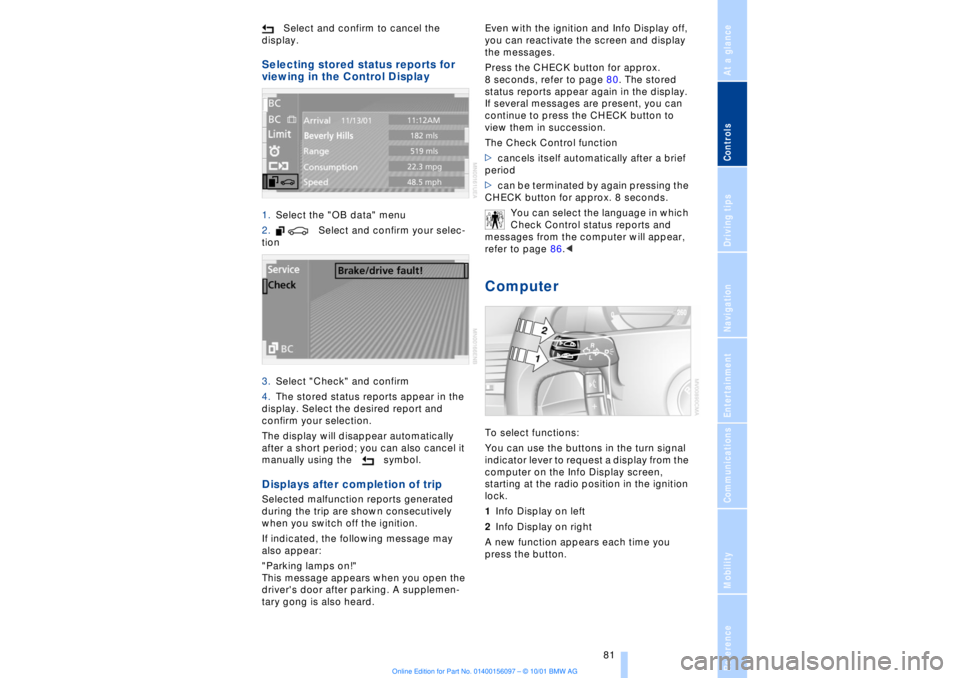
viewing in the Control Display 1.Select the "OB data" menu
2. Select and confirm your selec-
tion
3.Select "Check" and confirm
4.The stored status reports appear in the
display. Select the desired report and
confirm your selection.
The display will disappear automatically
after a short period; you can also cancel it
manually using the symbol. Displays after completion of trip Selected malfunction reports generated
during the trip are shown consecutively
when you switch off the ignition.
If indicated, the following message may
also appear:
"Parking lamps on!"
This message appears when you open the
driver's door after parking. A supplemen-
tary gong is also heard. Even with the ignition and Info Display off,
you can reactivate the screen and display
the messages.
Press the CHECK button for approx.
8 seconds, refer to page 80. The stored
status reports appear again in the display.
If several messages are present, you can
continue to press the CHECK button to
view them in succession.
The Check Control function
>cancels itself automatically after a brief
period
>can be terminated by again pressing the
CHECK button for approx. 8 seconds.
You can select the language in which
Check Control status reports and
messages from the computer will appear,
refer to page 86.<
Computer To select functions:
You can use the buttons in the turn signal
indicator lever to request a display from the
computer on the Info Display screen,
starting at the radio position in the ignition
lock.
1Info Display on left
2Info Display on right
A new function appears each time you
press the button.
Page 102 of 208
At a glanceControlsDriving tipsCommunicationsNavigationEntertainmentMobilityReference
101
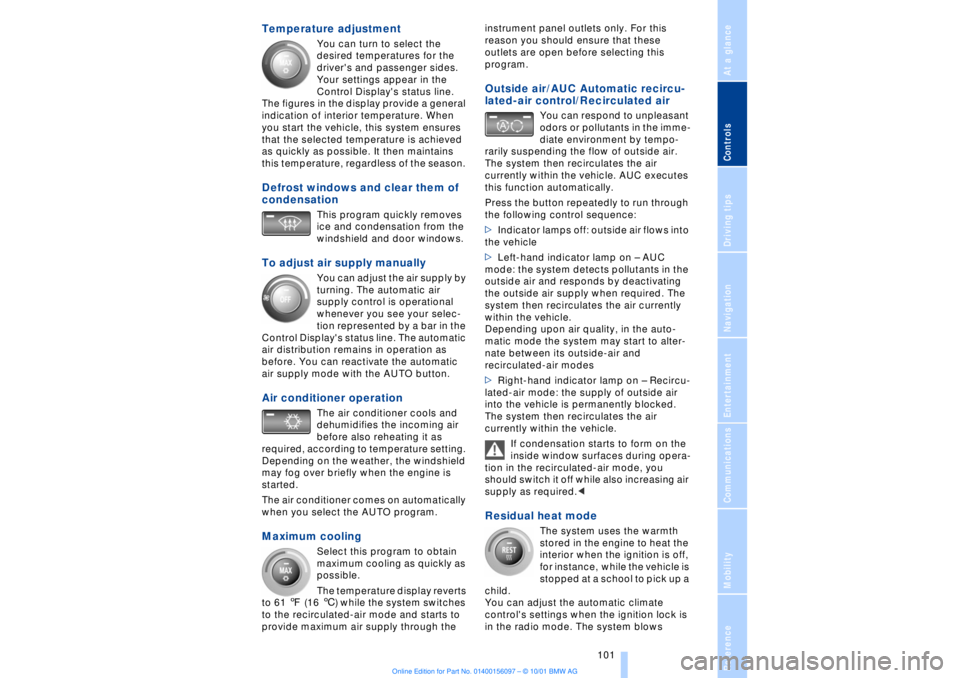
Temperature adjustment
You can turn to select the
desired temperatures for the
driver's and passenger sides.
Your settings appear in the
Control Display's status line.
The figures in the display provide a general
indication of interior temperature. When
you start the vehicle, this system ensures
that the selected temperature is achieved
as quickly as possible. It then maintains
this temperature, regardless of the season.
Defrost windows and clear them of
condensation
This program quickly removes
ice and condensation from the
windshield and door windows.
To adjust air supply manually
You can adjust the air supply by
turning. The automatic air
supply control is operational
whenever you see your selec-
tion represented by a bar in the
Control Display's status line. The automatic
air distribution remains in operation as
before. You can reactivate the automatic
air supply mode with the AUTO button.
Air conditioner operation
The air conditioner cools and
dehumidifies the incoming air
before also reheating it as
required, according to temperature setting.
Depending on the weather, the windshield
may fog over briefly when the engine is
started.
The air conditioner comes on automatically
when you select the AUTO program.
Maximum cooling
Select this program to obtain
maximum cooling as quickly as
possible.
The temperature display reverts
to 61 7 (16 6) while the system switches
to the recirculated-air mode and starts to
provide maximum air supply through the instrument panel outlets only. For this
reason you should ensure that these
outlets are open before selecting this
program.
Outside air/AUC Automatic recircu-
lated-air control/Recirculated air
You can respond to unpleasant
odors or pollutants in the imme-
diate environment by tempo-
rarily suspending the flow of outside air.
The system then recirculates the air
currently within the vehicle. AUC executes
this function automatically.
Press the button repeatedly to run through
the following control sequence:
>Indicator lamps off: outside air flows into
the vehicle
>Left-hand indicator lamp on Ð AUC
mode: the system detects pollutants in the
outside air and responds by deactivating
the outside air supply when required. The
system then recirculates the air currently
within the vehicle.
Depending upon air quality, in the auto-
matic mode the system may start to alter-
nate between its outside-air and
recirculated-air modes
>Right-hand indicator lamp on Ð Recircu-
lated-air mode: the supply of outside air
into the vehicle is permanently blocked.
The system then recirculates the air
currently within the vehicle.
If condensation starts to form on the
inside window surfaces during opera-
tion in the recirculated-air mode, you
should switch it off while also increasing air
supply as required.<
Residual heat mode
The system uses the warmth
stored in the engine to heat the
interior when the ignition is off,
for instance, while the vehicle is
stopped at a school to pick up a
child.
You can adjust the automatic climate
control's settings when the ignition lock is
in the radio mode. The system blows
Page 110 of 208
At a glanceControlsDriving tipsCommunicationsNavigationEntertainmentMobilityReference
109
4.Simultaneously press the transmit key
on the original hand-held transmitter,
arrow 3 and the selected channel key 1
on the Universal Garage Door Opener.
Release both keys as soon as the indicator
lamp flashes rapidly
5.To program other original hand-held
transmitters, repeat steps 3 and 4.
The corresponding channel key is now
programmed with the signal of the original
hand-held transmitter. Programming alternating-code
transmitters
Observe all of the safety precautions
described on the previous page.<
Consult the unit's operating instructions
when programming the Universal Garage
Door Opener.
When programming hand-held transmitters
that employ an alternating code, please
observe the following supplementary
instructions:
Programming will be easier with the
aid of a second person.<
1.Program the Universal Garage Door
Opener by following the instructions given
above under Programming.
2.Maintain pressure on the alternating-
code transmitter for roughly two seconds,
continuing until the program lamp lights up.
3.Press the selected channel key on the
Universal Garage Door Opener three times.
If you have any additional questions,
please contact your BMW center.<
To clear channel keys
Observe all of the safety precautions
described on the previous page.<
The memory of individual channel keys
cannot be deleted. However, the three
channel keys can be cleared together as
follows:
>Press both outside keys on the Universal
Garage Door Opener; maintain pressure
until the indicator lamp starts to flash, then
release the key.
Sun blinds*
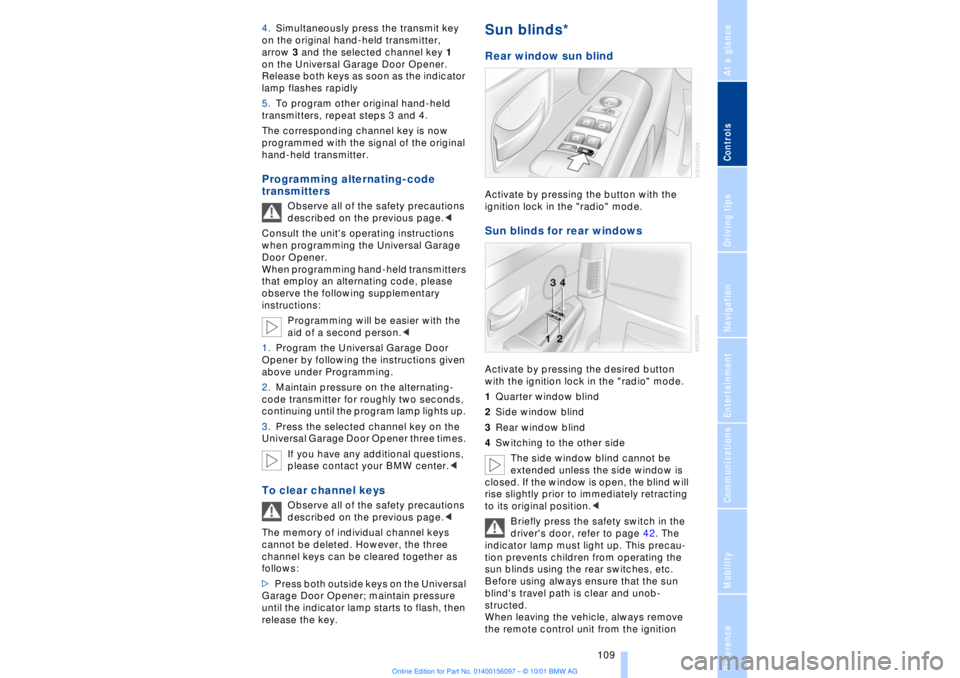
Rear window sun blind Activate by pressing the button with the
ignition lock in the "radio" mode. Sun blinds for rear windows Activate by pressing the desired button
with the ignition lock in the "radio" mode.
1Quarter window blind
2Side window blind
3Rear window blind
4Switching to the other side
The side window blind cannot be
extended unless the side window is
closed. If the window is open, the blind will
rise slightly prior to immediately retracting
to its original position.<
Briefly press the safety switch in the
driver's door, refer to page 42. The
indicator lamp must light up. This precau-
tion prevents children from operating the
sun blinds using the rear switches, etc.
Before using always ensure that the sun
blind's travel path is clear and unob-
structed.
When leaving the vehicle, always remove
the remote control unit from the ignition
Page 141 of 208
Sound system
140
Sound systemControlsThe cassette deck, or CD or MD player, is
installed in the instrument panel. Local user
controls for these sound systems are also
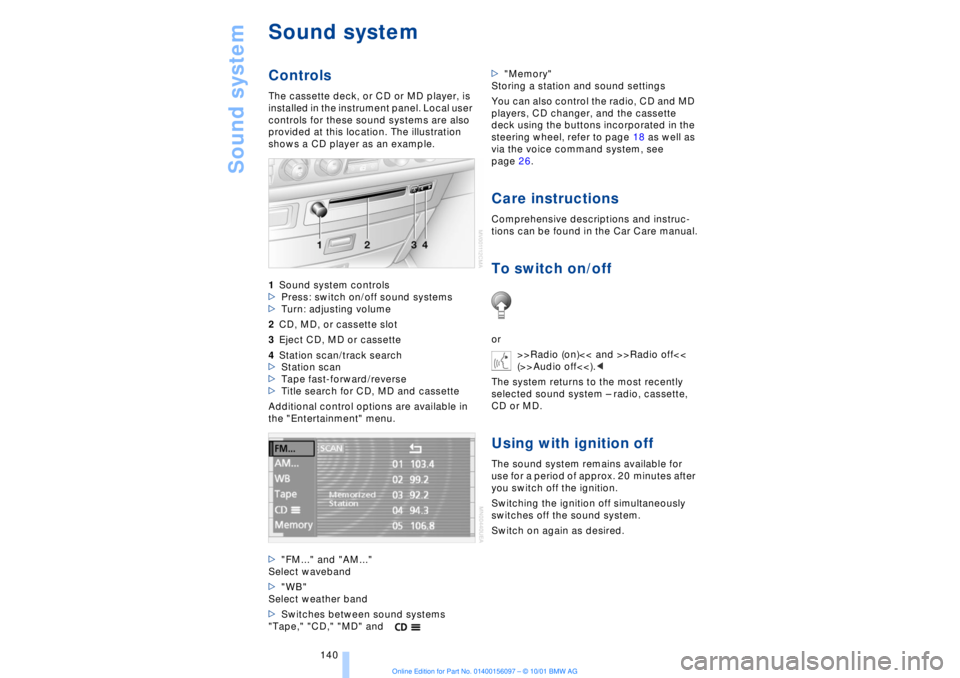
provided at this location. The illustration
shows a CD player as an example.
1Sound system controls
>Press: switch on/off sound systems
>Turn: adjusting volume
2CD, MD, or cassette slot
3Eject CD, MD or cassette
4Station scan/track search
>Station scan
>Tape fast-forward/reverse
>Title search for CD, MD and cassette
Additional control options are available in
the "Entertainment" menu.
>"FM..." and "AM..."
Select waveband
>"WB"
Select weather band
>Switches between sound systems
"Tape," "CD," "MD" and>"Memory"
Storing a station and sound settings
You can also control the radio, CD and MD
players, CD changer, and the cassette
deck using the buttons incorporated in the
steering wheel, refer to page 18 as well as
via the voice command system, see
page 26.
Care instructionsComprehensive descriptions and instruc-
tions can be found in the Car Care manual.To switch on/offor
>>Radio (on)<< and >>Radio off<<
(>>Audio off<<).<
The system returns to the most recently
selected sound system Ð radio, cassette,
CD or MD.Using with ignition offThe sound system remains available for
use for a period of approx. 20 minutes after
you switch off the ignition.
Switching the ignition off simultaneously
switches off the sound system.
Switch on again as desired.
Page 142 of 208
At a glanceControlsDriving tipsCommunicationsNavigationEntertainmentMobilityReference
141
It is not possible to operate the
system using the control buttons in
the steering wheel when the ignition is off.
To avoid discharging the battery you
should always switch off the sound system
when leaving the vehicle.<
Volume adjustmentAdjusting volumeTurn adjust the desired volume level.
The sound system automatically
reverts to its mute mode whenever
you use your mobile phone.
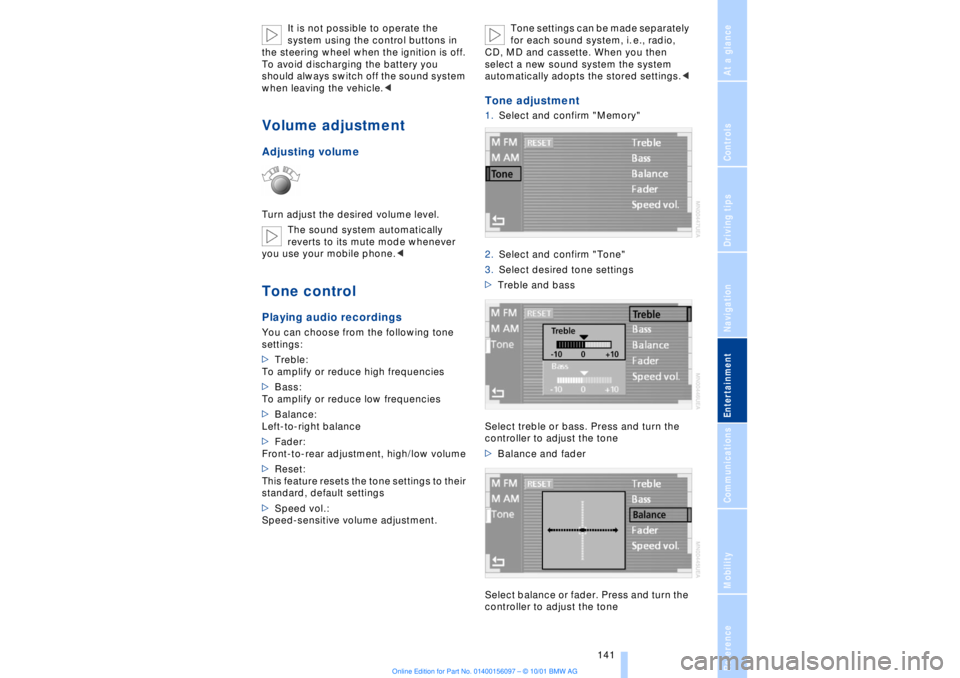
>Treble:
To amplify or reduce high frequencies
>Bass:
To amplify or reduce low frequencies
>Balance:
Left-to-right balance
>Fader:
Front-to-rear adjustment, high/low volume
>Reset:
This feature resets the tone settings to their
standard, default settings
>Speed vol.:
Speed-sensitive volume adjustment. Tone settings can be made separately
for each sound system, i. e., radio,
CD, MD and cassette. When you then
select a new sound system the system
automatically adopts the stored settings.<
Tone adjustment1.Select and confirm "Memory"
2.Select and confirm "Tone"
3.Select desired tone settings
>Treble and bass
Select treble or bass. Press and turn the
controller to adjust the tone
>Balance and fader
Select balance or fader. Press and turn the
controller to adjust the tone
Page 144 of 208
At a glanceControlsDriving tipsCommunicationsNavigationEntertainmentMobilityReference
143
RadioSelect the frequency bandYour radio provides reception of FM and
AM wavebands.
AM provides good long-range reception,
as its broadcast signals are not only propa-
gated at ground level as surface waves, but
also reflected from the ionosphere as
atmospheric waves.
FM furnishes substantially better acoustic
quality than AM broadcasts. However,
transmission range is limited, as FM relies
on line-of-sight broadcast signals.
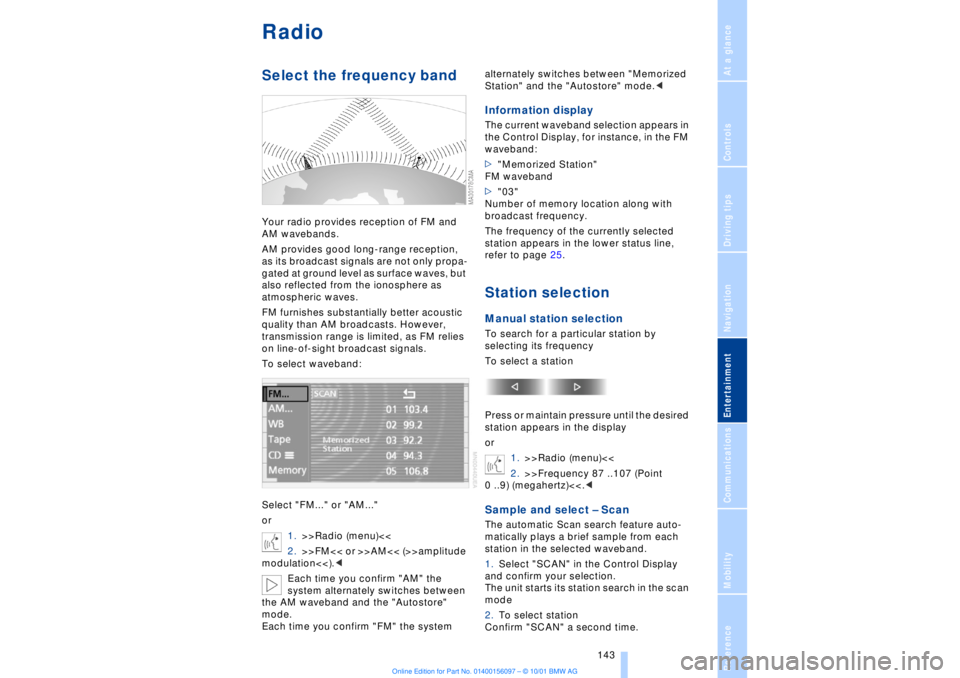
To select waveband:
Select "FM..." or "AM..."
or
1.>>Radio (menu)<<
2.>>FM<< or >>AM<< (>>amplitude
modulation<<).<
Each time you confirm "AM" the
system alternately switches between
the AM waveband and the "Autostore"
mode.
Each time you confirm "FM" the system alternately switches between "Memorized
Station" and the "Autostore" mode.<
Information displayThe current waveband selection appears in
the Control Display, for instance, in the FM
waveband:
>"Memorized Station"
FM waveband
>"03"
Number of memory location along with
broadcast frequency.
The frequency of the currently selected
station appears in the lower status line,
refer to page 25.Station selectionManual station selectionTo search for a particular station by
selecting its frequency
To select a station
Press or maintain pressure until the desired
station appears in the display
or
1.>>Radio (menu)<<
2.>>Frequency 87 ..107 (Point
0 ..9) (megahertz)<<.
station in the selected waveband.
1.Select "SCAN" in the Control Display
and confirm your selection.
The unit starts its station search in the scan
mode
2.To select station
Confirm "SCAN" a second time.
Page 146 of 208
At a glanceControlsDriving tipsCommunicationsNavigationEntertainmentMobilityReference
145
providing the best reception in the AM and
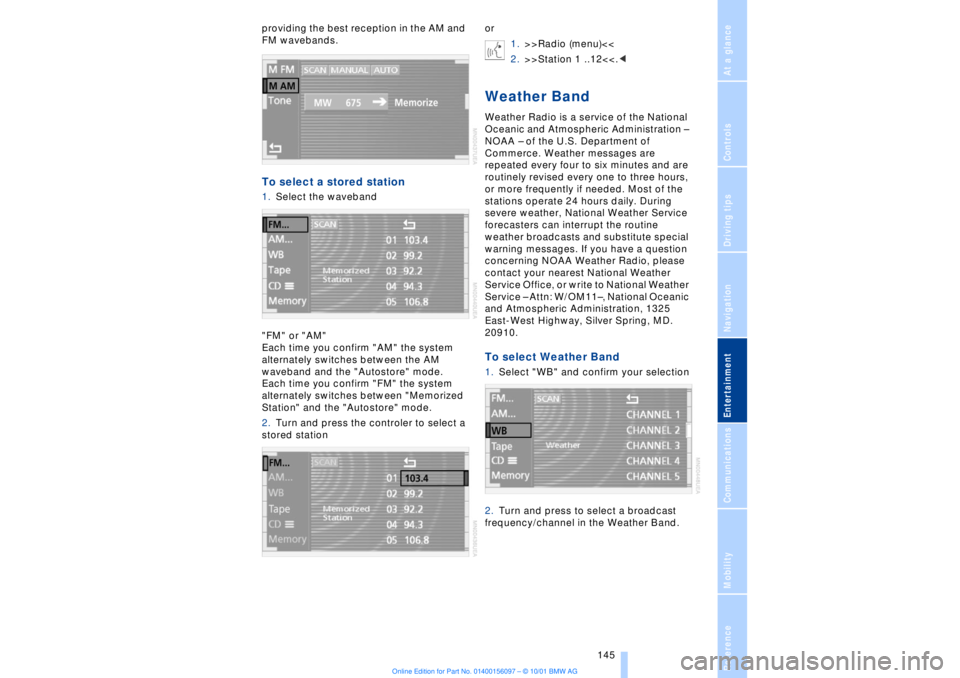
FM wavebands.To select a stored station 1.Select the waveband
"FM" or "AM"
Each time you confirm "AM" the system
alternately switches between the AM
waveband and the "Autostore" mode.
Each time you confirm "FM" the system
alternately switches between "Memorized
Station" and the "Autostore" mode.
2.Turn and press the controler to select a
stored stationor
1.>>Radio (menu)<<
2.>>Station 1 ..12<<.<
Weather BandWeather Radio is a service of the National
Oceanic and Atmospheric Administration Ð
NOAA Ð of the U.S. Department of
Commerce. Weather messages are
repeated every four to six minutes and are
routinely revised every one to three hours,
or more frequently if needed. Most of the
stations operate 24 hours daily. During
severe weather, National Weather Service
forecasters can interrupt the routine
weather broadcasts and substitute special
warning messages. If you have a question
concerning NOAA Weather Radio, please
contact your nearest National Weather
Service Office, or write to National Weather
Service Ð Attn: W/OM11Ð, National Oceanic
and Atmospheric Administration, 1325
East-West Highway, Silver Spring, MD.
20910.To select Weather Band1.Select "WB" and confirm your selection
2.Turn and press to select a broadcast
frequency/channel in the Weather Band.
Page 150 of 208
At a glanceControlsDriving tipsCommunicationsNavigationEntertainmentMobilityReference
149
Always refer all repair and maintenance
operations to qualified technicians.
You may experience playback prob-
lems, such as skips, when using CDs
that you have copied at home.<
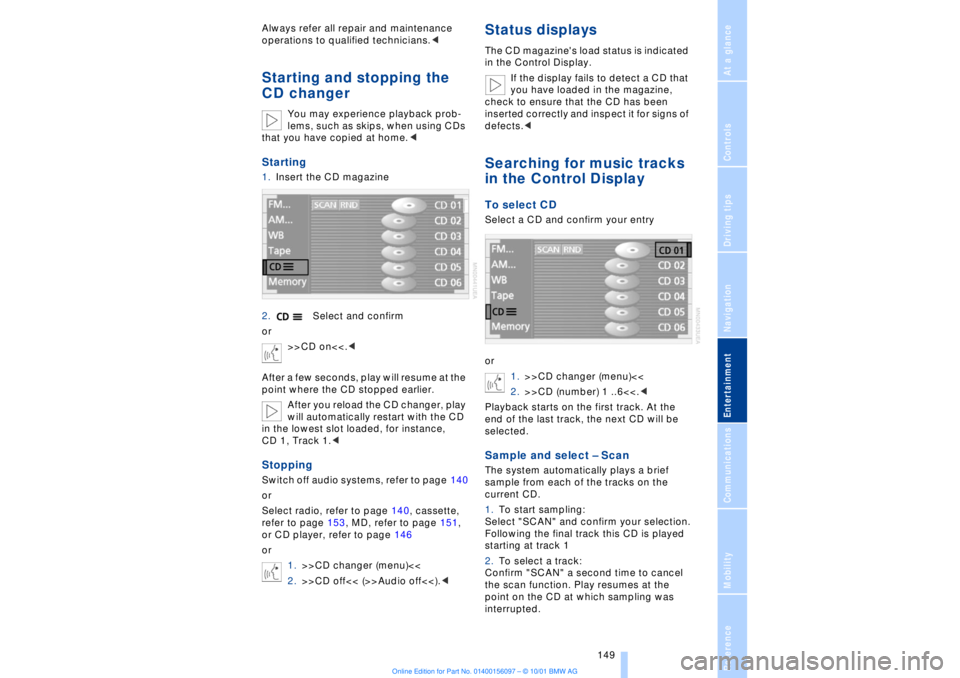
Starting1.Insert the CD magazine
2.Select and confirm
or
>>CD on<<.<
After a few seconds, play will resume at the
point where the CD stopped earlier.
After you reload the CD changer, play
will automatically restart with the CD
in the lowest slot loaded, for instance,
CD 1, Track 1.
Select radio, refer to page 140, cassette,
refer to page 153, MD, refer to page 151,
or CD player, refer to page 146
or
1.>>CD changer (menu)<<
2.>>CD off<< (>>Audio off<<).<
Status displaysThe CD magazine's load status is indicated
in the Control Display.
If the display fails to detect a CD that
you have loaded in the magazine,
check to ensure that the CD has been
inserted correctly and inspect it for signs of
defects.
or
1.>>CD changer (menu)<<
2.>>CD (number) 1 ..6<<.<
Playback starts on the first track. At the
end of the last track, the next CD will be
selected.Sample and select Ð ScanThe system automatically plays a brief
sample from each of the tracks on the
current CD.
1.To start sampling:
Select "SCAN" and confirm your selection.
Following the final track this CD is played
starting at track 1
2.To select a track:
Confirm "SCAN" a second time to cancel
the scan function. Play resumes at the
point on the CD at which sampling was
interrupted.