2002 BMW 745LI SEDAN battery
[x] Cancel search: batteryPage 5 of 208
Inhaltsverzeichnis
Radio
143Select the frequency band
143Station selection
144Storing and retrieving a station
145Weather Band
CD Compact Disc
146Using the buttons to search for music
tracks
147Searching for music tracks in the
Control Display
CD changer
149Starting and stopping the CD changer
149Status displays
149Searching for music tracks in the
Control Display
150Using the buttons to search for music
tracks
MiniDisc MD
151Using the buttons to search for music
tracks
152Searching for music tracks in the
Control Display
Cassette
153Noise suppression
154Music track search
Using your mobile phone
158Safety notice
159Care instructions
159Operation
161Hands-free system
161To make SOS call
161Initial operation
162Getting started
162Telephone directory
163To select a number from the Top 8 list
164Redialing, including numbers not
initially reached
164Missed calls
Refueling
168Fuel filler door
169Fuel specifications
Wheels and tires
170Tire inflation pressure
171Tire condition
172Tire replacement
173Wheel and tire combinations
173Special characteristics of winter tires
173Snow chains*
Under the hood
175Hood
176Engine compartment
176Engine oil
177Coolant
178Brake fluid
Maintenance
179The BMW Maintenance System
179Care
Rules and regulations
180California Proposition 65 Warning
180OBD connector
Replacing components
181Onboard tool kit
181Windshield wiper blades
181Lamps and bulbs
183Changing a tire
185Battery
186Fuses
Help Ð Giving and receiving
187Warning triangle*
187First-aid kit*
187Jump-starting
188Towing
Technical data
192Engine specifications
193Dimensions
194Weights
194Capacities
Everything from A to Z
195Contents
Page 35 of 208
Opening and closing
34
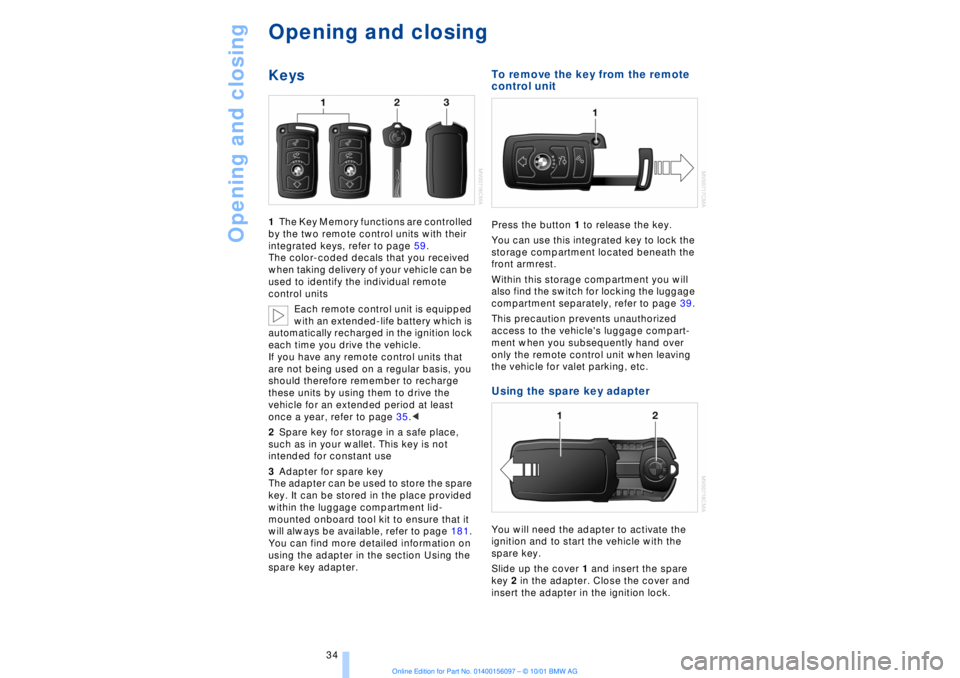
Opening and closingKeys1The Key Memory functions are controlled
by the two remote control units with their
integrated keys, refer to page 59.
The color-coded decals that you received
when taking delivery of your vehicle can be
used to identify the individual remote
control units
Each remote control unit is equipped
with an extended-life battery which is
automatically recharged in the ignition lock
each time you drive the vehicle.
If you have any remote control units that
are not being used on a regular basis, you
should therefore remember to recharge
these units by using them to drive the
vehicle for an extended period at least
once a year, refer to page 35.<
2Spare key for storage in a safe place,
such as in your wallet. This key is not
intended for constant use
3Adapter for spare key
The adapter can be used to store the spare
key. It can be stored in the place provided
within the luggage compartment lid-
mounted onboard tool kit to ensure that it
will always be available, refer to page 181.
You can find more detailed information on
using the adapter in the section Using the
spare key adapter.
To remove the key from the remote
control unit Press the button 1 to release the key.
You can use this integrated key to lock the
storage compartment located beneath the
front armrest.
Within this storage compartment you will
also find the switch for locking the luggage
compartment separately, refer to page 39.
This precaution prevents unauthorized
access to the vehicle's luggage compart-
ment when you subsequently hand over
only the remote control unit when leaving
the vehicle for valet parking, etc. Using the spare key adapter You will need the adapter to activate the
ignition and to start the vehicle with the
spare key.
Slide up the cover 1 and insert the spare
key 2 in the adapter. Close the cover and
insert the adapter in the ignition lock.
Page 36 of 208
At a glanceControlsDriving tipsCommunicationsNavigationEntertainmentMobilityReference
35
Central locking system The concept The central locking system is ready for
operation whenever the driver's door is
closed. This simultaneously engages and
releases the locks on the following:
>Doors
>Luggage compartment lid
>Fuel filler door.
The central locking system can be oper-
ated
>from outside via the remote control as
well as via the driver's door lock
>from inside via the button for the central
locking system.
When the system is locked from inside, the
fuel filler door remains unlocked, refer to
page 37.
The anti-theft system is automatically
armed whenever you activate the central
locking system from outside the vehicle.
The alarm system is armed/deactivated at
the same time.
In the event of an accident, the central
locking system unlocks automatically (only
those doors which were not locked sepa-
rately with the safety lock buttons). Refer to
page 38. In addition, the hazard warning
flashers and interior lamps come on.Opening and closing Ð from
outside Using the remote control The remote control makes opening and
closing the doors of your vehicle very
convenient. Furthermore, it provides three
additional functions which you can only
execute via the remote control:
>Switching on interior lamps, refer to
page 36.
You can also use this function to locate
your vehicle in parking garages, etc. >Opening and closing the luggage
compartment lid, refer to pages 36, 39.
The luggage compartment lid opens,
regardless of whether it was previously
locked.
>Panic mode
In case of danger, you can trigger an alarm.
When you engage/release the vehicle's
locks, you simultaneously activate/deacti-
vate the anti-theft system, arm/disarm the
alarm system
and switch the interior lamps
on/off.
You can have various confirmation
signals programmed into the system
to verify that the vehicle has been locked
securely.<
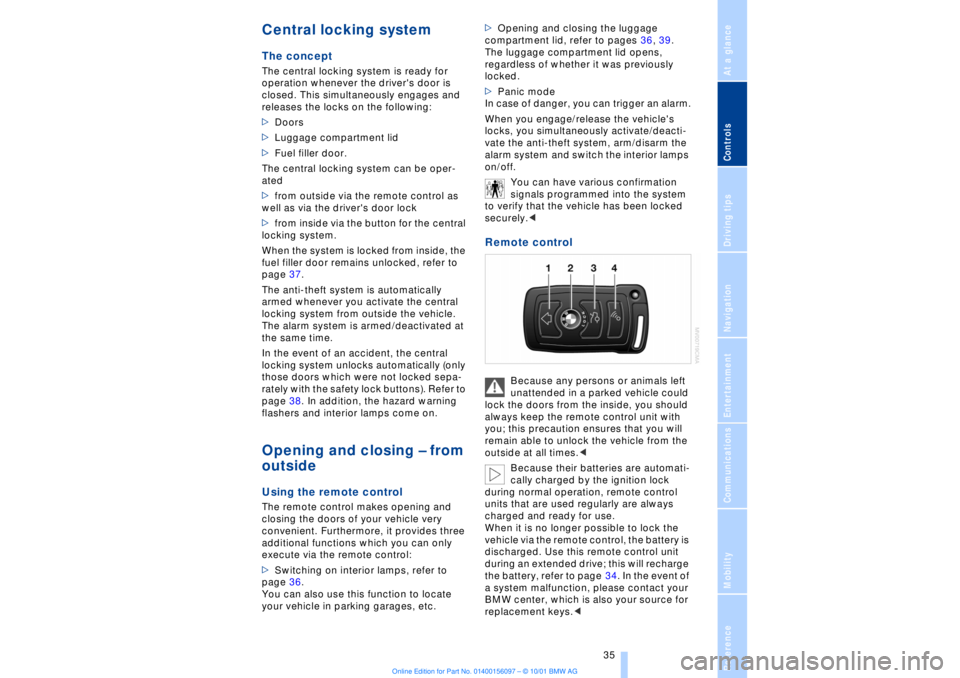
Remote control
Because any persons or animals left
unattended in a parked vehicle could
lock the doors from the inside, you should
always keep the remote control unit with
you; this precaution ensures that you will
remain able to unlock the vehicle from the
outside at all times.<
Because their batteries are automati-
cally charged by the ignition lock
during normal operation, remote control
units that are used regularly are always
charged and ready for use.
When it is no longer possible to lock the
vehicle via the remote control, the battery is
discharged. Use this remote control unit
during an extended drive; this will recharge
the battery, refer to page 34. In the event of
a system malfunction, please contact your
BMW center, which is also your source for
replacement keys.<
Page 41 of 208
Opening and closing
40 >press the button on the outside of the
luggage compartment lid, refer to page 38
>press the button 3on the remote
control unit, refer to page 36.
During opening the luggage compart-
ment lid pivots upward and to the
rear. Ensure that adequate clearance is
available before opening.<
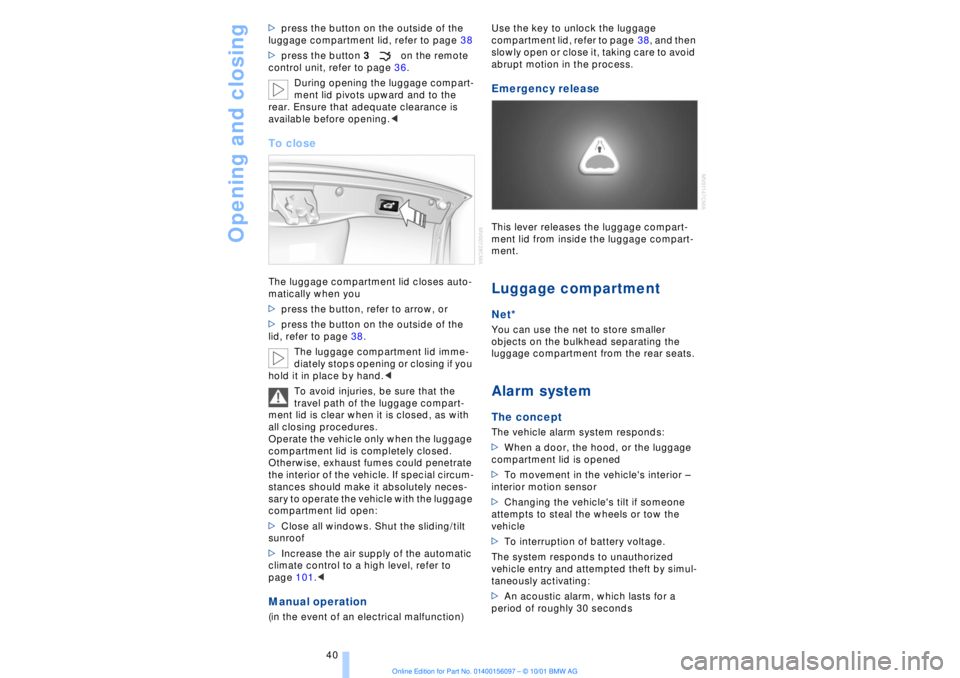
To closeThe luggage compartment lid closes auto-
matically when you
>press the button, refer to arrow, or
>press the button on the outside of the
lid, refer to page 38.
The luggage compartment lid imme-
diately stops opening or closing if you
hold it in place by hand.<
To avoid injuries, be sure that the
travel path of the luggage compart-
ment lid is clear when it is closed, as with
all closing procedures.
Operate the vehicle only when the luggage
compartment lid is completely closed.
Otherwise, exhaust fumes could penetrate
the interior of the vehicle. If special circum-
stances should make it absolutely neces-
sary to operate the vehicle with the luggage
compartment lid open:
>Close all windows. Shut the sliding/tilt
sunroof
>Increase the air supply of the automatic
climate control to a high level, refer to
page 101.< Manual operation(in the event of an electrical malfunction) Use the key to unlock the luggage
compartment lid, refer to page 38, and then
slowly open or close it, taking care to avoid
abrupt motion in the process.
Emergency release This lever releases the luggage compart-
ment lid from inside the luggage compart-
ment. Luggage compartmentNet*You can use the net to store smaller
objects on the bulkhead separating the
luggage compartment from the rear seats. Alarm system The conceptThe vehicle alarm system responds:
>When a door, the hood, or the luggage
compartment lid is opened
>To movement in the vehicle's interior Ð
interior motion sensor
>Changing the vehicle's tilt if someone
attempts to steal the wheels or tow the
vehicle
>To interruption of battery voltage.
The system responds to unauthorized
vehicle entry and attempted theft by simul-
taneously activating:
>An acoustic alarm, which lasts for a
period of roughly 30 seconds
Page 45 of 208
Opening and closing
44 point and holding it limits the response of
the safety feature. The sunroof only opens
a short distance.
If you again press the switch past the pres-
sure point and hold it in position within
about 1.5 seconds, the safety feature will
be deactivated.<
When you close the sliding/tilt-
sunroof it will slow down as it
approaches the end of its travel path; this is
to allow the safety feature to respond more
precisely to any obstructions encountered
in this critical range.<
Following interruptions in electrical
power supply Following interruptions in electrical power
(for instance, when the battery is discon-
nected), it is possible that the sliding/tilt-
sunroof will extend to its tilt-up position,
but fail to respond to other commands.
Should this occur, please have the sunroof
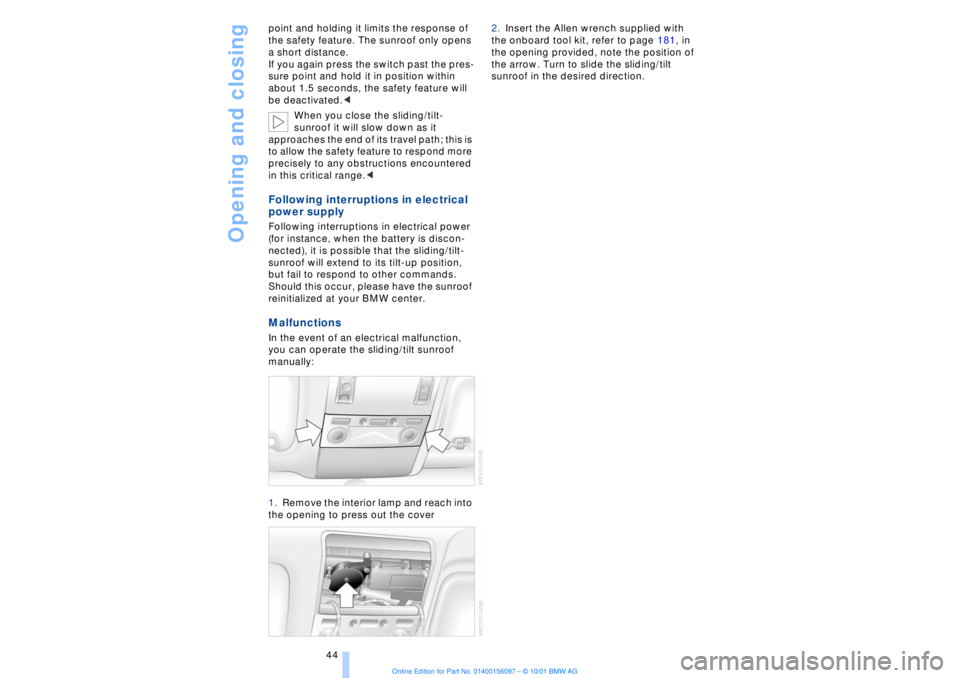
reinitialized at your BMW center.Malfunctions In the event of an electrical malfunction,
you can operate the sliding/tilt sunroof
manually:
1.Remove the interior lamp and reach into
the opening to press out the cover 2.Insert the Allen wrench supplied with
the onboard tool kit, refer to page 181, in
the opening provided, note the position of
the arrow. Turn to slide the sliding/tilt
sunroof in the desired direction.
Page 63 of 208
Driving
62
Starting the engine
Do not allow the engine to run in
enclosed spaces. The exhaust gases
contain carbon monoxide, an odorless and
colorless, but highly toxic gas. Breathing
the exhaust gases poses an extreme health
risk, and can lead to unconsciousness and
death.
Never leave the vehicle parked with the
engine running, as it would then pose a
potential safety hazard.<
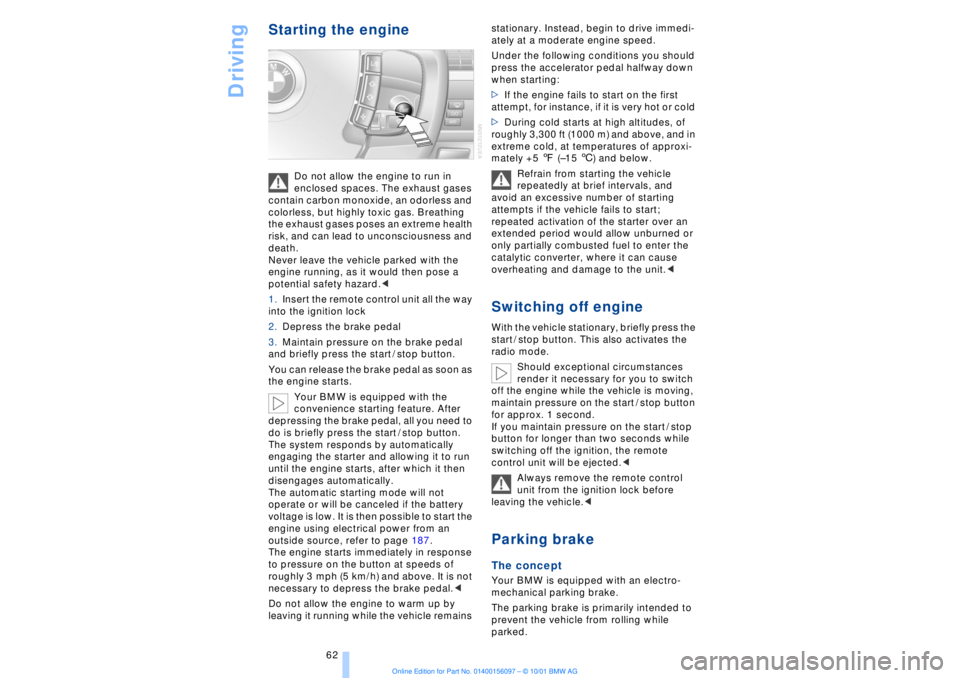
1.Insert the remote control unit all the way
into the ignition lock
2.Depress the brake pedal
3.Maintain pressure on the brake pedal
and briefly press the start / stop button.
You can release the brake pedal as soon as
the engine starts.
Your BMW is equipped with the
convenience starting feature. After
depressing the brake pedal, all you need to
do is briefly press the start / stop button.
The system responds by automatically
engaging the starter and allowing it to run
until the engine starts, after which it then
disengages automatically.
The automatic starting mode will not
operate or will be canceled if the battery
voltage is low. It is then possible to start the
engine using electrical power from an
outside source, refer to page 187.
The engine starts immediately in response
to pressure on the button at speeds of
roughly 3 mph (5 km/h) and above. It is not
necessary to depress the brake pedal.<
Do not allow the engine to warm up by
leaving it running while the vehicle remains stationary. Instead, begin to drive immedi-
ately at a moderate engine speed.
Under the following conditions you should
press the accelerator pedal halfway down
when starting:
>If the engine fails to start on the first
attempt, for instance, if it is very hot or cold
>During cold starts at high altitudes, of
roughly 3,300 ft (1000 m) and above, and in
extreme cold, at temperatures of approxi-
mately +5 7 (Ð15 6) and below.
Refrain from starting the vehicle
repeatedly at brief intervals, and
avoid an excessive number of starting
attempts if the vehicle fails to start;
repeated activation of the starter over an
extended period would allow unburned or
only partially combusted fuel to enter the
catalytic converter, where it can cause
overheating and damage to the unit.<
Switching off engineWith the vehicle stationary, briefly press the
start / stop button. This also activates the
radio mode.
Should exceptional circumstances
render it necessary for you to switch
off the engine while the vehicle is moving,
maintain pressure on the start / stop button
for approx. 1 second.
If you maintain pressure on the start / stop
button for longer than two seconds while
switching off the ignition, the remote
control unit will be ejected.<
Always remove the remote control
unit from the ignition lock before
leaving the vehicle.< Parking brake The concept Your BMW is equipped with an electro-
mechanical parking brake.
The parking brake is primarily intended to
prevent the vehicle from rolling while
parked.
Page 66 of 208
At a glanceControlsDriving tipsCommunicationsNavigationEntertainmentMobilityReference
65
>the hood is opened while the engine is
running
>the luggage compartment is opened
with the transmission in reverse while the
engine is running, and
>when the parking brake is used to bring
the vehicle to a stop.
The indicator lamp shifts from green
to red, and the "Auto P" message disap-
pears from the Info Display.
Before starting off again, briefly press the
button to disengage the parking brake
manually, refer to page 63, or reactivate
Automatic Hold, refer to page 64.
Before leaving the vehicle with the
engine running, always move the
automatic transmission's selector lever to
position P and ensure that the parking
brake is engaged. The vehicle could start to
roll if you fail to observe these precautions.
Never leave an unattended vehicle with the
engine running, as such a vehicle repre-
sents a potential safety hazard.<
Automatic Hold is automatically
deactivated whenever the system
detects any tendency for the wheels to spin
in response to slippery road surfaces. Note
the status displays in the Check Control
panel. You can find more detailed informa-
tion on Check Control on page 80.< Malfunctions In the event of malfunction, the indicator
lamp in the Info Display will light up
yellow, and a status report will appear in
the Check Control panel. Please remember
to observe the supplementary information
provided in the Control Display. To disengage the parking brake
manually You can respond to any interruptions in the
supply of electrical power, for instance, if
the battery is discharged or disconnected,
by releasing the parking brake manually.
Before proceeding to release the
parking brake manually, and each
time you park the vehicle without engaging the parking brake, always ensure that the
automatic transmission's selector lever is
in position P, refer to page 66. Note the
range indicated in the Info Display.
If it is not possible to avoid parking on an
extremely steep slope, use some supple-
mentary means, such as a wheel chock, to
make certain that the vehicle will not roll,
refer to page 184. Otherwise the danger
exists that the vehicle could roll when
parked on a very steep hill.<
Should it be necessary to release the auto-
matic transmission's lockout manually, for
instance, if the battery is discharged,
always adhere to the following sequence:
1.If necessary, start by manually releasing
the parking brake
2.Then release the automatic transmis-
sion's lockout manually, refer to page 70.
Towing and jump-starting, refer to
pages 187 and 188.
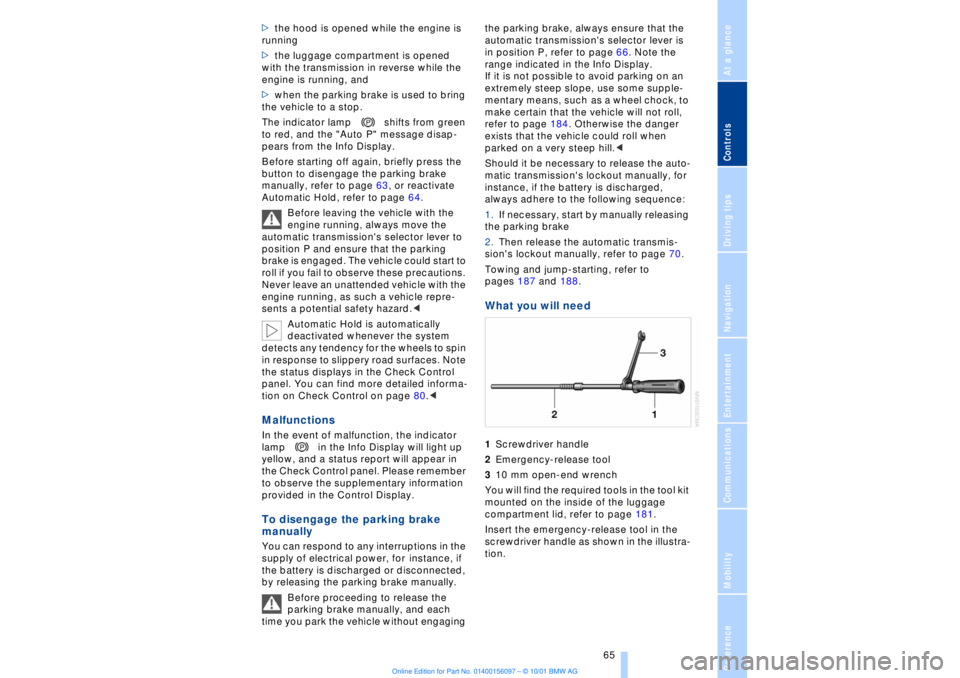
What you will need 1Screwdriver handle
2Emergency-release tool
310 mm open-end wrench
You will find the required tools in the tool kit
mounted on the inside of the luggage
compartment lid, refer to page 181.
Insert the emergency-release tool in the
screwdriver handle as shown in the illustra-
tion.
Page 67 of 208
Driving
66
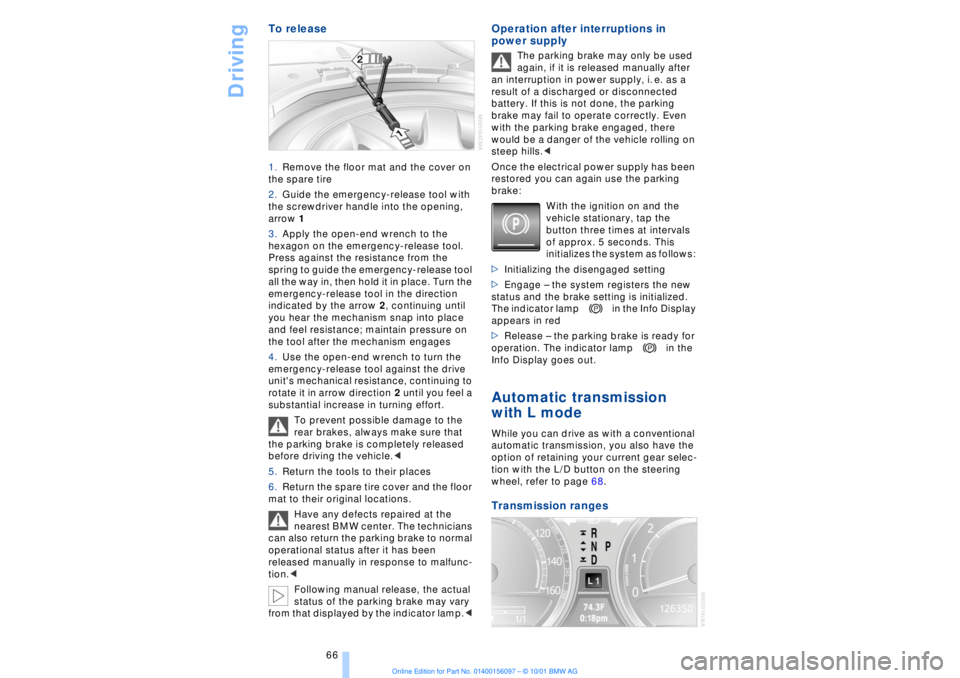
To release 1.Remove the floor mat and the cover on
the spare tire
2.Guide the emergency-release tool with
the screwdriver handle into the opening,
arrow 1
3.Apply the open-end wrench to the
hexagon on the emergency-release tool.
Press against the resistance from the
spring to guide the emergency-release tool
all the way in, then hold it in place. Turn the
emergency-release tool in the direction
indicated by the arrow 2, continuing until
you hear the mechanism snap into place
and feel resistance; maintain pressure on
the tool after the mechanism engages
4.Use the open-end wrench to turn the
emergency-release tool against the drive
unit's mechanical resistance, continuing to
rotate it in arrow direction 2 until you feel a
substantial increase in turning effort.
To prevent possible damage to the
rear brakes, always make sure that
the parking brake is completely released
before driving the vehicle.<
5.Return the tools to their places
6.Return the spare tire cover and the floor
mat to their original locations.
Have any defects repaired at the
nearest BMW center. The technicians
can also return the parking brake to normal
operational status after it has been
released manually in response to malfunc-
tion.<
Following manual release, the actual
status of the parking brake may vary
from that displayed by the indicator lamp.<
Operation after interruptions in
power supply
The parking brake may only be used
again, if it is released manually after
an interruption in power supply, i. e. as a
result of a discharged or disconnected
battery. If this is not done, the parking
brake may fail to operate correctly. Even
with the parking brake engaged, there
would be a danger of the vehicle rolling on
steep hills.<
Once the electrical power supply has been
restored you can again use the parking
brake:
With the ignition on and the
vehicle stationary, tap the
button three times at intervals
of approx. 5 seconds. This
initializes the system as follows:
>Initializing the disengaged setting
>Engage Ð the system registers the new
status and the brake setting is initialized.
The indicator lamp in the Info Display
appears in red
>Release Ð the parking brake is ready for
operation. The indicator lamp in the
Info Display goes out.
Automatic transmission
with L mode While you can drive as with a conventional
automatic transmission, you also have the
option of retaining your current gear selec-
tion with the L/D button on the steering
wheel, refer to page 68. Transmission ranges