2002 BMW 745LI SEDAN battery replacement
[x] Cancel search: battery replacementPage 5 of 208
Inhaltsverzeichnis
Radio
143Select the frequency band
143Station selection
144Storing and retrieving a station
145Weather Band
CD Compact Disc
146Using the buttons to search for music
tracks
147Searching for music tracks in the
Control Display
CD changer
149Starting and stopping the CD changer
149Status displays
149Searching for music tracks in the
Control Display
150Using the buttons to search for music
tracks
MiniDisc MD
151Using the buttons to search for music
tracks
152Searching for music tracks in the
Control Display
Cassette
153Noise suppression
154Music track search
Using your mobile phone
158Safety notice
159Care instructions
159Operation
161Hands-free system
161To make SOS call
161Initial operation
162Getting started
162Telephone directory
163To select a number from the Top 8 list
164Redialing, including numbers not
initially reached
164Missed calls
Refueling
168Fuel filler door
169Fuel specifications
Wheels and tires
170Tire inflation pressure
171Tire condition
172Tire replacement
173Wheel and tire combinations
173Special characteristics of winter tires
173Snow chains*
Under the hood
175Hood
176Engine compartment
176Engine oil
177Coolant
178Brake fluid
Maintenance
179The BMW Maintenance System
179Care
Rules and regulations
180California Proposition 65 Warning
180OBD connector
Replacing components
181Onboard tool kit
181Windshield wiper blades
181Lamps and bulbs
183Changing a tire
185Battery
186Fuses
Help Ð Giving and receiving
187Warning triangle*
187First-aid kit*
187Jump-starting
188Towing
Technical data
192Engine specifications
193Dimensions
194Weights
194Capacities
Everything from A to Z
195Contents
Page 36 of 208
At a glanceControlsDriving tipsCommunicationsNavigationEntertainmentMobilityReference
35
Central locking system The concept The central locking system is ready for
operation whenever the driver's door is
closed. This simultaneously engages and
releases the locks on the following:
>Doors
>Luggage compartment lid
>Fuel filler door.
The central locking system can be oper-
ated
>from outside via the remote control as
well as via the driver's door lock
>from inside via the button for the central
locking system.
When the system is locked from inside, the
fuel filler door remains unlocked, refer to
page 37.
The anti-theft system is automatically
armed whenever you activate the central
locking system from outside the vehicle.
The alarm system is armed/deactivated at
the same time.
In the event of an accident, the central
locking system unlocks automatically (only
those doors which were not locked sepa-
rately with the safety lock buttons). Refer to
page 38. In addition, the hazard warning
flashers and interior lamps come on.Opening and closing Ð from
outside Using the remote control The remote control makes opening and
closing the doors of your vehicle very
convenient. Furthermore, it provides three
additional functions which you can only
execute via the remote control:
>Switching on interior lamps, refer to
page 36.
You can also use this function to locate
your vehicle in parking garages, etc. >Opening and closing the luggage
compartment lid, refer to pages 36, 39.
The luggage compartment lid opens,
regardless of whether it was previously
locked.
>Panic mode
In case of danger, you can trigger an alarm.
When you engage/release the vehicle's
locks, you simultaneously activate/deacti-
vate the anti-theft system, arm/disarm the
alarm system
and switch the interior lamps
on/off.
You can have various confirmation
signals programmed into the system
to verify that the vehicle has been locked
securely.<
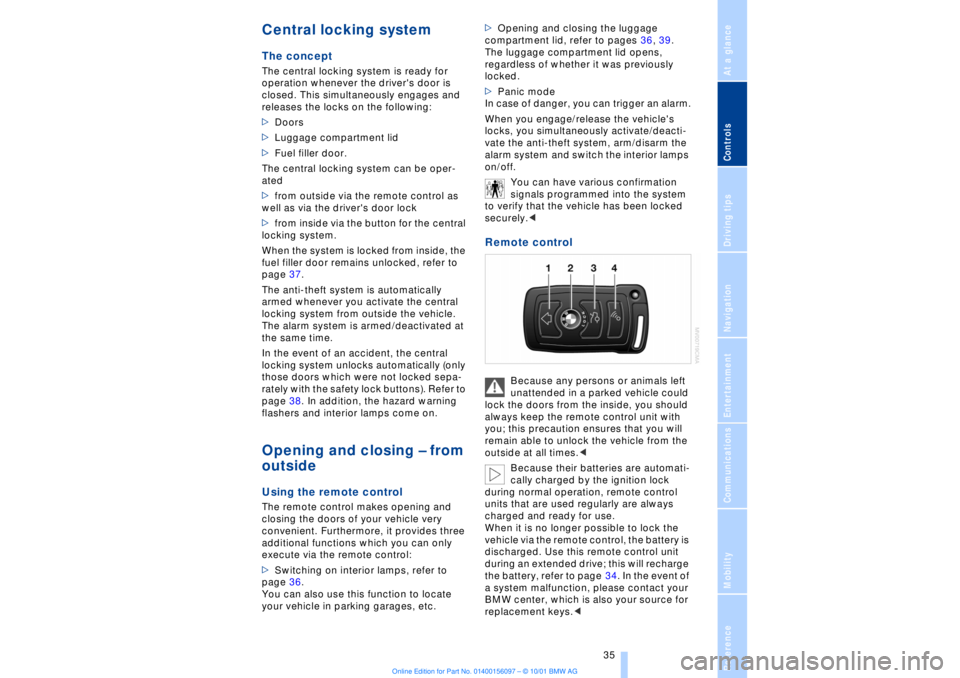
Remote control
Because any persons or animals left
unattended in a parked vehicle could
lock the doors from the inside, you should
always keep the remote control unit with
you; this precaution ensures that you will
remain able to unlock the vehicle from the
outside at all times.<
Because their batteries are automati-
cally charged by the ignition lock
during normal operation, remote control
units that are used regularly are always
charged and ready for use.
When it is no longer possible to lock the
vehicle via the remote control, the battery is
discharged. Use this remote control unit
during an extended drive; this will recharge
the battery, refer to page 34. In the event of
a system malfunction, please contact your
BMW center, which is also your source for
replacement keys.<
Page 182 of 208
OverviewControlsDriving tipsCommunicationsNavigationEntertainmentMobilityReference
181
Replacing componentsOnboard tool kitThe onboard tool kit is located in the
luggage compartment lid.
Loosen the wingnut to open. Windshield wiper blades To replace the blades, start by folding the
wipers out and away from the windshield,
refer to page 72.
Use only wiper blades that have been
approved by BMW.< Lamps and bulbsThe lamps and bulbs are essential factors
contributing to the safety of your vehicle.
Therefore, comply fully with the following
instructions during bulb replacement. If you
are not familiar with the specified proce-
dures, have the replacements carried out at
your BMW center.
Never touch the glass on new bulbs
with your bare fingers, as even minute
amounts of contamination will burn into the
bulb's surface and reduce its service life.
Use a clean cloth, napkin, etc., or hold the
bulb by its metal socket.<
You can obtain a selection of replacement
bulbs at your BMW center.
To prevent short circuits, before
working on any electrical system,
equipment or accessory you should always switch it off and disconnect the cable from
the battery's negative terminal before
starting.
To avoid possible injury or equipment
damage when changing bulbs, always
observe any instructions provided by the
bulb manufacturer.<
When caring for your headlamps:
>Do not clean by wiping with a dry
cloth (scratches). Never use abrasives or
strong solvents to clean the covers
>Remove contaminants such as dead
insects by soaking with BMW Shampoo
and then washing off with plenty of water
>Remove ice by thawing with a deicer
spray Ð never use an ice scraper.<
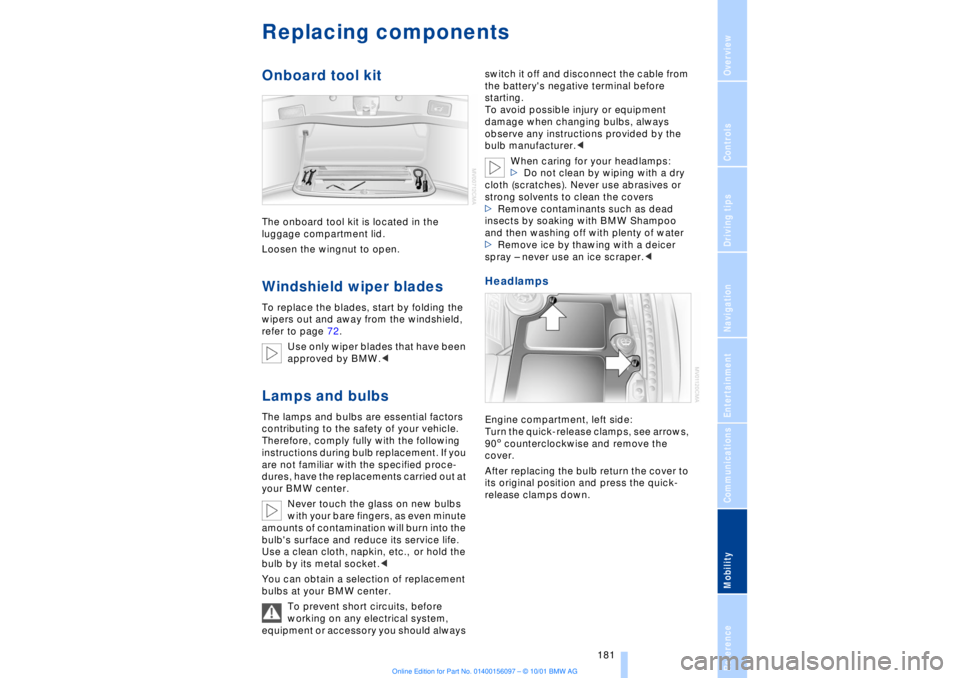
Headlamps Engine compartment, left side:
Turn the quick-release clamps, see arrows,
905 counterclockwise and remove the
cover.
After replacing the bulb return the cover to
its original position and press the quick-
release clamps down.
Page 188 of 208
At a glanceControlsDriving tipsCommunicationsNavigationEntertainmentMobilityReference
187
Help Ð Giving and receiving Warning triangle*
The warning triangle is conveniently stored
in the onboard tool kit mounted on the
inside of the luggage compartment lid.
Comply with legal requirements
requiring you to carry a hazard
warning triangle in the vehicle.< First-aid kit*
You will also find the first-aid kit in the
onboard tool kit's container.
Some of the articles contained in the
first-aid kit have a limited service life.
For this reason, check the expiration dates
of each of the items regularly, and replace
any whose expiration dates have passed.
You can find replacements in any phar-
macy.
Always comply with laws requiring a first-
aid kit to be carried in the vehicle.< Jump-starting Never use spray fluids to start the engine.
When your battery is discharged you can
use two jumper cables to start your vehicle
with power from the battery in a second
vehicle. You can also use the same method
to help start another vehicle. Use only
jumper cables with fully-insulated clamp
handles. To avoid the risk of potentially fatal
injury, always avoid all contact with
electrical components while the engine is
running. Carefully adhere to the following
sequence, both to prevent damage to one
or both vehicles, and to guard against
possible personal injury.<
1.The battery in the support vehicle must
also be rated at 12 volts. This information
can be found on the sticker affixed to the
battery
2.Switch off the support vehicle's engine
and switch off all electrical equipment and
accessories in both vehicles (except the
hazard warning flashers on the support
vehicle)
3.Ensure that no contact exists between
the bodywork on the two vehicles as there
is a danger of short circuits
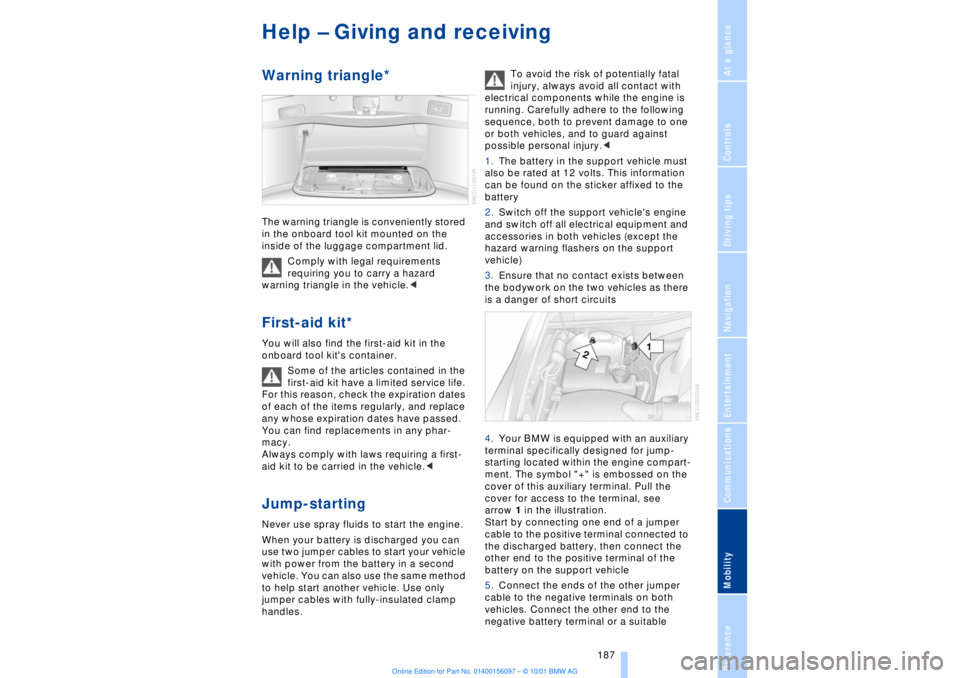
4.Your BMW is equipped with an auxiliary
terminal specifically designed for jump-
starting located within the engine compart-
ment. The symbol "+" is embossed on the
cover of this auxiliary terminal. Pull the
cover for access to the terminal, see
arrow 1 in the illustration.
Start by connecting one end of a jumper
cable to the positive terminal connected to
the discharged battery, then connect the
other end to the positive terminal of the
battery on the support vehicle
5.Connect the ends of the other jumper
cable to the negative terminals on both
vehicles. Connect the other end to the
negative battery terminal or a suitable
Page 197 of 208

Everything from A to Z
196 Backup lamp, bulb
replacement 183
Bass 141
Battery 185
Ð discharged 187
Battery switch 185, 186
"BC," refer to Computer 83
Belts 50
Beverage holders 112
Blinds 109
Blower 101
BMW active seat 52
"BMW ASSIST" 19, 22
BMW comfort seat 46
"Booktape" 153
Brake, malfunctions 178
Brake lamp, adaptive 94
Brake lamps, bulb
replacement 183
"Brake pads" 179
Brake pads 119
Brakes 119
Brake system
Ð brake fluid 178
Break-in procedures 118
Brief commands for voice
command system 29
"Brief info" 23
Bulb changes 181
Buttons in steering
wheel 18
CCalifornia Proposition
65 Warning 180
Call
Ð terminating 162
Calling 162
Ð from telephone
directory 163
Ð from the redial list 164
Ð from the Top 8 list 163
Ð redialing 164
Can holders, refer to Bever-
age holders 112
Capacities 194
Car care, refer to Car care
manual
Cargo, securing 120Cargo area
Ð capacity 194
Ð opening from the
inside 39
Car Memory 59
"Car parked" 103, 106
Car radio, see Radio 140
Car wash, refer to separate
Car care manual
Cassette 153
Cassette deck 153
Ð booktape 153
Ð fast-forward mode 154
Ð music search 154
Ð reverse 154
Ð selecting tape side 153
Ð skipping pauses 154
Ð switching on 153
CBC (Cornering Brake
Control) 91
CBS (Condition Based
Service) 179
"CD" 140, 146
CD changer 148
Ð fast forward 150
Ð humidity 148
Ð operating
temperatures 148
Ð random play 150
Ð reverse 150
Ð safety 148
Ð scan function 149
Ð skipping tracks 150
Ð switching on 149
Ð temperature range 148
CD player 146
Ð activation 146
Ð fast forward 146
Ð random selection 147
Ð reverse 146
Ð sampling 147
Ð scan 147
Ð skip track 146
Cell phone, refer to sepa-
rate Mobile phone
manual 158
Center (high-mount) brake
lamp 183
Center armrest 113
Center console, refer to
Comfort features 16Central locking
system 35, 38
"CHANGE" for
navigation 130
Changing bulbs 181
Changing bulbs, refer to
Lamps and bulbs 181
Changing language 86
Changing settings in Con-
trol Display 86
Changing units of measure
in Control Display 86
Check Control 80
Ð "Check" 81
Checking engine oil
level 176, 176
Checking tire
pressures 170
Child-restraint systems 57
Ð refer also to LATCH child-
restraint system 58
Child-safety locks 59
Child seats 57
Cigarette lighter 113
Cleaning, refer to Car care
manual
"Climate" 19, 22
"Clock" 86
Clock 77
Ð setting time and date 86
Closing
Ð from the inside 37
Closing assist
Ð doors 38
Ð luggage compartment
lid 39
Cockpit 12, 16
Coin box, see
Compartments 111
Cold start 62
Combination switch 71
"Comfort"
Ð "EDC" 92
Comfort features 16
Comfort seat 46
Ð in rear 47
"Communication" 19, 22
Compact Disc, see CD 146
Compartments 111
Page 204 of 208
203
At a glanceControlsDriving tipsCommunicationsNavigationEntertainmentMobilityReference
Steptronic 69
Stopwatch 85
Storage, refer to Car care
manual
Storage compartments 111
Storing preset speeds,
refer to Programmable
cruise control 75
Straps, refer to
Loading 120
Summer tires 173
Sun blinds 109
Switch for battery 185
Switching air conditioner
on and off 101
Switching off the engine 62
Switching off with mobile
phone 162
Switching on
Ð audio 140
Ð cassette deck 153
Ð CD changer 149
Ð CD player 146
Ð MD player 151
Ð radio 140
Symbols 6
Ð Control Center 20
System failure reports, refer
to Check Control 80TTachometer 77
Tail lamps 183
Ð bulb replacement 183
"Tape" 140, 153
Technical
modifications 8, 98
Telephone, refer to Mobile
phone 158
Telephone directory
Ð creating voice command
telephone directory 162
Ð dialing numbers 163
Ð updating voice command
telephone directory 162
"Temp. distribution" 51
Temperature
adjustment 101
Temperature display, out-
side temperature 77Third brake lamp 183
Tilt function, passenger-
side mirror 54
Time
Ð of arrival, estimated 83
Timing 85
Tire change 184
Tire inflation pressures 170
Tire pressure monitor 92
Tire Quality Grading 172
Tires
Ð flat tire 184
Ð tire changes 184
Ð tire damage 171
Ð tire inflation
pressures 170
Ð tire pressure monitoring
system 92
Ð tire replacement 172
Ð tire size, refer to Wheel
and tire
combinations 173
Ð tire tread 171
Ð tire tread wear
indicators 171
Title search
Ð cassette deck 154
Tone in audio operation
Ð adjusting 141
"Tone" in sound system
operation 141
Tools 181
"TOP 8" 163
Torque 192
Tow fittings 188
Towing 188
Track 193
Traction Control System,
refer to DSC 89
Traffic congestion, refer to
Selecting new route 133
Transmission
Ð automatic transmission
with L mode 66
Ð automatic transmission
with Steptronic 69
Transmission
lockout 67, 70
Ð manual release 70
Travel route, see Route 132
Tread depth, tires 171"Treble" in sound system
operation 141
Trip odometer 77
Trunk lid
Ð emergency release 40
Ð refer to luggage compart-
ment lid 38
Turning circle 193
Turn signal indicators 71
Ð bulb
replacement 182, 183
UUndercoating, refer to Car
care manual
Uniform Tire Quality Gra-
ding (UTQR) 172
Universal garage door
opener 108
Upholstery care, refer
to Car Care
Used batteries 186
User controls 16
"Using motorway" 130VVacuum cleaner
connection 113
Valve caps 185
Vanity mirror 53
Vehicle battery 185
Vehicle dimensions 193
Vehicle keys 34
Vehicle stability control 89
Ventilation 102
Ventilation, draft-free 102
Ventilation while
parked 106
Vents, ventilation 99
"View" with navigation
system 132, 133
Viscosity 177
Voice command
system 18, 25
Voice command system
notebook 27