Page 4249 of 4323
05_SEQUOIA_U (L/O 0408)
390
2005 SEQUOIA from Aug. '04 Prod. (OM34424U)
When storing the spare tire, put it in
place with the outer side of the wheel
facing up. Then secure the tire, taking
care that the tire goes straight up
without catching on any other part, to
prevent it from flying forward during
a collision or sudden braking.
2. Block the wheel diagonally op-
posite the flat tire to keep the
vehicle from rolling when it is
jacked up.
When blocking the wheel, place a
wheel block in front of one of the front
wheels or behind one of the rear
wheels.Ty p e A
Ty p e B
ÐBlocking the wheel ÐRemoving wheel ornament
Page 4251 of 4323
05_SEQUOIA_U (L/O 0408)
392
2005 SEQUOIA from Aug. '04 Prod. (OM34424U)
Front Rear
5. Position the jack at the correct
jack point as shown.
Make sure the jack is positioned on
a level and solid place.
JACK POINTS:
FrontÐUnder the frame side rail
RearÐUnder the rear axle hous-
ing
Put a jack handle, jack handle exten-
sion and jack handle end together as
shown in the illustration.
1 Jack handle end
2 Jack handle extension
3 Jack handle
NOTICE
Tighten all joints securely.
Otherwise, the extension may
come off and it may damage
the paint or vehicle body.
6. After making sure that no one
is in the vehicle, raise it high
enough so that the spare tire
can be installed.
Remember you will need more ground
clearance when putting on the spare
tire than when removing the flat tire.
ÐPositioning the jack ÐRaising your vehicle
Page 4252 of 4323
05_SEQUOIA_U (L/O 0408)
393
2005 SEQUOIA from Aug. '04 Prod. (OM34424U)
To raise the vehicle, insert the jack
handle extension in to the jack (it is
a loose fit) and turn it clockwise with
the handle, making sure the handle
remains firmly fitted onto the jack
handle extension. As the jack touches
the vehicle and begins to fit, double±
check that it is properly positioned.
CAUTION
Never get under the vehicle when
the vehicle is supported by the
jack alone.
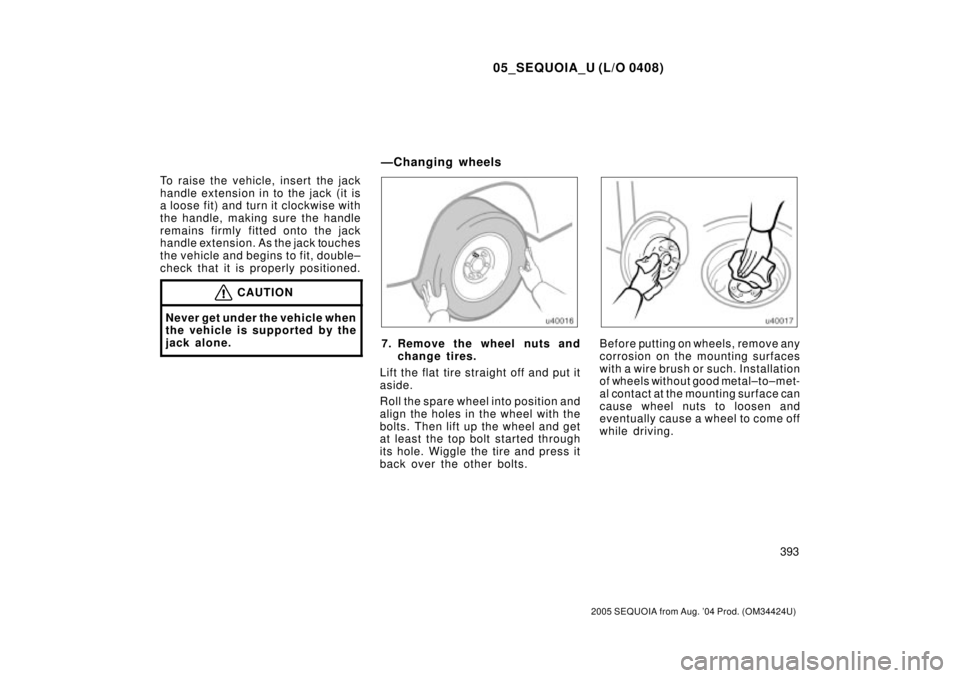
7. Remove the wheel nuts and
change tires.
Lift the flat tire straight off and put it
aside.
Roll the spare wheel into position and
align the holes in the wheel with the
bolts. Then lift up the wheel and get
at least the top bolt started through
its hole. Wiggle the tire and press it
back over the other bolts.Before putting on wheels, remove any
corrosion on the mounting surfaces
with a wire brush or such. Installation
of wheels without good metal±to±met-
al contact at the mounting surface can
cause wheel nuts to loosen and
eventually cause a wheel to come off
while driving.
ÐChanging wheels
Page 4255 of 4323
05_SEQUOIA_U (L/O 0408)
396
2005 SEQUOIA from Aug. '04 Prod. (OM34424U)
11. Check the air pressure of the re-
placed tire.
Adjust the air pressure to the specifi-
cation designated on page 458 in
Section 8. If the pressure is lower,
drive slowly to the nearest service
station and fill to the correct pressure.
Do not forget to reinstall the tire infla-
tion valve cap as dirt and moisture
could get into the valve core and
possibly cause air leakage. If the cap
is missing, have a new one put on as
soon as possible.
12.Restow all the tools, jack and
flat tire securely.
With a spare tire of the same wheel
type as the installed tiresÐ
As soon after changing wheels as
possible, tighten the wheel nuts to the
torque specified on page 458 in Sec-
tion 8 with a torque wrench. Have a
technician repair the flat tire.With a spare tire of different wheel
type from the installed tiresÐ
As soon after changing wheels as
possible, tighten the wheel nuts to the
torque specified on page 458 in Sec-
tion 8 with a torque wrench. Have a
technician repair the flat tire and re-
place the spare tire with it.
Initial adjustment of the tire pres-
sure warning system is necessary
after you have replaced your tires
or wheels. See ªTire pressure
warning systemº on page 198 in
Section 1±7.
CAUTION
Before driving, make sure all the
tools, jack and flat tire are se-
curely in place in their storage
location to reduce the possibility
of personal injury during a colli-
sion or sudden braking.
If your vehicle becomes stuck in snow,
mud, sand, etc., then you may attempt
to rock the vehicle free by moving it
forward and backward.
Two±wheel drive modelsÐTurn off the
traction control system to become un-
stuck to allow the tires to spin enough
to remove the vehicle from the obstruc-
tion. (For details, see ªTraction control
systemº on page 182 in Section 1±7.)
CAUTION
Do not attempt to rock the vehicle
free by moving it forward and back-
ward if people or objects are any-
where near the vehicle. During the
rocking operation the vehicle may
suddenly move forward or backward
as it becomes unstuck, causing injury
or damage to nearby people or ob-
jects.
ÐAfter changing wheels If your vehicle becomes stuck
Page 4274 of 4323
05_SEQUOIA_U (L/O 0408)
415
2005 SEQUOIA from Aug. '04 Prod. (OM34424U)
Tire inflation pressure
Check the pressure with a gauge ev-
ery two weeks, or at least once a
month. See page 429 in Section 7±2
for additional information.
Tire surface and wheel nuts
Check the tires carefully for cuts,
damage or excessive wear. See page
432 in Section 7±2 for additional in-
formation. When checking the tires,
make sure no nuts are missing, and
check the nuts for looseness. Tighten
them if necessary.
Tire rotation
Rotate the tires according to the
maintenance schedule. (For sched-
uled maintenance information, please
refer to the ªScheduled Maintenance
Guideº or ªOwner 's Manual Supple-
mentº.) See page 434 in Section 7±2
for additional information.Be on the alert for changes in perfor-
mance, sounds, and visual tip±offs that
indicate service is needed. Some impor-
tant clues are as follows:
�Engine missing, stumbling, or pinging
�Appreciable loss of power
�Strange engine noises
�A leak under the vehicle (however, wa-
ter dripping from the air conditioning
after use is normal.)
�Change in exhaust sound (This may
indicate a dangerous carbon monoxide
leak. Drive with the windows open and
have the exhaust system checked im-
mediately.)
�Flat±looking tire; excessive tire squeal
when cornering; uneven tire wear
�Vehicle pulls to one side when driving
straight on a level road
�Strange noises related to suspension
movement
�Loss of brake effectiveness; spongy
feeling brake pedal; pedal almost
touches floor; vehicle pulls to one side
when braking
�Engine coolant temperature continually
higher than normal
�Engine continually runs hot; oil pres-
sure gauge stays low
If you notice any of these clues, take your
vehicle to your Toyota dealer as soon as
possible. It probably needs adjustment or
repair.
CAUTION
Do not continue driving with the ve-
hicle unchecked. It could result in se-
rious vehicle damage and possibly
personal injury.
Does your vehicle need
repairing?
Page 4282 of 4323
05_SEQUOIA_U (L/O 0408)
423
2005 SEQUOIA from Aug. '04 Prod. (OM34424U)
DO±IT±YOURSELF MAINTENANCE
Engine and Chassis
Checking the engine oil level424 . . . . . . . . . . . . . . . . . . . . . . . . . . . . . . . . .
Checking the engine coolant level426 . . . . . . . . . . . . . . . . . . . . . . . . . . . .
Checking the radiator and condenser427 . . . . . . . . . . . . . . . . . . . . . . . . .
Checking brake fluid428 . . . . . . . . . . . . . . . . . . . . . . . . . . . . . . . . . . . . . . . .
Checking power steering fluid428 . . . . . . . . . . . . . . . . . . . . . . . . . . . . . . . .
Checking tire inflation pressure429 . . . . . . . . . . . . . . . . . . . . . . . . . . . . . .
Checking and replacing tires432 . . . . . . . . . . . . . . . . . . . . . . . . . . . . . . . . .
Rotating tires434 . . . . . . . . . . . . . . . . . . . . . . . . . . . . . . . . . . . . . . . . . . . . . . .
Installing snow tires and chains435 . . . . . . . . . . . . . . . . . . . . . . . . . . . . . .
Replacing wheels436 . . . . . . . . . . . . . . . . . . . . . . . . . . . . . . . . . . . . . . . . . . .
Aluminum wheel precautions437 . . . . . . . . . . . . . . . . . . . . . . . . . . . . . . . .
SECTION 7± 2
Page 4288 of 4323
05_SEQUOIA_U (L/O 0408)
429
2005 SEQUOIA from Aug. '04 Prod. (OM34424U)
Clean all dirt from the outside of the res-
ervoir tank and look at the fluid level. If
the fluid is cold, the level should be in the
ªCOLDº range. Similarly, if it is hot, the
fluid level should be in the ªHOTº range.
If the level is at the low side of either
range, add automatic transmission fluid
DEXRON�II or III to bring the level within
the range.
To remove the reservoir cap, turn it coun-
terclockwise and lift up. To reinstall it,
turn it clockwise. After replacing the reser-
voir cap, visually check the steering box
case, vane pump and hose connections
for leaks or damage.
CAUTION
The reservoir tank may be hot so be
careful not to burn yourself.
NOTICE
Avoid overfilling, or the power steer-
ing could be damaged.
Keep your tire inflation pressures
at the proper level.
The recommended cold tire inflation
pressures, tire sizes and the com-
bined weight of occupants and cargo
(vehicle capacity weight) are de-
scribed on page 454 and 458. The
recommended cold tire inflation pres-
sures and tire sizes are also de-
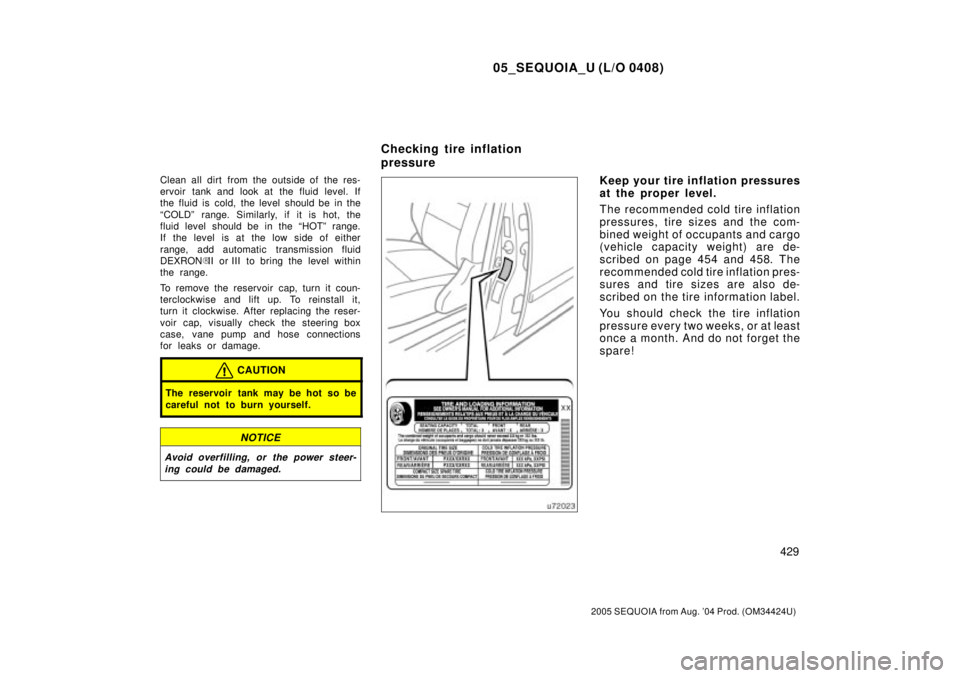
scribed on the tire information label.
You should check the tire inflation
pressure every two weeks, or at least
once a month. And do not forget the
spare!
Checking tire inflation
pressure
Page 4289 of 4323
05_SEQUOIA_U (L/O 0408)
430
2005 SEQUOIA from Aug. '04 Prod. (OM34424U)
The following instructions for
checking tire inflation pressure
should be observed:
�The pressure should be
checked only when the tires are
cold. If your vehicle has been
parked for at least 3 hours and has
not been driven for more than 1.5
km or 1 mile since, you will get
an accurate cold tire inflation pres-
sure reading.
�If you cannot adjust the tire
pressure when the tires are
cold, add 20 to 30 kPa more to
the front tires and rear tires than
the cold tire pressure, but never
exceed the maximum cold tire
pressure molded on the tire side-
wall.
�Always use a tire pressure
gauge. The appearance of a tire
can be misleading. Besides, tire
inflation pressures that are even
just a few pounds off can degrade
ride and handling.�Do not bleed or reduce tire
inflation pressure after driving.
It is normal for the tire inflation
pressure to be higher after driving.
�Never exceed the vehicle capac-
ity weight. Passenger and lug-
gage weight should be located so
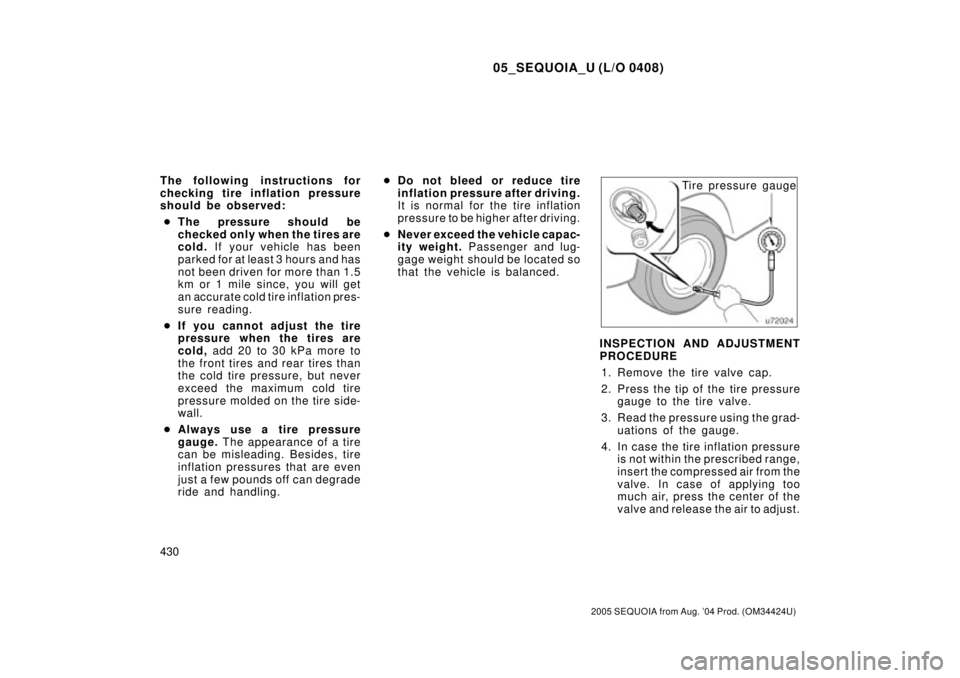
that the vehicle is balanced.Tire pressure gauge
INSPECTION AND ADJUSTMENT
PROCEDURE
1. Remove the tire valve cap.
2. Press the tip of the tire pressure
gauge to the tire valve.
3. Read the pressure using the grad-
uations of the gauge.
4. In case the tire inflation pressure
is not within the prescribed range,
insert the compressed air from the
valve. In case of applying too
much air, press the center of the
valve and release the air to adjust.