Page 1432 of 4323

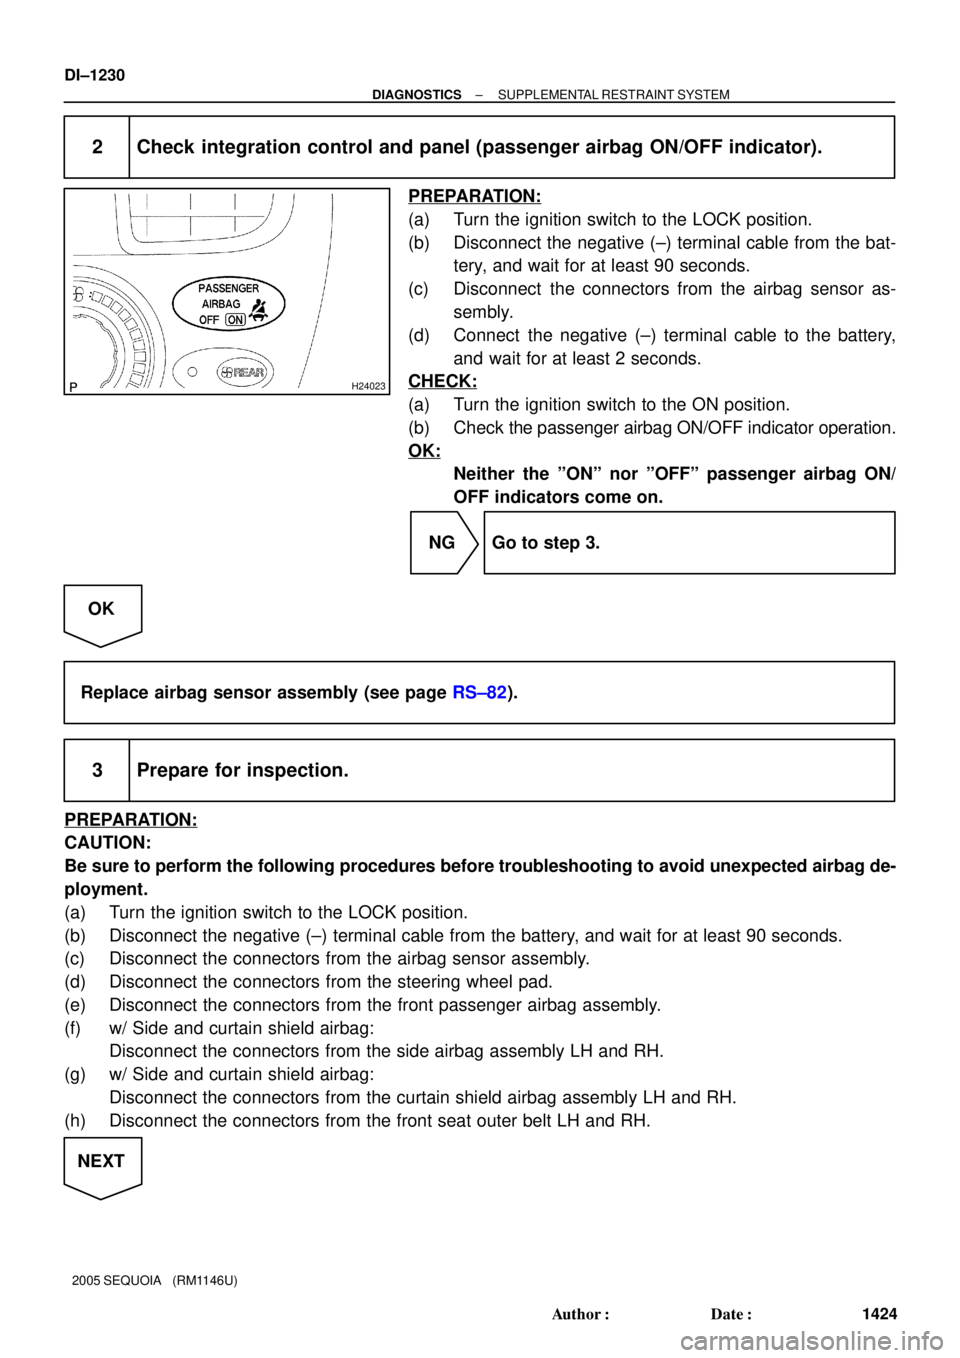
H24023
DI±1230
± DIAGNOSTICSSUPPLEMENTAL RESTRAINT SYSTEM
1424 Author�: Date�:
2005 SEQUOIA (RM1146U)
2 Check integration control and panel (passenger airbag ON/OFF indicator).
PREPARATION:
(a) Turn the ignition switch to the LOCK position.
(b) Disconnect the negative (±) terminal cable from the bat-
tery, and wait for at least 90 seconds.
(c) Disconnect the connectors from the airbag sensor as-
sembly.
(d) Connect the negative (±) terminal cable to the battery,
and wait for at least 2 seconds.
CHECK:
(a) Turn the ignition switch to the ON position.
(b) Check the passenger airbag ON/OFF indicator operation.
OK:
Neither the ºONº nor ºOFFº passenger airbag ON/
OFF indicators come on.
NG Go to step 3.
OK
Replace airbag sensor assembly (see page RS±82).
3 Prepare for inspection.
PREPARATION:
CAUTION:
Be sure to perform the following procedures before troubleshooting to avoid unexpected airbag de-
ployment.
(a) Turn the ignition switch to the LOCK position.
(b) Disconnect the negative (±) terminal cable from the battery, and wait for at least 90 seconds.
(c) Disconnect the connectors from the airbag sensor assembly.
(d) Disconnect the connectors from the steering wheel pad.
(e) Disconnect the connectors from the front passenger airbag assembly.
(f) w/ Side and curtain shield airbag:
Disconnect the connectors from the side airbag assembly LH and RH.
(g) w/ Side and curtain shield airbag:
Disconnect the connectors from the curtain shield airbag assembly LH and RH.
(h) Disconnect the connectors from the front seat outer belt LH and RH.
NEXT
Page 1435 of 4323

H24027
Integration Control and Panel:
IG+ I19
± DIAGNOSTICSSUPPLEMENTAL RESTRAINT SYSTEM
DI±1233
1427 Author�: Date�:
2005 SEQUOIA (RM1146U)
7 Prepare for inspection.
PREPARATION:
CAUTION:
Be sure to perform the following procedures before troubleshooting to avoid unexpected airbag de-
ployment.
(a) Turn the ignition switch to the LOCK position.
(b) Disconnect the negative (±) terminal cable from the battery, and wait for at least 90 seconds.
(c) Disconnect the connectors from the airbag sensor assembly.
(d) Disconnect the connectors from the steering wheel pad.
(e) Disconnect the connectors from the front passenger airbag assembly.
(f) w/ Side and curtain shield airbag:
Disconnect the connectors from the side airbag assembly LH.
(g) w/ Side and curtain shield airbag:
Disconnect the connectors from the curtain shield airbag assembly LH.
(h) Disconnect the connectors from the front seat outer belt LH.
NEXT
8 Check cowl wire (source voltage).
PREPARATION:
(a) Disconnect the connector from the integration control and
panel.
(b) Connect the negative (±) terminal cable to the battery,
and wait for at least 2 seconds.
CHECK:
(a) Turn the ignition switch to the ON position.
(b) Measure the voltage according to the value(s) in the table
below.
OK:
Tester ConnectionConditionSpecified Condition
I19±2 (IG+) ±
Body groundIgnition switch ON10 to 14 V
NG Repair or replace cowl wire (integration control
and panel ± battery).
OK
Page 1442 of 4323

DI±1240
± DIAGNOSTICSSUPPLEMENTAL RESTRAINT SYSTEM
1434 Author�: Date�:
2005 SEQUOIA (RM1146U)
INSPECTION PROCEDURE
1 Check RSCA OFF indicator condition.
CHECK:
Turn the ignition switch to the ON position, check the RSCA OFF indicator condition.
RESULT:
The RSCA OFF indicator does not come on when the RSCA OFF switch is
operate (remains off).A
The RSCA OFF indicator remains on when the RSCA OFF switch is not
operate (remains on).B
B Go to step 7.
A
2 Prepare for inspection.
PREPARATION:
CAUTION:
Be sure to perform the following procedures before troubleshooting to avoid unexpected airbag de-
ployment.
(a) Turn the ignition switch LOCK position.
(b) Disconnect the negative (±) terminal cable from the battery, and wait for at least 90 seconds.
(c) Disconnect the connectors from the airbag sensor assembly.
(d) Disconnect the connectors from the steering wheel pad.
(e) Disconnect the connectors from the front passenger airbag assembly.
(f) w/ Side and curtain shield airbag:
Disconnect the connectors from the side airbag assembly LH and RH.
(g) w/ Side and curtain shield airbag:
Disconnect the connectors from the curtain shield airbag assembly LH and RH.
(h) Disconnect the connectors from the front seat outer belt LH and RH.
NEXT
Page 1446 of 4323

DI±1244
± DIAGNOSTICSSUPPLEMENTAL RESTRAINT SYSTEM
1438 Author�: Date�:
2005 SEQUOIA (RM1146U)
7 Check connection of connectors.
PREPARATION:
(a) Turn the ignition switch to the LOCK position.
(b) Disconnect the negative (±) terminal cable from the battery, and wait for at least 90 seconds.
CHECK:
Check that the connectors are properly connected to the airbag sensor assembly and the combination meter.
OK:
The connectors are connected securely.
NG Connect connector, then go to step 1.
OK
8 Prepare for inspection.
PREPARATION:
CAUTION:
Be sure to perform the following procedures before troubleshooting to avoid unexpected airbag de-
ployment.
(a) Disconnect the connectors from the airbag sensor assembly.
(b) Disconnect the connectors from the steering wheel pad.
(c) Disconnect the connectors from the front passenger airbag assembly.
(d) w/ Side and curtain shield airbag:
Disconnect the connectors from the side airbag assembly LH and RH.
(e) w/ Side and curtain shield airbag:
Disconnect the connectors from the curtain shield airbag assembly LH and RH.
(f) Disconnect the connectors from the front seat outer belt LH and RH.
NEXT
Page 1525 of 4323

± DIAGNOSTICSSUPPLEMENTAL RESTRAINT SYSTEM
DI±1323
1517 Author�: Date�:
2005 SEQUOIA (RM1146U)
2 Check connection of connectors.
PREPARATION:
(a) Turn the ignition switch to the LOCK position.
(b) Disconnect the negative (±) terminal cable from the battery, and wait for at least 90 seconds.
CHECK:
Check that the connectors are properly connected to the occupant classification ECU and the airbag sensor
assembly.
OK:
The connectors are connected securely.
NG Connect connectors, then go to step 1.
OK
3 Prepare for inspection.
PREPARATION:
CAUTION:
Be sure to perform the following procedures before troubleshooting to avoid unexpected airbag de-
ployment.
(a) Disconnect the connectors from the airbag sensor assembly.
(b) Disconnect the connectors from the steering wheel pad.
(c) Disconnect the connectors from the front passenger airbag assembly.
(d) w/ Side and curtain shield airbag:
Disconnect the connectors from the side airbag assembly LH and RH.
(e) w/ Side and curtain shield airbag:
Disconnect the connectors from the curtain shield airbag assembly LH and RH.
(f) Disconnect the connectors from the front seat outer belt LH and RH.
NEXT
Page 1554 of 4323

DI±1352
± DIAGNOSTICSSUPPLEMENTAL RESTRAINT SYSTEM
1546 Author�: Date�:
2005 SEQUOIA (RM1146U)
DTC B1800/51 Short in D Squib Circuit
DTC B1801/51 Open in D Squib Circuit
DTC B1802/51 Short in D Squib Circuit (to Ground)
DTC B1803/51 Short in D Squib Circuit (to B+)
CIRCUIT DESCRIPTION
The D squib circuit consists of the airbag sensor assembly, the spiral cable and the steering wheel pad.
The circuit instructs the SRS to deploy when deployment conditions are met.
These DTCs are recorded when a malfunction is detected in the D squib circuit.
DTC No.DTC Detection ConditionTrouble Area
B1800/51
�The airbag sensor assembly receives a line short circuit
signal 5 times in the D squib circuit during primary check.
�Spiral cable malfunction
�D squib malfunction
�Airbag sensor assembly malfunction�Steering wheel pad (D squib)
�Airbag sensor assembly
�Spiral cable
�Cowl wire
B1801/51
�The airbag sensor assembly receives an open circuit sig-
nal in the D squib circuit for 2 seconds.
�Spiral cable malfunction
�D squib malfunction
�Airbag sensor assembly malfunction�Steering wheel pad (D squib)
�Airbag sensor assembly
�Spiral cable
�Cowl wire
B1802/51
�The airbag sensor assembly receives a short circuit to
ground signal in the D squib circuit for 0.5 seconds.
�Spiral cable malfunction
�D squib malfunction
�Airbag sensor assembly malfunction�Steering wheel pad (D squib)
�Airbag sensor assembly
�Spiral cable
�Cowl wire
B1803/51
�The airbag sensor assembly receive a short to B+ circuit
signal in the D squib circuit for 0.5 seconds.
�Spiral cable malfunction
�D squib malfunction
�Airbag sensor assembly malfunction�Steering wheel pad (D squib)
�Airbag sensor assembly
�Spiral cable
�Cowl wire
DIDHI±01
Page 1556 of 4323

DI±1354
± DIAGNOSTICSSUPPLEMENTAL RESTRAINT SYSTEM
1548 Author�: Date�:
2005 SEQUOIA (RM1146U)
INSPECTION PROCEDURE
CAUTION:
Be sure to perform the following procedures before troubleshooting to avoid unexpected airbag de-
ployment.
(a) Turn the ignition switch to the LOCK position.
(b) Disconnect the negative (±) terminal cable from the battery, and wait for at least 90 seconds.
(c) Disconnect the connectors from the airbag sensor assembly.
(d) Disconnect the connectors from the steering wheel pad.
(e) Disconnect the connectors from the front passenger airbag assembly.
(f) w/ Side and curtain shield airbag:
Disconnect the connectors from the side airbag assembly LH and RH.
(g) w/ Side and curtain shield airbag:
Disconnect the connectors from the curtain shield airbag assembly LH and RH.
(h) Disconnect the connectors from the front seat outer belt LH and RH.
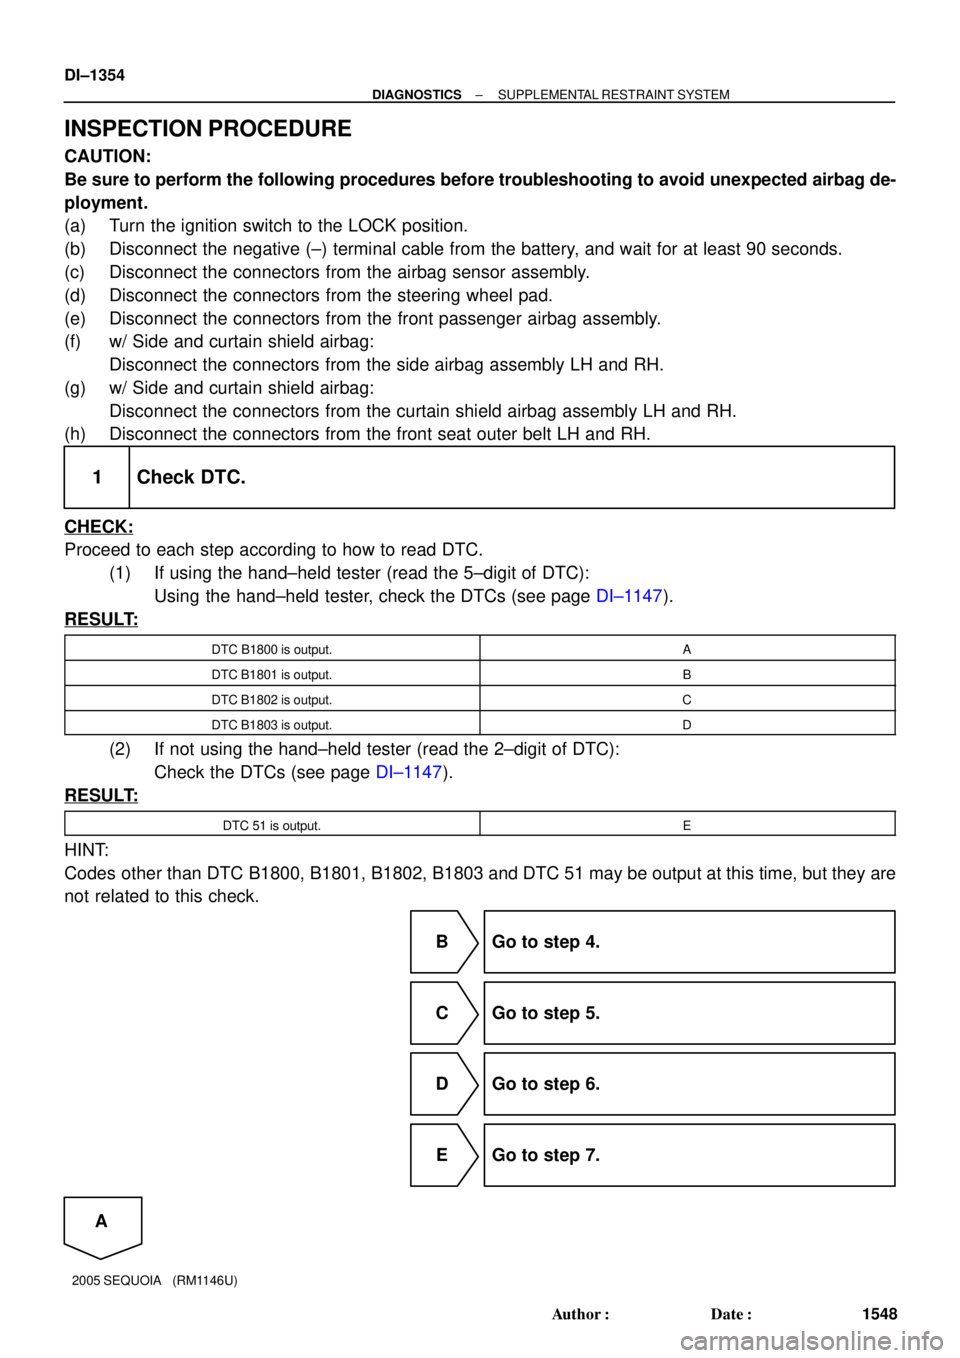
1 Check DTC.
CHECK:
Proceed to each step according to how to read DTC.
(1) If using the hand±held tester (read the 5±digit of DTC):
Using the hand±held tester, check the DTCs (see page DI±1147).
RESULT:
DTC B1800 is output.A
DTC B1801 is output.B
DTC B1802 is output.C
DTC B1803 is output.D
(2) If not using the hand±held tester (read the 2±digit of DTC):
Check the DTCs (see page DI±1147).
RESULT:
DTC 51 is output.E
HINT:
Codes other than DTC B1800, B1801, B1802, B1803 and DTC 51 may be output at this time, but they are
not related to this check.
B Go to step 4.
C Go to step 5.
D Go to step 6.
E Go to step 7.
A
Page 1557 of 4323
H23795H23974
H01001H23987
D+
D±
Color: Orange
D Squib
Spiral
CableA
B C D E FAirbag
Sensor
Assembly
± DIAGNOSTICSSUPPLEMENTAL RESTRAINT SYSTEM
DI±1355
1549 Author�: Date�:
2005 SEQUOIA (RM1146U)
2 Check connector.
CHECK:
Check that the spiral cable connectors (on the steering wheel pad side) are not damaged.
OK:
The lock button is not disengaged, or the claw of the lock is not deformed or damaged.
NG Replace spiral cable (see page RS±21).
OK
3 Check D squib circuit (short).
PREPARATION:
Release the activation prevention mechanism built into con-
nector ºBº (see page DI±1137).
CHECK:
Measure the resistance according to the value(s) in the table
below.
OK:
Tester ConnectionConditionSpecified Condition
D+ ± D±Always1 MW or higher
NG Go to step 13.
OK
Go to step 10.