Page 1926 of 1943

AC36R±01
I17955
I17954
± AIR CONDITIONINGRADIATOR AND CONDENSER MODULE
AC±47
2001 PRIUS (RM778U)
REMOVAL
1. DISCHARGE REFRIGERANT FROM REFRIGERATION
SYSTEM
HINT:
At the time of installation, please refer to the following item.
Evacuate air from refrigeration system.
Charge system with refrigerant and inspect for leakage of refrig-
erant.
Specified amount: 500 ± 50 g (17.64 ± 1.76 oz.)
2. DRAIN ENGINE COOLANT FROM RADIATOR
HINT:
It is not necessary to drain out all the coolant.
3. REMOVE CONDENSER FAN ASSEMBLY
(See Page AC±69)
4. REMOVE FRONT BUMPER (See Page BO±4)
5. REMOVE RADIATOR RESERVOIR HOSE
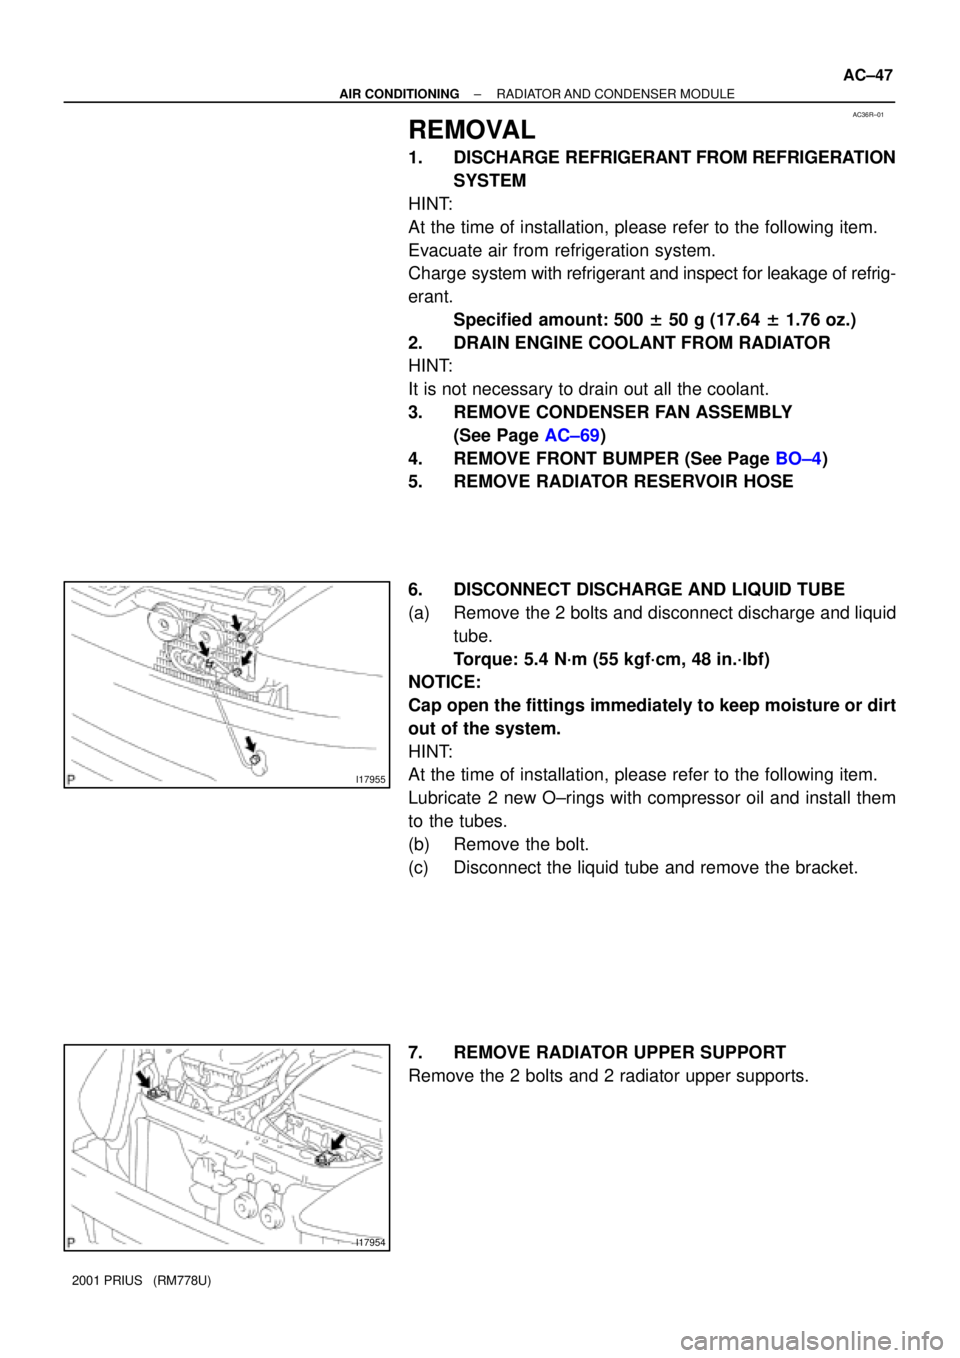
6. DISCONNECT DISCHARGE AND LIQUID TUBE
(a) Remove the 2 bolts and disconnect discharge and liquid
tube.
Torque: 5.4 N´m (55 kgf´cm, 48 in.´lbf)
NOTICE:
Cap open the fittings immediately to keep moisture or dirt
out of the system.
HINT:
At the time of installation, please refer to the following item.
Lubricate 2 new O±rings with compressor oil and install them
to the tubes.
(b) Remove the bolt.
(c) Disconnect the liquid tube and remove the bracket.
7. REMOVE RADIATOR UPPER SUPPORT
Remove the 2 bolts and 2 radiator upper supports.
Page 1927 of 1943
I17968
AC±48
± AIR CONDITIONINGRADIATOR AND CONDENSER MODULE
2001 PRIUS (RM778U)
8. REMOVE RADIATOR & CONDENSER MODULE
(a) Push the radiator & condenser module toward engine.
(b) Pull up the radiator until the lower radiator support is re-
moved.
(c) Pull it downward to remove it.
Page 1928 of 1943

I18027
Heater Main Relay
Magnetic
Clutch
Relay
Cooling
Fan No. 3
Relay
Cooling
Fan No. 1
Relay
Cooling
Fan No. 2
Relay
AC36O±01
I18028Heater 2 Relay
Heater 1 Relay
Heater 3 Relay
Water
Pump
Relay
I18286
3
2
15 4
1 4
32
5
N23635
3
2
15
4
Z18060
13
2 5
5 2
3
1
± AIR CONDITIONINGRELAY
AC±65
1953 Author�: Date�:
2001 PRIUS (RM778U)
RELAY
INSPECTION
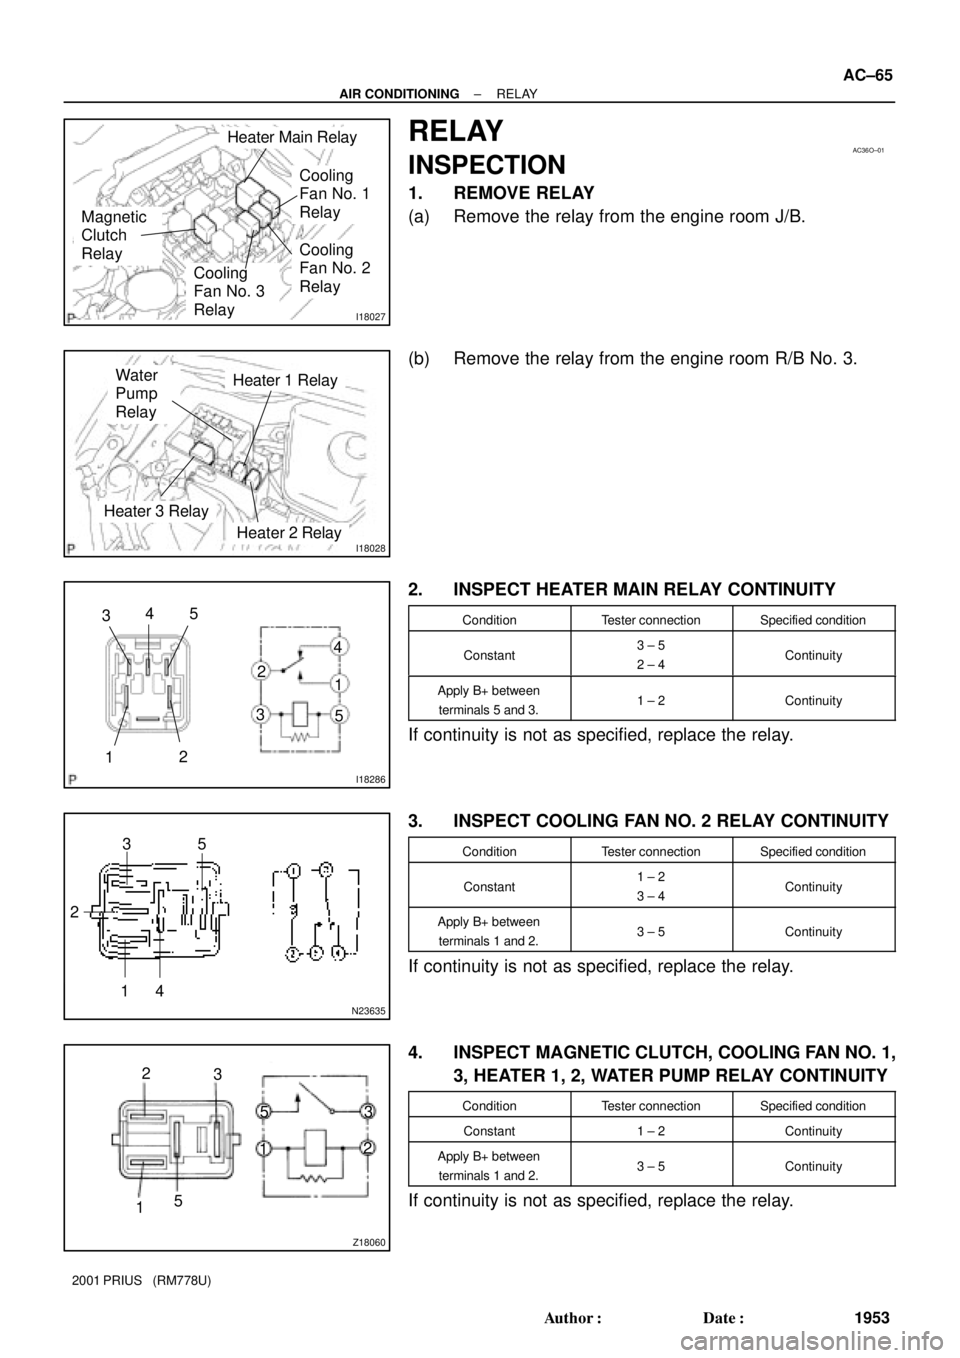
1. REMOVE RELAY
(a) Remove the relay from the engine room J/B.
(b) Remove the relay from the engine room R/B No. 3.
2. INSPECT HEATER MAIN RELAY CONTINUITY
ConditionTester connectionSpecified condition
Constant3 ± 5
2 ± 4Continuity
Apply B+ between
terminals 5 and 3.1 ± 2Continuity
If continuity is not as specified, replace the relay.
3. INSPECT COOLING FAN NO. 2 RELAY CONTINUITY
ConditionTester connectionSpecified condition
Constant1 ± 2
3 ± 4Continuity
Apply B+ between
terminals 1 and 2.3 ± 5Continuity
If continuity is not as specified, replace the relay.
4. INSPECT MAGNETIC CLUTCH, COOLING FAN NO. 1,
3, HEATER 1, 2, WATER PUMP RELAY CONTINUITY
ConditionTester connectionSpecified condition
Constant1 ± 2Continuity
Apply B+ between
terminals 1 and 2.3 ± 5Continuity
If continuity is not as specified, replace the relay.
Page 1929 of 1943
I07286
1
2 3
51
2
3
5 AC±66
± AIR CONDITIONINGRELAY
1954 Author�: Date�:
2001 PRIUS (RM778U)
5. INSPECT HEATER 3 RELAY CONTINUITY
ConditionTester connectionSpecified condition
Constant1 ± 2Continuity
Apply B+ between
terminals 1 and 2.3 ± 5Continuity
If continuity is not as specified, replace the relay.
Page 1930 of 1943

AC36D±01
I17963
I17964
± AIR CONDITIONINGCONDENSER FAN
AC±69
2001 PRIUS (RM778U)
REMOVAL
1. DISCHARGE REFRIGERANT FROM REFRIGERATION
SYSTEM
HINT:
At the time of installation, please refer to the following item.
Evacuate air from refrigeration system.
Charge system with refrigerant and inspect for leakage of refrig-
erant.
Specified amount: 500 ± 50 g (17.64 ± 1.76 oz.)
2. DRAIN ENGINE COOLANT FROM RADIATOR
HINT:
It is not necessary to drain out all coolant.
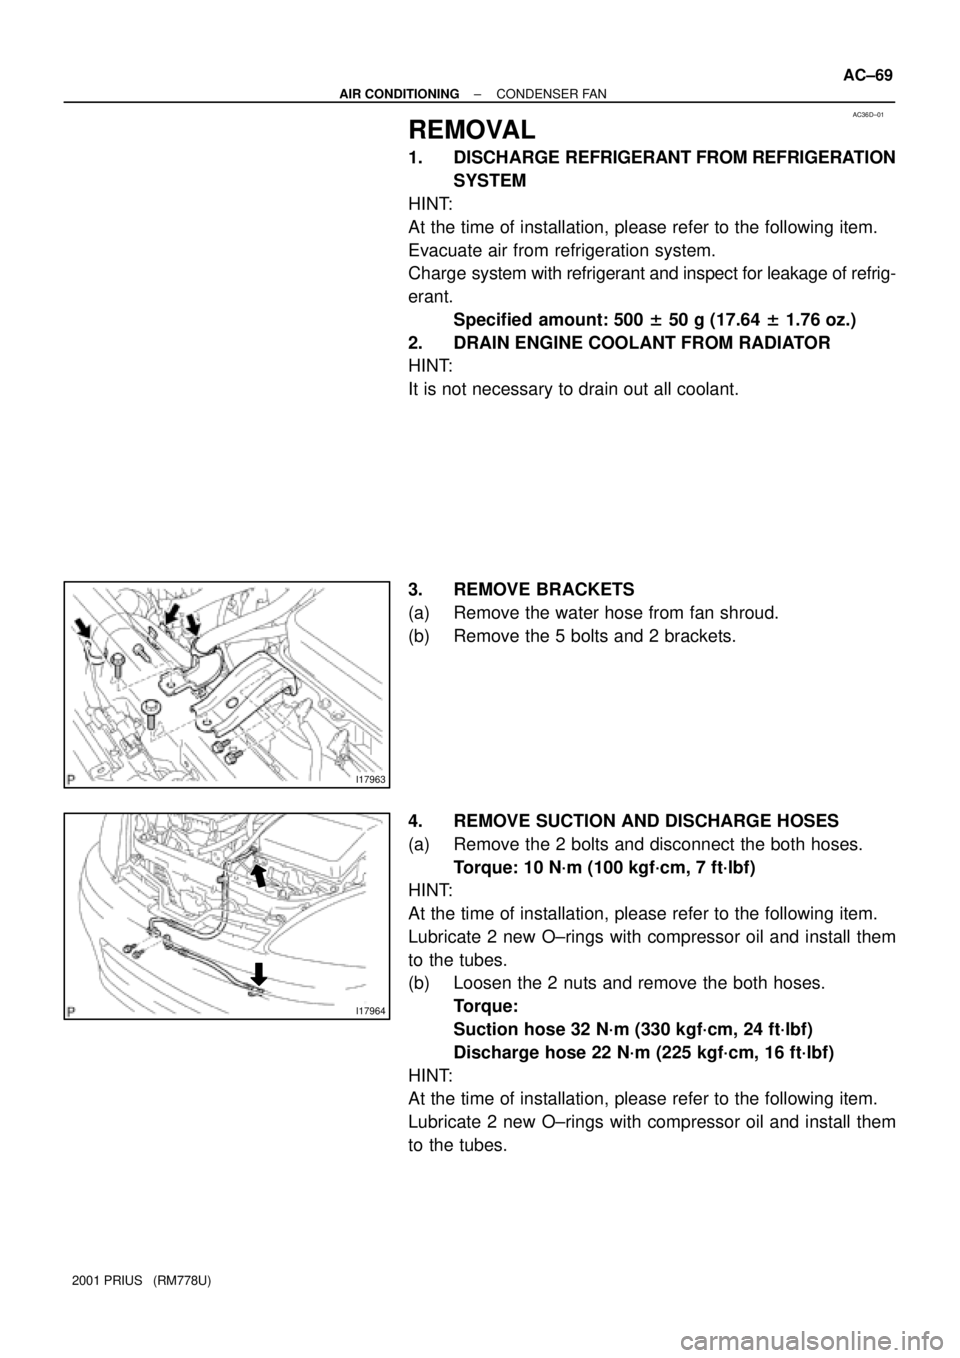
3. REMOVE BRACKETS
(a) Remove the water hose from fan shroud.
(b) Remove the 5 bolts and 2 brackets.
4. REMOVE SUCTION AND DISCHARGE HOSES
(a) Remove the 2 bolts and disconnect the both hoses.
Torque: 10 N´m (100 kgf´cm, 7 ft´lbf)
HINT:
At the time of installation, please refer to the following item.
Lubricate 2 new O±rings with compressor oil and install them
to the tubes.
(b) Loosen the 2 nuts and remove the both hoses.
Torque:
Suction hose 32 N´m (330 kgf´cm, 24 ft´lbf)
Discharge hose 22 N´m (225 kgf´cm, 16 ft´lbf)
HINT:
At the time of installation, please refer to the following item.
Lubricate 2 new O±rings with compressor oil and install them
to the tubes.
Page 1931 of 1943
I17965
I17967
I17956
AC±70
± AIR CONDITIONINGCONDENSER FAN
2001 PRIUS (RM778U)
5. DISCONNECT RADIATOR HOSES FROM RADIATOR
AND CONDENSER MODULE
(a) Using pliers, grip the claw of the hose clip and slide the
clip along the hose.
(b) Disconnect the radiator hoses.
6. REMOVE CONDENSER FAN WITH FAN SHROUD
(a) Disconnect the 2 connectors.
(b) Remove the 2 bolts.
(c) Pull up the condenser fan with fan shroud until the it is re-
moved from the radiator and condenser module.
(d) Pull it downward to remove it.
Page 1932 of 1943
AC36J±01
I17991
I18015
I18034
I18035
I18036 : Bulb
AC±76
± AIR CONDITIONINGHEATER CONTROL ASSEMBLY
2001 PRIUS (RM778U)
DISASSEMBLY
1. REMOVE CONTROL KNOBS
(a) Pull out the 5 control knobs.
(b) Remove the 3 nuts.
2. REMOVE MULTI DISPLAY & RADIO RECEIVER AS-
SEMBLY
Remove the 4 screws and multi display & radio receiver assem-
bly.
3. REMOVE A/C AMPLIFIER
(a) Remove the 12 screws and cover.
(b) Unlock the connector lock and pull out the flat harness
from center cluster module.
4. REMOVE BULBS
Using a screwdriver, turn the bulb to the left and pull out the
bulb.
Page 1933 of 1943
I18037
± AIR CONDITIONINGHEATER CONTROL ASSEMBLY
AC±77
2001 PRIUS (RM778U)
5. REMOVE CLUSTER MODULE CIRCUIT
Remove the 6 screws and center cluster module.