Page 65 of 142
’01 L/C U (L/O 0008)157
Clock
The digital clock indicates the time.
The key must be in the ”ACC” or ”ON”
position.
To reset the hour: Push the ”H” button.
To reset the minutes: Push the ”M” button.
If quick adjustment to a full hour is de-
sired, push the ”:00” button.
For example, if the ”:00” button is de-
pressed when the time is between
1:01—1:29, the time will change to 1:00.
If the time is between 1:30—1:59, the
time will change to 2:00.
If the electrical power source has been
disconnected from the clock, the time dis-
play will automatically be set to 1:00 (one
o’clock).
When the instrument panel lights are
turned on, the brightness of the time in-
dication will be reduced.
Outside temperature displayThe outside temperature display indi-
cates the outside air temperature.
The key must be in the ”ON” position.
The display indicates between the range of
−22 °F and 122 °F.
Page 66 of 142

158
Cigarette lighter and ashtray
CIGARETTE LIGHTER
To use the cigarette lighter, press it in.
When it becomes heated, it automatical-
ly pops out ready for use.
If the engi")
’01 L/C U (L/O 0008)
158
Cigarette lighter and ashtray
CIGARETTE LIGHTER
To use the cigarette lighter, press it in.
When it becomes heated, it automatical-
ly pops out ready for use.
If the engine is not running, the key must
be in the ”ACC” position.
Do not hold the cigarette lighter pressed
in.
Use a Toyota genuine cigarette lighter or
equivalent for replacement.
ASHTRAY
To use the ashtray, pull it out.
When finished with your cigarette, thor-
oughly extinguish it in the ashtray to pre-
vent other cigarette butts from catching
fire. After using the ashtray, push it back
in completely.
To remove the ashtray, press down on the
lock spring plate and pull out.
CAUTION
To reduce the chance of injury in
case of an accident or sudden stop
while driving, always close the ash-
tray completely after using.
Power outlets
The power outlets are designed for
power supply for car accessories. To
use them, open the lids as shown in
the following illustrations.
The key must be in the ”ACC” or ”ON”
position to be used.
NOTICE
�
To prevent the fuse from being
blown, do not use the electricity
over the total vehicle capacity of
12V/120W (all the outlets together).
� To prevent the battery from being
discharged, do not use the power
outlets longer than necessary when
the engine is not running.
� Close the power outlet lids when
the power outlets are not in use.
Inserting a foreign object other than
plug that fits the outlet, or pouring
juice or other liquid into the outlet
may cause troubles or short cir-
cuits.
Page 67 of 142
’01 L/C U (L/O 0008)159
Instrument panel
Rear console box (Vehicles without navi-
gation system)
Rear console box (Vehicles with naviga-
tion system)
Luggage compartment Fuel pump shut
−off system
In response to a severe impact which
may cause a large amount of vehicle
deformation, the fuel pump shut −off
system stops supplying fuel to the en-
gine to minimize the risk of fuel leak- age.
The fuel pump shut −off system activates
when the impact detection sensor located
in the footwell of the driver’s seat detects
an impact larger than specified.
Page 68 of 142

160
If the fuel pump shut
−off system has acti-
vated, you can turn on the fuel pump
shut −off system with the reset switch on
the impact detection sensor. To turn on
the f")
’01 L/C U (L/O 0008)
160
If the fuel pump shut
−off system has acti-
vated, you can turn on the fuel pump
shut −off system with the reset switch on
the impact detection sensor. To turn on
the fuel pump and reset the shut −off
switch, push the reset switch for longer
than one second with the vehicle parked
on a level surface.
CAUTION
� Inspect the ground under the ve-
hicle before resetting the fuel
pump shut −off system. If you
find liquid leakage on the
ground, it is probable that the
fuel system has been damaged
and is in need of repair. In this
case, do not reset the fuel pumpshut −off system.
� Do not strike or kick the impact
detection sensor. The fuel pumpshut −off system may activate,
shutting off the motor and plac-
ing the vehicle in a position to
be involved in an unexpected ac-
cident.
The fuel pump shut −off system is de-
signed to activate in a collision which may
cause a large amount of vehicle deforma-
tion. It does not operate in a small im-
pact. Rear console box
To use the rear console box, open as
shown in the illustration.
1. For upper box
2. For lower box
Page 69 of 142
161
Glove box
To use the glove box, do this.
To open: Pull the lever.
With the instrument panel lights on, the
glove box light will come on when the
glove box is open.
To l")
’01 L/C U (L/O 0008)161
Glove box
To use the glove box, do this.
To open: Pull the lever.
With the instrument panel lights on, the
glove box light will come on when the
glove box is open.
To lock: Insert the master key and turn it
clockwise.
CAUTION
To reduce the chance of injury in
case of an accident or a sudden stop,
always keep the glove box door
closed while driving.
Garage door opener
Indicator light
Buttons
The garage door opener ( HomeLink�
Universal Transceiver) is manufactured un-
der license from HomeLink �
and can be
programmed to operate garage doors,
gates, entry doors, door locks, home light-
ing systems, and security systems, etc.
(a) Programming the HomeLink �
The HomeLink �
in your vehicle has 3
buttons and you can store one program
for each button.
To ensure correct programming into the
HomeLink �
, install a new battery in the
hand −held transmitter prior to program-
ming. The battery side of the hand
−held trans-
mitter must be pointed away from the
HomeLink �
during the programming pro-
cess.
For Canadian users, follow the procedure
in “Programming an entrance gate/Pro-
gramming all devices in the Canadian
market”.
1. Decide which of 3 HomeLink �
buttons
you want to program.
2. Place your hand −held garage transmit-
ter 25 to 75 mm (1 to 3 in.) away from
the surface of the HomeLink �
.
Keep the indicator light on the
HomeLink �
in view while programming.
3. Simultaneously press and hold the hand −held garage transmitter button
along with the selected HomeLink �
but-
ton.
4. When the indicator light on the Home- Link �
changes from a slow to a rapid
flash after 20 seconds, you can release
both buttons.
5. Test the operation of the HomeLink �
by
pressing the newly programmed button.
If programming a garage door opener,
check to see if the garage door opens
and closes.
Page 70 of 142

162 If the garage door does not operate,
identify if your garage transmitter is of
the “Rolling C
ode” type. Press and hold
the programmed HomeLink �
button.
The garage d")
’01 L/C U (L/O 0008)
162 If the garage door does not operate,
identify if your garage transmitter is of
the “Rolling C
ode” type. Press and hold
the programmed HomeLink �
button.
The garage door has the rolling code
feature if the indicator light (on the
HomeLink �
) flashes rapidly and then
remains lit after 2 seconds. If your
garage transmitter is the “Rolling Code”
type, proceed to the heading “Program-
ming a rolling code system”.
6. Repeat steps 2 through 5 for each re- maining HomeLink �
button to program
another device.
Programming a rolling code system
If your device is “Rolling Code”
equipped, it is necessary to follow
steps 1 through 4 under the heading
“Programming the HomeLink �
” before
proceeding with the steps listed below.
1. Locate the “training” button on the ceil- ing mounted garage door opener motor.
The exact location and color of the
button may vary by brand of garage
door opener. Refer to the owner ’s
guide supplied by the garage door
opener manufacturer for the location of
this “training” button.
2. Press the “training” button on the ceil- ing mounted garage door opener motor. Following this step, you have 30 sec-
onds in which to initiate step 3 below.
3. Press and release the vehicle’s pro- grammed HomeLink �
button twice.
The garage door may open. If the door
does open, the programming process is
complete. If the door does not open,
press and release the button a third
time. This third press and release will
complete the programming process by
opening the garage door.
The ceiling mounted garage door open-
er motor should now recognize the
HomeLink �
unit and be able activate
the garage door up/down.
4. Repeat steps 1 through 3 for each re- maining HomeLink �
button to program
another rolling code system.
Programming an entrance gate/Program-
ming all devices in the Canadian market 1. Decide which of the 3 HomeLink �
but-
tons you want to program.
2. Place your hand −held gate/device
transmitter 25 to 75 mm (1 to 3 in.)
away from the surface of the Home-
Link �
.
Keep the indicator light on the
HomeLink �
in view while programming. 3. Press and hold the selected
HomeLink �
button.
4. Continuously press and release (cycle) the hand −held gate/device transmitter
button every two seconds until step 5
is complete.
5. When the indicator light on the Home- Link �
changes from a slow to a rapid
flash after 20 seconds, you can release
both buttons.
6. Test the operation of the HomeLink �
by
pressing the newly programmed button.
Check to see if the gate/device oper-
ates correctly.
7. Repeat steps 1 through 6 for each re- maining HomeLink �
button to program
another device.
Programming other devices
To program other devices such as home
security systems, home door locks or
lighting, contact your authorized Toyota
dealer for assistance.
Reprogramming a button
Individual HomeLink �
buttons cannot be
erased, however, to reprogram a single
button, follow the procedure “Programming
the HomeLink �
”.
Page 71 of 142
163
(b) Operating the HomeLink
�
To operate the HomeLink �
, press the ap-
propriate HomeLink �
button to activate the
programmed device. The HomeLink �
indi-
cator light shou")
’01 L/C U (L/O 0008)163
(b) Operating the HomeLink
�
To operate the HomeLink �
, press the ap-
propriate HomeLink �
button to activate the
programmed device. The HomeLink �
indi-
cator light should come on. The Home-
Link �
continues to send the signal for up
to 20 seconds as long as the button is
pressed.
(c) Erasing the entire HomeLink �
memory (all three programs)
To erase all previously programmed codes
at one time, press and hold down the 2
outside buttons for 20 seconds until the
indicator light flashes.
If you sell your vehicle, be sure to erase
the programs stored in the HomeLink �
memory.
CAUTION
� When programming the HomeLink- �
Universal Transceiver, you may
be operating a garage door or other device. Make sure people
and objects are out of the way of
the garage door or other device to prevent potential harm or da-mage.
� Do not use this HomeLink �
Uni-
versal Transceiver with any garage
door opener that lacks the safetystop and reverse feature as re-
quired by federal safety standards.
(This includes any garage door opener model manufactured before
April 1, 1982.) A garage door
opener, which cannot detect an
object, signaling the door to stop
and reverse, does not meet cur-
rent federal safety standards. Us-
ing a garage door opener without these features increases risk of
serious injury or death.
FCC ID: CB2V94800
CANADA: 1763 102 264
This device complies with FCC Rules
part 15. Operation is subject to the fol-
lowing two conditions: (1) This device
may not cause harmful interference, and
(2) this device must accept any interfer-
ence that may be received, including
interference that may cause undesired
operation.
WARNING: This transmitter has been
tested and complies with FCC and
DOC/MDC rules. Changes or modifi-
cations not expressly approved by the
party responsible for compliance
could void the user’s authority to op-
erate the device.
Page 72 of 142
’01 L/C U (L/O 0008)
164
Garage door opener box
Your vehicle is equipped with a box
designed to store a garage door opener
transmitter. You can operate the stored
garage door opener through the hole on
the lid.To use the garage door opener box, do
the following.
1. Open the garage door opener box with a flat −bladed screwdriver. To
protect the surface, put a sheet of
paper or cloth on the blade.2. Unscrew the screws on both sides and remove the stay.
 1
1 2
2 3
3 4
4 5
5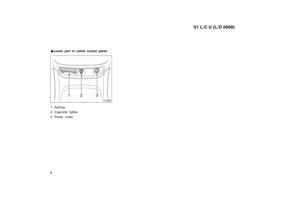 6
6 7
7 8
8 9
9 10
10 11
11 12
12 13
13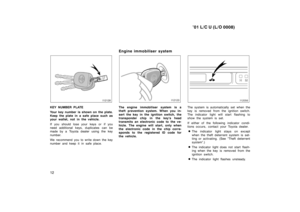 14
14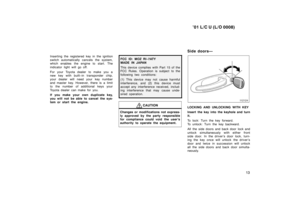 15
15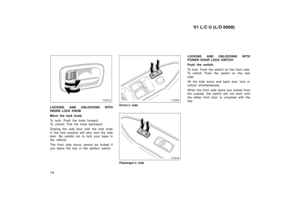 16
16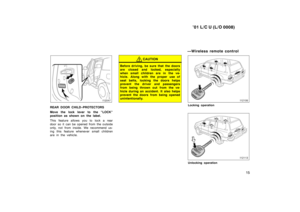 17
17 18
18 19
19 20
20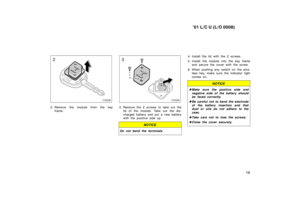 21
21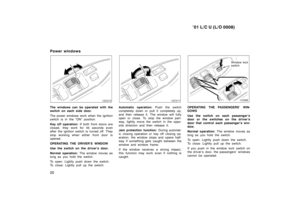 22
22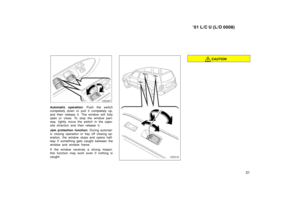 23
23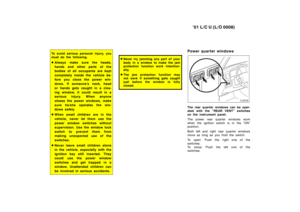 24
24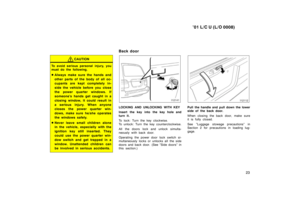 25
25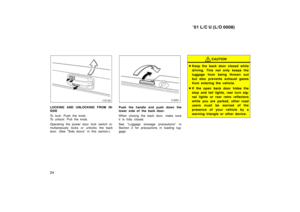 26
26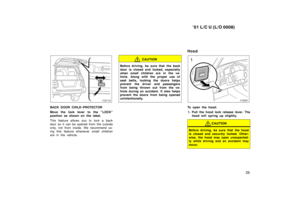 27
27 28
28 29
29 30
30 31
31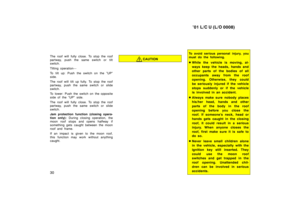 32
32 33
33 34
34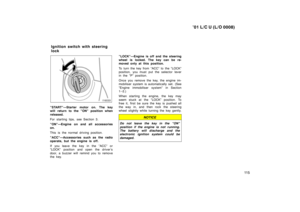 35
35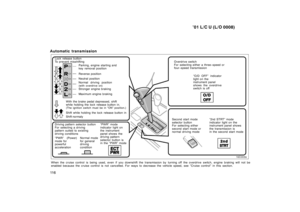 36
36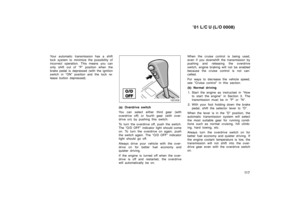 37
37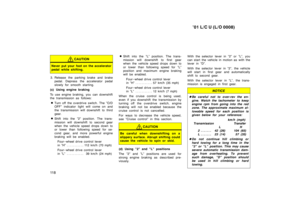 38
38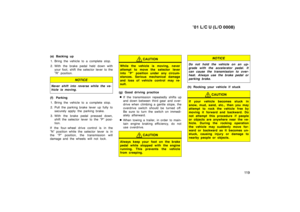 39
39 40
40 41
41 42
42 43
43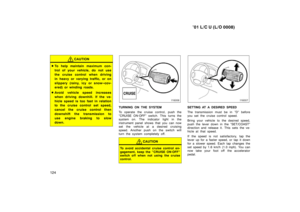 44
44 45
45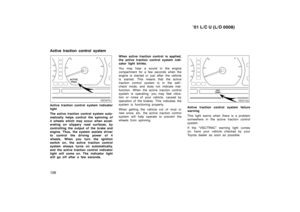 46
46 47
47 48
48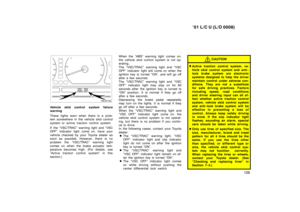 49
49 50
50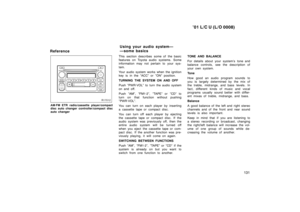 51
51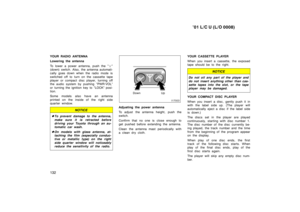 52
52 53
53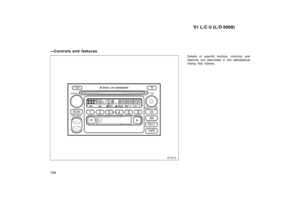 54
54 55
55 56
56 57
57 58
58 59
59 60
60 61
61 62
62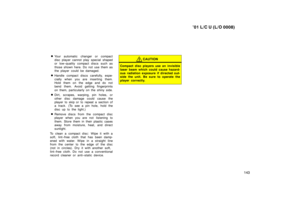 63
63 64
64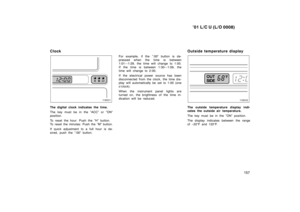 65
65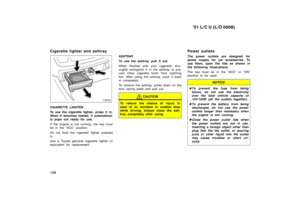 66
66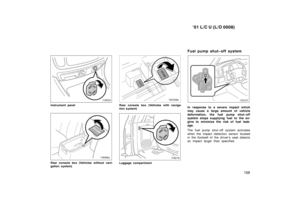 67
67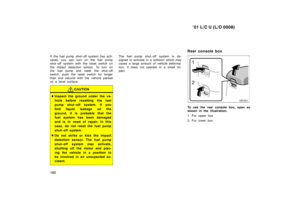 68
68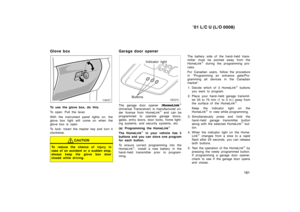 69
69 70
70 71
71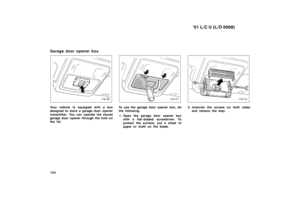 72
72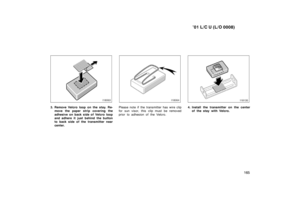 73
73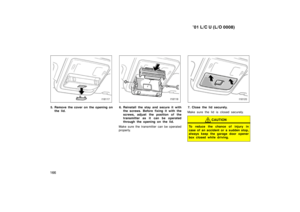 74
74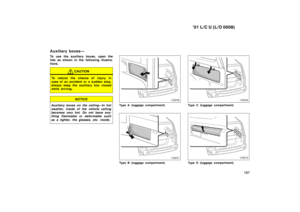 75
75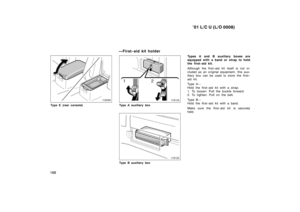 76
76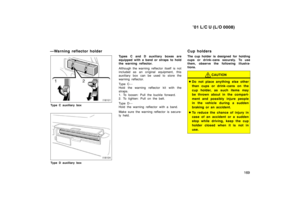 77
77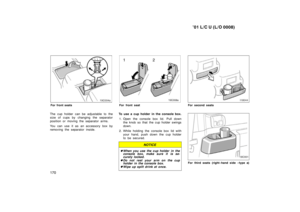 78
78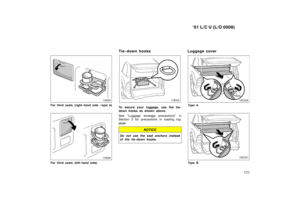 79
79 80
80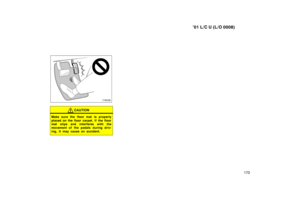 81
81 82
82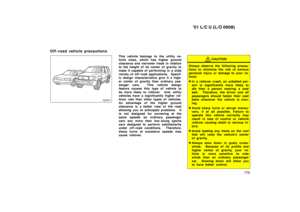 83
83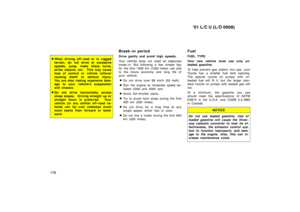 84
84 85
85 86
86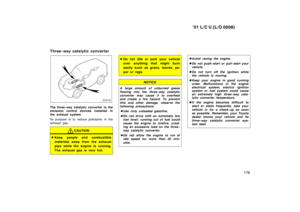 87
87 88
88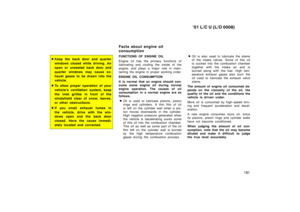 89
89 90
90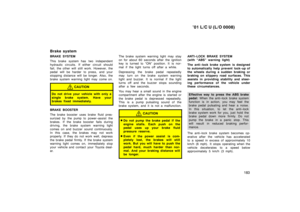 91
91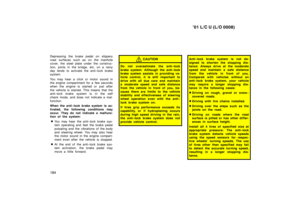 92
92 93
93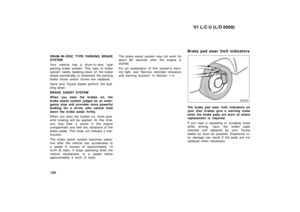 94
94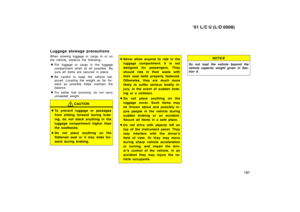 95
95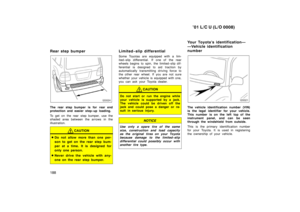 96
96 97
97 98
98 99
99 100
100 101
101 102
102 103
103 104
104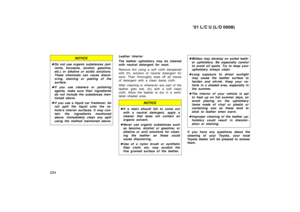 105
105 106
106 107
107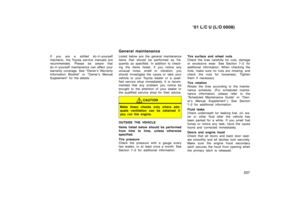 108
108 109
109 110
110 111
111 112
112 113
113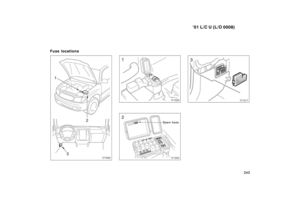 114
114 115
115 116
116 117
117 118
118 119
119 120
120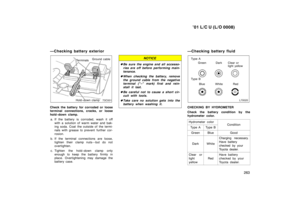 121
121 122
122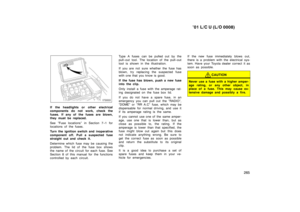 123
123 124
124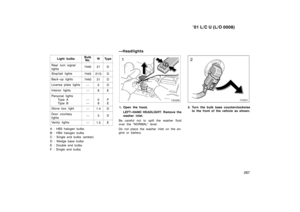 125
125 126
126 127
127 128
128 129
129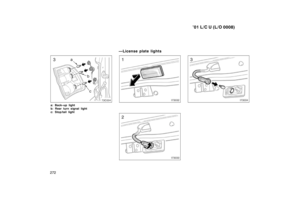 130
130 131
131 132
132 133
133 134
134 135
135 136
136 137
137 138
138 139
139 140
140 141
141157
Clock
The digital clock indicates the time.
The key must be in the ”ACC” or ”ON”
position.
To reset the hour: Push the ”H” button.
To reset the minutes: Push")
159
Instrument panel
Rear console box (Vehicles without navi-
gation system)
Rear console box (Vehicles with naviga-
tion system)
Luggage compartment Fuel pump shut
−off syst")

164
Garage door opener box
Your vehicle is equipped with a box
designed to store a garage door opener
transmitter. You can operate the stored
garage door opener through the h")