2001 NISSAN ALMERA TINO oil level
[x] Cancel search: oil levelPage 2701 of 3051

N
NATS (Nissan Anti-theft System)
precautions ................................................... GI-3
NATS (Nissan Anti-theft System) ............ EL-334
NATS - Wiring diagram ............................ EL-338
NVH troubleshooting (AX) ........................... AX-3
NVH troubleshooting (BR) .......................... BR-6
NVH troubleshooting (MT) .......................... MT-9
NVH troubleshooting (ST) ........................... ST-5
NVH troubleshooting (SU) ........................ SU-17
NVH troubleshooting CL ............................. CL-4
NVIS (Nissan vehicle immobiliser sys-
tem) precautions ....................................... GI-3
Neutral position switch . EC-402, 490, 931, 1016
O
Oil pan (engine) ......................... EM-20, 91, 170
Oil pressure (engine) ...................... LC-5, 25, 44
Oil pump (engine) ........................... LC-5, 25, 44
Oil pump regulator valve (engine) .. LC-7, 27, 46
Oil seal replacement (engine) .......... EM-31, 105
On board diagnostic system ... EC-59, 583, 1096
Operating cylinder (clutch) ........................ CL-14
P
PCV (positive crankcase ventilation) ....... EC-42,
576, 1082
PGC/V - Wiring diagram . EC-334, 460, 854, 988
PNP/SW - Wiring diagram ..... EC-404, 491, 933,
1017, 1297
POWER - Wiring diagram ................... EL-14, 24
PST/SW - Wiring diagram ............ EC-524, 1040
Park/Neutral position switch .. EC-402, 490, 931,
1016, 1297
Park/neutral position switch (A/T) .............. AT-66
Park/neutral position switch (M/T) ............ MT-16
Parking brake control ................................ BR-40
Parking lamp .............................................. EL-87
Piston assembly ....................... EM-60, 142, 236
Piston pin inspection ................ EM-54, 134, 226
Piston ring inspection ............... EM-54, 135, 226
Piston to bore clearance .......... EM-56, 137, 228
Power antenna ........................................ EL-233
Power door lock ....................................... EL-257
Power door mirror .................................... EL-241
Power steering fluid level ............................ ST-7
Power steering gear .................................. ST-15
Power steering hydraulic pressure .............. ST-9
Power steering oil pressure switch ........ EC-523,
1039
Power steering oil pump ..................... ST-21, 22
Power steering system bleeding ................. ST-8
Power supply routing ................................... EL-9Power transistor ............................ EC-907, 1010
Power window ......................................... EL-245
Precautions (General) .................................. GI-4
Pressure plate - See Clutch cover ............ CL-22
Pressure test (A/T) ..................................... AT-52
Priming pump .............................. EC-1094,1111
Q
Quick-glow system ................................ EC-1267
R
RR02 - Wiring diagram .. EC-230, 240, 249, 258,
427, 755, 764, 773, 781, 957
RR02/H - Wiring diagram .............. EC-265, 434,
788, 964
Radiator fan - See Cooling fan ................. LC-37
Radiator ......................................... LC-17, 37, 58
Radio - See Audio ................................... EL-208
Rear air spoiler .......................................... BT-38
Rear axle (disc brake type) ....................... AX-23
Rear axle ................................................... AX-21
Rear bumper .............................................. BT-10
Rear combination lamp removal and
installation .............................................. BT-38
Rear disc brake .................................. BR-28, 36
Rear door ................................................... BT-13
Rear heated oxygen sensor (HO2S)
heater .......................... EC-263, 433, 786, 963
Rear heated oxygen sensor (HO2S) ..... EC-227,
237, 246, 256, 426, 752, 761, 770, 779, 956
Rear seat belt ............................................. RS-7
Rear seat ................................................... BT-49
Rear suspension ....................................... SU-17
Rear window defogger ............................ EL-198
Rear window .............................................. BT-59
Refrigerant connection precaution .............. HA-3
Refrigerant general precaution ................... HA-2
Refrigerant lines ........................................ HA-98
Refrigeration cycle .................................... HA-12
Release bearing (clutch) ..................... CL-17, 20
Removal and installation (A/T) ................ AT-206
Resistor ......................................... EC-908, 1011
Reverse idler shaft (M/T) .................... MT-24, 63
Reverse lamp switch (M/T) - See
Back-up lamp switch (M/T) ................... MT-16
Reverse main gear (M/T) .................... MT-25, 63
Revolution sensor (A/T) ....................... AT-83, 89
Road wheel size ......................................... GI-41
Roof trim .................................................... BT-35
Room lamp - See Interior lamp ............... EL-116
ALPHABETICAL INDEX
IDX-6
Page 2708 of 3051
SEM853F
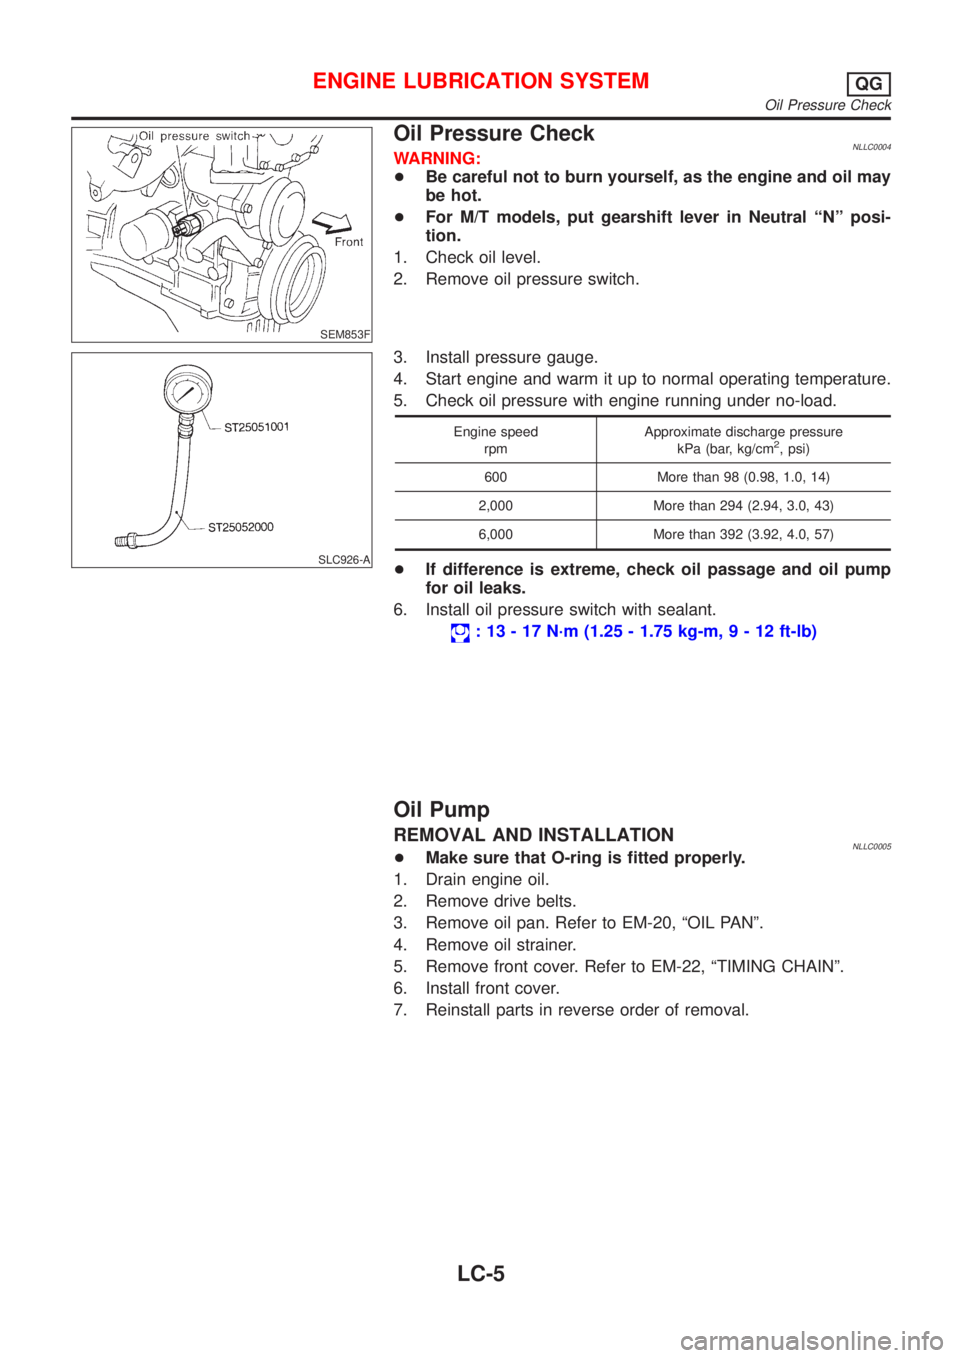
Oil Pressure CheckNLLC0004WARNING:
+Be careful not to burn yourself, as the engine and oil may
be hot.
+For M/T models, put gearshift lever in Neutral ªNº posi-
tion.
1. Check oil level.
2. Remove oil pressure switch.
SLC926-A
3. Install pressure gauge.
4. Start engine and warm it up to normal operating temperature.
5. Check oil pressure with engine running under no-load.
Engine speed
rpmApproximate discharge pressure
kPa (bar, kg/cm2, psi)
600 More than 98 (0.98, 1.0, 14)
2,000 More than 294 (2.94, 3.0, 43)
6,000 More than 392 (3.92, 4.0, 57)
+If difference is extreme, check oil passage and oil pump
for oil leaks.
6. Install oil pressure switch with sealant.
: 13 - 17 N´m (1.25 - 1.75 kg-m,9-12ft-lb)
Oil Pump
REMOVAL AND INSTALLATIONNLLC0005+Make sure that O-ring is fitted properly.
1. Drain engine oil.
2. Remove drive belts.
3. Remove oil pan. Refer to EM-20, ªOIL PANº.
4. Remove oil strainer.
5. Remove front cover. Refer to EM-22, ªTIMING CHAINº.
6. Install front cover.
7. Reinstall parts in reverse order of removal.
ENGINE LUBRICATION SYSTEMQG
Oil Pressure Check
LC-5
Page 2712 of 3051
SMA390C
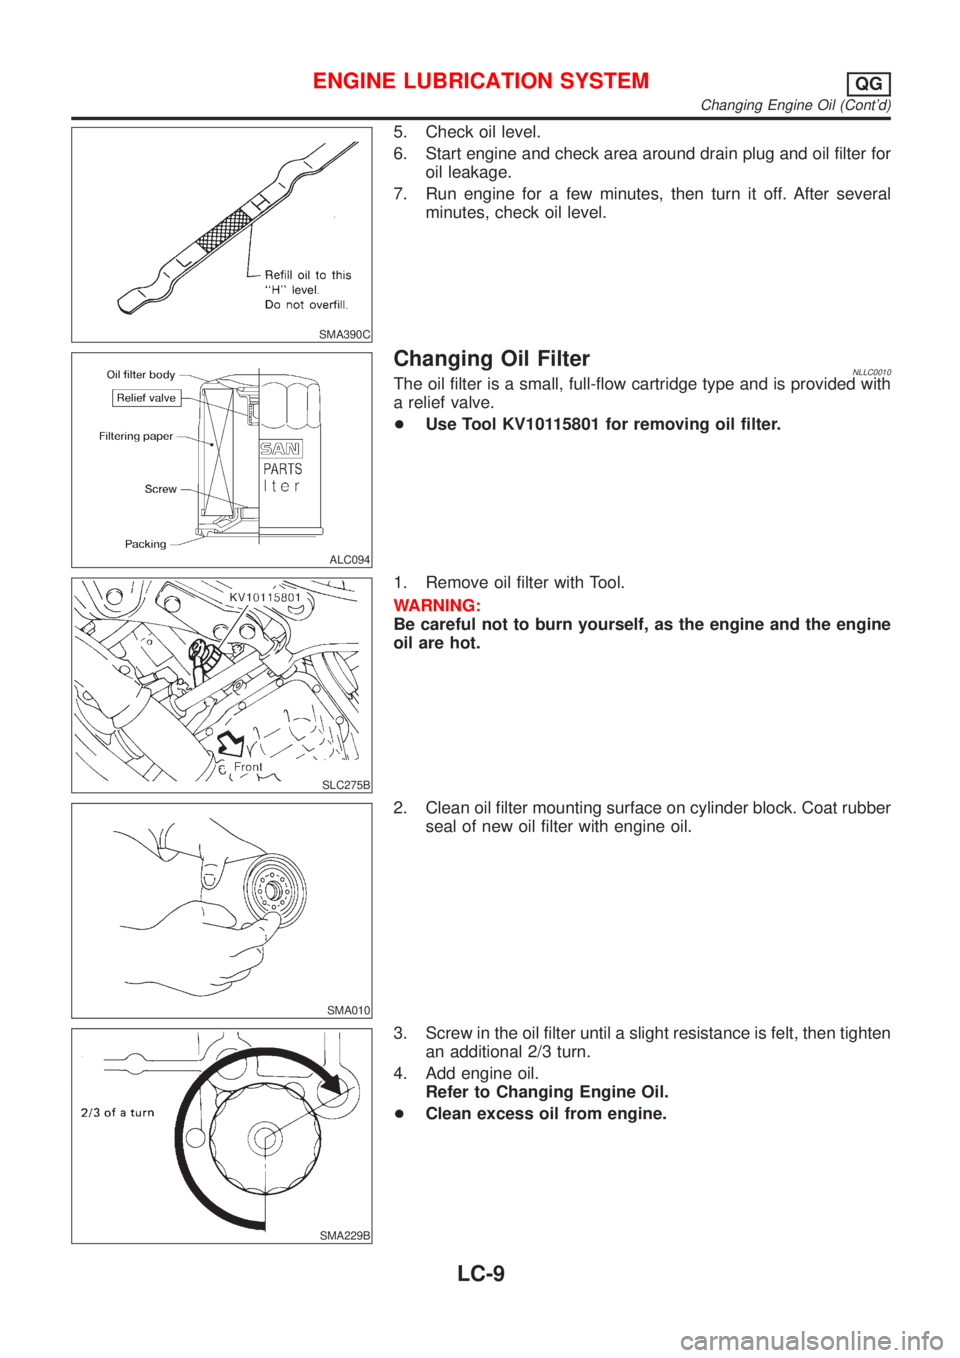
5. Check oil level.
6. Start engine and check area around drain plug and oil filter for
oil leakage.
7. Run engine for a few minutes, then turn it off. After several
minutes, check oil level.
ALC094
Changing Oil FilterNLLC0010The oil filter is a small, full-flow cartridge type and is provided with
a relief valve.
+Use Tool KV10115801 for removing oil filter.
SLC275B
1. Remove oil filter with Tool.
WARNING:
Be careful not to burn yourself, as the engine and the engine
oil are hot.
SMA010
2. Clean oil filter mounting surface on cylinder block. Coat rubber
seal of new oil filter with engine oil.
SMA229B
3. Screw in the oil filter until a slight resistance is felt, then tighten
an additional 2/3 turn.
4. Add engine oil.
Refer to Changing Engine Oil.
+Clean excess oil from engine.
ENGINE LUBRICATION SYSTEMQG
Changing Engine Oil (Cont'd)
LC-9
Page 2728 of 3051
NLC045
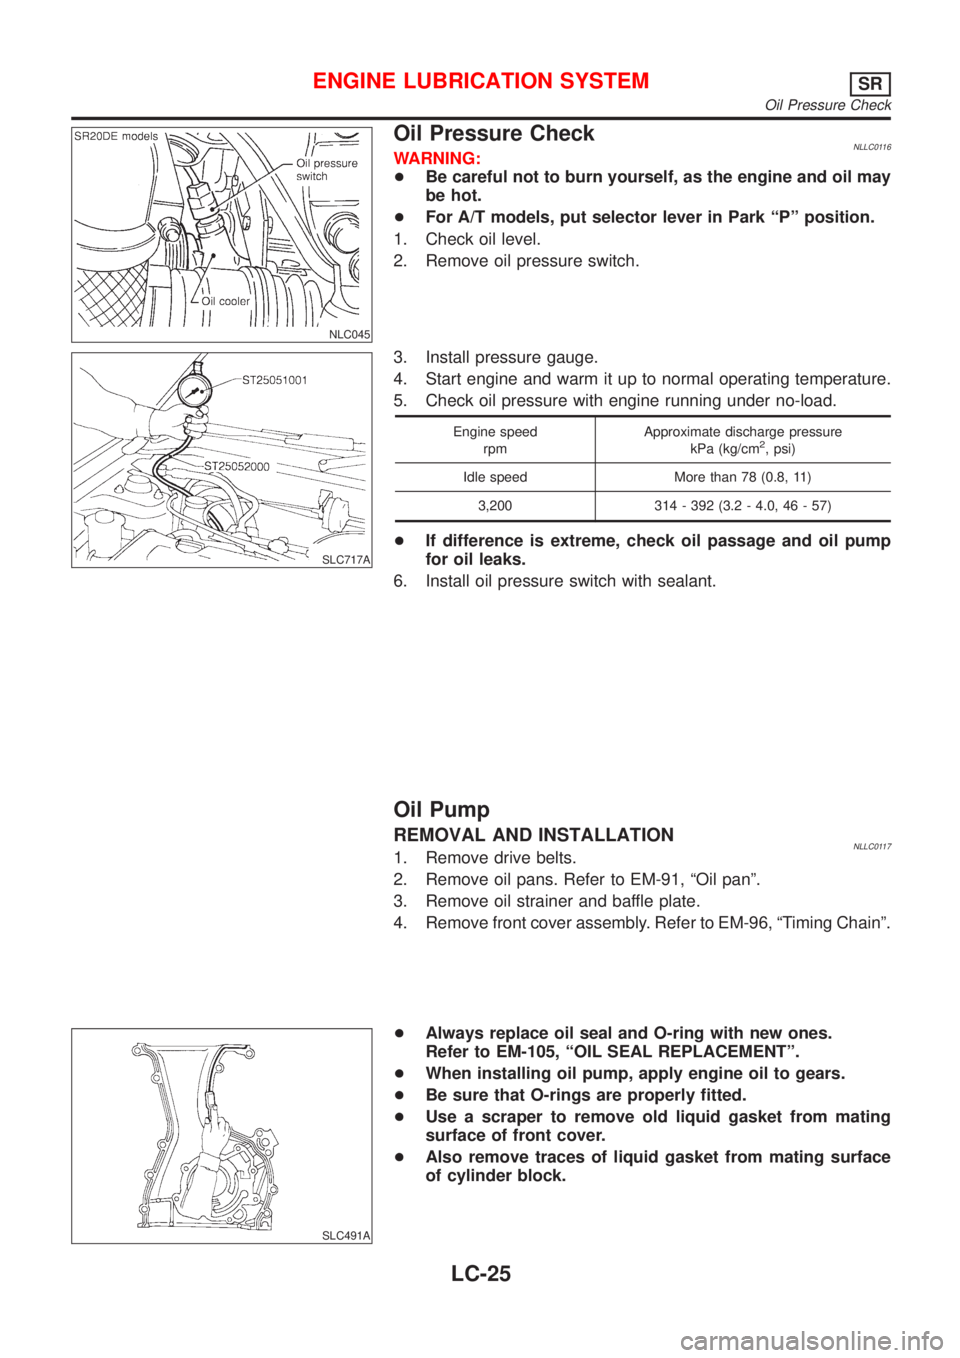
Oil Pressure CheckNLLC0116WARNING:
+Be careful not to burn yourself, as the engine and oil may
be hot.
+For A/T models, put selector lever in Park ªPº position.
1. Check oil level.
2. Remove oil pressure switch.
SLC717A
3. Install pressure gauge.
4. Start engine and warm it up to normal operating temperature.
5. Check oil pressure with engine running under no-load.
Engine speed
rpmApproximate discharge pressure
kPa (kg/cm2, psi)
Idle speed More than 78 (0.8, 11)
3,200 314 - 392 (3.2 - 4.0, 46 - 57)
+If difference is extreme, check oil passage and oil pump
for oil leaks.
6. Install oil pressure switch with sealant.
Oil Pump
REMOVAL AND INSTALLATIONNLLC01171. Remove drive belts.
2. Remove oil pans. Refer to EM-91, ªOil panº.
3. Remove oil strainer and baffle plate.
4. Remove front cover assembly. Refer to EM-96, ªTiming Chainº.
SLC491A
+Always replace oil seal and O-ring with new ones.
Refer to EM-105, ªOIL SEAL REPLACEMENTº.
+When installing oil pump, apply engine oil to gears.
+Be sure that O-rings are properly fitted.
+Use a scraper to remove old liquid gasket from mating
surface of front cover.
+Also remove traces of liquid gasket from mating surface
of cylinder block.
ENGINE LUBRICATION SYSTEMSR
Oil Pressure Check
LC-25
Page 2731 of 3051
NMA039
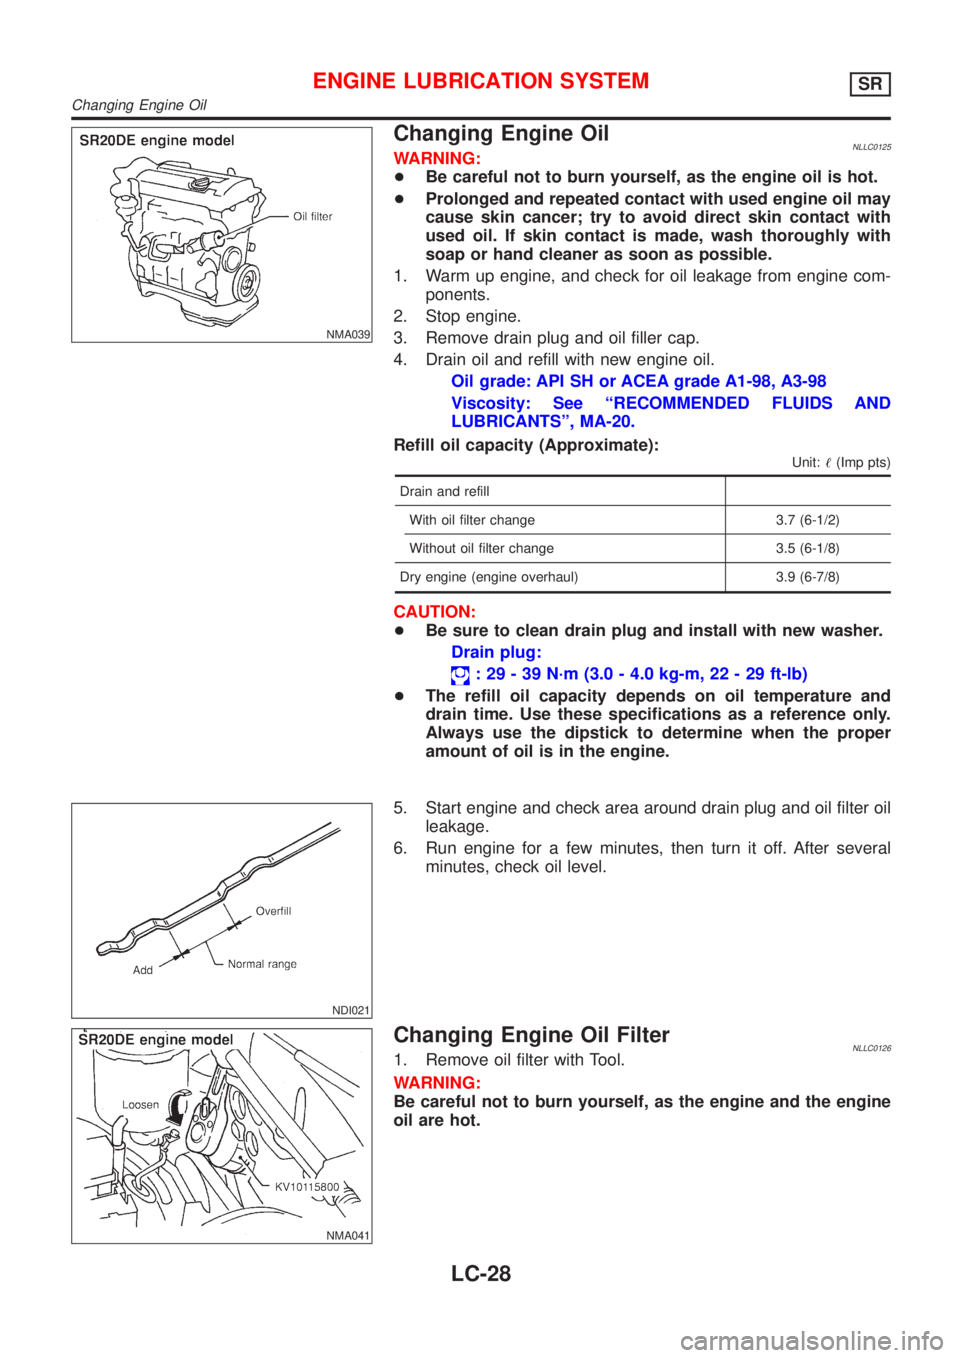
Changing Engine OilNLLC0125WARNING:
+Be careful not to burn yourself, as the engine oil is hot.
+Prolonged and repeated contact with used engine oil may
cause skin cancer; try to avoid direct skin contact with
used oil. If skin contact is made, wash thoroughly with
soap or hand cleaner as soon as possible.
1. Warm up engine, and check for oil leakage from engine com-
ponents.
2. Stop engine.
3. Remove drain plug and oil filler cap.
4. Drain oil and refill with new engine oil.
Oil grade: API SH or ACEA grade A1-98, A3-98
Viscosity: See ªRECOMMENDED FLUIDS AND
LUBRICANTSº, MA-20.
Refill oil capacity (Approximate):
Unit:!(Imp pts)
Drain and refill
With oil filter change 3.7 (6-1/2)
Without oil filter change 3.5 (6-1/8)
Dry engine (engine overhaul) 3.9 (6-7/8)
CAUTION:
+Be sure to clean drain plug and install with new washer.
Drain plug:
: 29 - 39 N´m (3.0 - 4.0 kg-m, 22 - 29 ft-lb)
+The refill oil capacity depends on oil temperature and
drain time. Use these specifications as a reference only.
Always use the dipstick to determine when the proper
amount of oil is in the engine.
NDI021
5. Start engine and check area around drain plug and oil filter oil
leakage.
6. Run engine for a few minutes, then turn it off. After several
minutes, check oil level.
NMA041
Changing Engine Oil FilterNLLC01261. Remove oil filter with Tool.
WARNING:
Be careful not to burn yourself, as the engine and the engine
oil are hot.
ENGINE LUBRICATION SYSTEMSR
Changing Engine Oil
LC-28
Page 2747 of 3051
SLC283B
JLC284B
SLC926-A
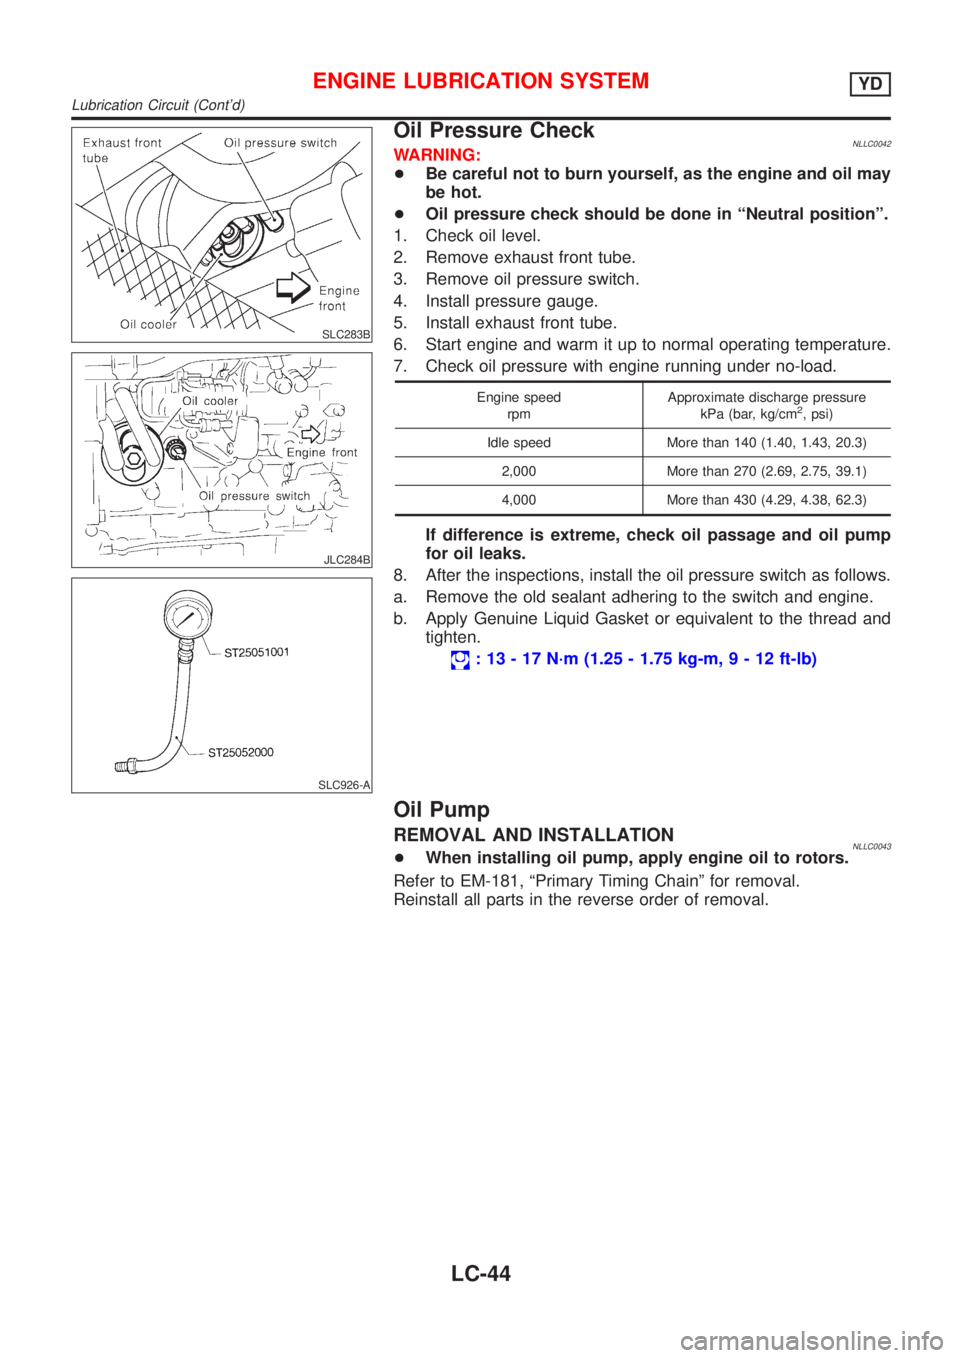
Oil Pressure CheckNLLC0042WARNING:
+Be careful not to burn yourself, as the engine and oil may
be hot.
+Oil pressure check should be done in ªNeutral positionº.
1. Check oil level.
2. Remove exhaust front tube.
3. Remove oil pressure switch.
4. Install pressure gauge.
5. Install exhaust front tube.
6. Start engine and warm it up to normal operating temperature.
7. Check oil pressure with engine running under no-load.
Engine speed
rpmApproximate discharge pressure
kPa (bar, kg/cm2, psi)
Idle speed More than 140 (1.40, 1.43, 20.3)
2,000 More than 270 (2.69, 2.75, 39.1)
4,000 More than 430 (4.29, 4.38, 62.3)
If difference is extreme, check oil passage and oil pump
for oil leaks.
8. After the inspections, install the oil pressure switch as follows.
a. Remove the old sealant adhering to the switch and engine.
b. Apply Genuine Liquid Gasket or equivalent to the thread and
tighten.
: 13 - 17 N´m (1.25 - 1.75 kg-m,9-12ft-lb)
Oil Pump
REMOVAL AND INSTALLATIONNLLC0043+When installing oil pump, apply engine oil to rotors.
Refer to EM-181, ªPrimary Timing Chainº for removal.
Reinstall all parts in the reverse order of removal.
ENGINE LUBRICATION SYSTEMYD
Lubrication Circuit (Cont'd)
LC-44
Page 2750 of 3051
SLC287B
JLC288B
Changing Engine OilNLLC0074WARNING:
+Be careful not to burn yourself, as the engine oil is hot.
+Prolonged and repeated contact with used engine oil may
cause skin cancer; try to avoid direct skin contact with
used oil. If skin contact is made, wash thoroughly with
soap or hand cleaner as soon as possible.
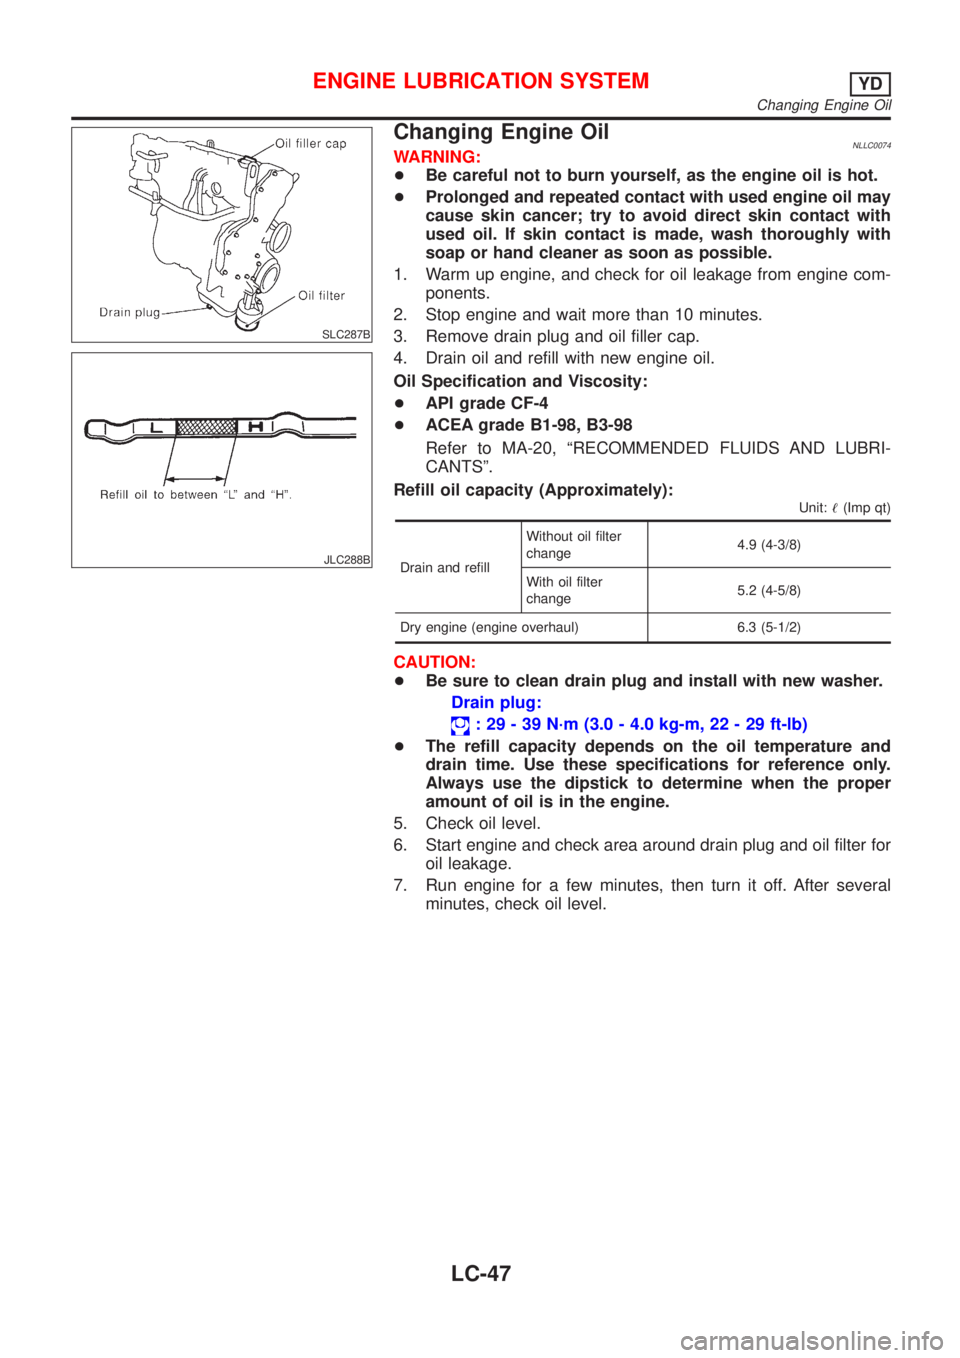
1. Warm up engine, and check for oil leakage from engine com-
ponents.
2. Stop engine and wait more than 10 minutes.
3. Remove drain plug and oil filler cap.
4. Drain oil and refill with new engine oil.
Oil Specification and Viscosity:
+API grade CF-4
+ACEA grade B1-98, B3-98
Refer to MA-20, ªRECOMMENDED FLUIDS AND LUBRI-
CANTSº.
Refill oil capacity (Approximately):
Unit:!(Imp qt)
Drain and refillWithout oil filter
change4.9 (4-3/8)
With oil filter
change5.2 (4-5/8)
Dry engine (engine overhaul) 6.3 (5-1/2)
CAUTION:
+Be sure to clean drain plug and install with new washer.
Drain plug:
: 29 - 39 N´m (3.0 - 4.0 kg-m, 22 - 29 ft-lb)
+The refill capacity depends on the oil temperature and
drain time. Use these specifications for reference only.
Always use the dipstick to determine when the proper
amount of oil is in the engine.
5. Check oil level.
6. Start engine and check area around drain plug and oil filter for
oil leakage.
7. Run engine for a few minutes, then turn it off. After several
minutes, check oil level.
ENGINE LUBRICATION SYSTEMYD
Changing Engine Oil
LC-47
Page 2769 of 3051
NLMA0036
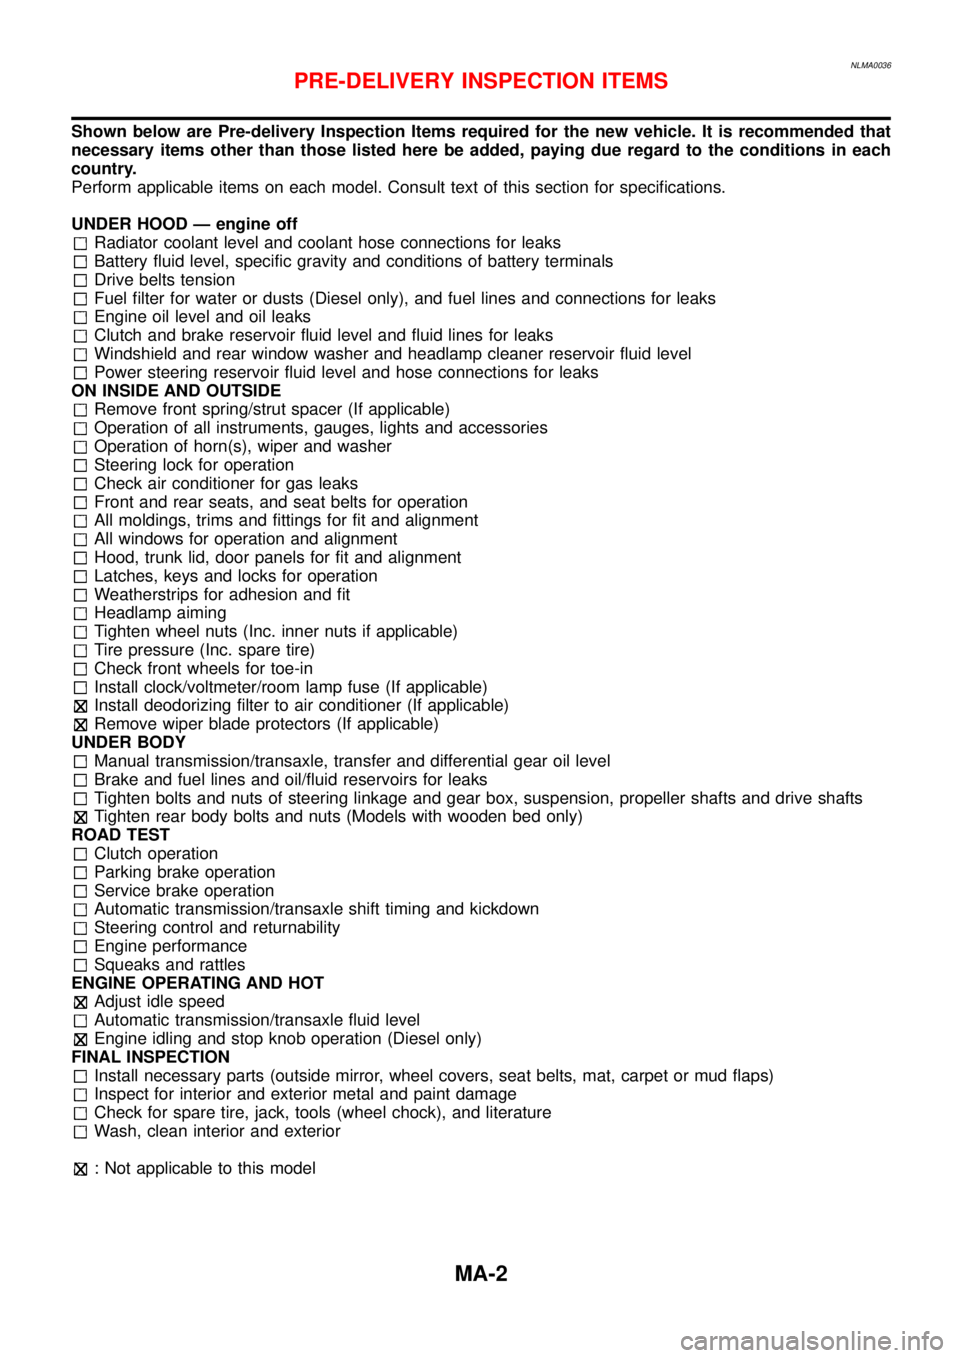
Shown below are Pre-delivery Inspection Items required for the new vehicle. It is recommended that
necessary items other than those listed here be added, paying due regard to the conditions in each
country.
Perform applicable items on each model. Consult text of this section for specifications.
UNDER HOOD — engine off
Radiator coolant level and coolant hose connections for leaks
Battery fluid level, specific gravity and conditions of battery terminals
Drive belts tension
Fuel filter for water or dusts (Diesel only), and fuel lines and connections for leaks
Engine oil level and oil leaks
Clutch and brake reservoir fluid level and fluid lines for leaks
Windshield and rear window washer and headlamp cleaner reservoir fluid level
Power steering reservoir fluid level and hose connections for leaks
ON INSIDE AND OUTSIDE
Remove front spring/strut spacer (If applicable)
Operation of all instruments, gauges, lights and accessories
Operation of horn(s), wiper and washer
Steering lock for operation
Check air conditioner for gas leaks
Front and rear seats, and seat belts for operation
All moldings, trims and fittings for fit and alignment
All windows for operation and alignment
Hood, trunk lid, door panels for fit and alignment
Latches, keys and locks for operation
Weatherstrips for adhesion and fit
Headlamp aiming
Tighten wheel nuts (Inc. inner nuts if applicable)
Tire pressure (Inc. spare tire)
Check front wheels for toe-in
Install clock/voltmeter/room lamp fuse (If applicable)
Install deodorizing filter to air conditioner (If applicable)
Remove wiper blade protectors (If applicable)
UNDER BODY
Manual transmission/transaxle, transfer and differential gear oil level
Brake and fuel lines and oil/fluid reservoirs for leaks
Tighten bolts and nuts of steering linkage and gear box, suspension, propeller shafts and drive shafts
Tighten rear body bolts and nuts (Models with wooden bed only)
ROAD TEST
Clutch operation
Parking brake operation
Service brake operation
Automatic transmission/transaxle shift timing and kickdown
Steering control and returnability
Engine performance
Squeaks and rattles
ENGINE OPERATING AND HOT
Adjust idle speed
Automatic transmission/transaxle fluid level
Engine idling and stop knob operation (Diesel only)
FINAL INSPECTION
Install necessary parts (outside mirror, wheel covers, seat belts, mat, carpet or mud flaps)
Inspect for interior and exterior metal and paint damage
Check for spare tire, jack, tools (wheel chock), and literature
Wash, clean interior and exterior
: Not applicable to this model
PRE-DELIVERY INSPECTION ITEMS
MA-2