Page 2346 of 3051

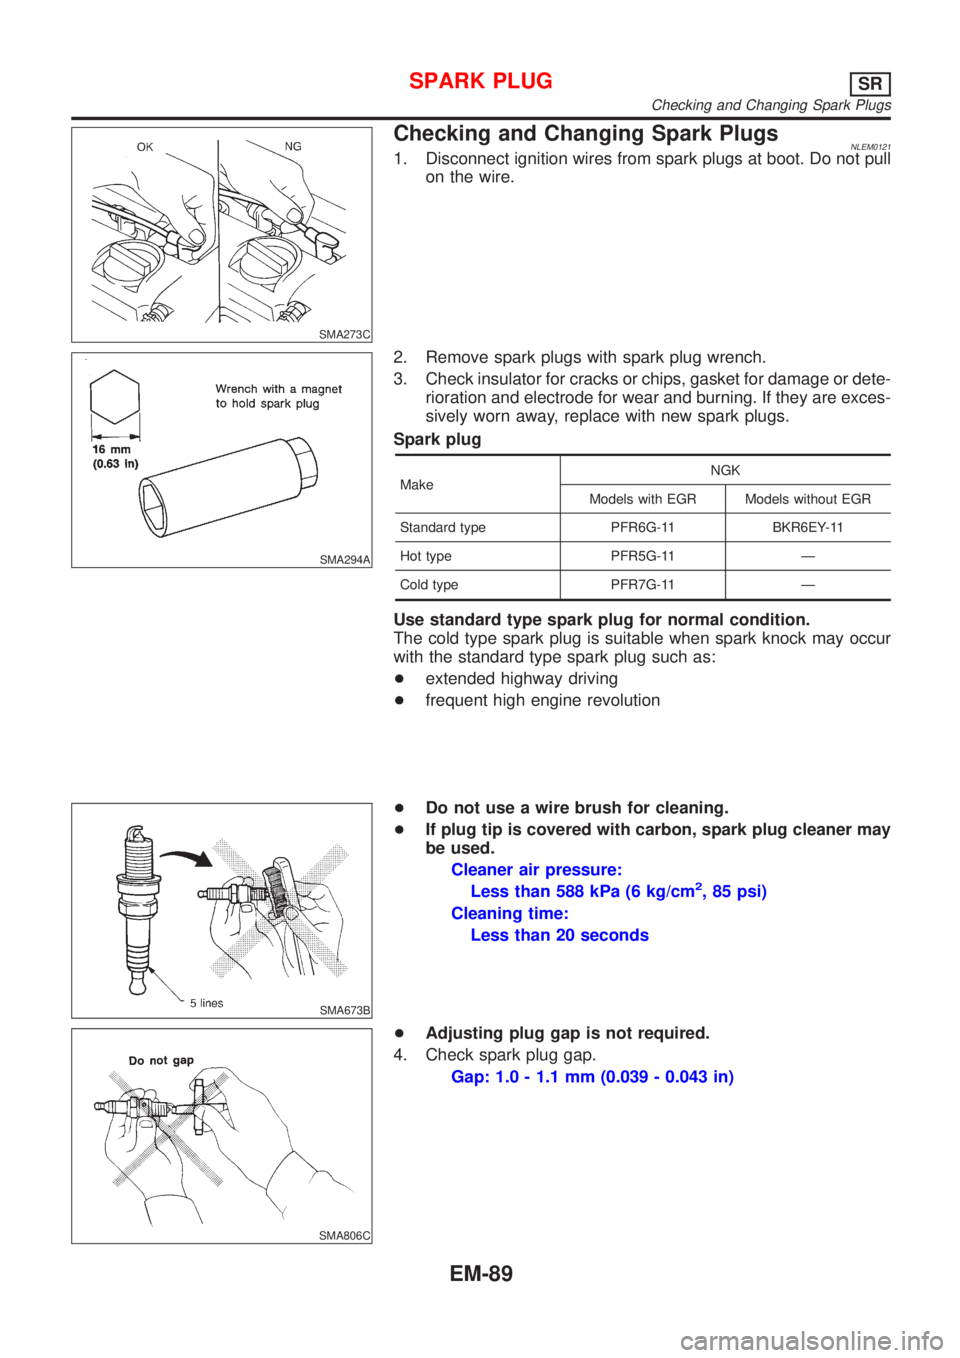
SMA273C
Checking and Changing Spark PlugsNLEM01211. Disconnect ignition wires from spark plugs at boot. Do not pull
on the wire.
SMA294A
2. Remove spark plugs with spark plug wrench.
3. Check insulator for cracks or chips, gasket for damage or dete-
rioration and electrode for wear and burning. If they are exces-
sively worn away, replace with new spark plugs.
Spark plug
MakeNGK
Models with EGR Models without EGR
Standard type PFR6G-11 BKR6EY-11
Hot type PFR5G-11 Ð
Cold type PFR7G-11 Ð
Use standard type spark plug for normal condition.
The cold type spark plug is suitable when spark knock may occur
with the standard type spark plug such as:
+extended highway driving
+frequent high engine revolution
SMA673B
+Do not use a wire brush for cleaning.
+If plug tip is covered with carbon, spark plug cleaner may
be used.
Cleaner air pressure:
Less than 588 kPa (6 kg/cm
2, 85 psi)
Cleaning time:
Less than 20 seconds
SMA806C
+Adjusting plug gap is not required.
4. Check spark plug gap.
Gap: 1.0 - 1.1 mm (0.039 - 0.043 in)
SPARK PLUGSR
Checking and Changing Spark Plugs
EM-89
Page 2347 of 3051
5. Install spark plugs. Reconnect ignition wires according to num-
bers indicated on them.
Spark plug:
: 20 - 29 N´m (2 - 3 kg-m, 14 - 22 ft-lb)
SMA015A
Checking Ignition LeadsNLEM01581. Inspect wires for cracks, damage, burned terminals and for
improper fit.
2. Measure the resistance of wires and check for intermittent
breaks.
Resistance:
Cylinder No. Resistance kW[at 25ÉC (77ÉF)]
1 Approximately 3.8
2 Approximately 3.5
3 Approximately 2.76
4 Approximately 2.4
For U.K. (Made by Bougicord)
4.48 - 6.72 kW/m (1.365 - 2.048 kW/ft) [at 25ÉC (77ÉF)]
If it exceeds the limit, replace the ignition wire with a new one.
SPARK PLUGSR
Checking and Changing Spark Plugs (Cont'd)
EM-90
Page 2361 of 3051

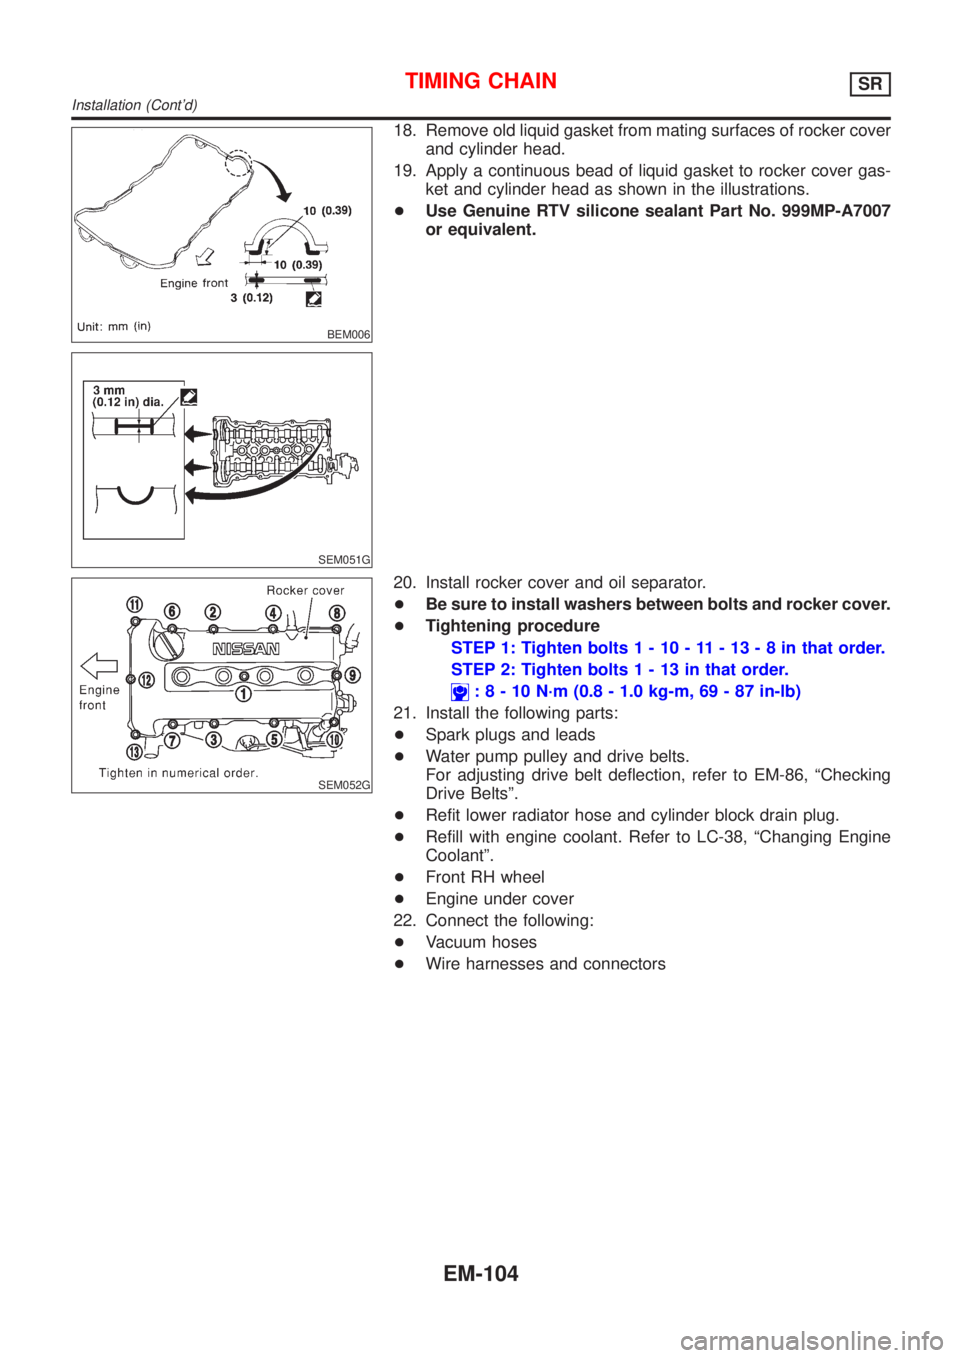
BEM006
SEM051G
18. Remove old liquid gasket from mating surfaces of rocker cover
and cylinder head.
19. Apply a continuous bead of liquid gasket to rocker cover gas-
ket and cylinder head as shown in the illustrations.
+Use Genuine RTV silicone sealant Part No. 999MP-A7007
or equivalent.
SEM052G
20. Install rocker cover and oil separator.
+Be sure to install washers between bolts and rocker cover.
+Tightening procedure
STEP 1: Tighten bolts1-10-11-13-8inthat order.
STEP 2: Tighten bolts1-13inthat order.
:8-10N´m(0.8 - 1.0 kg-m, 69 - 87 in-lb)
21. Install the following parts:
+Spark plugs and leads
+Water pump pulley and drive belts.
For adjusting drive belt deflection, refer to EM-86, ªChecking
Drive Beltsº.
+Refit lower radiator hose and cylinder block drain plug.
+Refill with engine coolant. Refer to LC-38, ªChanging Engine
Coolantº.
+Front RH wheel
+Engine under cover
22. Connect the following:
+Vacuum hoses
+Wire harnesses and connectors
TIMING CHAINSR
Installation (Cont'd)
EM-104
Page 2362 of 3051
SEM077D
ReplacementNLEM0129VALVE OIL SEALNLEM0129S011. Remove accelerator wire.
2. Remove rocker cover.
3. Remove camshafts and sprockets. Refer to EM-109.
4. Remove spark plugs.
5. Install air hose adapter into spark plug hole and apply air
pressure to hold valves in place. Apply a pressure of 490 kPa
(5 kg/cm
2, 71 psi).
6. Remove rocker arm, rocker arm guide and shim.
SEM604E
7. Remove valve spring with Tool. Temporarily install camshaft as
shown.
Piston concerned should be set at TDC to prevent valve from
falling.
SEM054G
8. Remove valve oil seal with a suitable tool.
SEM358E
9. Apply new engine oil to new valve oil seal and install it with
Tool.
SEM997C
FRONT OIL SEALNLEM0129S021. Remove the following parts:
+Engine under cover
+Front RH wheel and engine side cover
+Drive belts
+Crankshaft pulley
2. Remove front oil seal.
+Be careful not to scratch front cover.
OIL SEALSR
Replacement
EM-105
Page 2366 of 3051
RemovalNLEM01311. Release fuel pressure.
Refer to EC-578, ªFuel Pressure Releaseº.
2. Remove engine under covers.
3. Remove front RH wheel and engine side cover.
4. Drain coolant by removing cylinder block drain plug and radia-
tor drain cock. Refer to LC-38, ªChanging Engine Coolantº.
5. Remove radiator.
6. Remove air duct to intake manifold.
7. Disconnect the following parts:
+Vacuum hoses
+Fuel hoses
+Wires
+Harness
+Connectors
+Front exhaust tube
8. Remove all spark plugs.
SEM029G
9. Remove rocker cover bolts in numerical order.
10. Remove rocker cover.
SEM030G
11. Remove intake manifold supports.
SEM065G
12. Remove water pipe assembly.
CYLINDER HEADSR
Removal
EM-109
Page 2386 of 3051
SEM052G
17. Install rocker cover and oil separator.
+Be sure to install washers between bolts and rocker cover.
+Tightening procedure
STEP 1: Tighten bolts1-10-11-13-8inthat order.
STEP 2: Tighten bolts1-13inthat order.
:8-10N´m(0.8 - 1.0 kg-m, 69 - 87 in-lb)
18. Install the following parts:
+Spark plugs and leads
+Radiator
Refit hoses and refill with coolant.
Refer to LC-38, ªChanging Engine Coolantº.
+Front RH wheel
+Engine under covers
19. Connect the following:
+Vacuum hoses
+Fuel hoses
+Wire harnesses and connectors
+Air duct to intake manifold
+Front exhaust tube
CYLINDER HEADSR
Installation (Cont'd)
EM-129
Page:
< prev 1-8 9-16 17-24