Page 2199 of 2898
SEM935F
7. Measure connecting rod side clearance.
Connecting rod side clearance:
Standard
0.200 - 0.470 mm (0.0079 - 0.0185 in)
Limit
0.5 mm (0.020 in)
If beyond the limit, replace connecting rod and/or crank-
shaft.
AEM248
8. Install rear oil seal retainer.
a. Before installing rear oil seal retainer, remove old liquid gasket
from cylinder block and retainer.
b. Apply a continuous bead of liquid gasket to rear oil seal
retainer.
+Use Genuine Liquid Gasket or equivalent.
+Apply around inner side of bolt holes.
9. Install crankshaft positon sensor (POS).
SEM936F
10. Install knock sensor.
CYLINDER BLOCKQG
Assembly (Cont'd)
EM-65
Page 2223 of 2898
ComponentsNJEM0054
SEM654G
RemovalNJEM0055CAUTION:
When removing the upper oil pan from engine, first remove
the crankshaft position sensor (TDC sensor) from the assem-
bly.
Be careful not to damage sensor edges and signal plate teeth.
1. Remove right engine undercover.
2. Drain engine oil.
OIL PANYD
Components
EM-89
Page 2224 of 2898
JEM114G
3. Remove air compressor bracket.
4. Remove lower oil pan bolts.
+Loosen bolts in the reverse order of that shown in the figure.
SEM544G
5. Remove lower oil pan.
a. Insert Tool between upper oil pan and lower oil pan.
+Be careful not to damage aluminum mating surface.
+Do not insert screwdriver, or oil pan flange will be
deformed.
SEM545G
b. Slide Tool by tapping on the side of the Tool with a hammer.
c. Remove lower oil pan.
6. Remove oil strainer.
7. Remove front exhaust tube and its support.
Refer to FE-32, ªRemoval and Installationº.
JEM553G
8. Set a suitable transmission jack under transaxle and hoist
engine with engine slinger.
+Place the jack as close to the center as possible for support.
9. Remove front and rear engine mounting nuts and bolts.
10. Remove center member.
11. Remove crankshaft position sensor (TDC sensor) from oil pan.
12. Remove oil pan cover.
OIL PANYD
Removal (Cont'd)
EM-90
Page 2226 of 2898
JEM116G
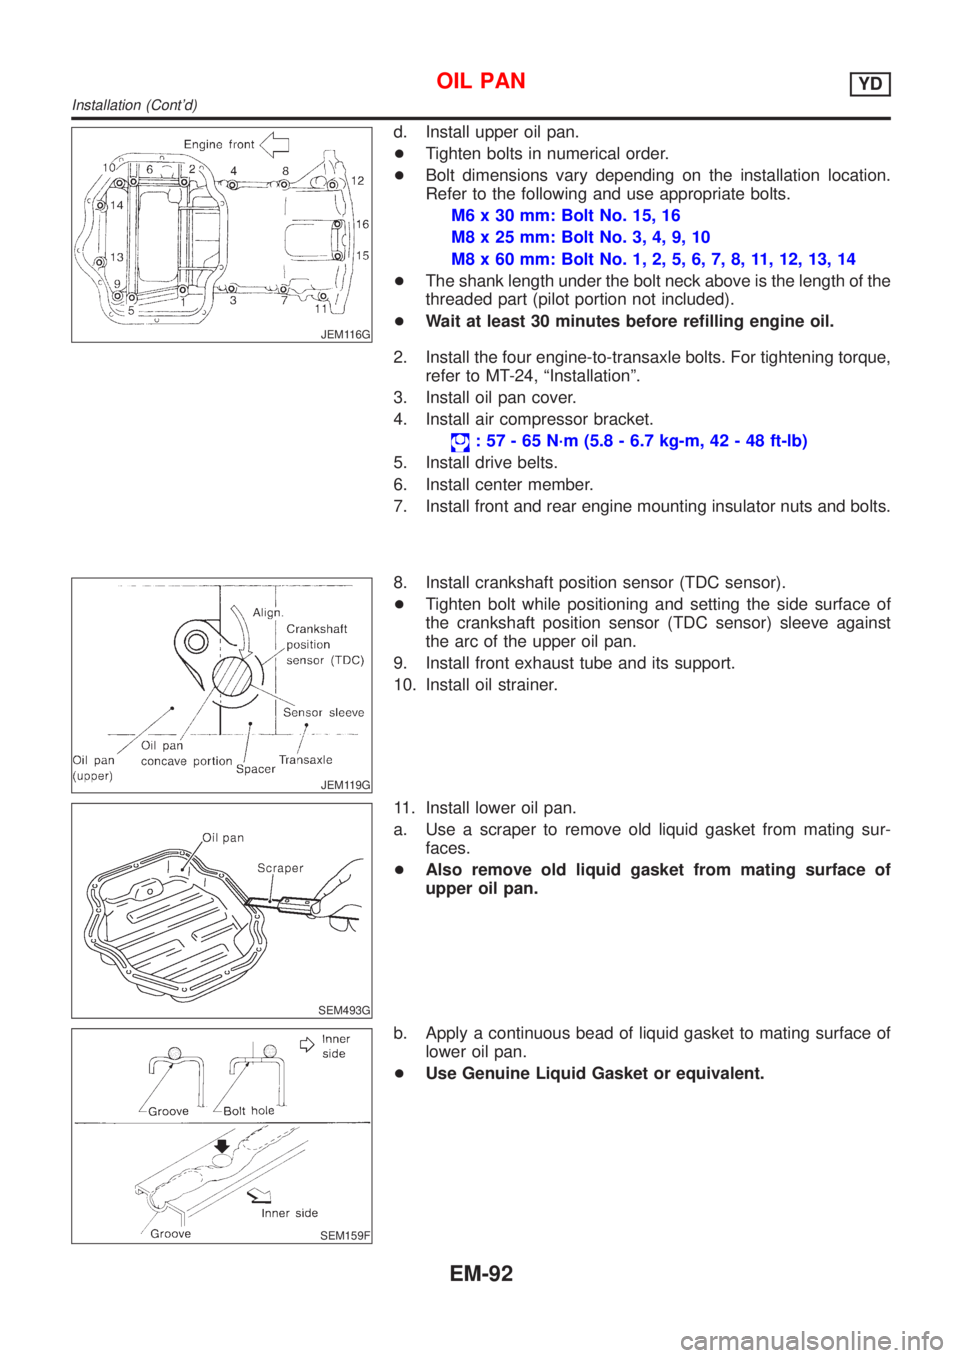
d. Install upper oil pan.
+Tighten bolts in numerical order.
+Bolt dimensions vary depending on the installation location.
Refer to the following and use appropriate bolts.
M6 x 30 mm: Bolt No. 15, 16
M8 x 25 mm: Bolt No. 3, 4, 9, 10
M8 x 60 mm: Bolt No. 1, 2, 5, 6, 7, 8, 11, 12, 13, 14
+The shank length under the bolt neck above is the length of the
threaded part (pilot portion not included).
+Wait at least 30 minutes before refilling engine oil.
2. Install the four engine-to-transaxle bolts. For tightening torque,
refer to MT-24, ªInstallationº.
3. Install oil pan cover.
4. Install air compressor bracket.
: 57 - 65 N´m (5.8 - 6.7 kg-m, 42 - 48 ft-lb)
5. Install drive belts.
6. Install center member.
7. Install front and rear engine mounting insulator nuts and bolts.
JEM119G
8. Install crankshaft position sensor (TDC sensor).
+Tighten bolt while positioning and setting the side surface of
the crankshaft position sensor (TDC sensor) sleeve against
the arc of the upper oil pan.
9. Install front exhaust tube and its support.
10. Install oil strainer.
SEM493G
11. Install lower oil pan.
a. Use a scraper to remove old liquid gasket from mating sur-
faces.
+Also remove old liquid gasket from mating surface of
upper oil pan.
SEM159F
b. Apply a continuous bead of liquid gasket to mating surface of
lower oil pan.
+Use Genuine Liquid Gasket or equivalent.
OIL PANYD
Installation (Cont'd)
EM-92
Page 2228 of 2898
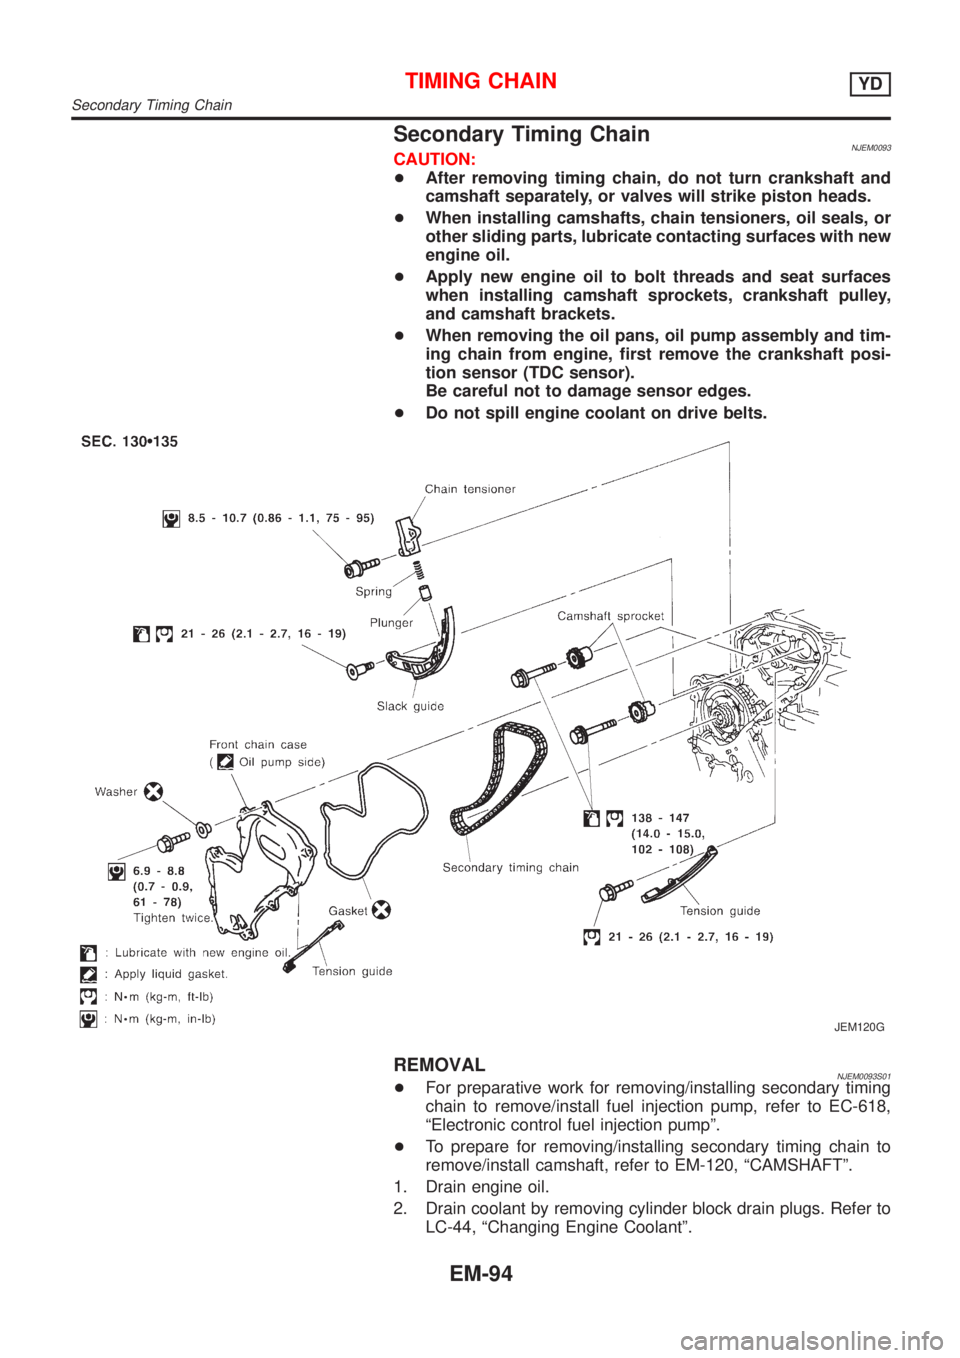
Secondary Timing ChainNJEM0093CAUTION:
+After removing timing chain, do not turn crankshaft and
camshaft separately, or valves will strike piston heads.
+When installing camshafts, chain tensioners, oil seals, or
other sliding parts, lubricate contacting surfaces with new
engine oil.
+Apply new engine oil to bolt threads and seat surfaces
when installing camshaft sprockets, crankshaft pulley,
and camshaft brackets.
+When removing the oil pans, oil pump assembly and tim-
ing chain from engine, first remove the crankshaft posi-
tion sensor (TDC sensor).
Be careful not to damage sensor edges.
+Do not spill engine coolant on drive belts.
JEM120G
REMOVALNJEM0093S01+For preparative work for removing/installing secondary timing
chain to remove/install fuel injection pump, refer to EC-618,
ªElectronic control fuel injection pumpº.
+To prepare for removing/installing secondary timing chain to
remove/install camshaft, refer to EM-120, ªCAMSHAFTº.
1. Drain engine oil.
2. Drain coolant by removing cylinder block drain plugs. Refer to
LC-44, ªChanging Engine Coolantº.
TIMING CHAINYD
Secondary Timing Chain
EM-94
Page 2272 of 2898
crankshaft position sensor (TDC sensor) from the assem-
bly.
+Always pay extra attention not to damage edge of crank-
shaft position sensor (TDC sensor) or ring gear teeth.
REMOVALNJEM0069S011. Remove engine undercover, and hood for hoisting.
2. Drain coolant from both cylinder block and radiator. Refer to
LC-44, ªChanging Engine Coolantº.
3. Remove the following parts:
+Battery
+RH and LH front wheels
+RH and LH splash covers (combined with undercover)
+Auxiliary belts
+Alternator
+Alternator brackets
+Radiator and cooling fan
+Engine cover
+Air ducts and air cleaner case
LH side of engine room:
4. Disconnect all harnesses and grounds that are connected to
components on vehicle.
5. Disconnect vacuum hose on vacuum pump side.
6. Disconnect fuel feed and fuel return hoses on engine side.
+Immediately put blind plugs into the openings to prevent
fuel from flowing out.
7. Disconnect heater hose. Plug opening of hose to prevent cool-
ant from flowing out.
RH side of engine room:
8. Remove air conditioner compressor from brackets and move
it toward vehicle side. Secure compressor on vehicle side with
rope.
Vehicle underside:
9. Remove exhaust front tube.
10. Disconnect two hoses from power steering pump and plug to
stop fluid.
11. Remove M/T control rod and support rod.
12. Remove ABS wheel sensor, and temporarily hang brake cali-
per with rope on vehicle side.
13. Remove RH and LH drive shafts.
SEM666G
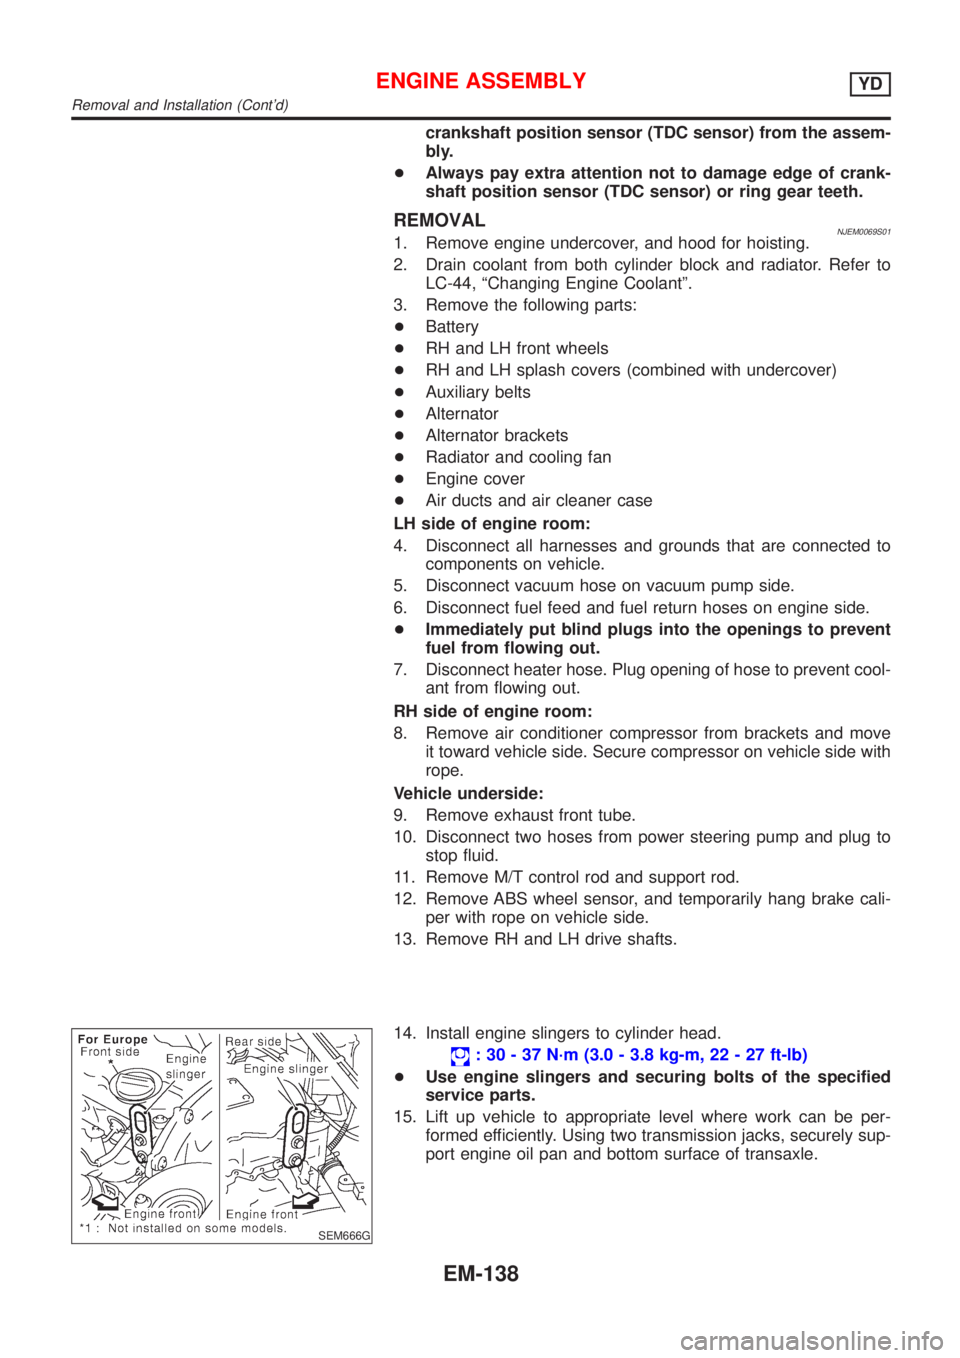
14. Install engine slingers to cylinder head.
: 30 - 37 N´m (3.0 - 3.8 kg-m, 22 - 27 ft-lb)
+Use engine slingers and securing bolts of the specified
service parts.
15. Lift up vehicle to appropriate level where work can be per-
formed efficiently. Using two transmission jacks, securely sup-
port engine oil pan and bottom surface of transaxle.
ENGINE ASSEMBLYYD
Removal and Installation (Cont'd)
EM-138
Page 2275 of 2898
Removal and InstallationNJEM0071CAUTION:
+When installing bearings, pistons, or other sliding parts,
lubricate contacting surfaces with new engine oil.
+Place removed parts such as bearings and bearing caps
in their proper order and direction.
+When installing connecting rod nuts, and main bearing
cap bolts, apply new engine oil to threads and seating
surfaces.
+Do not allow any magnetic materials to contact the signal
plate of flywheel.
+Do not remove the signal plate at back.
+Do not place the signal plate side facing under.
+Handle with care so as not to damage the signal plate
[especially four places on protrusions for signal of crank
position sensor (TDC sensor)].
DisassemblyNJEM0072PISTON AND CRANKSHAFTNJEM0072S011. Remove engine. Refer to ªENGINE ASSEMBLYº, ªRemoval
and Installationº, EM-137.
2. Place engine on a work stand.
a. Remove flywheel.
+Hold ring gear with ring gear stopper (KV10105630,
KV10105610). Then, loosen securing bolts with TORX socket
(size: Q8 E20, Commercial Service Tool) and remove them.
As an alternative method, hold the crankshaft pulley with a
pulley holder (SST) to remove the flywheel.
JEM192G
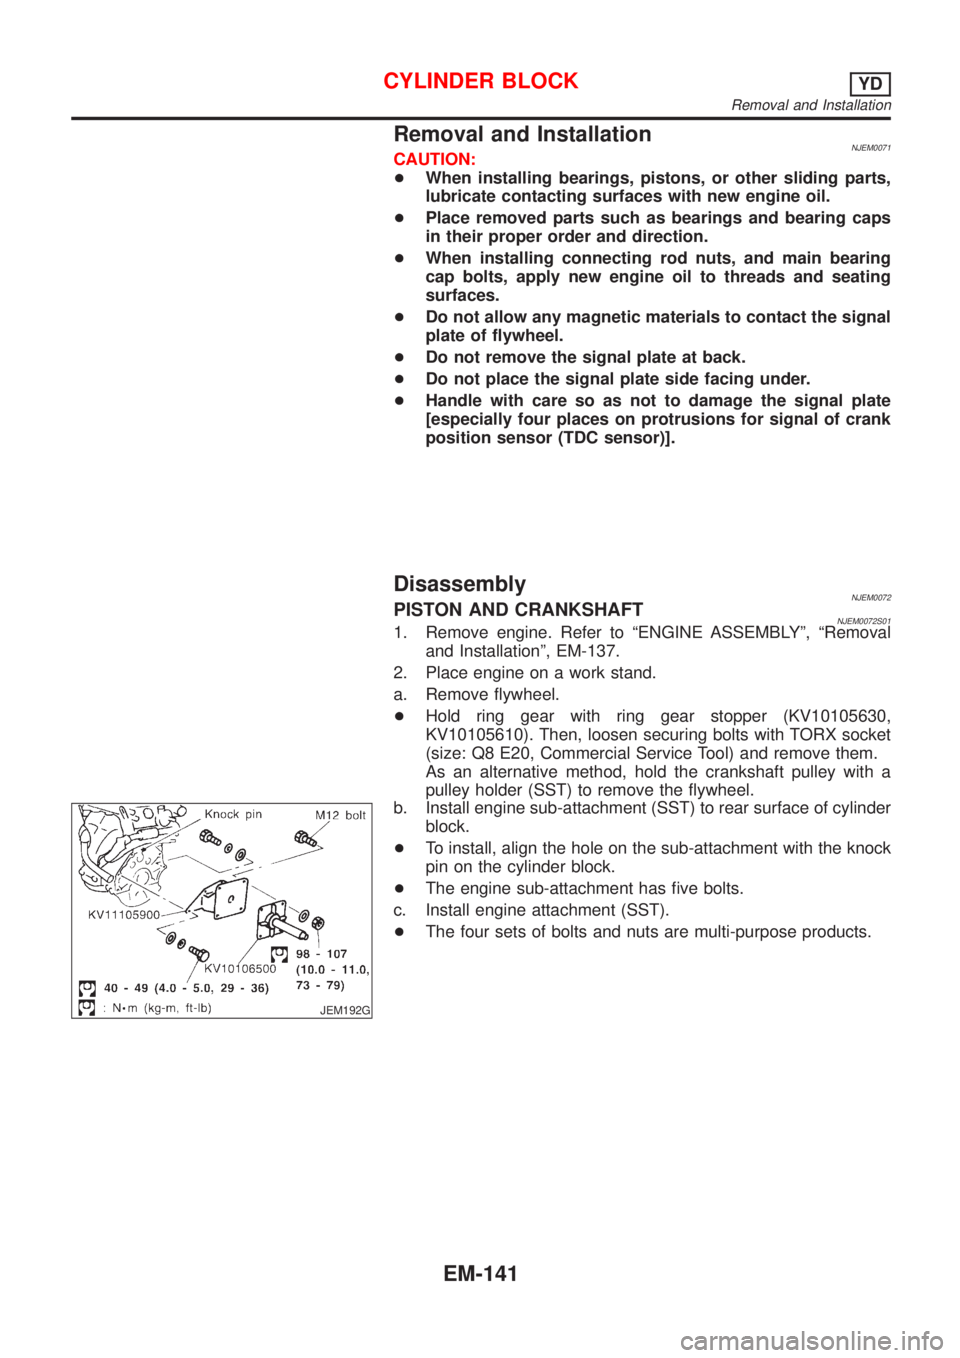
b. Install engine sub-attachment (SST) to rear surface of cylinder
block.
+To install, align the hole on the sub-attachment with the knock
pin on the cylinder block.
+The engine sub-attachment has five bolts.
c. Install engine attachment (SST).
+The four sets of bolts and nuts are multi-purpose products.
CYLINDER BLOCKYD
Removal and Installation
EM-141
Page 2305 of 2898
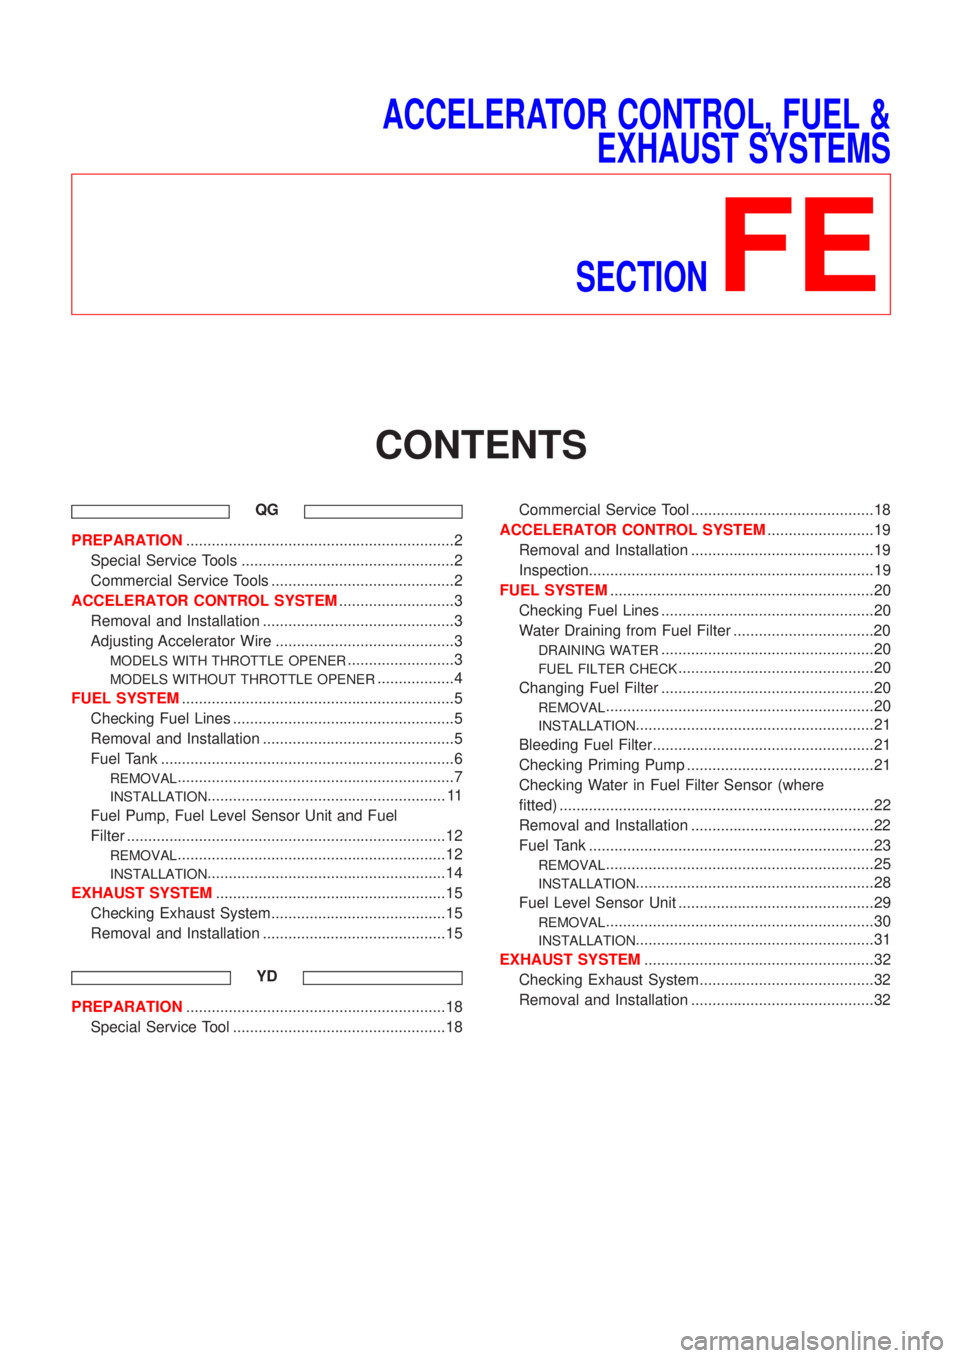
ACCELERATOR CONTROL, FUEL &
EXHAUST SYSTEMS
SECTION
FE
CONTENTS
QG
PREPARATION...............................................................2
Special Service Tools ..................................................2
Commercial Service Tools ...........................................2
ACCELERATOR CONTROL SYSTEM...........................3
Removal and Installation .............................................3
Adjusting Accelerator Wire ..........................................3
MODELS WITH THROTTLE OPENER.........................3
MODELS WITHOUT THROTTLE OPENER..................4
FUEL SYSTEM................................................................5
Checking Fuel Lines ....................................................5
Removal and Installation .............................................5
Fuel Tank .....................................................................6
REMOVAL.................................................................7
INSTALLATION........................................................ 11
Fuel Pump, Fuel Level Sensor Unit and Fuel
Filter ...........................................................................12
REMOVAL...............................................................12
INSTALLATION........................................................14
EXHAUST SYSTEM......................................................15
Checking Exhaust System.........................................15
Removal and Installation ...........................................15
YD
PREPARATION.............................................................18
Special Service Tool ..................................................18Commercial Service Tool ...........................................18
ACCELERATOR CONTROL SYSTEM.........................19
Removal and Installation ...........................................19
Inspection...................................................................19
FUEL SYSTEM..............................................................20
Checking Fuel Lines ..................................................20
Water Draining from Fuel Filter .................................20
DRAINING WATER..................................................20
FUEL FILTER CHECK..............................................20
Changing Fuel Filter ..................................................20
REMOVAL...............................................................20
INSTALLATION........................................................21
Bleeding Fuel Filter....................................................21
Checking Priming Pump ............................................21
Checking Water in Fuel Filter Sensor (where
fitted) ..........................................................................22
Removal and Installation ...........................................22
Fuel Tank ...................................................................23
REMOVAL...............................................................25
INSTALLATION........................................................28
Fuel Level Sensor Unit ..............................................29
REMOVAL...............................................................30
INSTALLATION........................................................31
EXHAUST SYSTEM......................................................32
Checking Exhaust System.........................................32
Removal and Installation ...........................................32