Page 1012 of 2395
7 CHECK SWIRL CONTROL VALVE CONTROL SOLENOID VALVE
With CONSULT-II
1. Reconnect the disconnected harness connectors.
2. Start engine and let it idle.
3. Remove vacuum hose connected to swirl control valve actuator.
4. Select ªSWIRL CONT SOL/Vº in ªACTIVE TESTº mode with CONSULT-II.
5. Touch ªONº and ªOFFº on CONSULT-II screen.
6. Check vacuum existence and operation delay time under the following conditions.
SEF004Z
Without CONSULT-II
1. Reconnect ECM harness connector.
2. Remove vacuum hose connected to swirl control valve actuator.
3. Start engine and let it idle.
4. Apply 12V of direct current between swirl control valve control solenoid valve terminals 1 and 2.
5. Check vacuum existence and operation delay time under the following conditions.
SEF005Z
OK or NG
OK©GO TO 8.
NG©Replace intake manifold collector assembly.
GI
MA
EM
LC
FE
AT
TF
PD
AX
SU
BR
ST
RS
BT
HA
SC
EL
IDX
DTC P1130 SWIRL CONTROL VALVE CONTROL SOLENOID VALVE
Diagnostic Procedure (Cont'd)
EC-477
Page 1015 of 2395
11 CHECK THROTTLE POSITION SENSOR
With CONSULT-II
1. Start engine and warm it up to normal operating temperature.
2. Stop engine (ignition switch OFF).
3. Remove the vacuum hose connected to the throttle opener.
4. Connect suitable vacuum hose to the vacuum pump and the opener.
5. Apply vacuum [more than þ40.0 kPa (þ300 mmHg, þ11.81 inHg)] until the throttle drum becomes free from the rod of
the throttle opener.
SEF793W
6. Turn ignition switch ON.
7. Select ªDATA MONITORº mode with CONSULT-II.
8. Check voltage of ªTHRTL POS SENº under the following conditions.
Voltage measurement must be made with throttle position sensor installed in vehicle.
SEF062Y
OK or NG
OK©GO TO 14.
NG©GO TO 13.
DTC P1130 SWIRL CONTROL VALVE CONTROL SOLENOID VALVE
Diagnostic Procedure (Cont'd)
EC-480
Page 1016 of 2395

12 CHECK THROTTLE POSITION SENSOR
Without CONSULT-II
1. Start engine and warm it up to normal operating temperature.
2. Stop engine (ignition switch OFF).
3. Remove the vacuum hose connected to the throttle opener.
4. Connect suitable vacuum hose to the vacuum pump and the opener.
5. Apply vacuum [more than þ40.0 kPa (þ300 mmHg, þ11.81 inHg)] until the throttle drum becomes free from the rod of
the throttle opener.
SEF793W
6. Turn ignition switch ON.
7. Check voltage between ECM terminal 91 (Throttle position sensor signal) and ground.
Voltage measurement must be made with throttle position sensor installed in vehicle.
MTBL0231
OK or NG
OK©GO TO 14.
NG©GO TO 13.
13 ADJUST CLOSED THROTTLE POSITION SWITCH
Adjust closed throttle position switch. Refer to ªBasic Inspectionº, EC-101.
MTBL0655
OK or NG
OK©GO TO 14.
NG©Replace throttle position sensor. To adjust it, perform ªBasic Inspectionº, EC-101.
14 CHECK INTERMITTENT INCIDENT
Perform ªTROUBLE DIAGNOSIS FOR INTERMITTENT INCIDENTº, EC-140.
©INSPECTION END
GI
MA
EM
LC
FE
AT
TF
PD
AX
SU
BR
ST
RS
BT
HA
SC
EL
IDX
DTC P1130 SWIRL CONTROL VALVE CONTROL SOLENOID VALVE
Diagnostic Procedure (Cont'd)
EC-481
Page 1022 of 2395
Diagnostic ProcedureNBEC0712
1 RETIGHTEN GROUND SCREWS
1. Turn ignition switch ªOFFº.
2. Loosen and retighten engine ground screws.
SEF959Y
©GO TO 2.
2 CHECK INTAKE VALVE TIMING CONTROL POSITION SENSOR POWER SUPPLY CIRCUIT
1. Disconnect intake valve timing control position sensor harness connector.
SEF360Z
2. Turn ignition switch ªONº.
3. Check voltage between intake valve timing control position sensor harness connector terminal 3 and ground with CON-
SULT-II or tester.
SEF370X
4. Also check harness for short to ground and short to power.
OK or NG
OK©GO TO 4.
NG©GO TO 3.
GI
MA
EM
LC
FE
AT
TF
PD
AX
SU
BR
ST
RS
BT
HA
SC
EL
IDX
DTC P1140 (RIGHT, -B1), P1145 (LEFT, -B2) INTAKE VALVE TIMING CONTROL
POSITION SENSOR (CIRCUIT)
Diagnostic Procedure
EC-487
Page 1023 of 2395

3 DETECT MALFUNCTIONING PART
Check the following.
IHarness connectors M32, F23
IHarness connectors E1, M1
IHarness for open or short between ECM and intake valve timing control position sensor
IHarness for open or short between ECM relay and intake valve timing control position sensor
©Repair open circuit or short to ground or short to power in harness or connectors.
4 CHECK INTAKE VALVE TIMING CONTROL POSITION SENSOR GROUND CIRCUIT FOR OPEN AND
SHORT
1. Turn ignition switch ªOFFº.
2. Check harness connector continuity between intake valve timing control position sensor harness connector terminal 1
and engine ground. Refer to Wiring Diagram.
Continuity should exist.
3. Also check harness for short to power.
OK or NG
OK©GO TO 5.
NG©Repair open circuit or short to power in harness or connectors.
5 CHECK INTAKE VALVE TIMING CONTROL POSITION SENSOR INPUT SIGNAL CIRCUIT
1. Disconnect ECM harness connector.
2. Check harness connectors continuity between ECM terminal 79 (Right) or 89 (Left) and terminal 2. Refer to Wiring Dia-
gram.
Continuity should exist.
3. Also check harness for short to ground and short to power.
OK or NG
OK©GO TO 6.
NG©Repair open circuit or short to ground or short to power in harness or connectors.
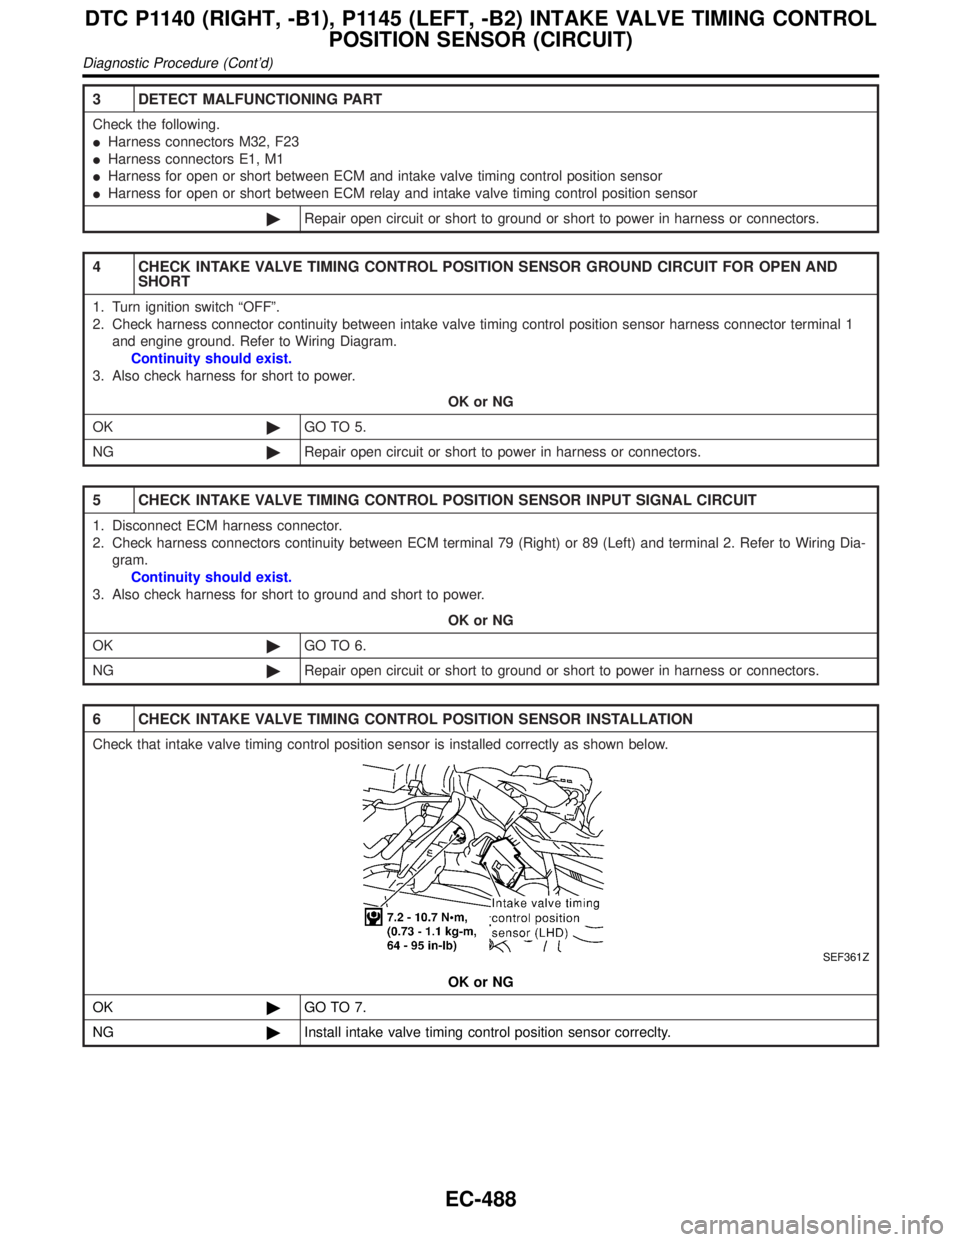
6 CHECK INTAKE VALVE TIMING CONTROL POSITION SENSOR INSTALLATION
Check that intake valve timing control position sensor is installed correctly as shown below.
SEF361Z
OK or NG
OK©GO TO 7.
NG©Install intake valve timing control position sensor correclty.
DTC P1140 (RIGHT, -B1), P1145 (LEFT, -B2) INTAKE VALVE TIMING CONTROL
POSITION SENSOR (CIRCUIT)
Diagnostic Procedure (Cont'd)
EC-488
Page 1026 of 2395

On Board Diagnosis LogicNBEC0282HThe closed loop control has the one trip detection logic.
Malfunction is detected when the closed loop control function for
right bank does not operate even when vehicle is driving in the
specified condition, the closed loop control function for left bank
does not operate even when vehicle is driving in the specified
condition.
Possible CauseNBEC0531IThe front heated oxygen sensor circuit is open or shorted.
IHeated oxygen sensor 1 (front)
IHeated oxygen sensor 1 heater (front)
DTC Confirmation ProcedureNBEC0283CAUTION:
Always drive vehicle at a safe speed.
NOTE:
If ªDTC Confirmation Procedureº has been previously conducted,
always turn ignition switch ªOFFº and wait at least 10 seconds
before conducting the next test.
TESTING CONDITION:
INever raise engine speed above 3,600 rpm during the
ªDTC Confirmation Procedureº. If the engine speed limit is
exceeded, retry the procedure from step 2.
IBefore performing the following procedure, confirm that
battery voltage is more than 11V at idle.
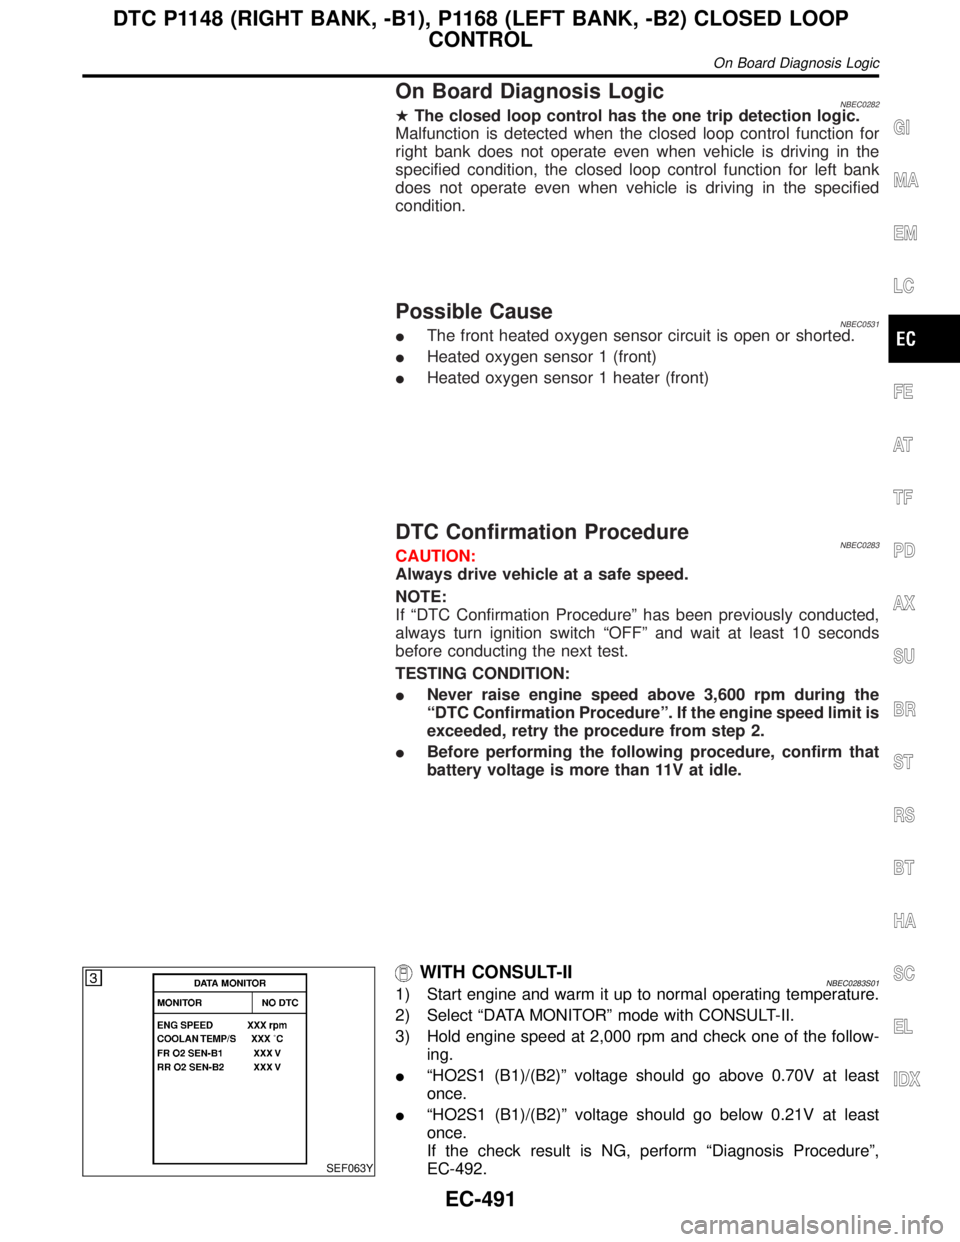
SEF063Y
WITH CONSULT-IINBEC0283S011) Start engine and warm it up to normal operating temperature.
2) Select ªDATA MONITORº mode with CONSULT-II.
3) Hold engine speed at 2,000 rpm and check one of the follow-
ing.
IªHO2S1 (B1)/(B2)º voltage should go above 0.70V at least
once.
IªHO2S1 (B1)/(B2)º voltage should go below 0.21V at least
once.
If the check result is NG, perform ªDiagnosis Procedureº,
EC-492.
GI
MA
EM
LC
FE
AT
TF
PD
AX
SU
BR
ST
RS
BT
HA
SC
EL
IDX
DTC P1148 (RIGHT BANK, -B1), P1168 (LEFT BANK, -B2) CLOSED LOOP
CONTROL
On Board Diagnosis Logic
EC-491
Page 1027 of 2395

If the check result is OK, perform the following step.
4) Let engine idle at least 5 minutes.
5) Maintain the following condition at least 50 consecutive sec-
onds.
B/FUEL SCHDL 3.6 msec or more
ENG SPEED 1,500 rpm or more
Selector lever Suitable position
VHCL SPEED SE More than 70 km/h (43 MPH)
During this test, P0130 and/or P0150 may be displayed on
CONSULT-II screen.
6) If DTC is detected, go to ªDiagnostic Procedureº, EC-492.
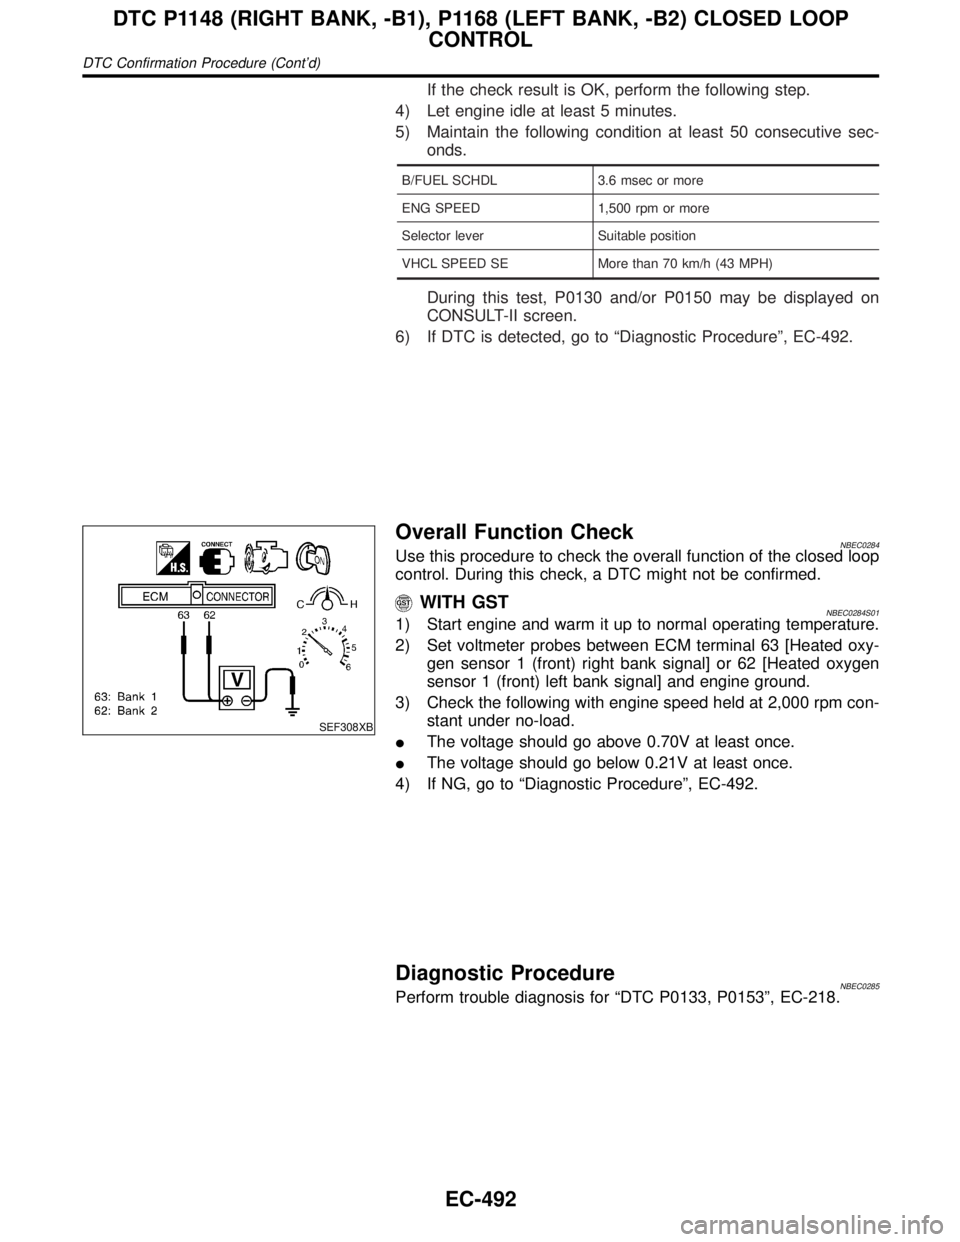
SEF308XB
Overall Function CheckNBEC0284Use this procedure to check the overall function of the closed loop
control. During this check, a DTC might not be confirmed.
WITH GSTNBEC0284S011) Start engine and warm it up to normal operating temperature.
2) Set voltmeter probes between ECM terminal 63 [Heated oxy-
gen sensor 1 (front) right bank signal] or 62 [Heated oxygen
sensor 1 (front) left bank signal] and engine ground.
3) Check the following with engine speed held at 2,000 rpm con-
stant under no-load.
IThe voltage should go above 0.70V at least once.
IThe voltage should go below 0.21V at least once.
4) If NG, go to ªDiagnostic Procedureº, EC-492.
Diagnostic ProcedureNBEC0285Perform trouble diagnosis for ªDTC P0133, P0153º, EC-218.
DTC P1148 (RIGHT BANK, -B1), P1168 (LEFT BANK, -B2) CLOSED LOOP
CONTROL
DTC Confirmation Procedure (Cont'd)
EC-492
Page 1028 of 2395

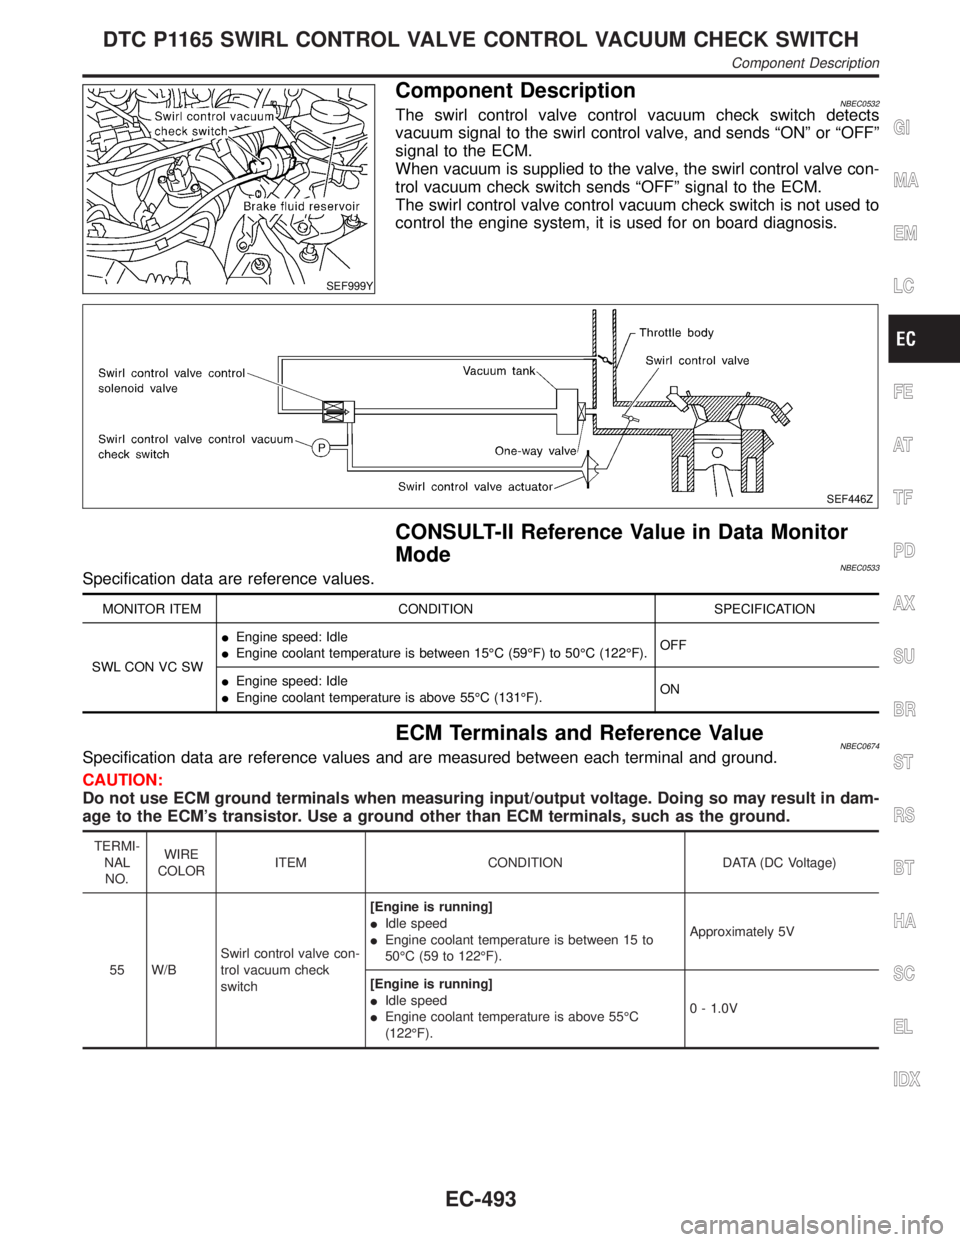
SEF999Y
Component DescriptionNBEC0532The swirl control valve control vacuum check switch detects
vacuum signal to the swirl control valve, and sends ªONº or ªOFFº
signal to the ECM.
When vacuum is supplied to the valve, the swirl control valve con-
trol vacuum check switch sends ªOFFº signal to the ECM.
The swirl control valve control vacuum check switch is not used to
control the engine system, it is used for on board diagnosis.
SEF446Z
CONSULT-II Reference Value in Data Monitor
Mode
NBEC0533Specification data are reference values.
MONITOR ITEM CONDITION SPECIFICATION
SWL CON VC SWIEngine speed: Idle
IEngine coolant temperature is between 15ÉC (59ÉF) to 50ÉC (122ÉF).OFF
IEngine speed: Idle
IEngine coolant temperature is above 55ÉC (131ÉF).ON
ECM Terminals and Reference ValueNBEC0674Specification data are reference values and are measured between each terminal and ground.
CAUTION:
Do not use ECM ground terminals when measuring input/output voltage. Doing so may result in dam-
age to the ECM's transistor. Use a ground other than ECM terminals, such as the ground.
TERMI-
NAL
NO.WIRE
COLORITEM CONDITION DATA (DC Voltage)
55 W/BSwirl control valve con-
trol vacuum check
switch[Engine is running]
IIdle speed
IEngine coolant temperature is between 15 to
50ÉC (59 to 122ÉF).Approximately 5V
[Engine is running]
IIdle speed
IEngine coolant temperature is above 55ÉC
(122ÉF).0 - 1.0V
GI
MA
EM
LC
FE
AT
TF
PD
AX
SU
BR
ST
RS
BT
HA
SC
EL
IDX
DTC P1165 SWIRL CONTROL VALVE CONTROL VACUUM CHECK SWITCH
Component Description
EC-493