Page 2047 of 2395
SPD024
2. Loosen ring gear bolts in a criss-cross pattern.
3. Tap ring gear off the differential case with a soft hammer.
Tap evenly all around to keep ring gear from binding.
SPD025
4. Punch off pinion mate shaft lock pin from ring gear side.
SPD236A
DIFFERENTIAL SIDE SHAFTNBPD0018S041. Cut collar with cold chisel. Be careful not to damage differen-
tial side shaft.
SPD672
2. Reinstall differential side shaft into extension tube and secure
with bolts. Remove rear axle bearing by drawing out differen-
tial side shaft from rear axle bearing with puller.
FRONT FINAL DRIVER200A
Disassembly (Cont'd)
PD-22
Page 2050 of 2395

SPD194A
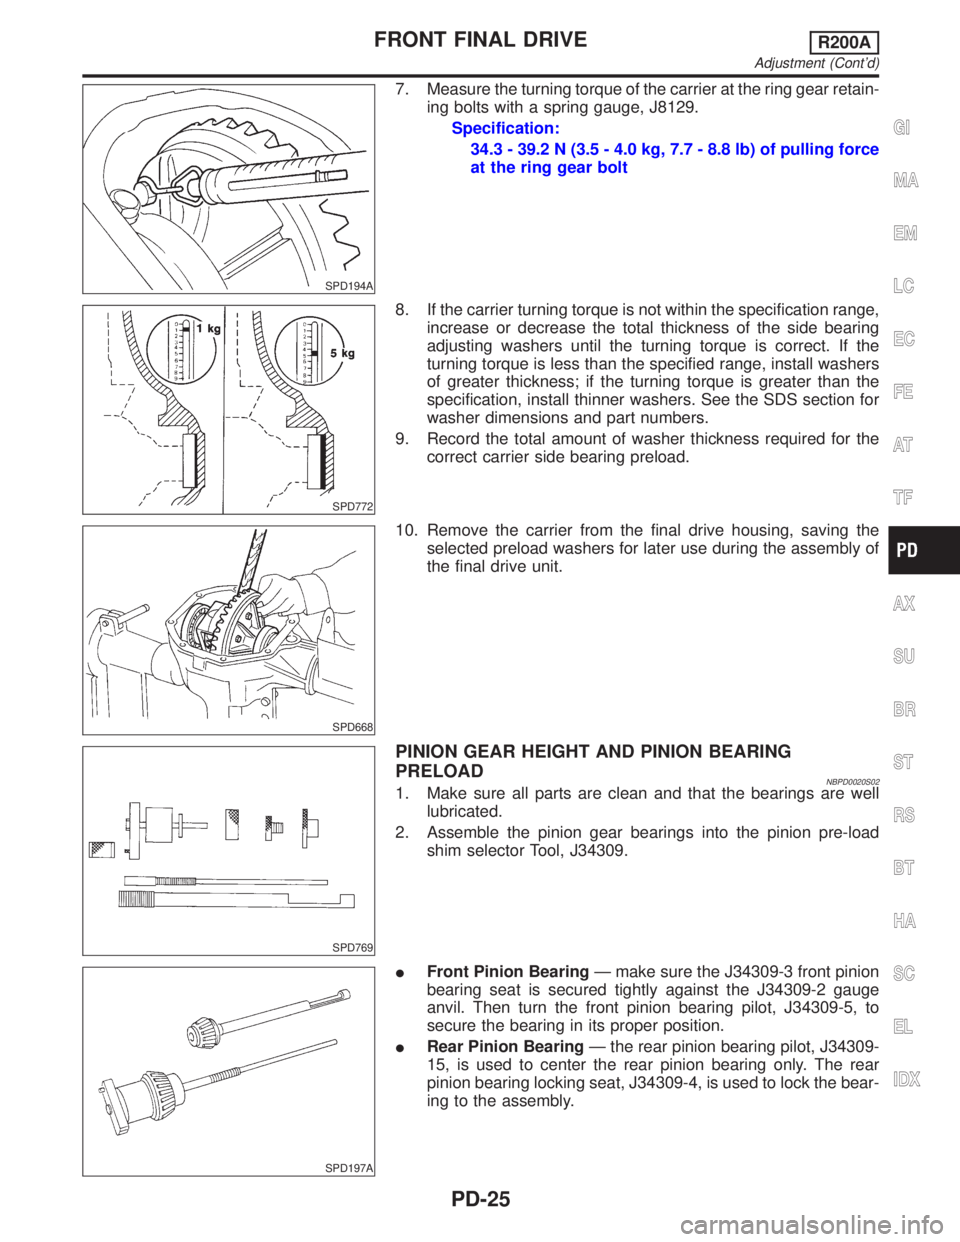
7. Measure the turning torque of the carrier at the ring gear retain-
ing bolts with a spring gauge, J8129.
Specification:
34.3 - 39.2 N (3.5 - 4.0 kg, 7.7 - 8.8 lb) of pulling force
at the ring gear bolt
SPD772
8. If the carrier turning torque is not within the specification range,
increase or decrease the total thickness of the side bearing
adjusting washers until the turning torque is correct. If the
turning torque is less than the specified range, install washers
of greater thickness; if the turning torque is greater than the
specification, install thinner washers. See the SDS section for
washer dimensions and part numbers.
9. Record the total amount of washer thickness required for the
correct carrier side bearing preload.
SPD668
10. Remove the carrier from the final drive housing, saving the
selected preload washers for later use during the assembly of
the final drive unit.
SPD769
PINION GEAR HEIGHT AND PINION BEARING
PRELOAD
NBPD0020S021. Make sure all parts are clean and that the bearings are well
lubricated.
2. Assemble the pinion gear bearings into the pinion pre-load
shim selector Tool, J34309.
SPD197A
IFront Pinion BearingÐ make sure the J34309-3 front pinion
bearing seat is secured tightly against the J34309-2 gauge
anvil. Then turn the front pinion bearing pilot, J34309-5, to
secure the bearing in its proper position.
IRear Pinion BearingÐ the rear pinion bearing pilot, J34309-
15, is used to center the rear pinion bearing only. The rear
pinion bearing locking seat, J34309-4, is used to lock the bear-
ing to the assembly.
GI
MA
EM
LC
EC
FE
AT
TF
AX
SU
BR
ST
RS
BT
HA
SC
EL
IDX
FRONT FINAL DRIVER200A
Adjustment (Cont'd)
PD-25
Page 2078 of 2395

SPD364A
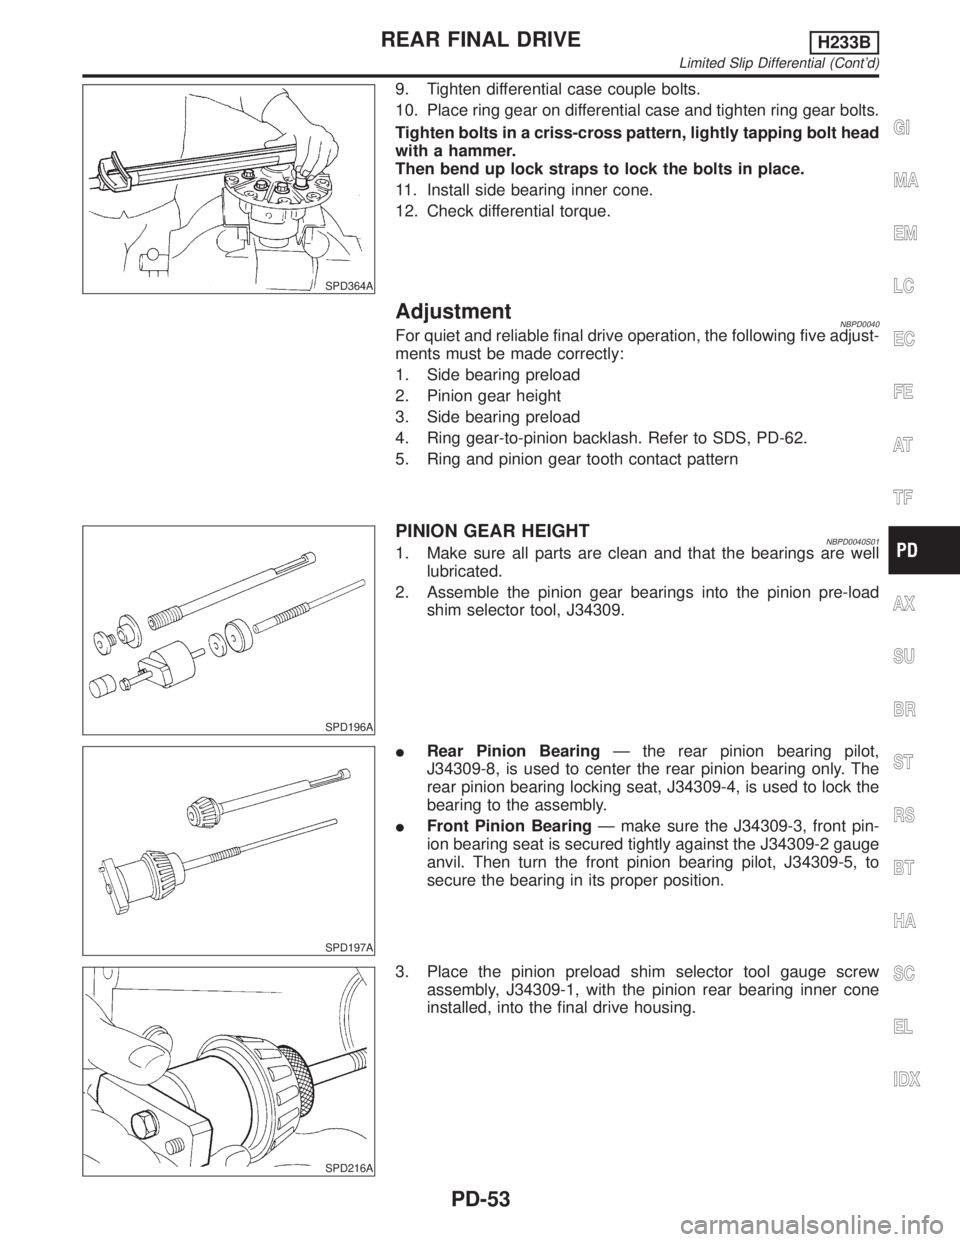
9. Tighten differential case couple bolts.
10. Place ring gear on differential case and tighten ring gear bolts.
Tighten bolts in a criss-cross pattern, lightly tapping bolt head
with a hammer.
Then bend up lock straps to lock the bolts in place.
11. Install side bearing inner cone.
12. Check differential torque.
AdjustmentNBPD0040For quiet and reliable final drive operation, the following five adjust-
ments must be made correctly:
1. Side bearing preload
2. Pinion gear height
3. Side bearing preload
4. Ring gear-to-pinion backlash. Refer to SDS, PD-62.
5. Ring and pinion gear tooth contact pattern
SPD196A
PINION GEAR HEIGHTNBPD0040S011. Make sure all parts are clean and that the bearings are well
lubricated.
2. Assemble the pinion gear bearings into the pinion pre-load
shim selector tool, J34309.
SPD197A
IRear Pinion BearingÐ the rear pinion bearing pilot,
J34309-8, is used to center the rear pinion bearing only. The
rear pinion bearing locking seat, J34309-4, is used to lock the
bearing to the assembly.
IFront Pinion BearingÐ make sure the J34309-3, front pin-
ion bearing seat is secured tightly against the J34309-2 gauge
anvil. Then turn the front pinion bearing pilot, J34309-5, to
secure the bearing in its proper position.
SPD216A
3. Place the pinion preload shim selector tool gauge screw
assembly, J34309-1, with the pinion rear bearing inner cone
installed, into the final drive housing.
GI
MA
EM
LC
EC
FE
AT
TF
AX
SU
BR
ST
RS
BT
HA
SC
EL
IDX
REAR FINAL DRIVEH233B
Limited Slip Differential (Cont'd)
PD-53
Page 2093 of 2395
Front Seat Belt
REMOVAL AND INSTALLATION=NBRS00031. Slide the seat all the way forward and tilt the seatback toward the front.
2. Remove adjuster cover.
3. Remove floor anchor bolt.
4. Remove shoulder anchor bolt.
5. Remove center pillar upper and lower garnish. Refer to BT-28, ªSIDE AND FLOOR TRIMº for details.
6. Disconnect seat belt pre-tensioner connector.
7. Remove the bolt securing seat belt retractor, then remove seat belt and seat belt retractor.
8. Remove bolts securing seat belt adjuster, then remove seat belt adjuster.
SRS873
SEAT BELTS
Front Seat Belt
RS-4
Page 2094 of 2395
Rear Seat Belt
REMOVAL AND INSTALLATION=NBRS00041. Raise up rear seat cushion.
2. Remove outer anchor bolt.
3. Remove rear side upper and lower garnish. Refer to BT-28, ªSIDE AND FLOOR TRIMº for details.
4. Remove anchor through-bolt.
5. Remove anchor bolt and bolt securing rear seat belt retractor, then remove seat belt and seat belt
retractor.
6. Remove each anchor bolt.
SRS654-A
GI
MA
EM
LC
EC
FE
AT
TF
PD
AX
SU
BR
ST
BT
HA
SC
EL
IDX
SEAT BELTS
Rear Seat Belt
RS-5
Page 2096 of 2395

Seat Belt Inspection=NBRS0029AFTER A COLLISIONNBRS0029S01WARNING:
Inspect all seat belt assemblies including retractors and attaching hardware after any collision.
NISSAN recommends that all seat belt assemblies in use during a collision be replaced unless the
collision was minor and the belts show no damage and continue to operate properly. Failure to do so
could result in serious personal injury in an accident. Seat belt assemblies not in use during a colli-
sion should also be replaced if either damage or improper operation is noted. Seat belt pre-tensioner
should be replaced even if the seat belts are not in use during a frontal collision in which the air bags
are deployed.
Replace any seat belt assembly if:
IThe seat belt was in use at the time of a collision (except for minor collisions and the belts, retractors and
buckles show no damage and continue to operate properly).
IThe seat belt was damaged in an accident. (i.e. torn webbing, bent retractor or guide, etc.)
IThe seat belt attaching point was damaged in an accident. Inspect the seat belt attaching area for dam-
age or distortion and repair as necessary before installing a new seat belt assembly.
IAnchor bolts are deformed or worn out.
IThe seat belt pre-tensioner should be replaced even if the seat belts are not in use during the collision in
which the air bags are deployed.
PRELIMINARY CHECKSNBRS0029S021. Check the seat belt warning lamp/chime for proper operation as follows:
a. Switch ignition ON. The seat belt warning lamp should illuminate. Also, the seat belt warning chime should
sound for about seven seconds.
b. Fasten driver's seat belt. The seat belt warning lamp should go out and the chime (if sounding) should
stop.
2. If the air bag warning lamp is blinking, conduct self-diagnosis using CONSULT-II, and air bag warning lamp.
Refer to ªSRS Operation Checkº, RS-38.
3. Check that the seat belt retractor, seat belt anchor and buckle bolts are securely attached.
4. Check the shoulder seat belt guide and shoulder belt height adjuster for front seats. Ensure guide swiv-
els freely and that belt lays flat and does not bind in guide. Ensure height adjuster operates properly and
holds securely.
5. Check retractor operation:
a. Fully extend the seat belt webbing and check for twists, tears or other damage.
b. Allow the seat belt to retract. Ensure that belt returns smoothly and completely into the retractor. If the seat
belt does not returns smoothly, wipe the inside of the loops with a clean paper cloth etc. because dirt built
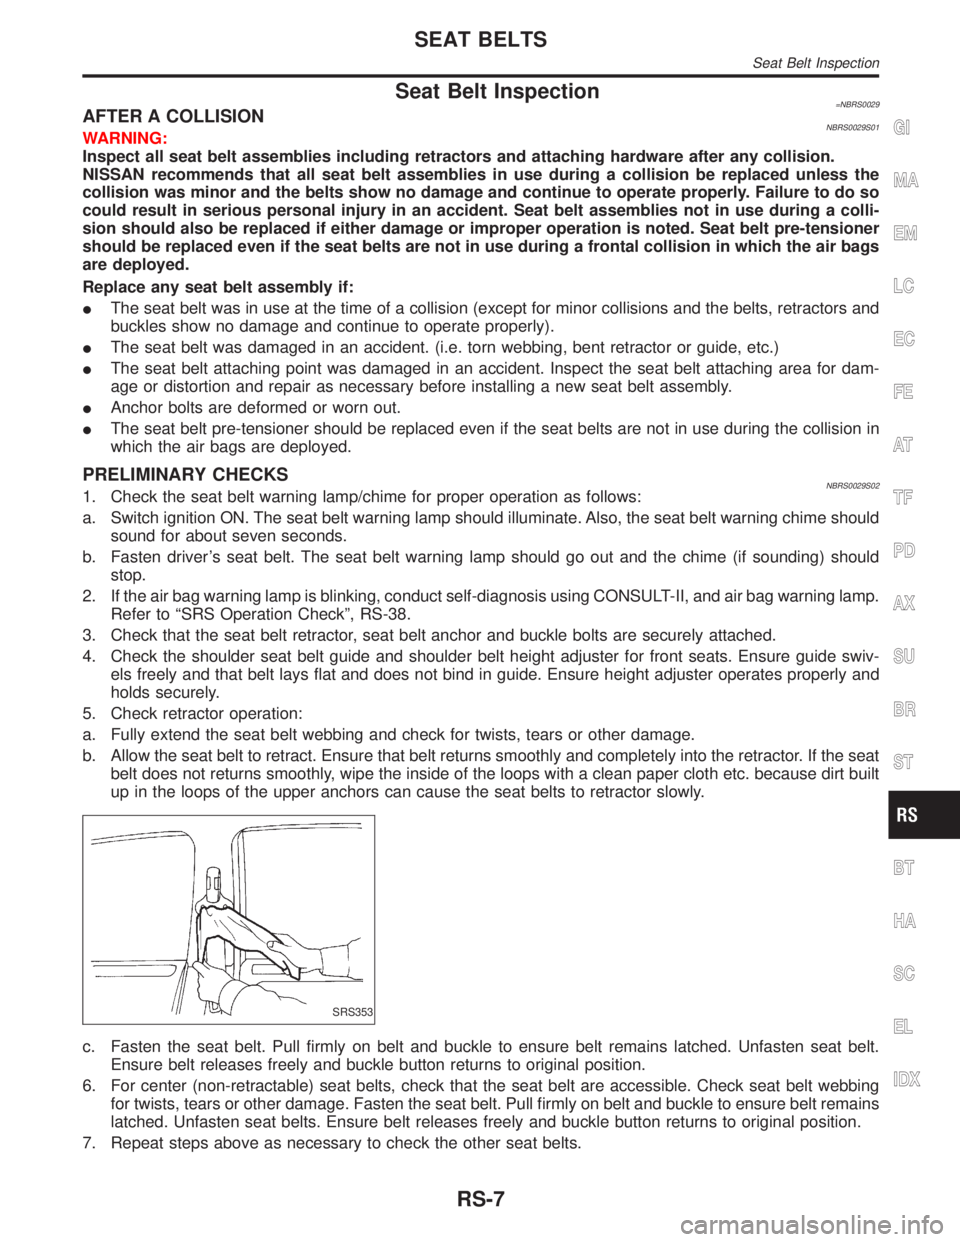
up in the loops of the upper anchors can cause the seat belts to retractor slowly.
SRS353
c. Fasten the seat belt. Pull firmly on belt and buckle to ensure belt remains latched. Unfasten seat belt.
Ensure belt releases freely and buckle button returns to original position.
6. For center (non-retractable) seat belts, check that the seat belt are accessible. Check seat belt webbing
for twists, tears or other damage. Fasten the seat belt. Pull firmly on belt and buckle to ensure belt remains
latched. Unfasten seat belts. Ensure belt releases freely and buckle button returns to original position.
7. Repeat steps above as necessary to check the other seat belts.
GI
MA
EM
LC
EC
FE
AT
TF
PD
AX
SU
BR
ST
BT
HA
SC
EL
IDX
SEAT BELTS
Seat Belt Inspection
RS-7
Page 2101 of 2395

DescriptionNBRS0009
SRS585-F
The air bag deploys if the diagnosis sensor unit activates while the ignition switch is in the ªONº or ªSTARTº
position.
The collision modes for which supplemental restraint systems are activated are different among the SRS sys-
tems. For example, the driver air bag module and passenger air bag module are activated in a frontal colli-
sion but not in a side collision.
SRS configurations which are activated for some collision modes are as follows;
SRS configuration Frontal collision Left side collision Right side collision
Driver air bag moduleqÐÐ
Passenger air bag moduleqÐÐ
Seat belt pre-tensioner (Driver side)qÐÐ
Seat belt pre-tensioner (Passenger side)qÐÐ
Side air bag module (LH) ÐqÐ
Side air bag module (RH) Ð Ðq
SRS444
Seat Belt Pre-tensioner with Load LimiterNBRS0032The seat belt pre-tensioner system with load limiter is installed to
both the driver's seat and the front passenger's seat. It operates
simultaneously with the SRS air bag system in the event of a fron-
tal collision with an impact exceeding a specified level.
When the frontal collision with an impact exceeding a specified
level occurs, seat belt slack resulting from clothing or other factors
is immediately taken up by the pre-tensioner. Vehicle passengers
are securely restrained.
When passengers in a vehicle are thrown forward in a collision and
the restraining force of the seat belt exceeds a specified level, the
SUPPLEMENTAL RESTRAINT SYSTEM (SRS)
Description
RS-12
Page 2110 of 2395

SRS162
4. Install instrument lower panel on passenger side.
5. Connect air bag module connector to air bag harness connec-
tor.
6. Install glove box assembly.
7. Connect both battery cables.
8. Conduct self-diagnosis to ensure entire SRS operates prop-
erly. (Use CONSULT-II or warning lamp check.)
SRS682
Side Air Bag Module
REMOVALNBRS0036CAUTION:
IBefore servicing SRS, turn the ignition switch OFF, dis-
connect both battery cables and wait at least 3 minutes.
IAlways work from the rear of the air bag module.
1. Remove seatback board.
IWhen using a clip removal tool to remove the seatback
board, take care not to damage the air bag harness.
2. Disconnect side air bag module connector by sliding tab.
SRS683
3. Pull up the seatback trim.
4. Remove the nuts securing the inner cloth with seatback frame.
Then pull up the inner cloth.
5. Remove seatback trim. Refer to BT-41, ªFRONT SEATº for
details.
SRS684
6. Remove the torx nuts coated with bonding agent from the side
air bag module.
7. Remove side air bag connector. Side air bag module can then
be removed.
SRS623
CAUTION:
IAlways place the air bag module stading with the stud bolt
side setting bottom.
IDo not attempt to disassemble air bag module.
IThe torx nuts are coated with bonding agent. Do not use
old nuts after removal; replace with new coated nuts.
IDo not insert any foreign objects (screwdriver, etc.) into
air bag module connector.
GI
MA
EM
LC
EC
FE
AT
TF
PD
AX
SU
BR
ST
BT
HA
SC
EL
IDX
SUPPLEMENTAL RESTRAINT SYSTEM (SRS)
Front Passenger Air Bag Module (Cont'd)
RS-21