2000 AUDI ALLROAD wheel
[x] Cancel search: wheelPage 111 of 306

CONTROLS AND
EQUIPMEN T--------------------
Selecting a driving position
�W ARNING
• Power is transmitted to the
wheels as soon as a driving posi
tion Is engaged. Therefore, when
the selector lever is in a driving
position, the vehicle may creep
even at idle speed. Do not release
the parking brake or foot brake un
til you are ready to move.
• If you must check under the
hood with the engine running,
never have any driving position en
gaged. Make sure the selector le
ver is securely locked into the P
(Park) position with the parking
brake firmly set. Otherwise, any
increase in engine speed may set
the vehicle in motion, even with
the parking brake applied.
• Do not accelerate while select
ing a driving position. At this time
the engine must run at idle speed
so that no undue stress will be
placed on the automatic clutches
in the transmission.
110 rA'J
WARNING continued
o If the selector lever is uninten
tionally moved into N (Neutral}
while you are driving, take your
foot off the accelerator pedal and
wait to idle speed before selecting
a driving position.
• Never shift into R (Reverse) or P
(Park) when the vehicle is in mov
ing. You will damage the transmis
sion.
Sta rting off
Select a gear. Wait for the transmis·
sion to engage the gaar (the vehicle
may move slightly). Then press the gas
pedal.
Maneuvering
When alternating between forward (D) and
reverse (R)-for instance, while maneuver
ing the vehicle into a tight parking space -
shift only when the vehicle has come to a
full stop and the engine is running at idle
speed. Stopping
• When stopping briefly, at a traffic light for
example, it is not necessary to move these
lector lever to N (Neutra l). Simply apply
the foot brake.
• The driving positions must never be used
for holding the vehicle on a hill. Always use
the foot brake when stopped on inclines.
mi WARNING
It is best never to get out of the
driver's seat when the engine is
running. However, if you must get
out of the vehicle, do this: Move
the selector lever securely into the
P (Park) position and apply the
parking brake firmly. If you are not
securely in P (Park), your vehicle
could move, possibly causing a se
rious accident.
Page 114 of 306
Ignition
switch
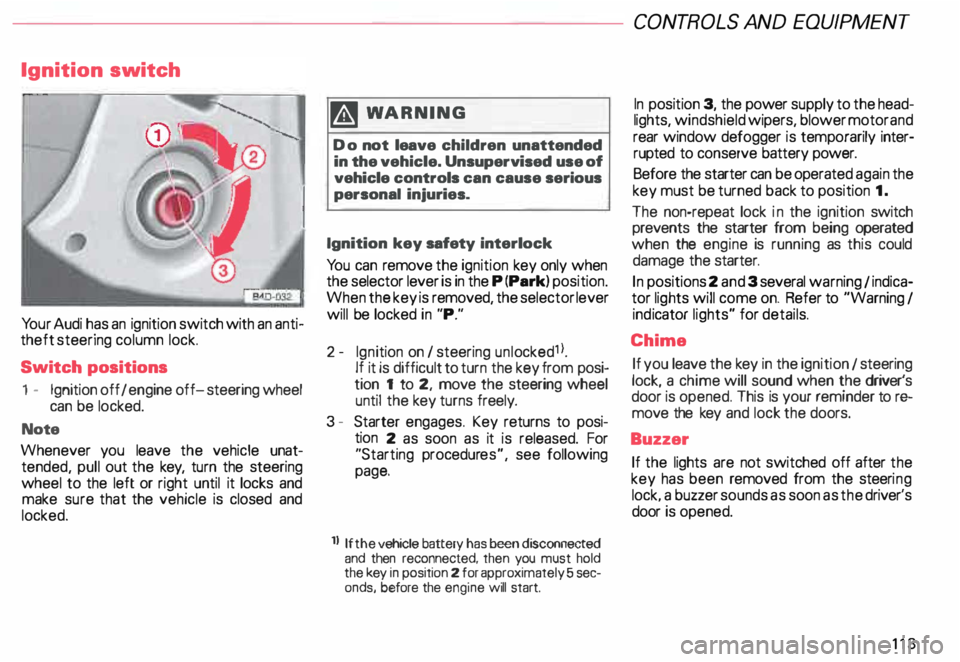
Yo ur Audi has an ignition switch with an anti
theft steering column lock.
Switch positions
1 - Ignition off I engine off-steering wheel
can be locked.
Note
Whenever you leave the vehicle unat
tended, pull out the key, turn the steering
wheel to the left or right until it locks and
make sure that the vehicle is closed and
locked. m
WARNING
Do not leave children unattended
in the vehicle. Unsupervised use of
vehicle controls can cause serious
personal injuries.
Ignition key safety interlock
Yo u can remove the ignition key only when
the selector lever is in the P (Park) position.
When the key is removed, the selector lever
will be locked in "P."
2- Ignition on I steering unlocked1 l.
If it is difficult to turn the key from posi
tion 1 to 2, move the steering wheel
until the key turns freely.
3 - Starter engages. Key returns to posi
tion 2 as soon as it is released. For
"Starting procedures", see following
page.
ll If the
vehicle battery has been disconnected
and then reconnected, then you must hold
the key in position 2 for approximately 5 sec
onds, before the engine will start. CONT
ROLS AND EQUIPMEN T
In position 3, the power supply to the head
lights, windshield wipers, blower motor and
rear window defogger is temporarily inter·
rupted to conserve battery power.
Before the starter can be operated again the
key must be turned back to position 1.
The non-repeat lock in the ignition switch
prevents the starter from being operated
when the engine is running as this could
damage the starter.
In positions 2 and 3 several warning 1 indica
tor lights will come on. Refer to "Warning I
ind icator lights" for details.
Chime If you leave the key in the ignition 1 steering
lock, a chime will sound when the driver's
door is opened. This is your reminder tor&
move the key and lock the doors.
Buzzer If the lights are not switched off after the
key has been removed from the steeri ng
lock. a buzzer sounds as soon as the driver's
door is opened.
113
Page 127 of 306
CONTROLS
AND EQUIPMENT---------------------
If there is an ABS problem:
o The ABS warning light to come
on. The vehicle can still be braked,
however, the ABS will not work. See
your authorized Audl Dealer as soon
as possible.
• The ABS warning light and the
brake warning light come on to
gether. The ABS will not work and
you will notice a change in braking
characteristics and performance.
�W ARNING
If both warning lights (ABS and
BRAKE warning light) come on at
the same time, the rear wheels
could lock up first under hard
braking. Rear wheel brake lock-up
can cause loss of vehicle control
and an accident. Have your vehicle
repaired immediately by your au
thorized Audi Dealer or a qualified
workshop. Drive slowly and avoid
sudden, hard brake application.
12 6 If
the ABS fails, the ESP warning light will
come on. See page and pages 202 -205.
Electronic differential lock (EDL)
The electronic differential lock works in con
junction with the ABS system. A fault in the
ABS causes therefore a malfunction of the
electr onic differential lock.
For more details on how the EDL works, go
to page 204.
Brake
USA models:
BRAKE
Canada models:
(Q))
The light comes on while the engine is
cranking. It goes out after the engine has
been started and the parking brake is fully
released. This is your assurance that the
brake warning light is functioning properly. A If the brake warning light does ¥ not light up when the engine is
cra nking or the parking brake is ap
plied, there may be a malfunction in
the electrical system. In this case,
contact your Audi Dealer.
When the light comes on, an audible warn
ing signal is also given.
�W ARNING
• If both warning lights (ABS and
BRAKE warning light) come on at
the same time, the rear wheels
could lock up first under hard
braking. Rear wheel brake lock-up
can cause loss of vehicle control
and an accident. Have your vehicle
repaired immediately by your au
thorized Audi Dealer or a qualified
workshop. Drive slowly and avoid
sudden, hard brake application.
Page 150 of 306
Front
fog lights
�D
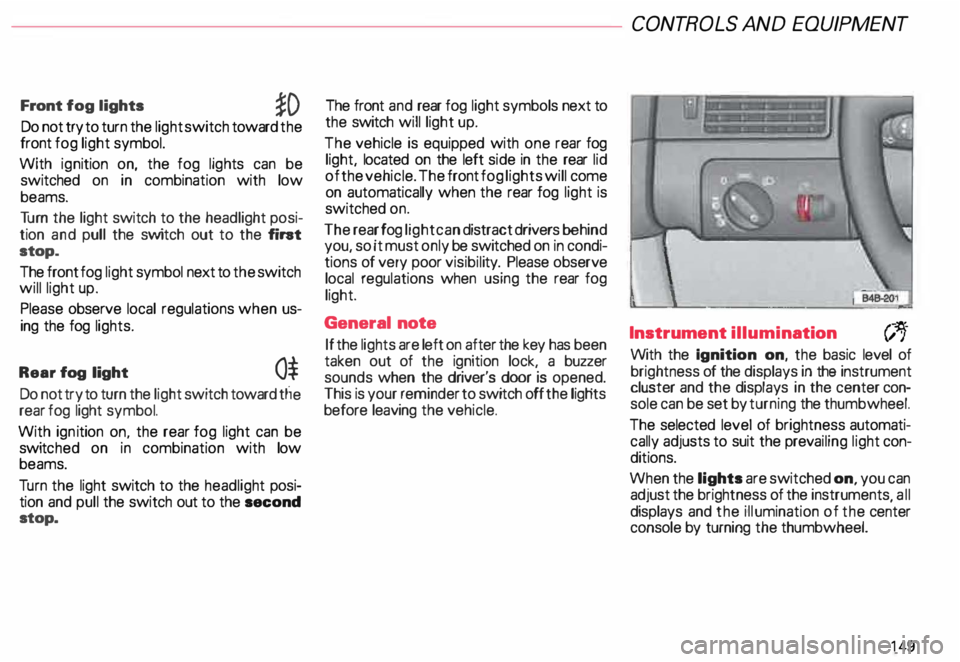
Do not try to turn the light switch toward the
front fog light symbol.
With ignition on, the fog lights can be
switched on in combination with low
beams.
Tu rn the light switch to the headlight posi
tion and pull the switch out to the fint
stop.
The front fog light symbol next to the switch
will light up.
Please observe local regulations when us
ing the fog lights.
Rear fog light
0$
Do not try to turn the light switch toward tlie
rear fog light symbol.
With ignition on. the rear fog light can be
switc hed on in combination with low
beams.
Tu rn the light switch to the headlight posi
tion and pull the switch out to the second
stop. The front
and rear fog light symbols next to
the switch will light up.
The vehicle is equipped with one rear fog
light, located on the left side in the rear lid
of the vehicle. The front fog lights will come
on automatically when the rear fog light is
switched on.
The rear fog light can distract drivers behind
you, so it must only be switched on in condi
tions of very poor visibil ity. Please observe
local regulations when using the rear fog
light.
General note
If the lights are left on after the key has been
taken out of the ignition lock, a buzzer
sounds when the driver's door is opened.
This is your reminder to switch off the ligHts
before leaving the vehicle. CONT
ROLS AND EQUIPMEN T
Instrument illumination
(;,.
With the Ignition on, the basic level of
brightness of the displays in the instrument
cluster and the displays in the center con
sole can be set by turning the thumbwheel.
The selected level of brightness automati
cally adjusts to suit the prevailing light con
ditions.
When the lights are switched on, you can
adjust the brightness of the instruments all
displays and the illumination of the ce�ter
console by turning the thumbwheel.
149
Page 151 of 306

CONTROLS AND
EQUIPMENT--------------------
1 and 4-Electrically heated ... 8
seats• utJ
The heating elements in both seats can be
turned on and regulated separately with the
two thumb wheel switches.
With the ignition on, the seat cushion and
backrest of the front seats can be heated
electrically.
15 0 1
- Use this thumb wheel switch to activate
and regulate the heating elements in the
driver's seat.
4- Use this thumbwheel switch to activate
and regulate the heating elements in the
front passenger's seat.
From position 0, roll thumbwheel upward to
activate the heating elements.
Select the desired temperature setting be
tween positions 1-6. When the heating ele
ments are activated, the numbers on the
thumb wheel will light up.
The steering wheel heating* is
swit ched on automatically when the seat
heating is switched on. The temperature.
however, remains at a constant preset level
and cannot be regulated with the thumb
wheel (1).
Note
To prevent possible damage to the heating
elements, do not kneel on the seats or in
any other way apply a heavy load to relative
ly small areas of the seat. The
heating elements* for the left and right
seating positions of the rear seat bench are
switched on and off and regulated by the
thumbwheel in the center console:
a - left
b- right
The rear seat heating* only operates when
a sensor registers the weight of the occu
pant on the seat.
Select the desired temperature setting be
tween positions 1-6. When the heating ele
ments are activated, the numb ers on the
thumbwheel will light up.
Page 156 of 306
---------------------CONTROLS AND EQUIPMEN T
Notes continued
• At excessive loads (for example, over
heating caused by frequent changes in the
ride height when the vehicle is stationary),
the system is temporarily deactivated for
safety reasons. The system will return to
full operation once it has cooled down.
• The system automatically switches to
the normal level if the ESP automatically
shuts off (see page 205). If this happens,
switch the ignition off, and then on again.
Now you can select the desired level once
again.
Jack mode
Activating Before lifting the vehicle with a jack or lift,
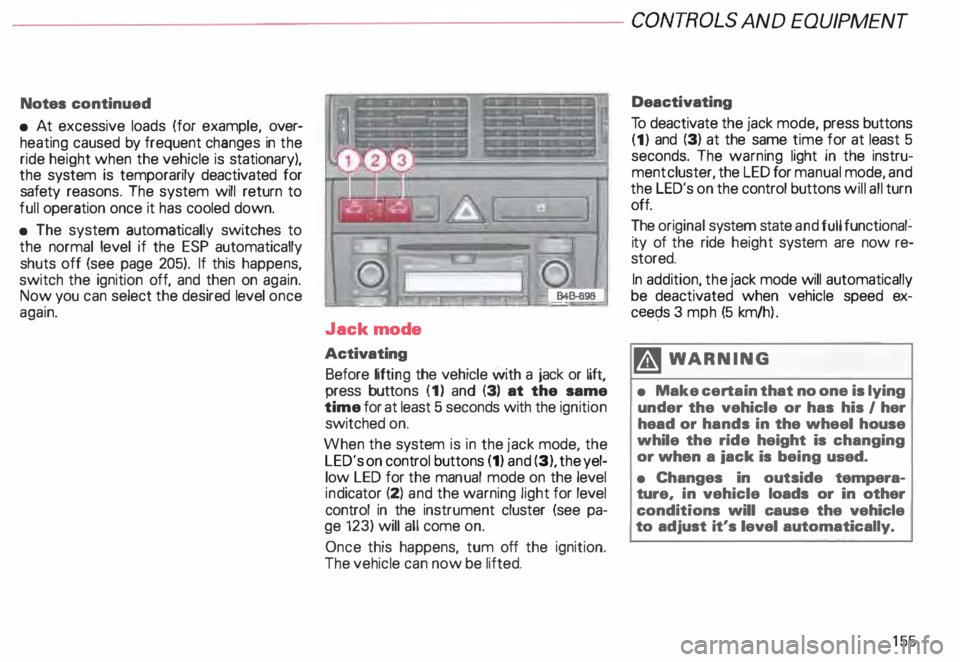
press buttons (1) and (3) at the same
time for at least 5 seconds with the ignition
switched on.
When the system is in the jack mode, the
LED's on control buttons (1) and (3), the yel
low LED for the manual mode on the level
ind icator (2) and the warning light for level
control in the instrument cluster (see pa
ge 123) will all come on.
Once this happens, tum off the ignition.
The vehicle can now be lifted. Deactivating
To deactivate the jack mode, press buttons
(1) and (3) at the same time for at least 5
seconds. The warning light in the instru
ment cluster, the LED for manual mode, and
the LED's on the control buttons will all turn
off.
The original system state and full functional�
ity of the ride height system are now re
stored.
In addition, the jack mode will automatically
be deactivated when vehicle speed ex
ceec;ls 3 mph (5 km/h ).
�W ARNING
• Make certain that no one is lying
under the vehicle or has his I her
head or hands in the wheel house
while the ride height is changing
or when a iack is being used.
• Changes in outside tempera
ture, in vehicle loads or in other
conditions will cause the vehicle
to adjust it's level automatically.
155
Page 157 of 306
CONTROLS
AND EQUIPMENT---------------------
Turn signals, headlight dimmer switch lever
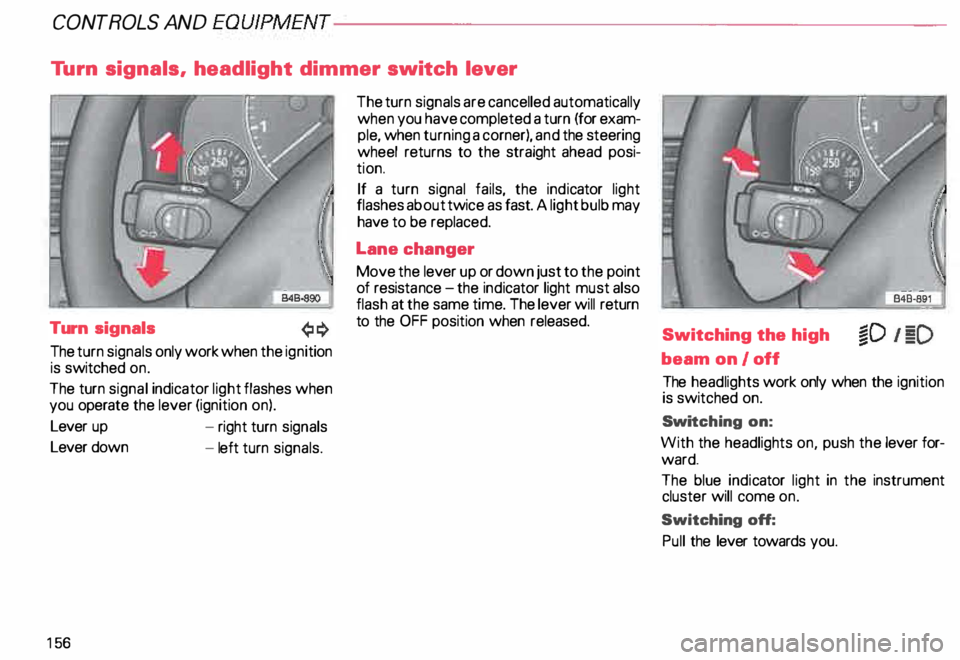
Turn signals
The turn signals only work when the ignition
is switched on.
The turn signal indicator light flashes when
you operate the lever (ignition on).
Lever up
Lever down
15 6 -
right turn signals
- left turn signals. The
turn signals are cancelled automatically
when you have completed a turn (for exam
ple, when turning a corner), and the steering
wheel returns to the straight ahead posi
tion.
If a turn signal fails, the indicator light
flashes about twice as fast. A light bulb may
have to be replaced.
Lane changer
Move the lever up or down just to the point
of resista nce-the ind icator light must also
flash at the same time. The lever will return
to the OFF position when released.
Switching the high
beam on/off
The headlights work only when the ignition
is switched on.
Swi tching on:
With the headlights on, push the lever for
ward.
The blue indicator light in the instrument
cluster will come on.
Switching off:
Pull the lever towards you.
Page 158 of 306
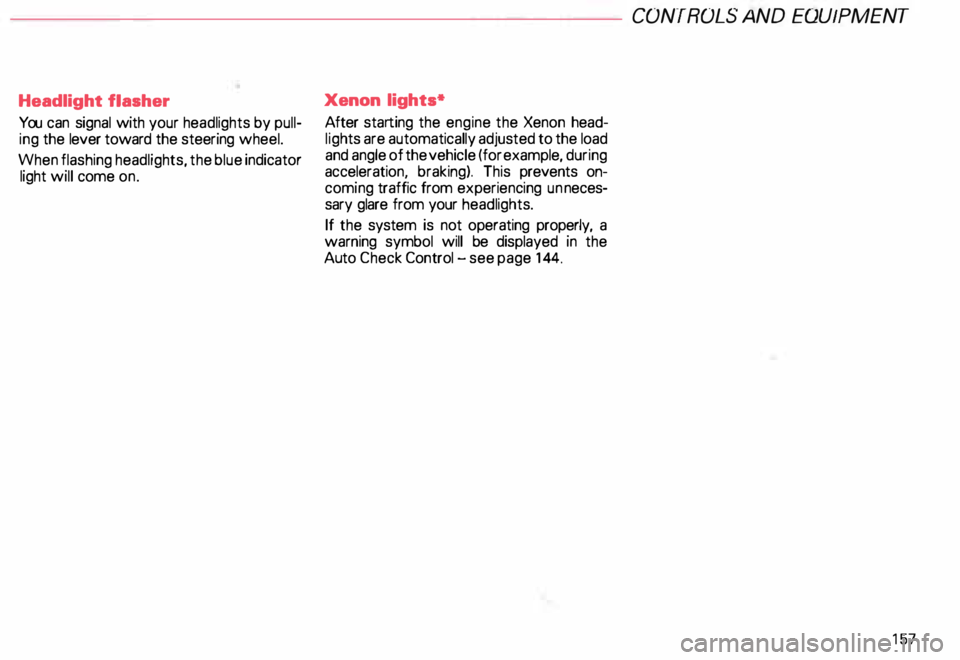
Headlight flasher
You can signal with your headlights by pull
ing the lever toward the steering wheel.
When flashing headlights, the blue indicator
light will come on. Xenon
lights*
After starting the engine the Xenon head
ligh ts are automatically adjusted to the load
and angle of the vehicle (for example, during
acceleration, braking). This prevents on
coming traffic from experiencing unneces
sary glare from your headlights.
If the system is not operating properly, a
warning symbol will be displayed in the
Auto Check Control -see page 144. CONTROLS
AND EQUIPMENT
157