2000 AUDI ALLROAD wheel
[x] Cancel search: wheelPage 83 of 306
CONTROLS AND
EQUIPMENT---------------------
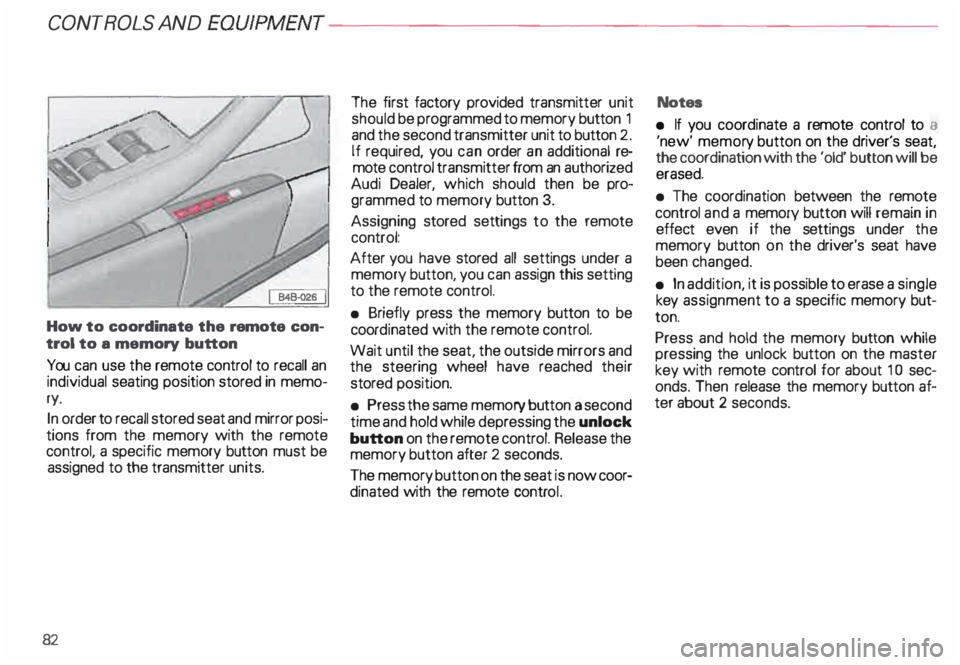
How to coordinate the remote con
trol to a memory button
You can use the remote control to recall an
individual seating position stored in memo
ry.
In order to recall stored seat and mirror posi
tions from the memory with the remote
control, a specific memory button must be
assigned to the transmitter units.
82 The
first factory provided transmitter unit
should be programmed to memory button 1
and the second transmitter unit to button 2.
If required, you can order an additional re
mote control transmitter from an authorized
Audi Dealer, which should then be pro
grammed to memory button 3.
Assigning stored settings to the remote
control:
After you have stored all settings under a
memory button, you can assign this setting
to the remote control.
• Briefly press the memory button to be
coord inated with the remote control.
Wait until the seat, the outside mirrors and
the steering wheel have reached their
stored position.
• Press the same memory button a second
time and hold while depressing the unlock
button on the remote control. Release the
memory button after 2 seconds.
The memory button on the seat is now coor
dinated with the remote control. Notes
• If you coordinate a remote control to a
'new' memor y button on the driver's seat,
the coordination with the 'old' button will be
erased.
• The coordination between the remote
control and a memory button will remain in
effect even if the settings under the
memory button on the driver's seat have
been changed.
• In addition, it is possible to erase a single
key assignment to a specific memory but
ton.
Press and hold the memory button while
pressing the unlock button on the master
key with remote control for about 1 0 sec
onds. Then release the memory button af
ter about 2 seconds.
Page 85 of 306
CONTROLS AND EQ
UIPMEN T---------------------
Retrieving using the
memory buttons
• With the passenger's door open, de
press and release the desired memory but
ton. The seat will automatically adjust to the
stored position.
• If the door has been closed, you must
then depress and hold the memory button
until the seat has reached its stored posi
tion.
Note
You can not reca ll the stored seat adjust
ment for the front passenger's seat using
the remote control in the master key.
84 Emergency
Off
In an emergency, you can interrupt
any retrieval procedure by
• pressing the '"STOP'" button (see il
lustration on page 81 and 83). or
• tapping one of the memory buttons.
Pushing the"ON/OFF"button to the OFF
position only switches off the Memory. The
stored settings will not be erased.
It's a good idea to turn the Memory off if the
vehicle is going to be used temporarily by a
driver whose driving position will not be
memorized.
The advantage is that the personal settings
that have already been memorized will re
main intact and will not change each time
the vehicle is unlocked using the remote
control. Note
The memory function is switched off when
the STOP button is pressed. The word
''OFF" lights up if the headlights are
switched on. However, the programmed
seat, outside mirrors and steering wheel
positions remain stored in the memory.
Page 99 of 306
CONT
ROLS AND EQUIPMENT---------------------
Adjustable steering column (tilt and telescopic)
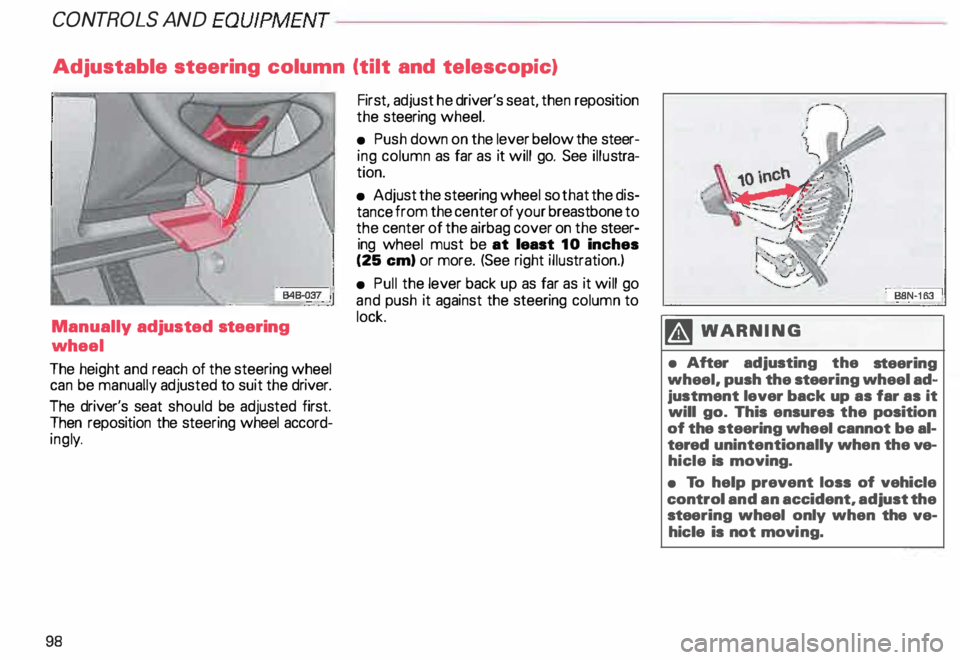
Manually adjusted steering
wheel
The height and reach of the steering wheel
can be manually adjusted to suit the driver.
The driver's seat should be adjusted first.
Then reposition the steering wheel accord
ing ly.
98 First,
adjust he driver's seat, then reposition
the steering wheel.
• Push down on the lever below the steer
ing column as far as it will go. See illustra
tion.
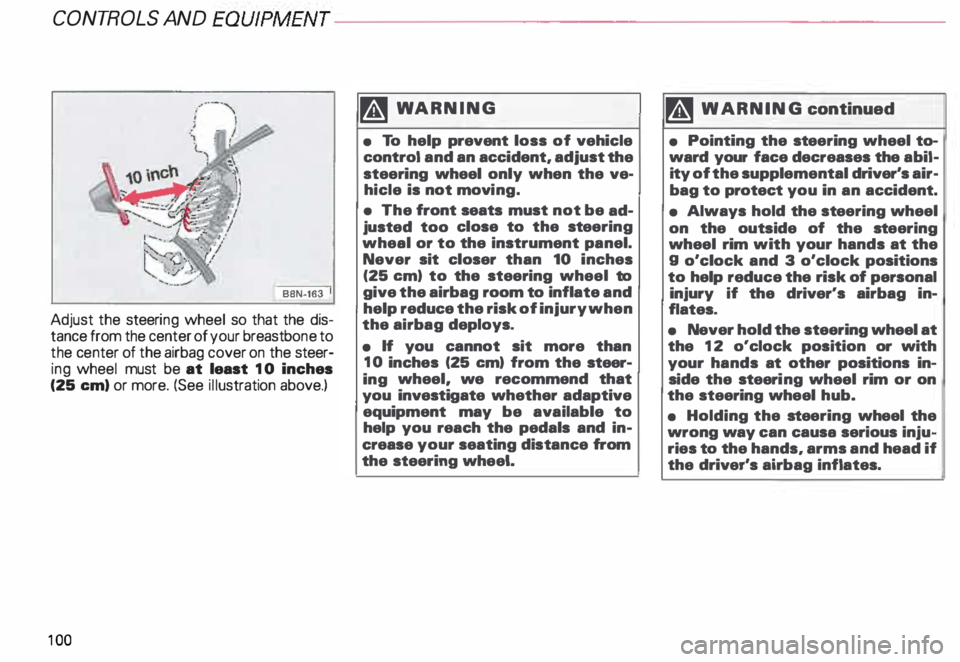
• Adjust the steering wheel so that the dis
tance from the center of your breastbone to
the center of the airbag cover on the steer
ing wheel must be at least 10 inches
(25 em) or more. (See right illustration.)
• Pull the lever back up as far as it will go
and push it against the steering column to
lock. M WARN ING
• After adjusting the steering
wheel, push the stee ring wheel ad
justment lever back up as far as it
will go. This ensures the position
of the steering wheel cannot be al
tered unintentionally when the ve
hicle is moving.
• To help prevent loss of vehicle
control and an accident, adjust the
stee ring wheel only when the ve
hicle is not movi ng.
Page 100 of 306
---------------------CONTROLS
AND EQUIPMEN T
U WARNING continued
• The front seats must not be
pushed too close to the steering
wheel or to the instrument panel.
Never sit closer than 10 inches
(25 em) to the steering wheel.
• If you cannot sit more than
1 0 inches (26 em) from the steer
ing wheel, we recommend that
you investigate whether adaptive
equipment may be available to
help you reach the pedals and in
crease your seating distance from
the stee ring wheel.
• Pointing the stee ring wheel to
ward your face decreases the abil
ity of the supplemental driver's air
bag to protect you in an accident. �
WARNING continued
• Always hold the steering wheel
on the outside of the steering
wheel rim with your hands at the
9 o'clock and 3 o'clock positions
to help reduce the risk of personal
injury if the driver's airbag in
flates.
• Never hold the steering wheel at
the 12 o'clock position or with
your hands at other positions in·
side the steering wheel rim or on
the stee ring wheel hub.
• Holding the steering wheel the
wrong way can cause serious inju
ries to the hands. arms and head if
the driver's airbag inflates. Electrically
adjusted steering
wheel*
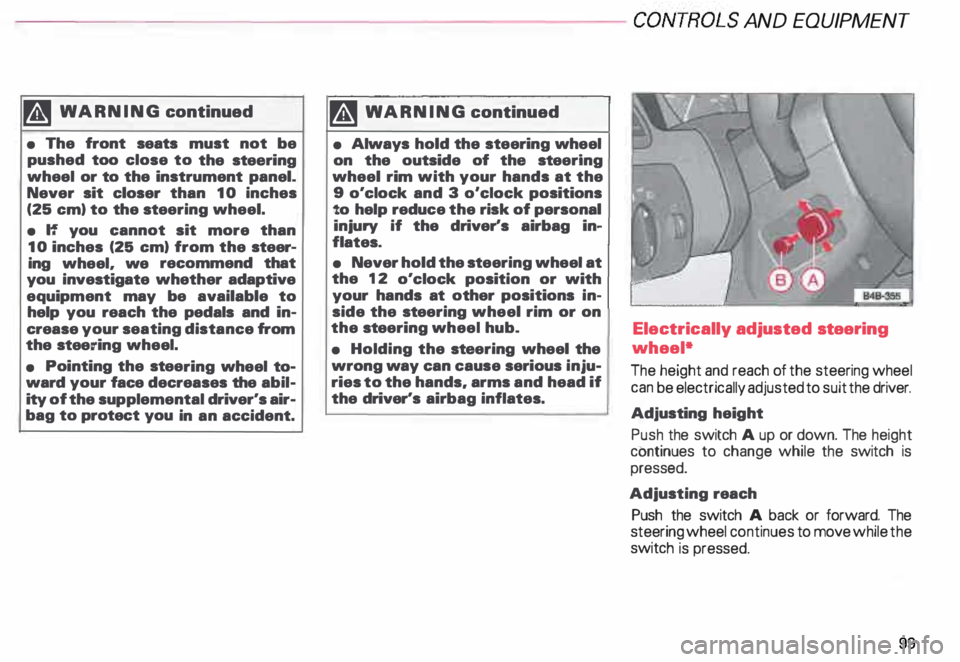
The height and reach of the steering wheel
can be electrically adjusted to suit the driver.
Adjusting height
Push the switch A up or down. The height
continues to change while the switch is
pressed.
Adjusting reach
Push the switch A back or forward. The
steering wheel continues to move while the
switch is pressed.
99
Page 101 of 306
CONT
ROLS AND
EQUIPMEN T---------------------
BBN-163 I
Adjust the steeri ng wheel so that the dis
tance from the center of your breastb one to
the center of the airbag cover on the steer
ing wheel must be at least 10 inches
(25 em) or more. (See illustration above.)
10 0 �W
ARNING
• To help prevent loss of vehicle
control and an accident, adjust the
steering wheel only when the ve
hicle is not movi ng.
• The front seats must not be ad
justed too close to the steering
wheal or to the instrument panel.
Never sit closer than 10 inches
(25 em) to the steering wheel to
give the airbag room to inflate and
help reduce the risk of injury when
the airbag deploys.
• If you cannot sit more than
10 inches (25 em) from the steer
ing wheel, we recommend that
you investigate whether adaptive
equipment may be available to
help you reach the pedals and in
crease your seating distance from
the steering wheel. '4
WARNING continued
• Pointing the stee ring wheel to
ward your face decreases the abil
ity of the supplemental driver's air
bag to protect you in an accident.
• Always hold the st eering wheel
on the outside of the steering
wheel rim with your hands at the
g o'clock and 3 o'clock positions
to help reduce the risk of personal
injury if the driver's airbag in
flates.
• Never hold the steering wheel at
the 12 o'clock position or with
your hands at other positions in
side the steeri ng wheel rim or on
the steering wheel hub.
• Holding the steering wheel the
wrong way can causa serious inju
ries to the hands, arms and head if
the driver's airbag inflates.
Page 102 of 306
Convenient
entry function
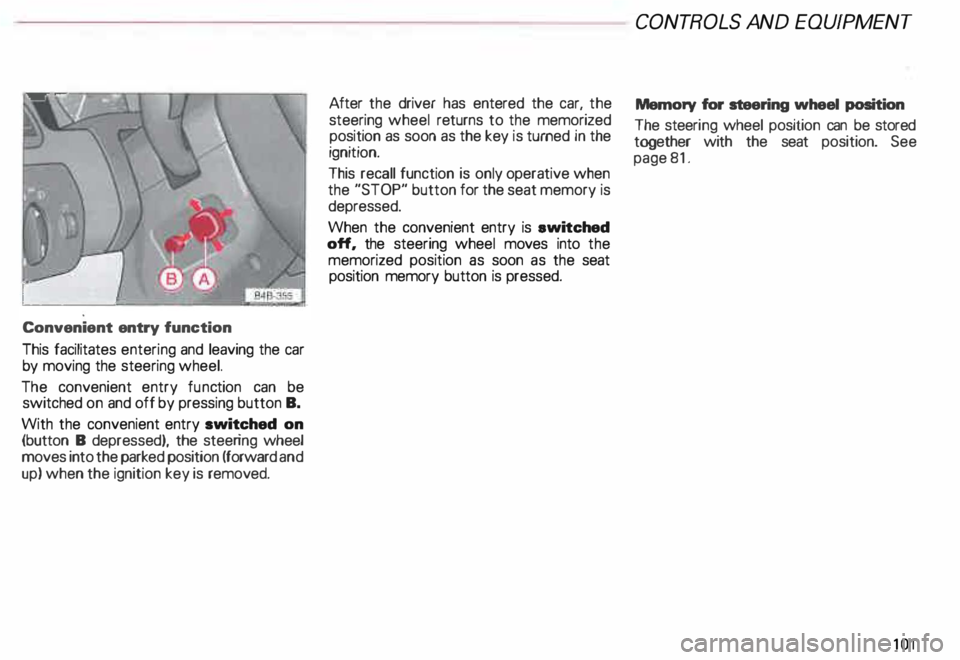
This facilitates entering and leaving the car
by moving the steering wheel.
The convenient entry function can be
switched on and off by pressing button B.
With the convenient entry switched on
(button B depressed), the steering wheel
moves into the parked position (forward and
up) when the ignition key is removed. After
the driver has entered the car, the
steering wheel returns to the memorized
position as soon as the key is turned in the
ignition.
This recall function is only operative when
the "STOP" button for the seat memory is
depressed.
When the convenient entry is ewitched
off, the steering wheel moves into the
memorized position as soon as the seat
position memory button is pressed. CONT
ROLS AND EQUIPMEN T
Memory for steering wheel position
The steeri ng wheel position can be stored
together with the seat position. See
page 81.
101
Page 104 of 306
Parking
brake lever
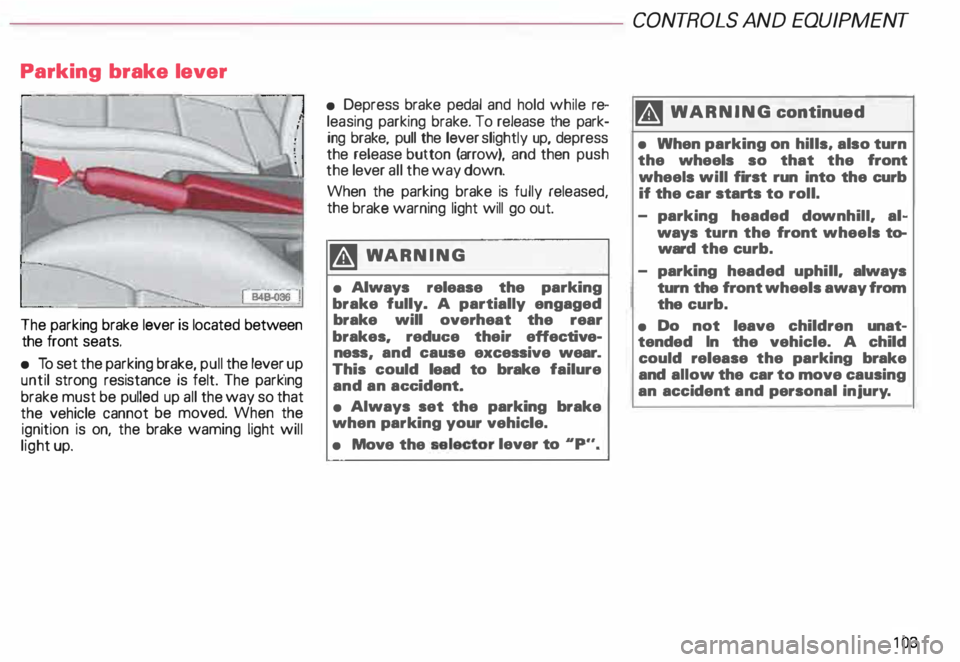
The parking brake lever is located between
the front seats.
• To set the parking brake, pull the lever _up
until strong resistance is felt. The park1ng
brake must be pulled up all the way so that
the vehicle cannot be moved. When the
ignition is on, the brake waming light will
light up. •
Depress brake pedal and hold while re
leasing parking brake. To release the park
ing brake, pull the lever slightly up, depress
the release button (arrow), and then push
the lever all the way down.
When the parking brake is fully released,
the brake warning light will go out.
�W ARNING
• Always release the parking
brake fully. A partially engaged
brake will overheat the rear
brakes. reduc:e their effective
ness and cause excessive wear.
This • could lead to brake failure
and an ac:c:ident.
• Always set the parking brake
when parking your vehicle.
• Move the selector
lever to .. p.,. CONT
ROLS AND EQUIPMENT
II WARNING continued
• When parking on hills, also turn
the wheels so that the front
wheels will first run into the curb
if the car starts to roll.
- parking headed downhill. al
ways turn the front wheels to
ward the curb.
- parking headed uphill. always
turn the front wheels away from
the curb.
• Do not leave children unat
tended In the vehicle. A child
could release the parking brake
and allow the c:ar to move causing
an accident and personal injury.
10 3
Page 107 of 306
CONT
ROLS AND EQUIPMEN T---------------------
Steering wheel with Tiptronic ®
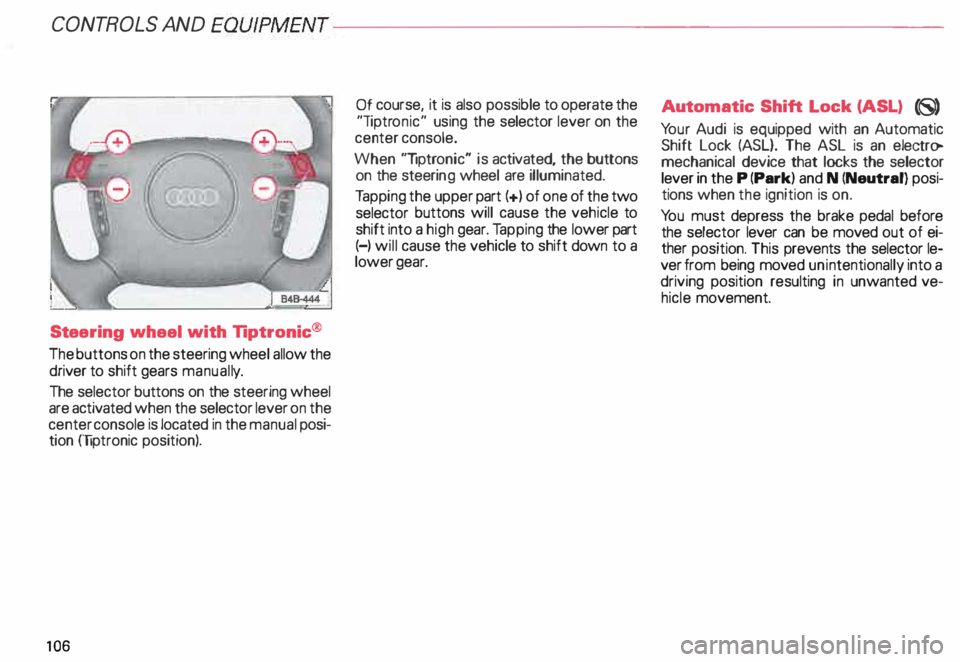
The buttons on the steering wheel allow the
driver to shift gears manuall y.
The selector buttons on the steering wheel
are activated when the selector lever on the
center console is located in the manual posi
tion (liptronic position).
10 6 Of
course, it is also possible to operate the
"liptr onic" using the selector lever on the
center console.
When "liptronic" is activated, the buttons
on the steeri ng wheel are illuminated.
Ta pping the upper part(+) of one of the two
selector buttons will cause the vehicle to
shift into a high gear. Tapping the lower part
(-) will cause the vehicle to shift down to a
lower gear. Aut
omatic Shift Lock (ASL) (8)
Yo ur Audi is equipped with an Automatic
Shift Lock (ASL}. The ASL is an electro
mechanical device that locks the selector
lever in the P (Park) and N (Neutral) posi
tions when the ignition is on.
Yo u must depress the brake pedal before
the selector lever can be moved out of ei
ther position. This prevents the selector le
ver from being moved unintentionally into a
driving position resulting in unwanted ve
hicle movement.