2000 AUDI ALLROAD lights
[x] Cancel search: lightsPage 144 of 306

---------------------CONTROLS AND EQUIPMENT
Engine oil pressure
If this warning light comes on, 1t Indi cates
that the engine oil pressure is too low.
• Stop the engine immediately,
check the engine oil level and
add oil if necessary.
If engine oil level is normal but the
light comes on again, do not con
tinua to operate the vehicle. This
could damage the engine.
Tu rn the engine off and contact the nearest
Audi Dealer for assistance.
The oil pressure warning light is not
an indicator for low engine oil level.
To check the oil level, always use
dipstick (sea page 235).
Make it a habit to have the engine oil
level checked with every fuel filling.
A Always heed all WA RNINGS
� on page 232. Brake
pads worn
0
See your Audi Dealer promptly to have front
and rear brake pads checked and replaced
as necessary.
Headlights I tail lights
�
Check, repair or replace:
• Light bulbs
• Fuses
• Electrical connections.
Washer fluid
Replenish the windshield washer
fluid in the container (see page 250).
Fuel Pull into the next filling station and
fill up. Battery
voltage too high
t::::1
or too low
See your Audi Dealer promptly to locate and
correct the problem. The battery may be run
down, the generator may be overcharging,
or the V-belt tension may need adjustment.
The voltage in the electrical system is dis
played on the voltmeter. See page 120 for
additional details.
143
Page 145 of 306

CONTROLS AND EQUIPMENT---------------------
Check
engine oil level �N
Check the engine oil level as soon as pos
sible by using the dip stick. Add engine oil
accordingly. See page 236.
Engine oil sensor
defective �ENOOR
Contact an authorized Audi dealer and have
the engine oil sensor inspected.
Speed warning 8 or 8
The stored speed h·as been exceeded. Slow
down or set new speed.
Dynamic headlight dimmer �(D
control• not functioning =1.
•
Have your authorized Audi dealer repair the
headlight dimmer control.
Refer to "Xenon lights" on page 157 for de
tails.
14 4 Speed
warning
You can store a road speed which is not to
be exceeded. As soon as you exceed that
speed by approximately 6 miles (1 0 kilome
ters), a warning tone sounds and "MPH"
("k m/h ") appears in the disp lay.
Nota Always monitor the vehicle speed by
means of the speedometer. The speed
warning device may only be used as a re
minder not to exceed the posted speed
limit. The
following describes how to store or de
lete speed warnings 1 and 2.
Speed warning 1
The ''MPH" ("km/h ") disappears when you
reduce the speed below the stored speed.
Also, the ''MPH" goes out when the driving
speed increases approximately 25 mph
(40 km/h) over the set speed for at least
1 0 seconds. The stored speed is not de
leted.
Selec ting speed limit
Press the test button for the Auto-Check
control briefly when the desired speed is in
dicated on the speedometer. The speed
warning symbol lights up when the button
is released to confirm that the selected
speed has been stored.
The set speed limit remains stored until
another speed is selected by pressing the
button again or until the memory is cleared.
Page 149 of 306
CONTROLS ANDEO�PMENT-----------------------------------------
Switches
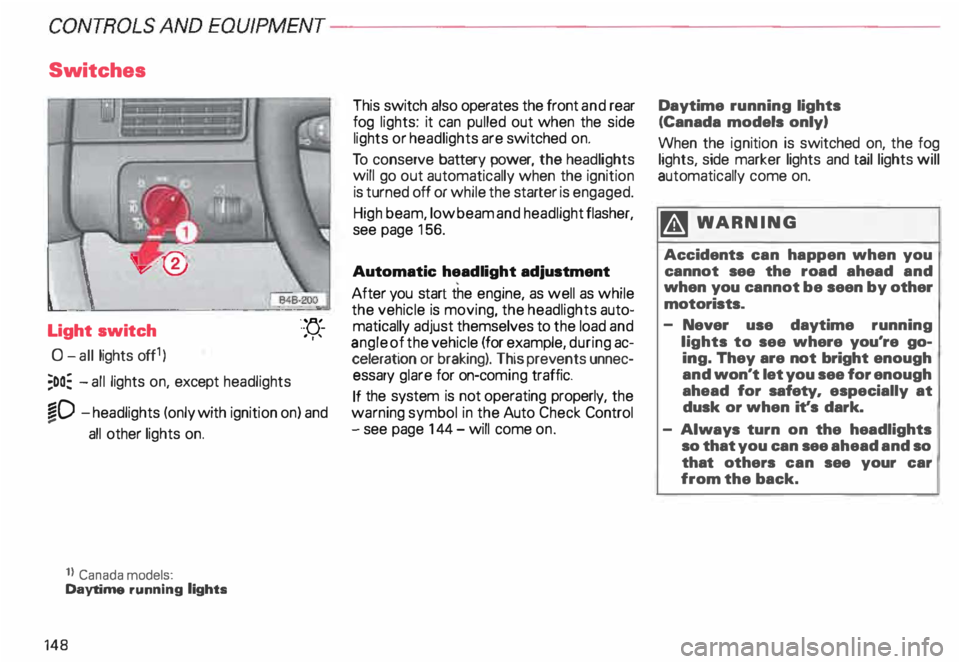
Light switch
0- all lights off1)
;oo: -all lights on, except headlights "-
YJ.-
. ''
�D -headlights (only with ignition on) and
...
all other lights on.
1} Canada models:
Daytime running lights
148 This
switch also operates the front and rear
fog lights: it can pulled out when the side
lights or headlights are switched on.
To conserve battery power, the headlights
will go out automatically when the ignition
is turned off or while the starter is engaged.
High beam, low beam and headlight flasher,
see page 156.
Automatic headlight adjustment
After you start the engine, as well as while
the vehicle is moving, the headlights auto
matically adjust themselves to the load and
angle of the vehicle (for example, during ac
celeration or braking). This prevents unnec
essary glare for on-com ing traffic.
If the system is not operating properly, the
warning symbol in the Auto Check Control
- see page 144- will come on. Daytime
running lights
(Canada models only)
When the ignition is switched on, the fog
lights, side marker lights and taillights will
automatically come on.
�W ARNING
Accidents can happen when you
cannot see the road ahead and
when you cannot be seen by other
motorists.
- Never use daytime running
lights to see where you're go
ing. They are not bright enough
and won't let you see for enough
ahead for safety, especially at
dusk or when it's dark.
- Always turn on the headlights
so that you can see ahead and so
that others can see your car
from the back.
Page 150 of 306
Front
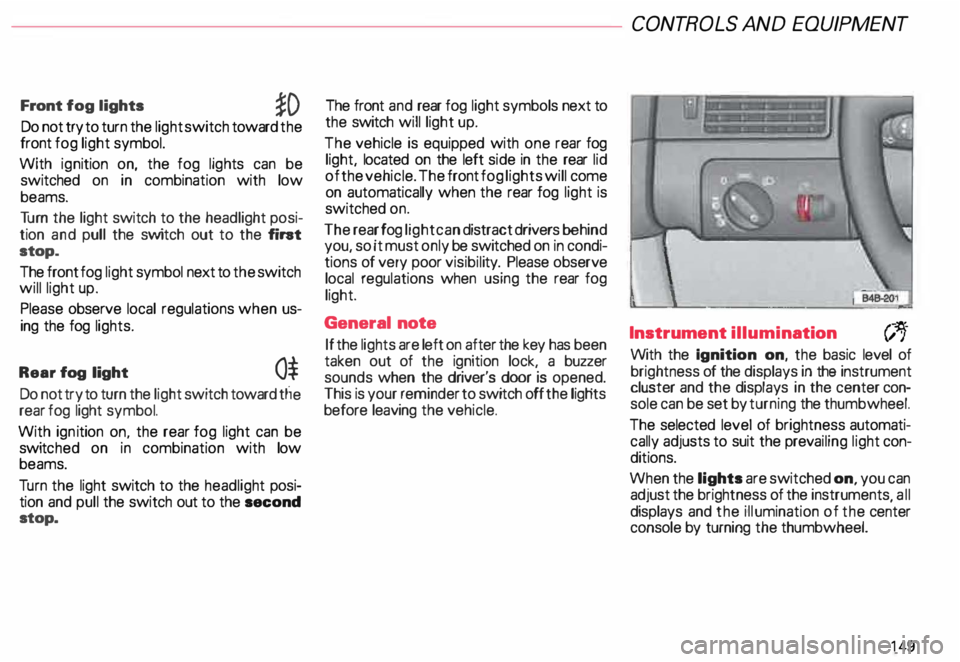
fog lights
�D
Do not try to turn the light switch toward the
front fog light symbol.
With ignition on, the fog lights can be
switched on in combination with low
beams.
Tu rn the light switch to the headlight posi
tion and pull the switch out to the fint
stop.
The front fog light symbol next to the switch
will light up.
Please observe local regulations when us
ing the fog lights.
Rear fog light
0$
Do not try to turn the light switch toward tlie
rear fog light symbol.
With ignition on. the rear fog light can be
switc hed on in combination with low
beams.
Tu rn the light switch to the headlight posi
tion and pull the switch out to the second
stop. The front
and rear fog light symbols next to
the switch will light up.
The vehicle is equipped with one rear fog
light, located on the left side in the rear lid
of the vehicle. The front fog lights will come
on automatically when the rear fog light is
switched on.
The rear fog light can distract drivers behind
you, so it must only be switched on in condi
tions of very poor visibil ity. Please observe
local regulations when using the rear fog
light.
General note
If the lights are left on after the key has been
taken out of the ignition lock, a buzzer
sounds when the driver's door is opened.
This is your reminder to switch off the ligHts
before leaving the vehicle. CONT
ROLS AND EQUIPMEN T
Instrument illumination
(;,.
With the Ignition on, the basic level of
brightness of the displays in the instrument
cluster and the displays in the center con
sole can be set by turning the thumbwheel.
The selected level of brightness automati
cally adjusts to suit the prevailing light con
ditions.
When the lights are switched on, you can
adjust the brightness of the instruments all
displays and the illumination of the ce�ter
console by turning the thumbwheel.
149
Page 157 of 306
CONTROLS
AND EQUIPMENT---------------------
Turn signals, headlight dimmer switch lever
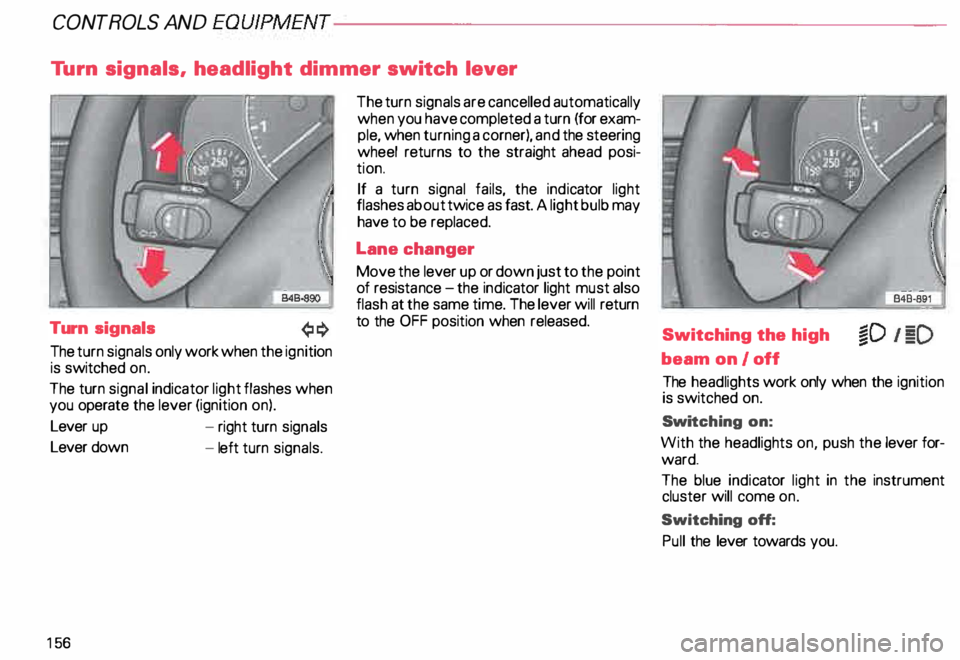
Turn signals
The turn signals only work when the ignition
is switched on.
The turn signal indicator light flashes when
you operate the lever (ignition on).
Lever up
Lever down
15 6 -
right turn signals
- left turn signals. The
turn signals are cancelled automatically
when you have completed a turn (for exam
ple, when turning a corner), and the steering
wheel returns to the straight ahead posi
tion.
If a turn signal fails, the indicator light
flashes about twice as fast. A light bulb may
have to be replaced.
Lane changer
Move the lever up or down just to the point
of resista nce-the ind icator light must also
flash at the same time. The lever will return
to the OFF position when released.
Switching the high
beam on/off
The headlights work only when the ignition
is switched on.
Swi tching on:
With the headlights on, push the lever for
ward.
The blue indicator light in the instrument
cluster will come on.
Switching off:
Pull the lever towards you.
Page 158 of 306
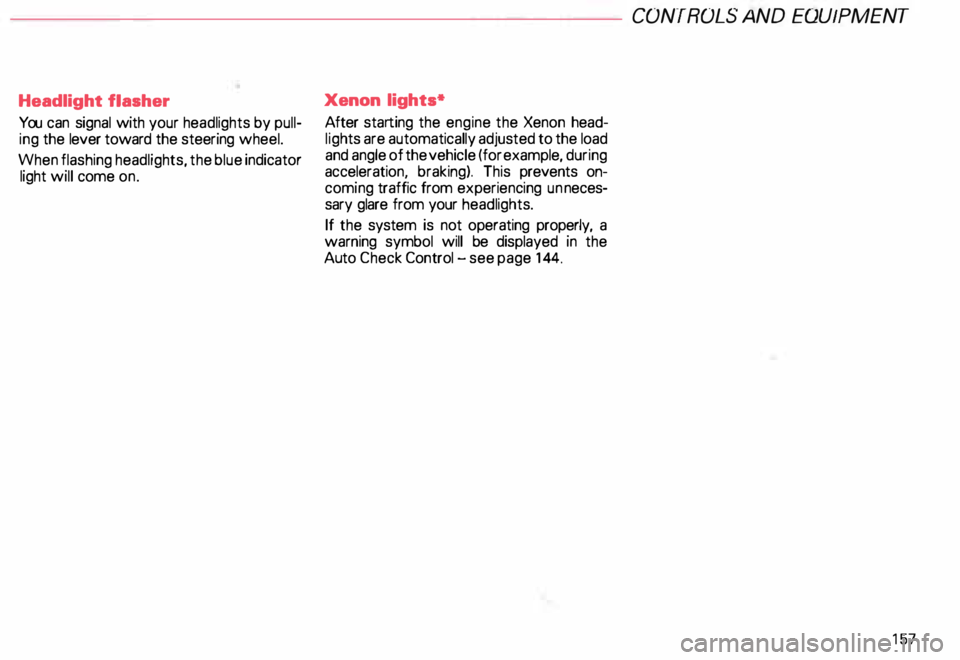
Headlight flasher
You can signal with your headlights by pull
ing the lever toward the steering wheel.
When flashing headlights, the blue indicator
light will come on. Xenon
lights*
After starting the engine the Xenon head
ligh ts are automatically adjusted to the load
and angle of the vehicle (for example, during
acceleration, braking). This prevents on
coming traffic from experiencing unneces
sary glare from your headlights.
If the system is not operating properly, a
warning symbol will be displayed in the
Auto Check Control -see page 144. CONTROLS
AND EQUIPMENT
157
Page 161 of 306
CONT
ROLS AND EQUIPMENT---------------------
Wiper and washer system
The wiper and washer system only works
when the ignition is on.
The heated washer jets do not have a
separate switch. Depending on the outside
temperature, the heated washer jets will
operate when the ignition is on.
To prevent damage to the w1pmg
system. always loosen blades frozen
to glass before operating wipers.
Notes
• Filling washer container, see page 250.
• Replacing wiper blades, see page 251.
� WARNING
Always heed WARNINGS on
page 161.
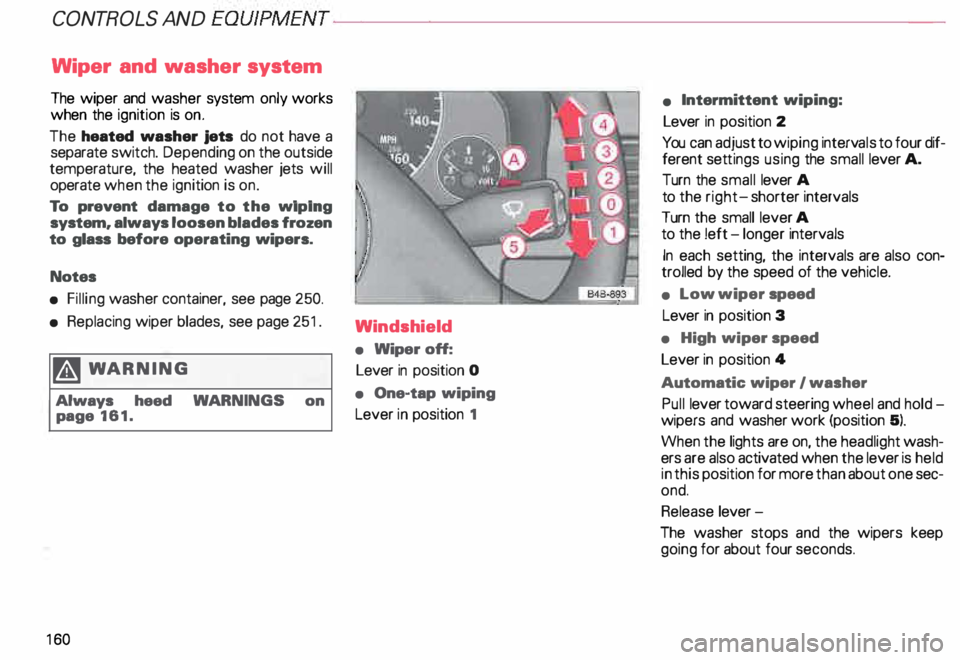
16 0 Windshield
•
Wiper off:
Lever in position 0
• One-tap wiping
Lever in position 1 •
Intermittent wiping:
Lever in position 2
You can adjust to wiping intervals to four dif
ferent settings using the small lever A.
Turn the small lever A
to the right- shorter intervals
Turn the small lever A
to the !eft -longer intervals
In each setting, the intervals are also con
trolled by the speed of the vehicle.
• Low wiper speed
Lever in position 3
• High wiper speed
Lever in position 4
Automatic wiper I washer
Pull lever toward steering wheel and hold
wipers and washer work (position 5).
When the lights are on, the headlight wash
ers are also activated when the lever is held
in this position for more than about one sec
ond.
Release lever-
The washer stops and the wipers keep
going for about four seconds.
Page 162 of 306
---------------------CONTROLS AND
EQUIPMENT
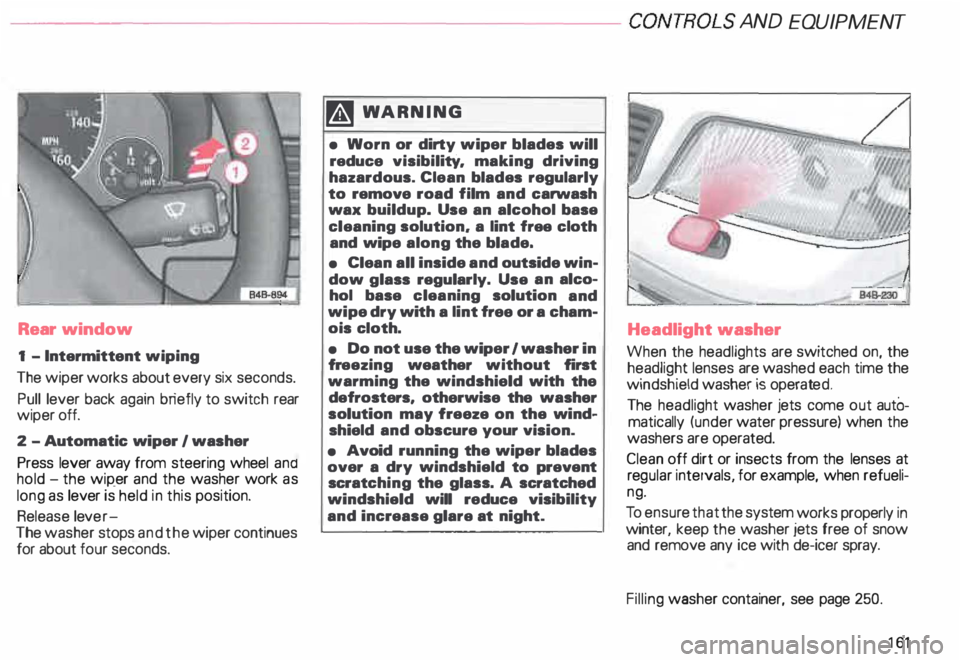
Rear window
1 - Intermittent wiping
The wiper works about every six seconds.
Pull lever back again briefly to switch rear
wiper off.
2 -Automatic wiper I washer
Press lever away from steering wheel and
hold -the wip_er and the washer work as
long as lever is held in this position.
Release lever-
The washer stops and the wiper continues
for about four seconds. �W
ARNING
• Worn or dirty wiper blades will
reduce visibility. making driving
hazardous. Clean blades regularly
to remove road film and carwash
wax buildup. Use an alcohol base
cleaning solution. a lint free cloth
and wipe along the blade.
• Clean all inside and outside win
dow glass regularly. Use an alco
hol base cleaning solution and
wipe dry with a lint free or a cham
ois cloth.
• Do not use the wiper 1 washer in
fr eezing weather without first
warming the windshield with the
defrosters, otherwise the washer
solution may freeze on the wind
shield and obscure your vision.
• Avoid running the wiper blades
over a dry windshield to prevent
scratc hing the glass. A scratched
windshield will reduce visibility
and increase glare at night. Headlight
washer
When the headlights are switched on, the
headlight lenses are washed each time the
windshield washer is operated.
The headlight washer jets come out autO
matically (under water pressure) when the
washers are operated.
Clean off dirt or insects from the lenses at
reg ular intervals, for example, when refueli
ng.
To ensur e that the system works properly in
winter, keep the washer jets free of snow
and remove any ice with de-icer spray.
Filling washer container, see page 250.
161