2000 AUDI ALLROAD engine
[x] Cancel search: enginePage 118 of 306

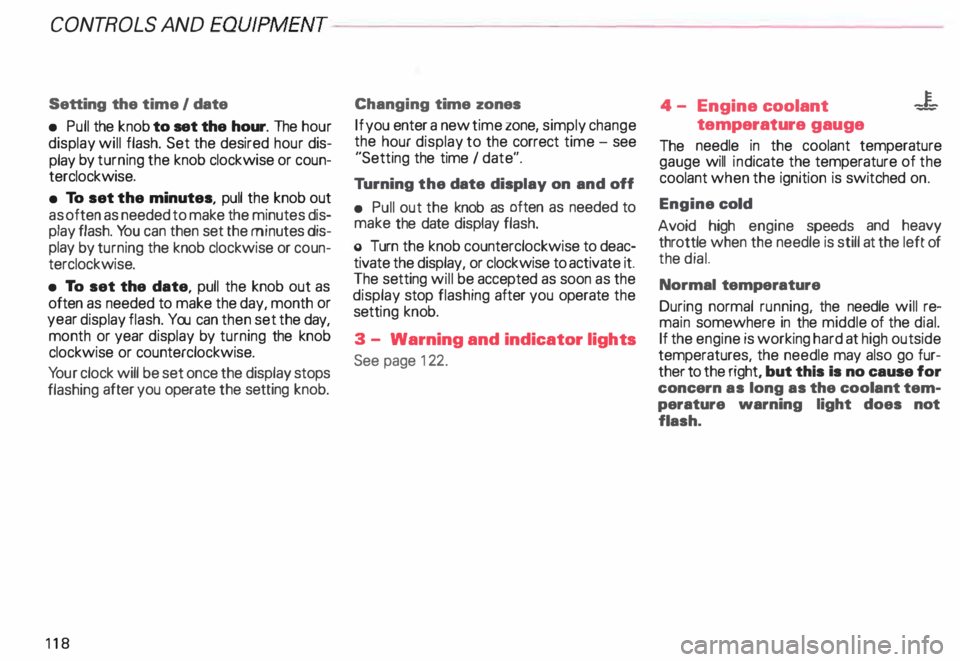
The illustration on previous page shows the
arrangement of the instrument cluster in a
U.S. vehicle.
1 - Engine oil temperature
gauge �
Of (C)
Engine oil temperature ranges from 150 OF
(60 °C) to 350 °F (180 °C). With the needle
around 150 °F (60 °C), do not accelerate un
der full load.
If the needle moves into the upper zone in
excepti onal cases, reduce your speed. The
needle should then return to the normal
zone.
If the needle stays in upper zone, stop the
vehicle, switch off the engine and check the
oil leve l. If the oil level is correct and the oil
pressure warning light does not flash when
the engine is started, you can drive to the
next authorized Audi Dealer but do·not run
engine at high speeds. 2
- Ta chometer with clock
Ta chometer
The red area at the end of the scale indi
cates maximum permissible engine rpm
(rev olutions per minute) for all gears after
the break-in period. Before reaching this
area, the next higher gear or selector lever
position "D" should be selected or the foot
eased off the accelerator pedal.
r.Gb Upshifting early saves fuel and
1!/!:i reduces engine noise.
Shift to the next lower gear when engine
rpm drops below 1,500 rpm. CONT
ROLS AND EQUIPMENT
Digital clock with date display
The clock and date are located in the
tachometer dial. Adjusting the clock I date:
see next page.
When the ignition is off the clock I date dis
play can be illuminated by pressing the set
butt on. See illustration above.
117
Page 119 of 306

CONTROLS AND
EQUIPMENT-----------------------------------------
Setting the time I date
• Pull the knob to set the hour. The hour
display will flash. Set the desired hour dis
play by turning the knob clockwise or coun
terclockwise.
• To set the minutes, pull the knob out
as often as needed to make the minutes dis
play flash. You can then set the minutes dis
play by turning the knob clockwise or coun
terclockwise.
• To set the date, pull the knob out as
often as needed to make the day, month or
year display flash. You can then set the day,
month or year display by turning the knob
clockwise or counterclockwise.
Yo ur clock will be set once the display stops
flashing after you operate the setting knob.
118 Changing
time zones
If you enter a new time zone, simply change
the hour display to the correct time -see
"Setting the time I date".
Tu rning the date display on and off
• Pull out the knob as often as needed to
make the date display flash.
o Turn the knob counterclockwise to deac
tivate the display, or clockwise to activate it.
The setting will be accepted as soon as the
display stop flashing after you operate the
setti ng knob.
3 - Warning and indicator lights
See page 122. 4
- Engine coolant -¥
-
temperature gauge
The needle in the coolant temperature
gauge will indicate the temperature of the
coolant when the ignition is switched on.
Engine cold
Avoid high engine speeds and heavy
throttle when the needle is still at the left of
the dial.
Normal temperature
During normal running, the needle will re
main somewhere in the middle of the dial.
If the engine is working hard at high outside
temperatures, the needle may also go fur
ther to the right, but this Is no cause for
concern as long as the coolant tem
perature warning light does not
flash.
Page 120 of 306

--------------------CONTROLS AND EQUIPMENT
Warning light
If the coolant warning light m the Auto
Check System (see page 141) flashes when
driving, the engine may be overheated be
cause of low coolant level.
Note
Do not install accessories (addi
tional lights or Insect screens. for
example) on top of the front bumper.
They may restrict engine cooling
and cause engine damage.
Always heed all WA RNINGS
on page 142 and 232. 5
- Fuel gauge
iU
The fuel gauge works when the ignition is
switched on.
The fuel tank capacity is approximately 18.5
gallons (70 liters).
When the needle reaches the red area
there is a reserve of about 2.4 U.S. gallon �
(9 liters) of fuel left in the tank. lime to re
fuel.
The fuel pump symbol in the instrument
cluster lights up as an additional reminder to
refuel.
Never run the tank completely dry. See also
page 222. 6
- Speedometer I odometer
Speedometer Refer to "Break-In Period" before driving
off see page 193.
The speedometer indicates the speed.
On U.S. models, the outer row of numbers
� larg ": numbers) indicates the vehicle speed
1n m1les per hour (mph). The inner row
(small numbers) indicates the vehicle
speed in kilometres per hour (km I h).
The arrangement of the instruments in the
c !uster may vary depending on engine ver
SIOn.
119
Page 121 of 306

CONTROLS AND
EQUIPMEN T--------------------
Odometer
The odometer indicates the distance driven.
USA models:
Miles
Canada models: Kilometres
On the trip odometer, the last digit indicates
1 /,0 of a mile or 1 00 meters.
Reset knob for trip odometer
To record a distance, reset the trip odome
ter by pressing the knob until the display re
turns to zero -see illustrat ion.
12 0 When
the ignition is off, the display can be
ill umin ated by pressing the test knob for the
Auto-Check System. See page 116, posi
tion 8. The display switches off automati
cally after about 15 seconds.
Also the display will remain illuminated for
abo �t 30 seconds after you open the driv
er's door.
Defect message
If there is a defect in the instrument cluster,
"dEF" will be displayed continuously in the
trip odometer display area. Have this prob
lem corrected as soon as possible by an au
thorized Audi Dealer.
7 - Vo ltmeter
The voltmeter indicates the voltage for the
vehicle's total electrical system, which
should normally be between 12 and
14 volts. If the display drops below 12 volts
when the engine is running, have the power
supply (battery and alternator) checked by
an authorized Audi Dealer. See also
pages 127 and 143.
The voltage may fall below 8 volts while the
engine is being started. 8
- Set I Check knob
Setting the clock ...• ... .
Auto-ch eck system
Odometer lighting .
Service indicator .. 118
14 0
12 0
121
9 - Driver information system
Auto-C heck System display . . . . . ... 138
Outside air temperature display .... 137
Tr ip computer display . . . . . . . . 146
Selector lever position display ....... 1 07
Radio frequency display . . . . . . 138
Service interval display . . . . . . . . . . .
121
10 -Reset knob
Reset knob for trip odometer . .... .. 12 0
Service indicator . . . . . .. . . . . . . 121
Page 122 of 306

Service
Interval Display
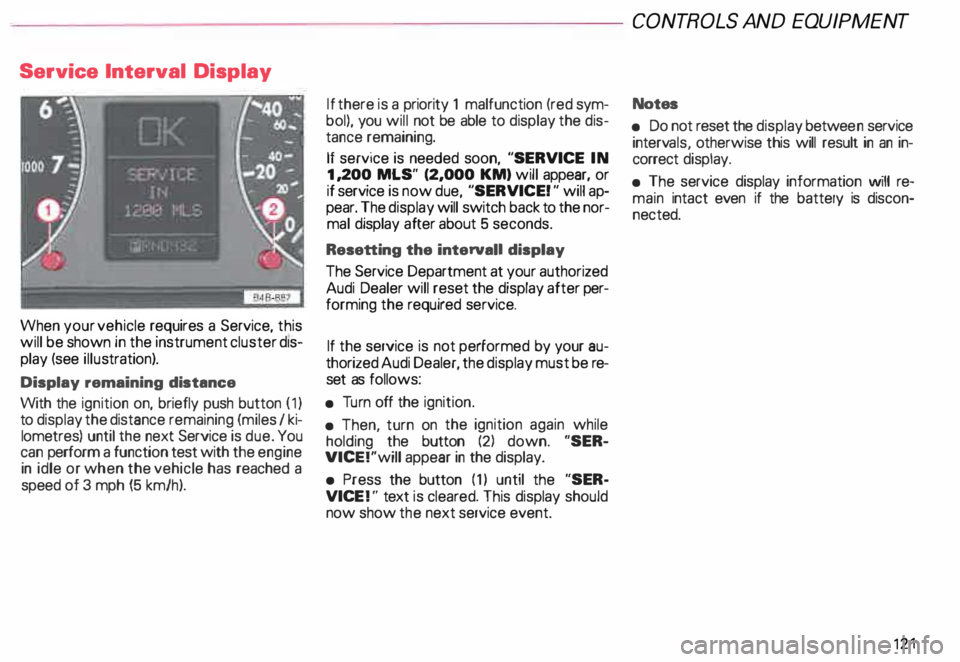
When your vehicle requires a Service, this
will be shown in the instrument cluster dis
play (see illustration).
Display remaining distance
With the ignition on, briefly push button (1)
to display the distance remaining (miles I ki
lometres) until the next Service is due. You
can perform a function test with the engine
in idle or when the vehicle has reached a
speed of 3 mph (5 km/h). If
there is a priority 1 malfunction (red sym
bol), you will not be able to display the dis
tance remaining.
If service is needed soon, "SERVICE IN
1, 200 MLS" (2,000 KM) will appear, or
if service is now due, "SERVICE! " will ap
pear. The display will switch back to the nor
mal display after about 5 seconds.
Resetting the interval! display
The Service Department at your authorized
Audi Dealer will reset the display after per
forming the required service.
If the service is not performed by your au
thorized Audi Dealer, the display must be re
set as follows:
• Turn off the ignition.
• Then, turn on the ignition again while
holding the button (2) down. "SER
VICE!"will appear in the display.
• Press the button (1) until the "SER
VICE !" text is cleared. This display should
now show the next service event. CONT
ROLS AND EQUIPMENT
Notes
• Do not reset the display betwee n service
interv als, otherwise this will result in an in
correct display.
• The service display information will re
main intact even if the battery is discon
nected. 121
Page 123 of 306

CONT
ROLS AND EQUIPMENT
Warning /Ind icator lights
Yo ur vehicle is equipped with several impor
tant warning and indic ator lights to help you
monitor the continued reliable operation of
your vehicle. Furthermore, certain func
tions and vehicle components are consis
tently monitored by the Auto-Check System
(see page 138). Please be sure to get to
know these lights so if one should come on
you know what to do.
12 2 �W
ARNING
• Failure to heed warning lights
and other important vehicle infor
mation may result in serious per
sonal injury or vehicle damage.
• Whenever stalled or stopped for
repair, move the vehicle a safe dis
tance off the road, stop the en
gine, and turn on the emergency
flasher -see page 152.
• The engine compartment of any
motor vehicle is a potentially haz
ardous area. Before you check any
thing in the engine compartment,
stop the engine and let it cool
down. Always exercise extreme
caution when working under the
engine hood. -sea page 232. -Always heed all WA RNINGS
l!!l on page 232, chapter ""En
gine compartment ...
Page 124 of 306

---------------------CONTROLS AND
EQUIPMENT
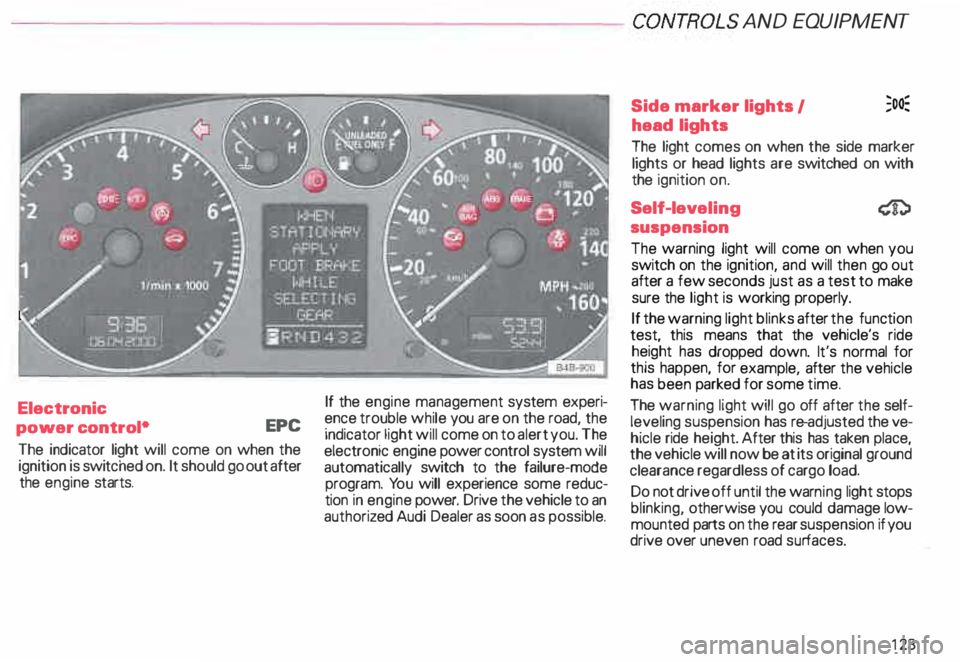
Electronic
power control• EPC
The indicator light will come on when the
ignition is switc hed on. It should go out after
the engine starts. If
the engine management system experi
ence trouble while you are on the road, the
indicator light will come on to alert you. The
electronic engine power control system will
automatically switch to the failure-mode
program. You will experience some reduc
tion in engine power. Drive the vehicle to an
authoriz ed Audi Dealer as soon as possible. Side
marker lights I ;o�
head lights
The light comes on when the side marker
lights or head lights are switched on with
the ignition on.
Self-lev eling
suspension
The warning light will come on when you
switch on the ignition, and will then go out
after a few seconds just as a test to make
sure the light is working properly.
If the warning light blinks after the function
test, this means that the vehicle's ride
height has dropped down. It's normal for
this happen, for example, after the vehicle
has been parked for some time.
The warning light will go off after the self
leveling suspension has re-adjusted the ve
hicle ride height. After this has taken place,
the vehicle will now be at its original ground
clearance regardless of cargo load.
Do not drive off until the warn ing light stops
blinking, otherwise you could damage low
mounted parts on the rear suspension if you
drive over uneven road surfaces.
123
Page 125 of 306

CONTROLS AND
EQUIPMEN T--------------------
If the warning light is flashing, it can also
mean that the vehicle is riding ''too high"
(above the highest level). Once again, do
not drive off until the warning light stops
flashing.
If the .warning light stays on continuous ly,
there 1s a problem with the ride height ad
JUStment system. The light will also come
on continuously if the vehicle is on an ex
treme incline.
Tro uble in the ESP may also cause the warn
ing light to remain on continuously.
A system failure can cause the vehicle to
have too little or too much ground clear
ance. Drive very carefully and slowly to your
nearest authorized Audi dealer and have the
fault corrected.
See page 153 for additional information.
12 4 Electronic Stability
Program {ESP)
The indicator light lights up when the igni
tion is turned on, and it must go out after
about 2 seconds.
When the ESP system is in control mode,
this indicator light will flash while the ve
hicle is being operated.
When you start the engine, the ESP
may shut off for safety reasons. The indica
tor light also turns on to indicate this statu s.
If this should happen, you can reactivate the
ESP by turning the ignition off and then on
� gain. This indicator light will go out, indicat
Ing that the system is once again operating
properly.
If the system is off or is malfunctioning, the
indi cator light will remain on.
Since the ESP system works together with
the ABS system, the ESP indicator light will
also come on if the ABS stops operating. Electronic
immobilizer
�
When you turn on the ignition, the vehicle
key data are automatically scanned. The in
dicator light will come on briefly, indicating
that the data verification procedure has
been acknowledged.
If a non-coded vehicle key was used (for ex
ample a duplic ate key), the control light
goes to a continuous flashing mode. If this
happens, the vehicle cannot be started. See
also page 57