Page 120 of 4592

AT0953
SST
AX03J±01
AT3306
Hold
TurnLock
Free
Q04237
AX±26
± AUTOMATIC TRANSAXLE (A140E)TORQUE CONVERTER CLUTCH AND DRIVE PLATE
1919 Author�: Date�:
TORQUE CONVERTER CLUTCH
AND DRIVE PLATE
INSPECTION
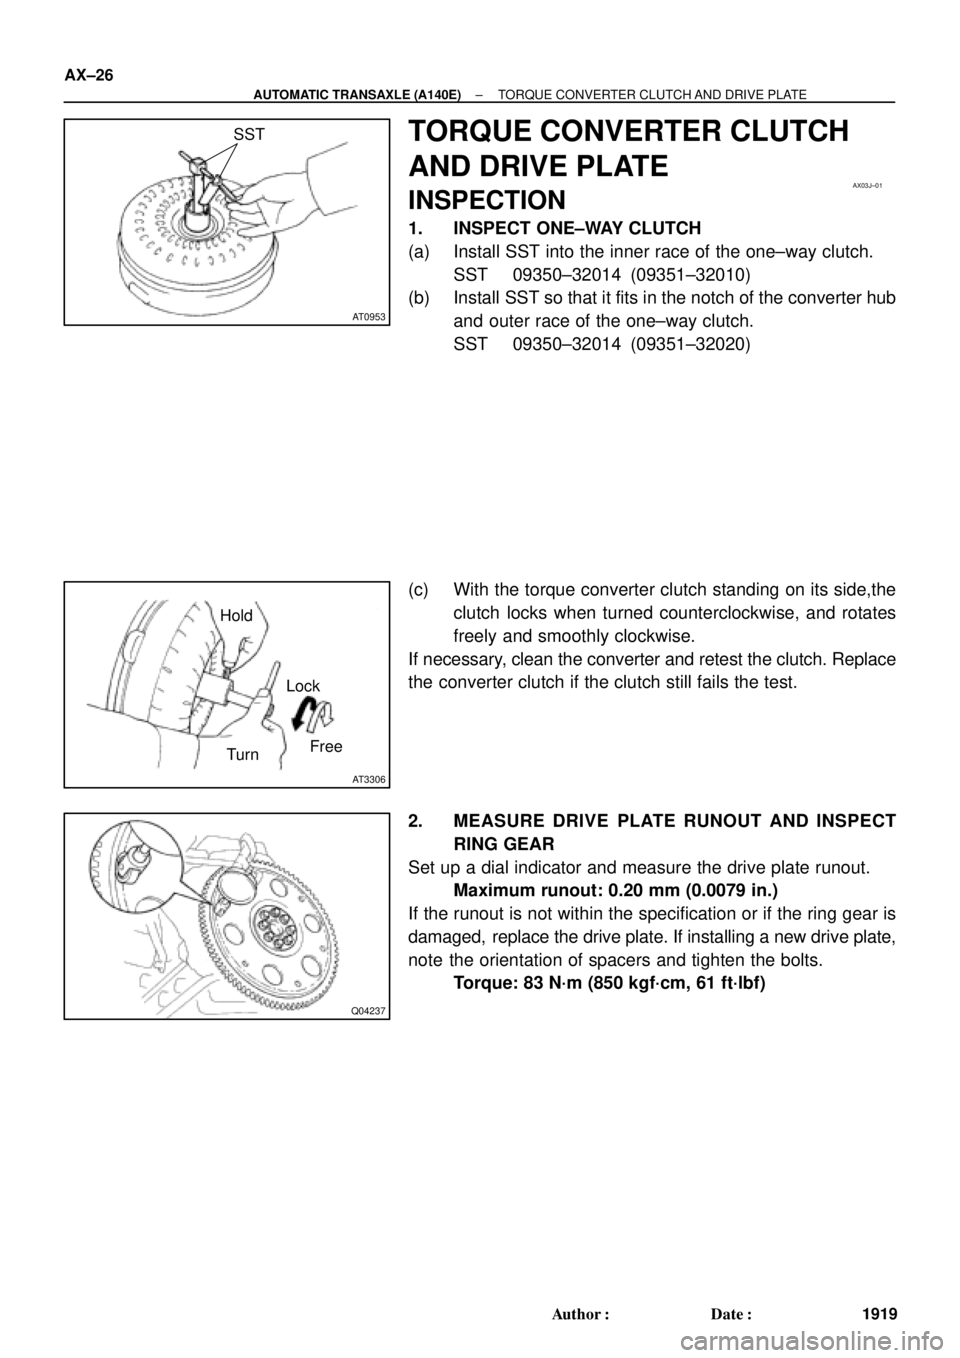
1. INSPECT ONE±WAY CLUTCH
(a) Install SST into the inner race of the one±way clutch.
SST 09350±32014 (09351±32010)
(b) Install SST so that it fits in the notch of the converter hub
and outer race of the one±way clutch.
SST 09350±32014 (09351±32020)
(c) With the torque converter clutch standing on its side,the
clutch locks when turned counterclockwise, and rotates
freely and smoothly clockwise.
If necessary, clean the converter and retest the clutch. Replace
the converter clutch if the clutch still fails the test.
2. MEASURE DRIVE PLATE RUNOUT AND INSPECT
RING GEAR
Set up a dial indicator and measure the drive plate runout.
Maximum runout: 0.20 mm (0.0079 in.)
If the runout is not within the specification or if the ring gear is
damaged, replace the drive plate. If installing a new drive plate,
note the orientation of spacers and tighten the bolts.
Torque: 83 N´m (850 kgf´cm, 61 ft´lbf)
Page 151 of 4592

AX040±01
AT0952
SST
AT0953
SST
AT3306
Hold
Lock
Free
Turn
AT2821
AX±30
± AUTOMATIC TRANSAXLE (A541E)TORQUE CONVERTER CLUTCH AND DRIVE PLATE
1950 Author�: Date�:
TORQUE CONVERTER CLUTCH
AND DRIVE PLATE
INSPECTION
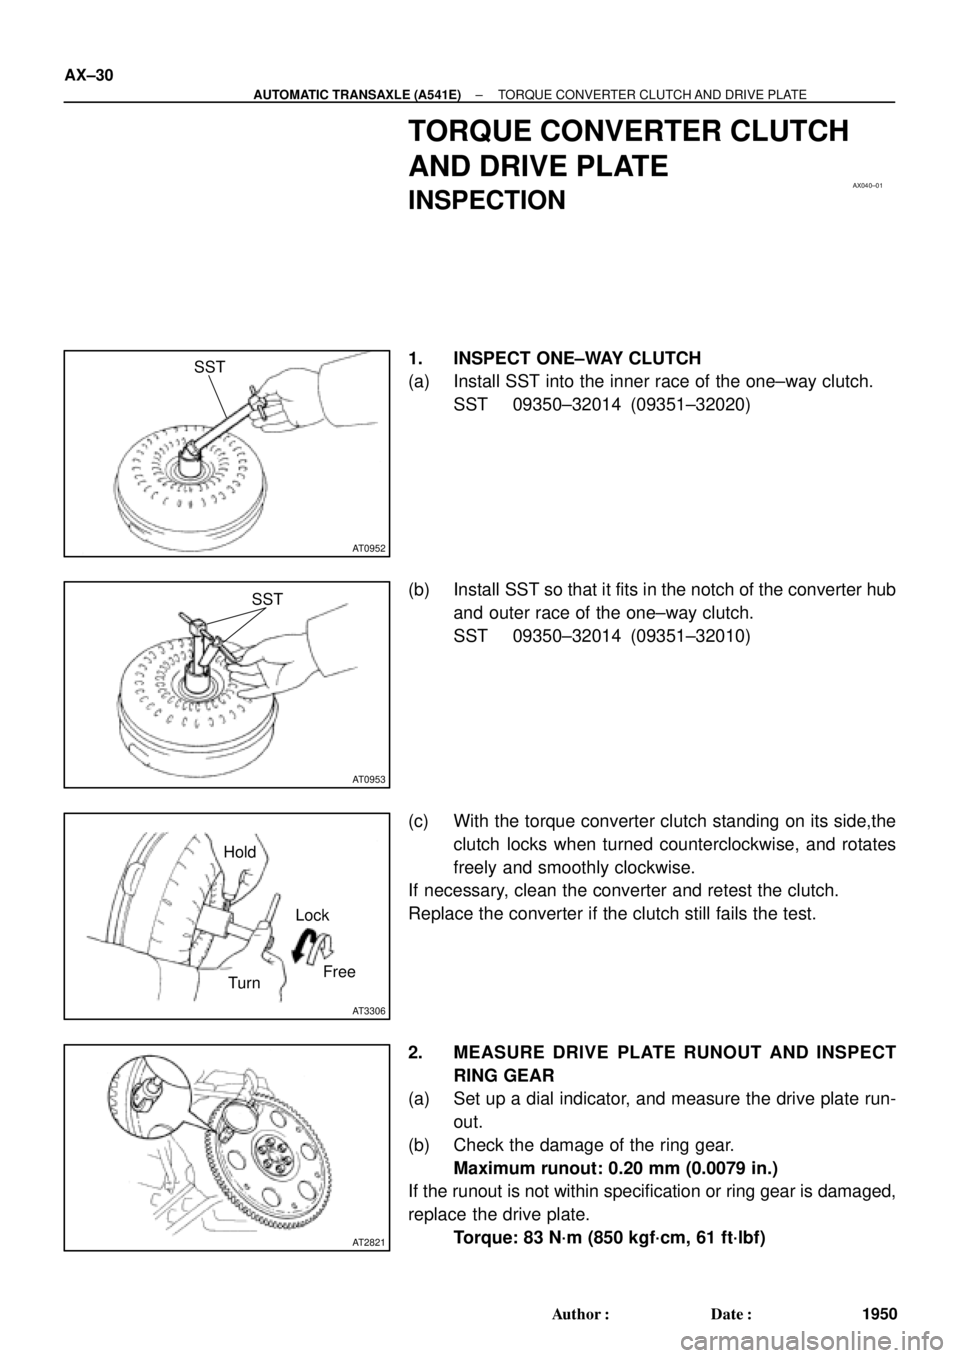
1. INSPECT ONE±WAY CLUTCH
(a) Install SST into the inner race of the one±way clutch.
SST 09350±32014 (09351±32020)
(b) Install SST so that it fits in the notch of the converter hub
and outer race of the one±way clutch.
SST 09350±32014 (09351±32010)
(c) With the torque converter clutch standing on its side,the
clutch locks when turned counterclockwise, and rotates
freely and smoothly clockwise.
If necessary, clean the converter and retest the clutch.
Replace the converter if the clutch still fails the test.
2. MEASURE DRIVE PLATE RUNOUT AND INSPECT
RING GEAR
(a) Set up a dial indicator, and measure the drive plate run-
out.
(b) Check the damage of the ring gear.
Maximum runout: 0.20 mm (0.0079 in.)
If the runout is not within specification or ring gear is damaged,
replace the drive plate.
Torque: 83 N´m (850 kgf´cm, 61 ft´lbf)
Page 174 of 4592

AUTOMATIC TRANSAXLEOPERATION ±
AX±4
1. FUNCTION OF COMPONENTS
FUNCTIONOPERATION
O/D Direct Clutch (C0)Connects overdrive sun gear and overdrive carrier
O/D Brake (B0)Prevents overdrive sun gear from turning either clockwise or
counterclockwise
O/D One±way Clutch (F0)When transmission is being driven by engine, connects overdrive sun
gear and overdrive carrier.
Front Clutch (C1)Connects input shaft and intermediate shaft
Rear Clutch (C2)Connects input shaft and front and rear planetary sun gears
No.1 Brake (B1)Prevents front and rear planetary sun gears from turning either clockwise
or counterclockwise
No.2 Brake (B2)Prevents outer race of F1 from turning either clockwise or counterclockwise, thus
previnting front and rear planetary sun gears from turning counterclockwise
No.3 Brake (B3)Prevents front planetary carrier from turning either clockwise or counterclockwise
No.1 One±way Clutch (F1)When B2 is operating prevents front and rear planetary sun gears from turning
counterclockwise
No.2 One±way Clutch (F2)Prevents front planetary carrier from turning counterclockwise
Page 219 of 4592
AUTOMATIC TRANSAXLEFRONT PLANETARY GEAR ±
AX±49
FRONT PLANETARY GEAR
COMPONENTS
ONE±WAY CLUTCH AND SUN GEAR
DISASSEMBLY
1. CHECK OPERATION OF ONE±WAY CLUTCH
Hold the sun gear and turn the hub. The hub should turn
freely clockwise and should lock counterclockwise.
2. REMOVE SECOND BRAKE HUB AND ONE±WAY
CLUTCH FRONT SUN GEAR
While turning the hub clockwise, remove the one±way
clutch from the sun gear.
AX0FE±02
AX0FF±02
Page 221 of 4592
AUTOMATIC TRANSAXLEFRONT PLANETARY GEAR ±
AX±51
4. INSTALL ONE±WAY CLUTCH AND SECOND BRAKE
HUB ON SUN GEAR
While turning the hub clockwise, slide the one±way clutch
onto the sun gear.
5. RECHECK OPERATION OF ONE±WAY CLUTCH
PLANETARY RING GEAR INSPECTION
1. INSPECT RING GEAR FLANGE BUSHING
Using a dial indicator, measure the inside diameter of the
flange bushing.
Standard inside diameter:
19.025 ± 19.050 mm (0.7490 ± 0.7500 in.)
If the inside diameter is greater than the maximum, re-
place the flange.
2. REMOVE RING GEAR FLANGE
(a) Using a screwdriver, remove the snap ring.
(b) Remove the flange from the ring gear.
3. INSTALL RING GEAR FLANGE
(a) Position the flange into the ring gear.
(b) Using a screwdriver, install the snap ring.
AX0FH±02
Page 225 of 4592
AUTOMATIC TRANSAXLEREAR PLANETARY GEAR ±
AX±55
REAR PLANETARY GEAR
COMPONENTS
ONE±WAY CLUTCH DISASSEMBLY
1. CHECK OPERATION OF ONE±WAY CLUTCH
Hold the outer race and turn the hub. The hub should turn
freely counterclockwise and should lock clockwise.
2. SEPARATE ONE±WAY CLUTCH AND PLANETARY
GEAR
3. REMOVE THRUST WASHERS
Remove the 2 thrust washers from both sides of the plan-
etary gear.
AX0FP±02
AX0FQ±02
Page 236 of 4592
AUTOMATIC TRANSAXLEOVERDRIVE UNIT ±
AX±66
COUNTER DRIVE GEAR DISASSEMBLY
1. CHECK OPERATION OF ONE±WAY CLUTCH
(a) While turning the overdrive gear clockwise, install the ov-
erdrive direct clutch into the one±way clutch.
(b) Hold the overdrive direct clutch and turn the intermediate
shaft. The shaft should turn freely clockwise and should
lock counterclockwise.
(c) Remove the overdrive direct clutch.
2. CHECK COUNTER DRIVE GEAR PRELOAD
(a) Hold the intermediate shaft in a vise with soft jaws.
(b) Using a tension gauge, measure the preload.
Preload (at starting):
9 ± 15 N (920 ± 1,530 gf, 2.0 ± 3.4 lbf)
HINT: Turn the counter drive gear right and left several
times before measuring the preload.
3. REMOVE RETAINING PLATE
(a) Remove the snap ring with a screwdriver.
(b) Remove the retaining plate.
4. REMOVE ONE±WAY CLUTCH AND OUTER RACE
AX0G2±02
Page 242 of 4592
AUTOMATIC TRANSAXLEOVERDRIVE UNIT ±
AX±72
12. INSTALL OVERDRIVE ONE±WAY CLUTCH INTO HUB
Be sure that the one±way clutch is installed in the correct
direction.
13. INSTALL RETAINING PLATE
(a) Place the retaining plate into the hub.
(b) Install the snap ring with a screwdriver.
14. CHECK OPERATION OF ONE±WAY CLUTCH
(a) While turning the overdrive gear clockwise, install the ov-
erdrive direct clutch into the one±way clutch.
(b) Hold the overdrive direct clutch and turn the intermediate
shaft. The shafts should turn freely clockwise and should
lock counterclockwise.
(c) Remove the overdrive direct clutch.