1998 PONTIAC BONNEVILLE oil
[x] Cancel search: oilPage 6 of 395
Vehicle Symbols
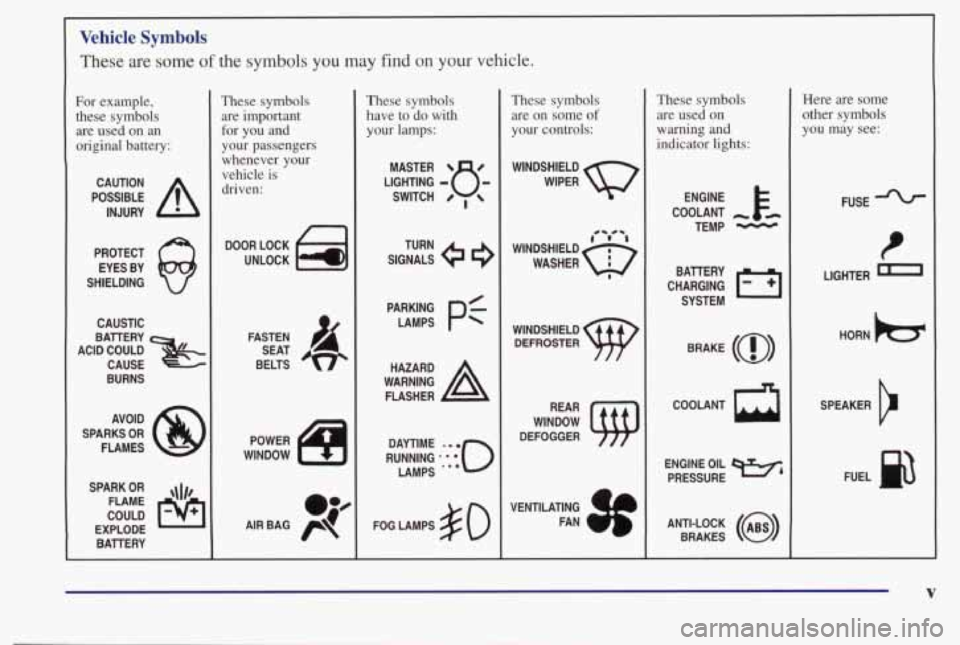
These are some of the symbols you may find on your vehicle.
For example,
these symbols are used on an
original battery:
POSSIBLE A
CAUTION
INJURY
PROTECT EYES BY
SHIELDING
Q
CAUSTIC
ACID COULD BAllERY
CAUSE -~~-. .
BURNS
AVOID
SPARKS
OR
FLAMES
SPARK
OR ,\I/,
COULD FLAME
EXPLODE BAllERY
I
These symbols are important
for you and
your passengers
whenever your
vehicle is
driven:
DOOR LOCK
UNLOCK
n
POWER
WINDOW
oJ4
AIR BAG p
These symbols
have to do with your lamps:
SIGNALS e3
TURN
FOG LAMPS
# 0
These symbols are on some
of
your controls:
WINDSHIELD
WIPER
WINDSHIELD
DEFROSTER
DEFOGGER
VENTILATING FAN
( rc?: A
These symbols are used on
warning
and
indicator lights:
COOLANT -
TEMP -
CHARGING I-1
BAllERY
SYSTEM
BRAKE
(a)
R
Here are some
other symbols
you may see:
FUSE
LIGHTER
n
HORN )b.
ENGINE OIL e,
PRESSURE
V
SPEAKER
b
FUEL
Page 80 of 395
Engine Coolant Heater (If Equipped)
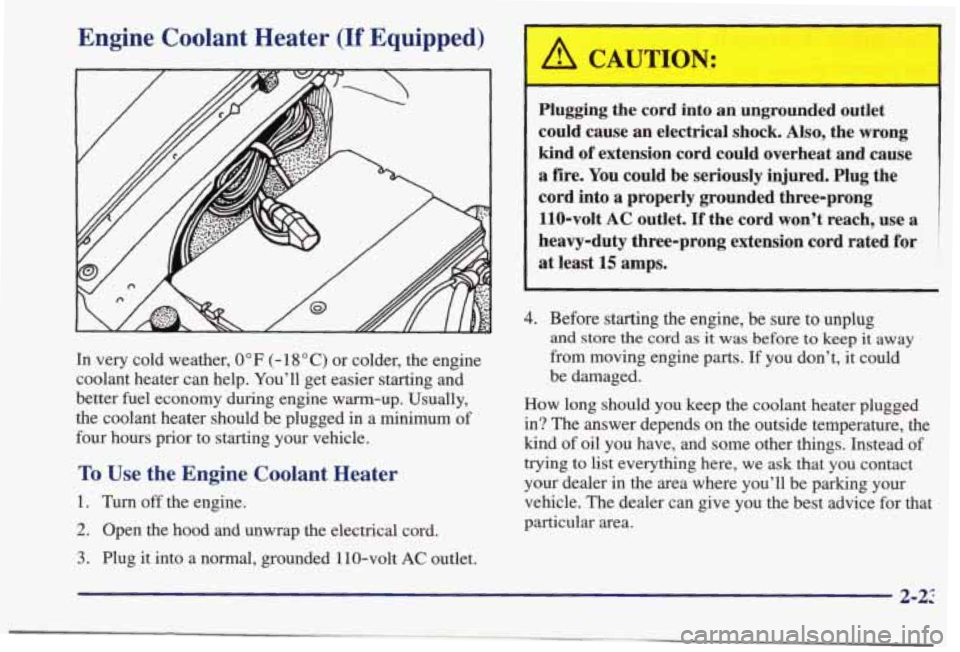
In very cold weather, 0” F (- 18 O C) or colder, the engine
coolant heater can help. You’ll get easier starting and
better fuel economy during engine warm-up. Usually,
the coolant heater should be plugged in a minimum of
four hours prior to starting your vehicle.
To Use the Engine Coolant Heater
1. Turn off the engine.
2. Open the hood and unwrap the electrical cord.
3. Plug it into a normal, grounded 1 10-volt AC outlet.
/1 CAUTION:
Plugging the cord into an ungrounded outlet
could cause
an electrical shock. Also, the wrong
kind of extension cord could overheat and cause
a fire. You could be seriously injured. Plug the
cord into a properly grounded three-prong
110-volt AC outlet.
If the cord won’t reach, use a
heavy-duty three-prong extension cord rated for at least
15 amps.
4. Before starting the engine, be sure to unplug
and store the cord as it was before to keep it away
from moving engine parts.
If you don’t, it could
be damaged.
How long should you keep the coolant heater plugged in? The answer depends
on the outside temperature, the
kind of oil you have, and some other things. Instead of
trying to list everything here, we ask that you contact
your dealer in the area where you’ll be parking your
vehicle. The dealer can give you the best advice for that
particular area.
2-22
Page 128 of 395
Oil Pressure Gage
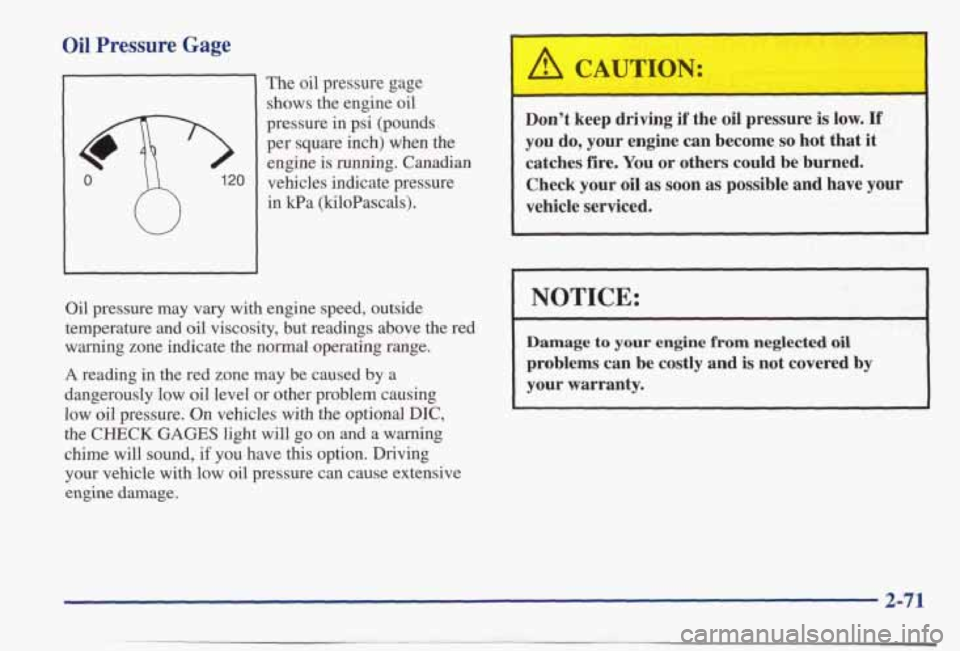
The oil pressure gage
shows the engine oil
pressure in psi (pounds
per square inch) when the
engine
is running. Canadian
vehicles indicate pressure
in kPa (kiloPascals).
Oil pressure may
vary with engine speed, outside
temperature and oil viscosity, but readings above the red
warning zone indicate the normal operating
range.
A reading in the red zone may be caused by a
dangerously low oil level or other problem causing
low oil pressure. On vehicles with the optional
DIC,
the CHECK GAGES light will go on and a warning
chime will sound, if you have this option. Driving
your vehicle with low oil pressure can cause extensive
engine damage.
I A CAUTION:
Don’t keep driving if the oil pressure is low* If
you do, your engine can become so hot that it
catches fire. You
or others could be burned.
Check your
oil as soon as possible and have your
vehicle serviced.
I NOTICE: I
Damage to your engine from neglected oil
problems can be costly and
is not covered by
your warranty.
2-71
. . ..
Page 129 of 395
Check Oil Level Warning Light
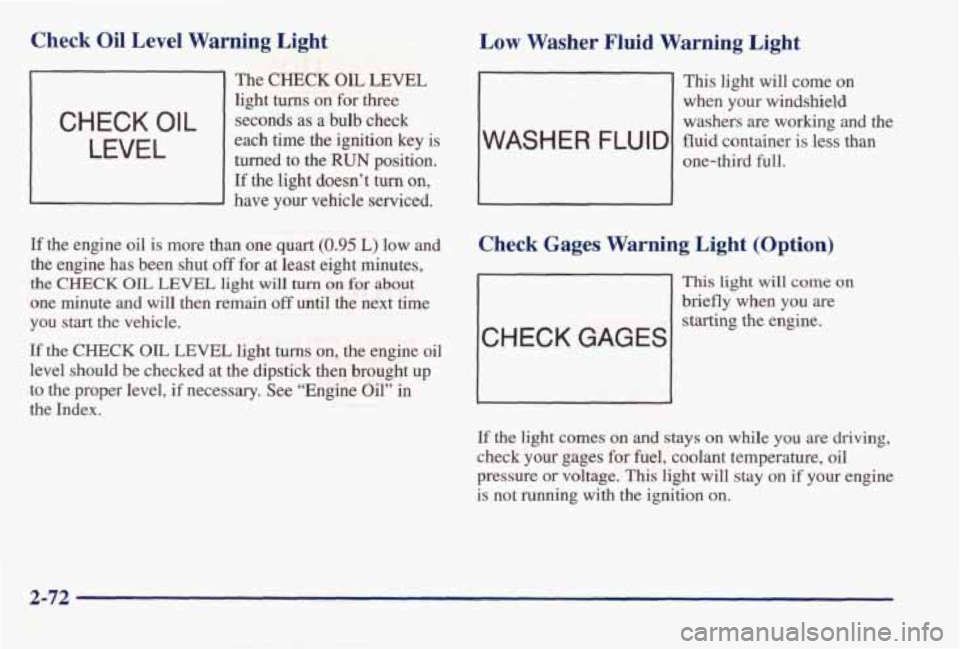
The CHECK OIL LEVEL
light turns on for three
each time the ignition key is turned to the
RUN position.
If the light doesn’t turn on,
- have your vehicle serviced.
C H EC K 0 I L seconds as a bulb check
LEVEL
If the engine oil is more than one quart (0.95 L) low and
the engine has been shut off for at least eight minutes,
the CHECK OIL LEVEL light will turn on for about
one minute and will then remain off until the next time
you start the vehicle.
If the CHECK OIL LEVEL light turns on, the engine oil
level should be checked at the dipstick then brought up
to the proper level, if necessary. See “Engine Oil” in
the Index.
Low Washer Fluid Warning Light
- This light will come on
when your windshield
washers are working
and the
one-third full.
WASH E R FLU I D fluid container is less than
Check Gages Warning Light (Option)
CHECK GAGES
This light will come on
briefly when you are
starting
the engine.
If
the light comes on and stays on while you are driving,
check your gages for fuel, coolant temperature, oil
pressure
or voltage. This light will stay on if your engine
is not running with the ignition
on.
2-72
Page 131 of 395
Boost Gage (Option) Head-Up Display (Option)
fXjST
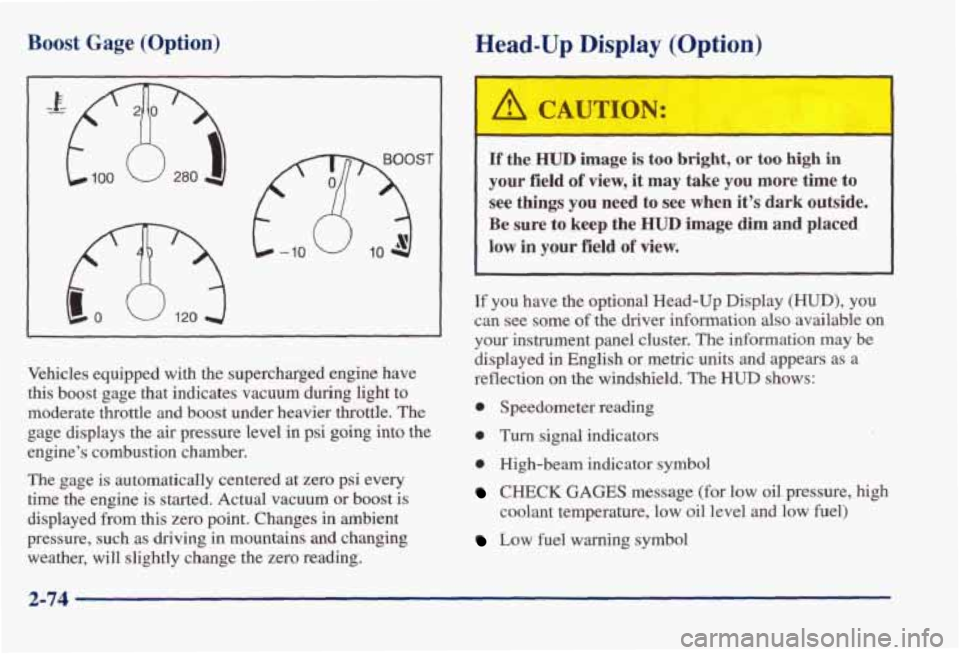
Vehicles equipped with the supercharged engine have
this boost gage that indicates vacuum during light
to
moderate throttle and boost under heavier throttle. The
gage displays the air pressure level in psi going into the
engine’s combustion chamber.
The gage is automatically centered at zero psi every
time the engine is started. Actual vacuum or boost
is
displayed from this zero point. Changes in ambient
pressure, such as driving in mountains
and changing
weather, will slightly change the zero reading.
If the HUD image is too bright, or too high in
your field of view, it may take you more time to
see things you need to see when it’s dark outside.
Be sure to keep the HUD image dim and placed
low in your field of view.
If you have the optional Head-Up Display (HUD), you
can see some
of the driver information also available on
your instrument panel cluster. The information
may be
displayed in English or metric units and appears as a
reflection on the windshield. The
HUD shows:
0 Speedometer reading
0 Turn signal indicators
0 High-beam indicator symbol
CHECK GAGES message (for low oil pressure, high
coolant temperature, low oil level and low fuel)
Low fuel warning symbol
2-74
Page 134 of 395
If you can’t see the HUD image when the ignition is on,
check to see if:
0 The headlamps are on.
0 The HUD unit is covered.
0 The HUD dimmer control is adjusted correctly.
0 The HUD image is adjusted to the proper height.
A fuse in the fuse panel may be blown. See “Fuses
and Circuit Breakers” in the Index.
If the HUD image is not clear, it could be too bright.
Move the HUD dimmer control further downward. You
may need to clean the windshield and
HUD lens.
Your windshield is part of the HUD system. If you ever
have to have a new
windshield, be sure to get one
designed for HUD. If you don’t, the HUD image may
look blurred
and out of focus.
Driver Information Center (Option)
DRIVER
CHECK OIL LEVEL
WABHER
FLUID
LOW COOLANT
CHECK WE8
HOOD DOOR
TRUNK
AJAR
MILES
888888
m
LAMP
MONITOR
HI BEAM HEAD
PARK
LAMP
TURN WONAL
BACK UP TAIL
BRAKE LAMP
TRIP
8 s 8 8.8
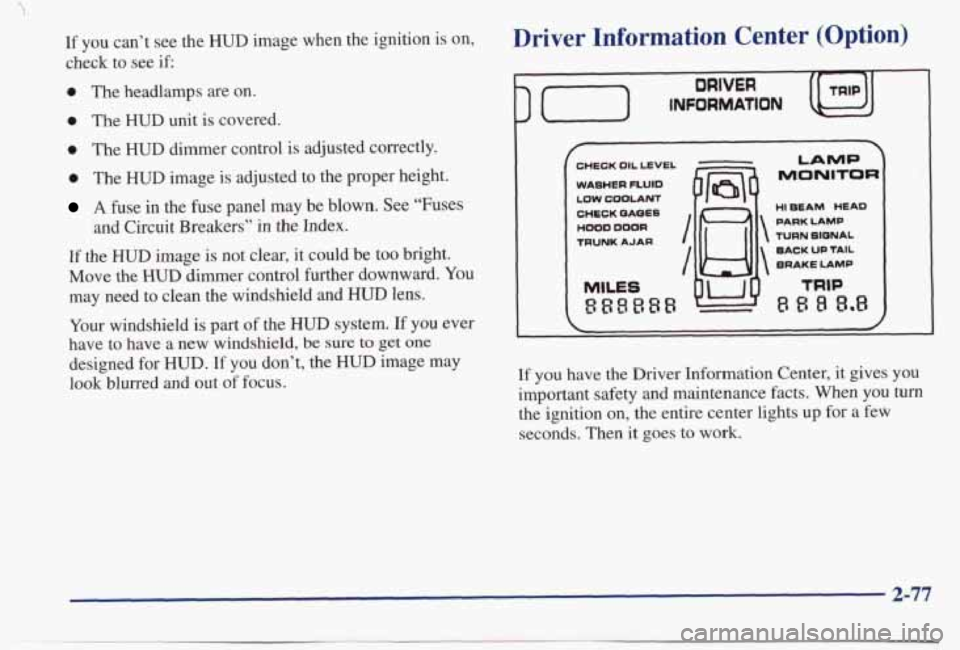
If you have the Driver Information Center, it gives you
important safety and maintenance facts.
When you turn
the ignition on, the entire center lights up for a few
seconds. Then it goes
to work.
2-77
Page 135 of 395
FUNCTION MONITOR: This lets you know if you are
low on fluids or have a problem with a vehicle function:
0
0
0
0
CHECK OIL LEVEL: This message could mean
your oil level
is low. If it comes on for more than
three seconds, see “Check Oil
Level Warning Light”
in the Index.
WASHER FLUID: This message means your
washer fluid
tank is less than about 30 percent full.
The windshield portion
of the vehicle outline will
also glow,
If these come on, see “Windshield Washer
Fluid” in the Index.
LOW COOLANT: This message means your
coolant level has fallen to about half full. If it comes
on,
see “Engine Coolant” in the Index.
CHECK GAGES: If this light comes on and stays
on while you are driving, check your gages for fuel,
coolant temperature, oil pressure or battery voltage.
SECURITY: You’ll get a DOOR AJAR message if a
door is not fully closed. The vehicle outline will show
you which door
it is. You will also get a HOOD AJAR
or TRUNK AJAR message if the hood or the trunk isn’t
fully closed. The vehicle outline will
also show you
these are ajar.
LAMP MONITOR: Whenever you try to use one of
the following lamps, the LAMP MONITOR will tell you
if a bulb is out.
0 Headlamp (Low and High Beam)
0 Turn Signal/Parking/Stop
0 Parking Lamp/Sidemarker
Brake Lamp and Center High-Mounted Stoplamp
0 Back-up Lamp
0 Taillamp~rn/Sidemarker/License
If a bulb is out, you will see a message, such as PARK
LAMP, and you will also see where the problem is on
the vehicle outline.
The message stays on until the
problem
is fixed. See “Replacement Bulbs” in the
Index for bulb details.
2-78
Page 170 of 395
When using a scrubbing action, non-abrasive cleaning cassette, it is normal for the cassette to eject because
your unit is equipped with a cut tape detection feature
and a cleaning cassette may appear as a broken tape.
To
prevent the cleaning cassette from being ejected, use the
following steps.
1.
2.
3.
4.
5.
Turn the ignition to RUN or ACCESSORY.
Turn the radio
off.
Press and hold the TAPEPLAY button for three
seconds. The tape symbol on the display will flash
for two seconds.
Insert the scrubbing action cleaning cassette while
the tape symbol is flashing.
Eject the cleaning cassette after the manufacturer’s
recommended cleaning time.
When the cleaning cassette has been ejected, the cut tape
detection feature is active again.
You may
also choose a non-scrubbing action, wet-type
cleaner which uses a cassette with a fabric belt to clean
the tape head.
This type of cleaning cassette will not
eject on
its own. A non-scrubbing action cleaner may
not clean as thoroughly
as the scrubbing type cleaner.
The use of a non-scrubbing action, dry-type cleaning
cassette is not recommended. After you clean
the player, press and hold
EJECT for
five seconds to reset the CLN indicator. The radio will
display
--- to show the indicator was reset.
Cassettes are subject to wear and the sound quality may
degrade over time. Always make sure the cassette tape is
in good condition before you have your tape
player serviced.
Care of Your Compact Discs
Handle discs carefully. Store them in their original cases
or other protective cases and away from direct sunlight and dust.
If the surface of a disc is soiled, dampen a
clean, soft cloth in a mild, neutral detergent solution
and
clean it, wiping from the center to the edge.
Be sure never to touch
the signal surface when handling
discs. Pick up discs by grasping the outer edges or the
edge of the hole and the outer edge.
Care of Your Compact Disc Player
The use of CD lens cleaner discs is not advised, due to
the
risk of contaminating the lens of the CD optics with
lubricants internal to the CD mechanism.
3-29