1998 PONTIAC BONNEVILLE height
[x] Cancel search: heightPage 19 of 395
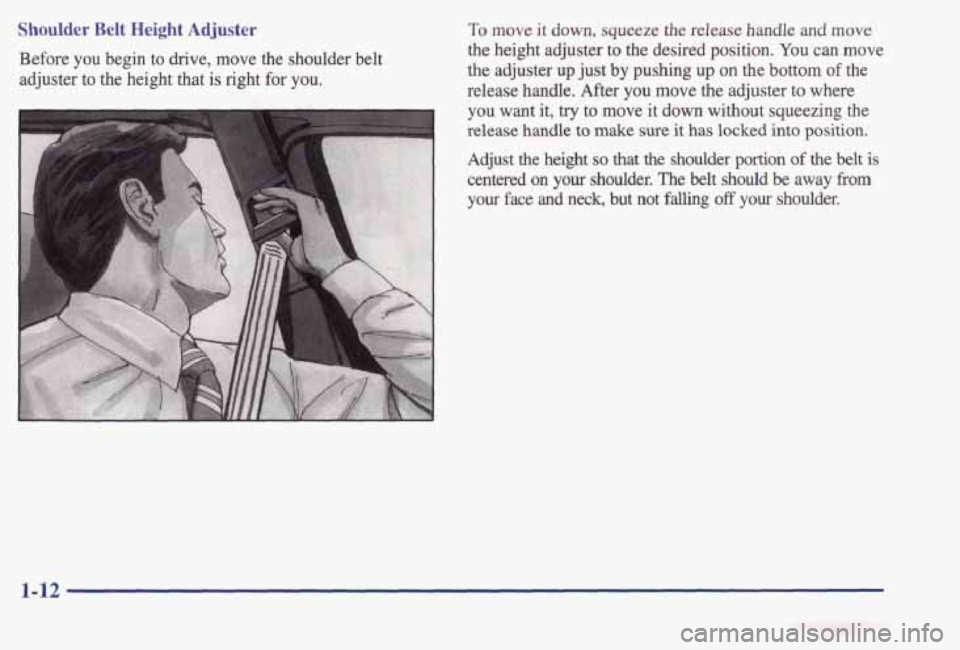
Shoulder Belt Height Adjuster
Before you begin to drive, move the shoulder belt
adjuster to the height that is right
for you.
To move it down, squeeze the release handle and move
the height adjuster to the desired position. You can move
the adjuster up just
by pushing up on the bottom of the
release handle. After you move the adjuster to where
you
want it, try to move it down without squeezing the
release handle to make sure it has locked into position.
Adjust the height so that the shoulder portion of the belt is
centered on your shoulder. The belt should be away from
your face and neck, but not falling off your shoulder.
1-12
Page 43 of 395
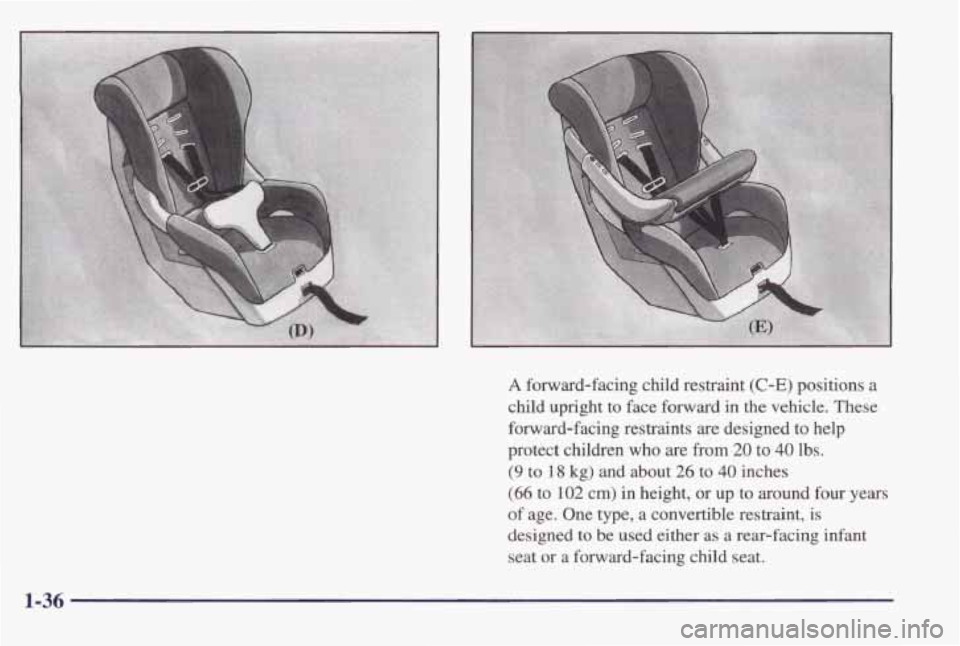
A forward-facing child restraint (C-E) positions a
child upright to face forward in the vehicle. These
forward-facing restraints
are designed to help
protect children
who are from 20 to 40 lbs.
(9 to 18 kg) and about 26 to 40 inches
(66 to 102 cm) in height, or up to around four years
of age. One
type, a convertible restraint, is
designed
to be used either as a rear-facing infant
seat or a forward-facing child seat.
1-36
Page 133 of 395
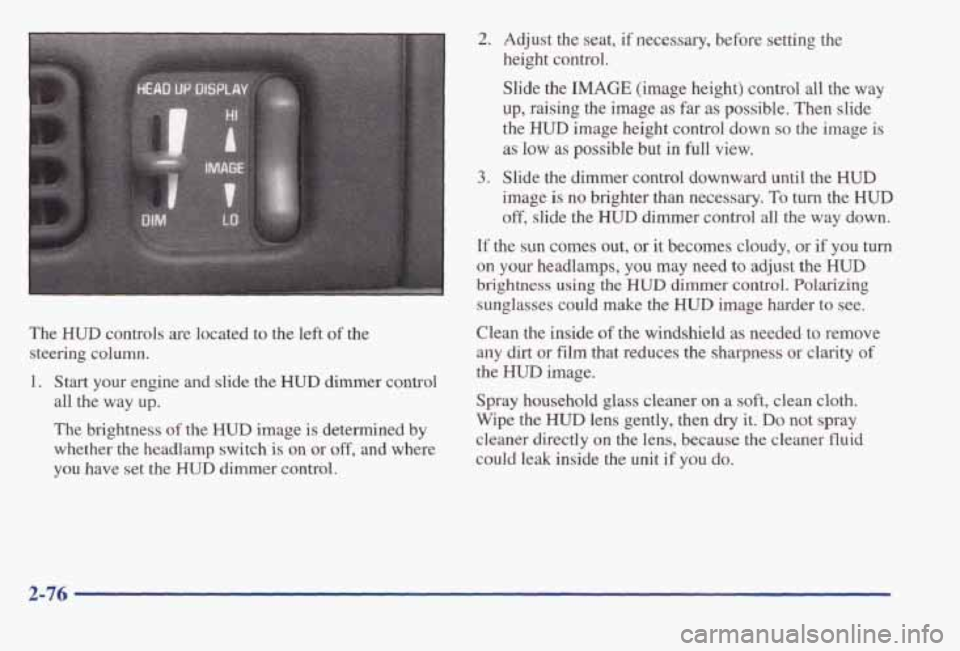
The HUD controls are located to the left of the
steering column. 1. Start your engine and slide the
HUD dimmer control
all the way up.
The brightness
of the HUD image is determined by
whether
the headlamp switch is on or off, and where
you have set the
HUD dimmer control.
2. Adjust the seat, if necessary, before setting the
height control.
Slide the
IMAGE (image height) control all the way
up, raising the image as far as possible. Then slide
the
HUD image height control down so the image is
as low as possible but in full view.
image
is no brighter than necessary. To turn the HUD
off, slide the HUD dimmer control all the way down.
If the sun comes out, or it becomes cloudy, or if you turn
on your headlamps, you may need to adjust the HUD
brightness using the HUD dimmer control. Polarizing
sunglasses could make the
HUD image harder to see.
Clean the inside
of the windshield as needed to remove
any dirt or film that reduces the sharpness or clarity of
the
HUD image.
Spray household
glass cleaner on a soft, clean cloth.
Wipe the
HUD lens gently, then dry it. Do not spray
cleaner directly on the lens, because
the cleaner fluid
could leak inside the
unit if you do.
3. Slide the dimmer control downward until the HUD
2-76
Page 134 of 395
If you can’t see the HUD image when the ignition is on,
check to see if:
0 The headlamps are on.
0 The HUD unit is covered.
0 The HUD dimmer control is adjusted correctly.
0 The HUD image is adjusted to the proper height.
A fuse in the fuse panel may be blown. See “Fuses
and Circuit Breakers” in the Index.
If the HUD image is not clear, it could be too bright.
Move the HUD dimmer control further downward. You
may need to clean the windshield and
HUD lens.
Your windshield is part of the HUD system. If you ever
have to have a new
windshield, be sure to get one
designed for HUD. If you don’t, the HUD image may
look blurred
and out of focus.
Driver Information Center (Option)
DRIVER
CHECK OIL LEVEL
WABHER
FLUID
LOW COOLANT
CHECK WE8
HOOD DOOR
TRUNK
AJAR
MILES
888888
m
LAMP
MONITOR
HI BEAM HEAD
PARK
LAMP
TURN WONAL
BACK UP TAIL
BRAKE LAMP
TRIP
8 s 8 8.8
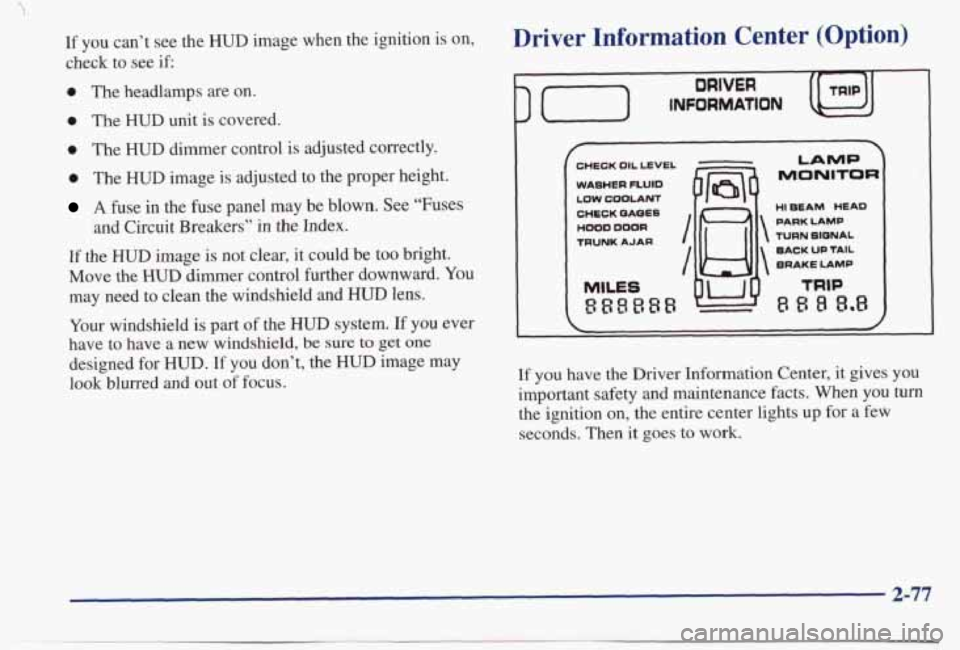
If you have the Driver Information Center, it gives you
important safety and maintenance facts.
When you turn
the ignition on, the entire center lights up for a few
seconds. Then it goes
to work.
2-77
Page 282 of 395
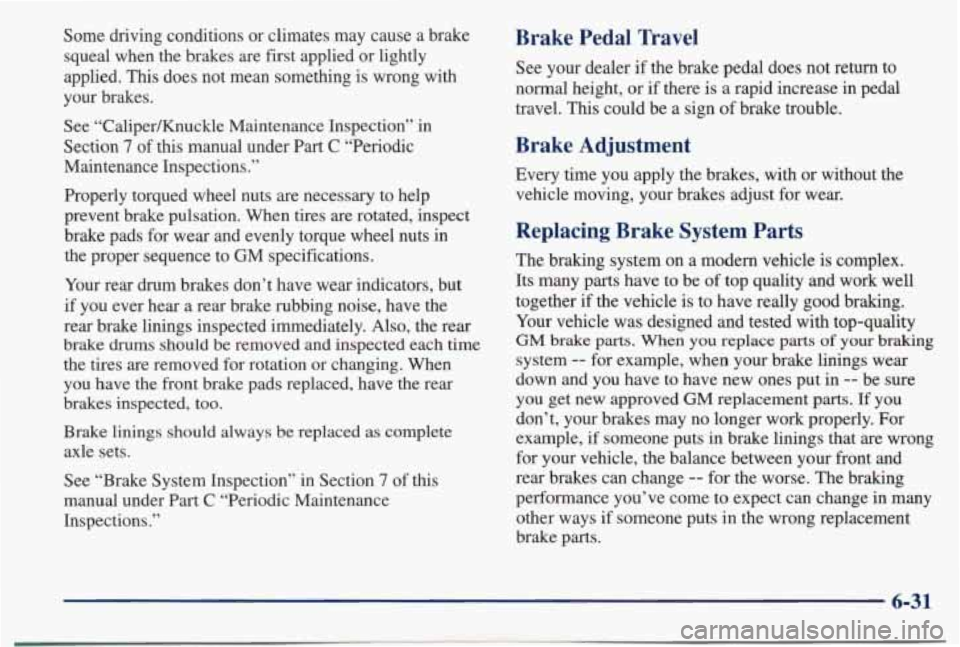
Some driving conditions or climates may cause a brake
squeal when the brakes are first applied or lightly
applied.
This does not mean something is wrong with
your brakes.
See “CaliperKnuckle Maintenance Inspection” in
Section
7 of this manual under Part C “Periodic
Maintenance Inspections.”
Properly torqued wheel nuts are necessary to help
prevent brake pulsation. When tires are rotated, inspect brake pads for wear and evenly torque wheel nuts in
the proper sequence to
GM specifications.
Your rear drum brakes don’t have wear indicators, but
if you ever hear a rear brake rubbing noise, have the
rear brake linings inspected immediately. Also, the rear
brake drums should be removed
and inspected each time
the tires are removed for rotation or changing. When
you have the front brake pads replaced, have the rear
brakes inspected, too.
Brake
linings should always be replaced as complete
axle sets.
See “Brake System Inspection” in Section
7 of this
manual under Part C “Periodic Maintenance
Inspections.”
Brake Pedal Travel
See your dealer if the brake pedal does not return to
normal height, or if there is
a rapid increase in pedal
travel.
This could be a sign of brake trouble.
Brake Adjustment
Every time you apply the brakes, with or without the
vehicle moving, your brakes adjust for wear.
Replacing Brake System Parts
The braking system on a modern vehicle is complex.
Its many parts have to be
of top quality and work well
together if the vehicle is to have really good braking. Your vehicle was designed and tested with top-quality
GM brake parts. When you replace parts of your braking
system -- for example, when your brake linings wear
down and you have to have new ones put
in -- be sure
you get new approved
GM replacement parts. If you
don’t, your brakes may no longer work properly. For example,
if someone puts in brake linings that are wrong
for your vehicle, the balance between your front and
rear brakes can change
-- for the worse. The braking
performance you’ve come to expect can change in many
other ways if someone puts in the wrong replacement
brake parts.
6-31
Page 299 of 395
NOTICE:
The wrong wheel can also cause problems with
bearing life, brake cooling, speedometer or
odometer calibration, headlamp aim, bumper
height, vehicle ground clearance and tire or tire
chain clearance to the body and chassis.
See “Changing a Flat Tire” in the Index for more
information.
Used Replacement Wheels
I
A CAUTION:
Putting a used wheel on your vehicle is
dangerous. You can’t know how it’s been used or
how far it’s been driven. It could fail suddenly
and cause an accident.
If you have to replace a
wheel, use a new GM original equipment wheel.
Tire Chains
I
NOTICE:
Use tire chains only where legal and only when
you must. Use only
SAE Class “S” type chains
that are the proper size for your tires. Install
them on the front tires and tighten them as
tightly
as possible with the ends securely
fastened. Drive slowly and follow the chain
manufacturer’s instructions.
If you can hear the
chains contacting your vehicle, stop and retighten
them.
If the contact continues, slow down until it
stops. Driving too fast or spinning the wheels
with chains on will damage your vehicle.
6-48
Page 317 of 395
Engine Specifications
VIN Engine Code . . ................... K
Type ............ ~ ................ V6
Displacement
.................... 3.8 Liters
Horsepower
...................... .205-hp
Firing Order
...................... 1-6-5-4-3-2
3800 Series I1 Engine (L36)
Thermostat Temperature ........... 195°F (91°C)
Normal Maintenance
Replacement
Parts
Engine Oil Filter ................ AC Type PF-47
Transaxle Filter
............ GM Part No. 865 1909
Spark Plugs
................. AC Type 41-921
Air Cleaner Filter
............. AC Type A-1096C
Gap: 0.060 inch (1.52 mm)
Windshield Wiper Blades
npe
.................
Length .................
.............. Pin
. . 22 inches (56 cm)
3800 Series I1 Supercharged Engine (L67) Vehicle Dimensions
VIN Engine Code 1 .............. Wheelbase 110.8 inches (28 1.4 cm)
Tread Width ...........................
5pe .............. .................. V6
Front ........... . . 60.4 inches (153.4 cm)
Displacement
........................ 3.8 Liters
Horsepower
........................ .240-hp
Thermostat Temperature
........... 195°F (91°C)
Firing Order ...................... 1-6-5-4-3-2 Rear
................... 60.3 inches (1 53.2 cm)
Length
................. 201.9 inches (512.8 cm)
Width
................... 74.6 inches (189.5 cm)
Height
................... 55.7 inches (141.5 cm)
6-66
Page 382 of 395
Reverse. Automatic Transaxle ..................... 2-25
Right Front Passenger Position
.................... 1 . 18
Roadside Assistance
.............................. 8-6
Roadside Assistance. Canadian ..................... 8-7
Rocking
Your Vehicle ........................... 5-38
Rotation. Tires
.............. ....... . . 6-43
safety Belt Extender
.... ................... 1-49
Safety Belts
.................................... 1-5
Adults
...................................... 1-10
Care
....................................... 6-51
Center Passenger Position
...................... 1-24
Children
.................................... 1-31
DriverPosition
............................... 1-10
Extender
.................................... 1-49
How to Wear Properly
......................... 1-10
Incorrect Usage
.................... 1.13.1.47. 1.48
LapBelt
.................................... 1-24
Lap-Shoulder
........................... 1.10. 1.26
Larger Children
.............................. 1-46
Questions and Answers
......................... 1-9
Rear
Comfort Guides .......................... 1-29
Rear Seat Outside Passenger Positions
............ 1-26
Rear Seat Passengers
.......................... 1-26
Reminder Light
.......................... 1.6. 2.63
Replacing After a Crash
........................ 1-49
Right Front Passenger Position
.................. 1 . 18
Shoulder Belt Height Adjuster
................... 1-12
Smaller Children and Babies
.................... 1-3 1
Use During Pregnancy ......................... 1 . 17
Warning Light
........................... 1.6. 2.63
WhyTheyWork
............................... 1-6
SafetyChains
.................................. 4-35 Safety Defects. Reporting
........................ 8-10
Safety Warnings and Symbols ....................... m
Scheduled Maintenance Services .................... 7-4
Seatback Reclining Front
.......................... 1-3
Seats Adjustable Support
............................. 1-3
Lumbar Control
............................... 1-3
ManualFront
................................. 1-2
Power ....................................... 1-2
Restraint Systems
.............................. 1-1
Seat Controls ................................. 1-2
Securing a Child Restraint
...................... 1-40
Second Gear. Automatic Transaxle
................. 2-27
SecurityFeedback
.............................. 2-12
Security Messages
.............................. 2-78
Security System
..... ...................... 2-18
Service
........................................ 6-2
Bulletins. Ordering
............................ 8-13
Manuals. Ordering ............................ 8-13
Parts Identification Label ....................... 6-57
Publications. Ordering
......................... 8-13
Work. Doing
Your Own ......................... 6-2
Service and Appearance Care
...................... 6-1
Service and Owner Publications
................... 8-12
Servicehblications
............................. 8-12
Servicing Your
Air Bag-Equipped Vehicle ........... 1-24
SheetMetalDamage
............................ 6-54
Shift Lever
............................... 2-29. 2-31
Shifting
Automatic Transaxle
.......................... 2-24
Into PARK (P) ............................... 2-29
Performance ................................. 2-27
...
Out of PARK (P) ............................. 2-32
9-9