1998 PONTIAC BONNEVILLE tow
[x] Cancel search: towPage 29 of 395

When should an air bag inflate?
An air bag is designed to inflate in a moderate to severe
frontal or near-frontal crash. The
air bag will inflate
only if the impact speed is above the system’s designed
“threshold level.”
If your vehicle goes straight into a
wall that doesn’t move or deform, the threshold level
is
about 9 to 15 mph (14 to 24 km/h). The threshold level
can vary, however, with specific vehicle design,
so that
it can be somewhat above or below
this range. If your
vehicle strikes something that will move or deform, such
as a parked car, the threshold level will be higher. The
air bag is not designed to inflate in rollovers, side
impacts or rear impacts, because inflation would not
help the occupant.
In any particular crash, no one can say whether
an air
bag
should have inflated simply because of the damage
to a vehicle or because of
what the repair costs were.
Inflation is determined
by the angle of the impact and
how quickly the vehicle slows down in frontal
or
near-frontal impacts.
What makes an air bag inflate?
In an impact of suEcient severity, the air bag sensing
system detects that the vehicle is in a crash. The sensing
system triggers a release
of gas from the inflator, which
inflates the
air bag. The inflator, air bag and related
hardware are all part of the
air bag modules inside the steering wheel and
in the instrument panel in front
of the
right front passenger.
How does an air bag restrain?
In moderate to severe frontal or near-frontal collisions,
even belted occupants can contact the steering wheel or
the instrument panel.
Air bags supplement the protection
provided by safety belts.
Air bags distribute the force of
the impact more evenly over the occupant’s upper body,
stopping the occupant more gradually. But air bags
would not help you
in many types of collisions,
including rollovers,
rear impacts and side impacts,
primarily because an occupant’s motion is not toward
those air bags. Air bags should never be regarded as
anything more than a supplement to safety belts, and
then only in moderate to severe frontal or near-frontal
collisions.
What will you see after an air bag inflates?
After an air bag inflates, it quickly deflates, so quickly
that some people may not
even realize the air bag
inflated. Some components of the air bag module -- the
steering wheel hub for the driver’s air bag, or the
instrument panel for the right front passenger’s
bag
-- will be hot for a short time. The parts of the
bag that come into contact with you may be warm,
but not too hot to touch. There will be some smoke
and dust coming from vents in the deflated
air bags.
1-22
Page 31 of 395
If your vehicle ever gets into a lot of water -- such as
water up to the carpeting or higher
-- or if water enters
your vehicle and soaks the carpet, the air bag controller
can be soaked and ruined. If this ever happens, and then
you
start your vehicle, the damage could make the air
bags inflate, even if there’s no crash. You would have to
replace the air bags
as well as the sensors and related
parts.
If your vehicle is ever in a flood, or if it’s exposed
to water that
soaks the carpet, you can avoid needless
repair costs by turning
off the vehicle immediately.
Don’t let anyone start the vehicle, even to tow it, unless
the battery cables are first disconnected.
Servicing Your Air Bag-Equipped Vehicle
Air bags affect how your vehicle should be serviced.
There are
parts of the air bag system in several places
around your vehicle. You don’t want the system to
inflate while someone
is working on your vehicle. Your
dealer and the Bonneville Service Manual have
information about servicing
your vehicle and the air bag
system.
To purchase a service manual, see “Service and
Owner Publications” in the Index.
I
For up to 10 minutes after the ignition key is
turned
off and the battery is disconnected, an air
bag can still inflate during improper service. You
can be injured
if you are close to an air bag when
it inflates. Avoid yellow connectors. They are
probably part
of the air bag system. Be sure to
follow proper service procedures, and make sure
the person performing work for you
is qualified
to do so.
The air bag system does not need regular maintenance.
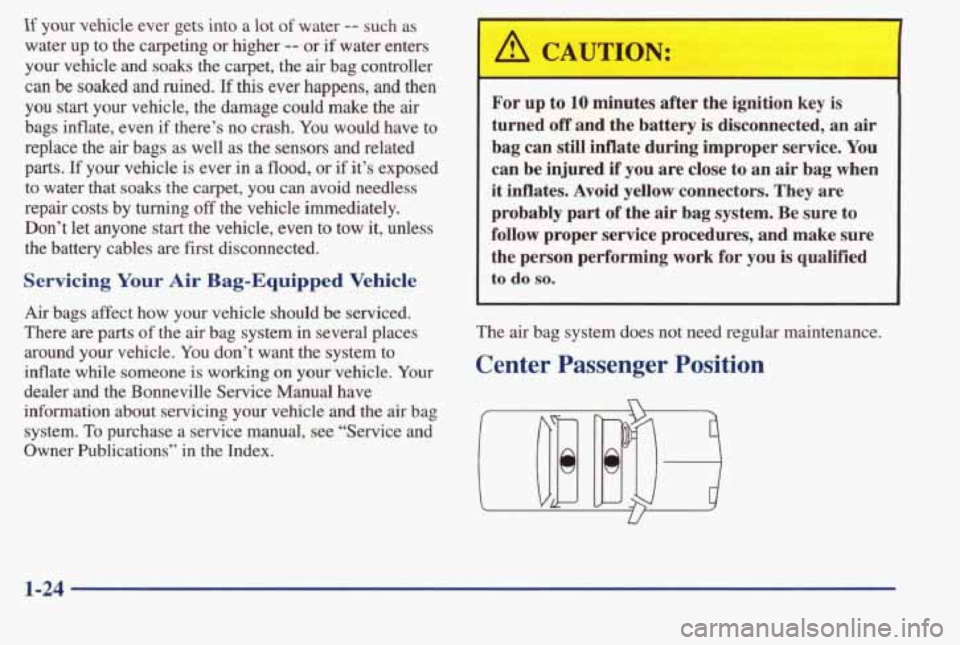
Center Passenger Position
1-24
Page 41 of 395

Child Restraints
Every time infants and young children ride in
vehicles, they should have protection provided by
appropriate restraints.
@ What are the different types of add-on
child restraints?
A: Add-on child restraints are available in four basic
types. When selecting a child restraint, take into
consideration not only the child’s weight and size,
but
also whether or not the restraint will be
compatible with the motor vehicle in which it will
be
used.
An infant car bed (A) is a special bed made for use
in a motor vehicle. It’s an infant restraint system
designed to restrain or position a child on a
continuous flat surface. With an infant car bed,
make sure that the infant’s head rests toward the
center of the vehicle.
1-34
Page 54 of 395

Accident statistics show that children are safer if they
are restrained in the rear seat. But they need to use the
safety belts properly.
Children who aren’t buckled up can be thrown out in
Children who aren’t buckled up can strike other
a
crash.
people who are.
Never do this.
Here two children are wearing the same belt. The
belt can’t properly spread the impact forces. In a
crash, the two children can be crushed together
and seriously injured.
A belt must be used by
only one person at a time.
&.’ What if a child is wearing a lap-shoulder belt,
but the child is
so small that the shoulder belt is
very close to the child’s face or neck?
A: Move the child toward the center of the vehicle, but
be sure that the shoulder belt still is on the child’s
shoulder,
so that in a crash the child’s upper body
would have the restraint that belts provide.
If the
child is sitting in a rear seat outside position, see
“Rear Safety Belt
Comfort Guides” in the Index. If
the child is so small that the shoulder belt is still
very close to the child’s face or neck, you might
want to place the child
in the center seat position,
the one that has only a lap belt.
1-47
Page 61 of 395
Door Locks
A CAUTION:
~
I
Unlocked doors can be dangerous. Passengers
-- especially children -- can easily
open the doors and fall out. When
a door is
locked, the inside handle won’t open it.
Outsiders can easily enter through an unlocked
door when you slow down or stop your vehicle.
This may not be
so obvious: You increase the
chance of being thrown out of the vehicle in a
crash if the doors aren’t locked. Wear safety belts
properly, lock your doors, and you will be far
better
off whenever you drive your vehicle.
mere are several ways to lock and unlock your vehicle. From the outside,
use your door key
or remote keyless
entry transmitter,
if your vehicle has this option. With
your door key, turning the key toward the rear of the
vehicle will lock the door and turning the key toward the
front of the vehicle will unlock
it.
If your vehicle has a theft-deterrent system and it is
activated, unlock the doors only with the key or
remote keyless entry system.
This will avoid setting
off the alarm.
To lock the door from the
inside, slide the locking
lever rearward. To unlock
the door, slide the locking
lever forward.
2-4
Page 76 of 395
See your dealer or a locksmith who can service the
PASS-Key
I1 to have a new key made.
If you’re ever driving and the SECURITY light comes
on and remains on, you will be able to restart your
engine if you turn it off. Your PASS-Key
I1 system,
however, is not working properly and must be serviced by your dealer. Your vehicle is not protected by the
PASS-Key I1 system.
If you lose or damage a PASS-Key I1 ignition key,
see your dealer
or a locksmith who can service
PASS-Key
11 to have a new key made. In an
emergency, call the Pontiac Roadside Assistance Center
at
1 -800-ROADSIDJ or 1-800-762-3743.
In Canada, call 1-800-268-6800.
New Vehicle “Break-In”
NOTICE:
Your vehicle doesn’t need an elaborate
“break-in.” But it will perform better in the
long run
if you follow these guidelines:
0
0
0
Don’t drive at any one speed -- fast or
slow
-- for the first 500 miles (805 km).
Don’t make full-throttle starts.
Avoid making hard stops for the first
200 miles (322 km) or so. During this time
your new brake linings aren’t yet broken
in. Hard stops with new linings can mean
premature wear and earlier replacement.
Follow this breaking-in guideline every
time you get new brake linings.
Don’t tow a trailer during break-in.
See “Towing
a Trailer’’ in the Index for
more information.
2-19
Page 77 of 395
Ignition Positions
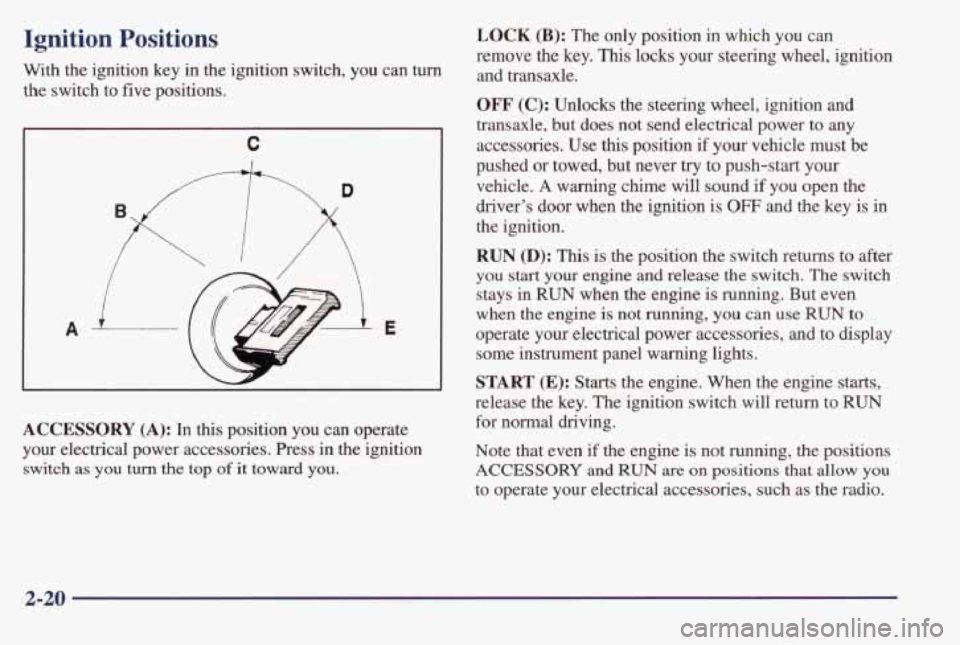
With the ignition key in the ignition switch, you can turn
the switch to five positions.
C
A E
ACCESSORY (A): In this position you can operate
your electrical power accessories. Press
in the ignition
switch as you turn the top of it toward you.
LOCK (B): The only position in which you can
remove the key.
This locks your steering wheel, ignition
and transaxle.
OFF' (C): Unlocks the steering wheel, ignition and
transaxle, but does not send electrical power to any
accessories. Use
this position if your vehicle must be
pushed or towed, but never
try to push-start your
vehicle.
A warning chime will sound if you open the
driver's door when the ignition is
OFF and the key is in
the ignition.
RUN @): This is the position the switch returns to after
you start your engine and release the switch. The switch
stays in
RUN when the engine is running. But even
when the engine is not running,
you can use RUN to
operate your electrical power accessories, and to display
some instrument panel warning lights.
START (E): Starts the engine. When the engine starts,
release the key. The ignition switch will return to
RUN
for normal driving.
Note that even if
the engine is not running, the positions
ACCESSORY and RUN are on positions that allow you
to operate your electrical accessories, such as the radio.
2-20
Page 79 of 395
Starting Your V6 Engine
1. Without pushing the accelerator pedal, turn your
ignition
key to START. When the engine starts, let
go
of the key. The idle speed will go down as your
engine gets
warm.
NOTICE:
Holding your key in START for longer than 15
seconds at a time will cause your battery to be
drained much sooner. And the excessive heat
can
damage your starter motor.
2. If it doesn’t start right away, hold your key in
START for about three to five seconds at a time until
your engine starts. Wait about 15 seconds between
each try to help avoid draining your battery or
damaging your starter.
3. If your engine still won’t start (or starts but then stops),
it could
be flooded with too much gasoline. Try
pushing your accelerator pedal all the way to the floor
and holding it there as you hold the key in START for
about
three seconds. If the vehicle starts briefly but
then stops again, do the same
thing, but this time keep
the
pedal down for five or six seconds. This clears the
extra gasoline
from the engine. After waiting about
15 seconds,
repeat the normal starting procedure.
I NOTICE:
I
Your engine is designed to work with the
electronics in your vehicle.
If you add electrical
parts or accessories, you could change the way
the engine operates. Before adding electrical
equipment, check with your dealer.
If you don’t,
your engine might not perform properly.
If you ever have to have your vehicle towed, see
the part
of this manual that tells how to do it
without damaging your vehicle. See “T~wing
Your Vehicle” in the Index.
2-22