1998 NISSAN PICK-UP engine
[x] Cancel search: enginePage 1226 of 1659
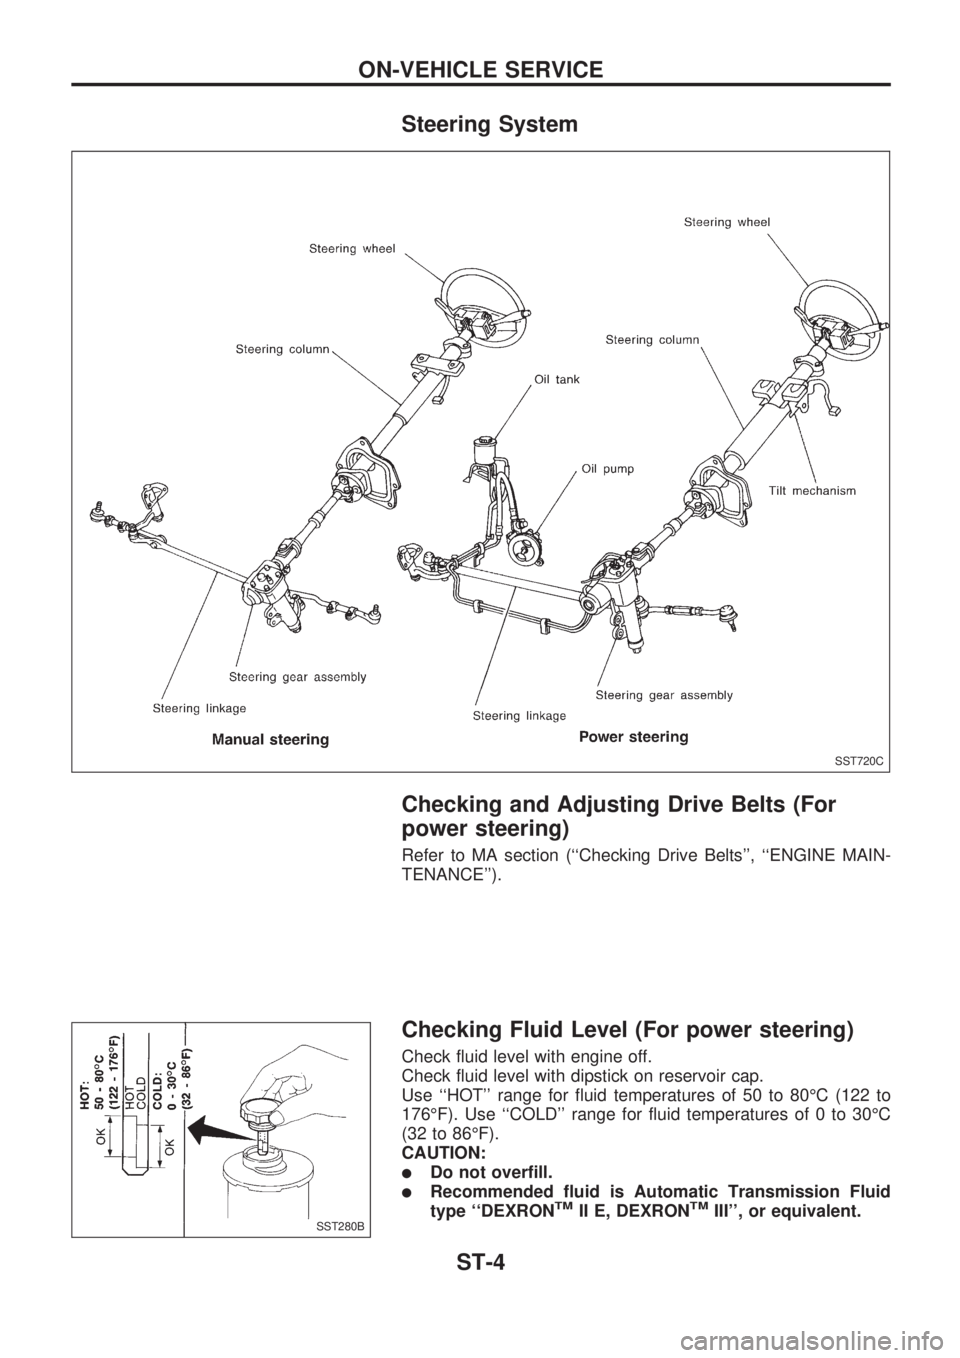
Steering System
Checking and Adjusting Drive Belts (For
power steering)
Refer to MA section (``Checking Drive Belts'', ``ENGINE MAIN-
TENANCE'').
Checking Fluid Level (For power steering)
Check fluid level with engine off.
Check fluid level with dipstick on reservoir cap.
Use ``HOT'' range for fluid temperatures of 50 to 80ÉC (122 to
176ÉF). Use ``COLD'' range for fluid temperatures of 0 to 30ÉC
(32 to 86ÉF).
CAUTION:
lDo not overfill.
lRecommended fluid is Automatic Transmission Fluid
type ``DEXRONTMII E, DEXRONTMIII'', or equivalent.
SST720C
SST280B
ON-VEHICLE SERVICE
ST-4
Page 1227 of 1659
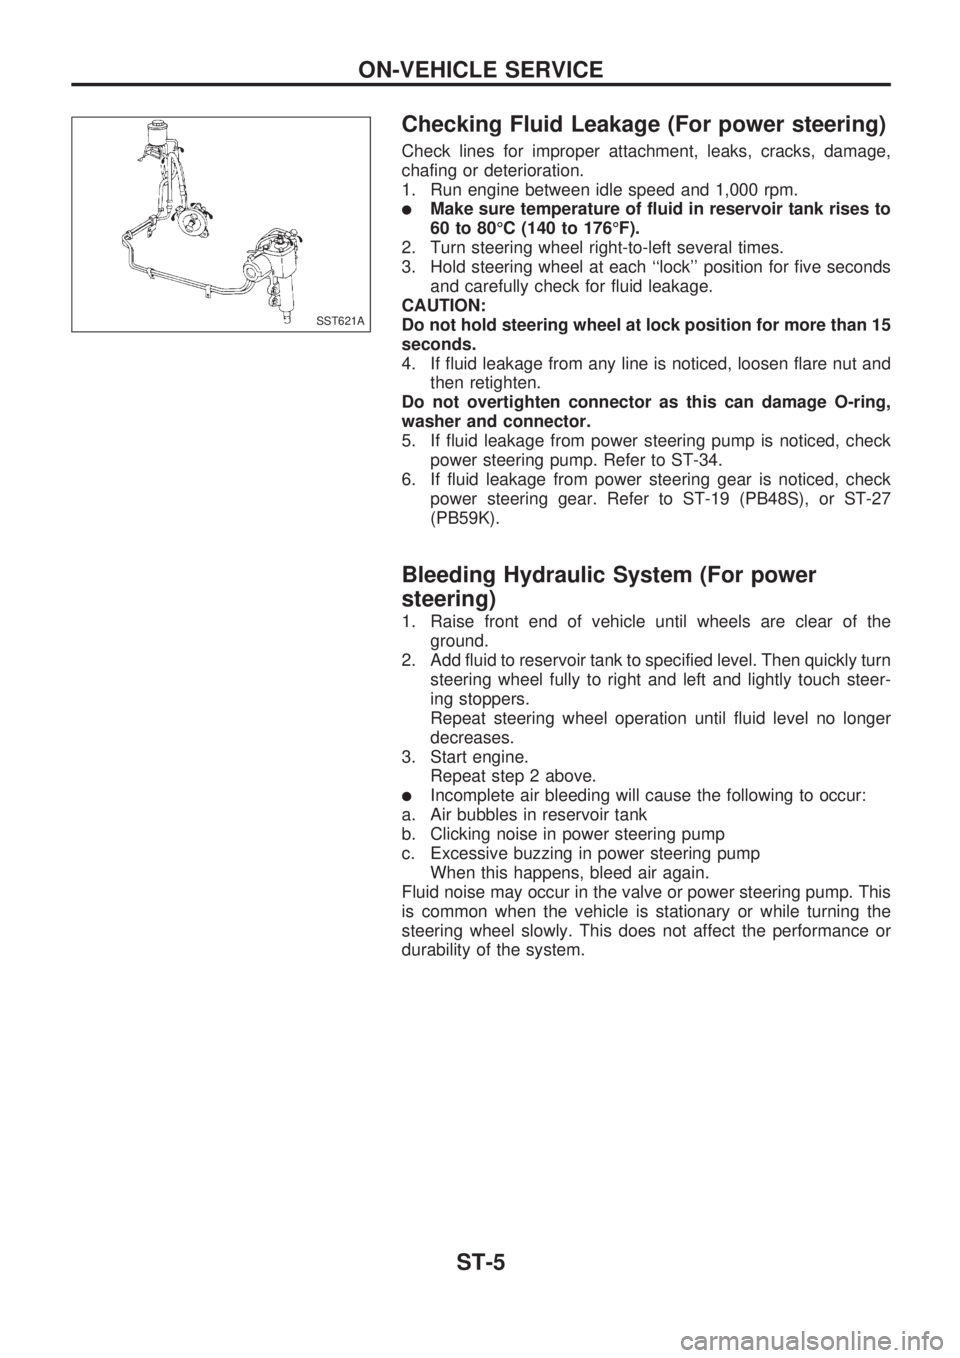
Checking Fluid Leakage (For power steering)
Check lines for improper attachment, leaks, cracks, damage,
chafing or deterioration.
1. Run engine between idle speed and 1,000 rpm.
lMake sure temperature of fluid in reservoir tank rises to
60 to 80ÉC (140 to 176ÉF).
2. Turn steering wheel right-to-left several times.
3. Hold steering wheel at each ``lock'' position for five seconds
and carefully check for fluid leakage.
CAUTION:
Do not hold steering wheel at lock position for more than 15
seconds.
4. If fluid leakage from any line is noticed, loosen flare nut and
then retighten.
Do not overtighten connector as this can damage O-ring,
washer and connector.
5. If fluid leakage from power steering pump is noticed, check
power steering pump. Refer to ST-34.
6. If fluid leakage from power steering gear is noticed, check
power steering gear. Refer to ST-19 (PB48S), or ST-27
(PB59K).
Bleeding Hydraulic System (For power
steering)
1. Raise front end of vehicle until wheels are clear of the
ground.
2. Add fluid to reservoir tank to specified level. Then quickly turn
steering wheel fully to right and left and lightly touch steer-
ing stoppers.
Repeat steering wheel operation until fluid level no longer
decreases.
3. Start engine.
Repeat step 2 above.
lIncomplete air bleeding will cause the following to occur:
a. Air bubbles in reservoir tank
b. Clicking noise in power steering pump
c. Excessive buzzing in power steering pump
When this happens, bleed air again.
Fluid noise may occur in the valve or power steering pump. This
is common when the vehicle is stationary or while turning the
steering wheel slowly. This does not affect the performance or
durability of the system.
SST621A
ON-VEHICLE SERVICE
ST-5
Page 1228 of 1659
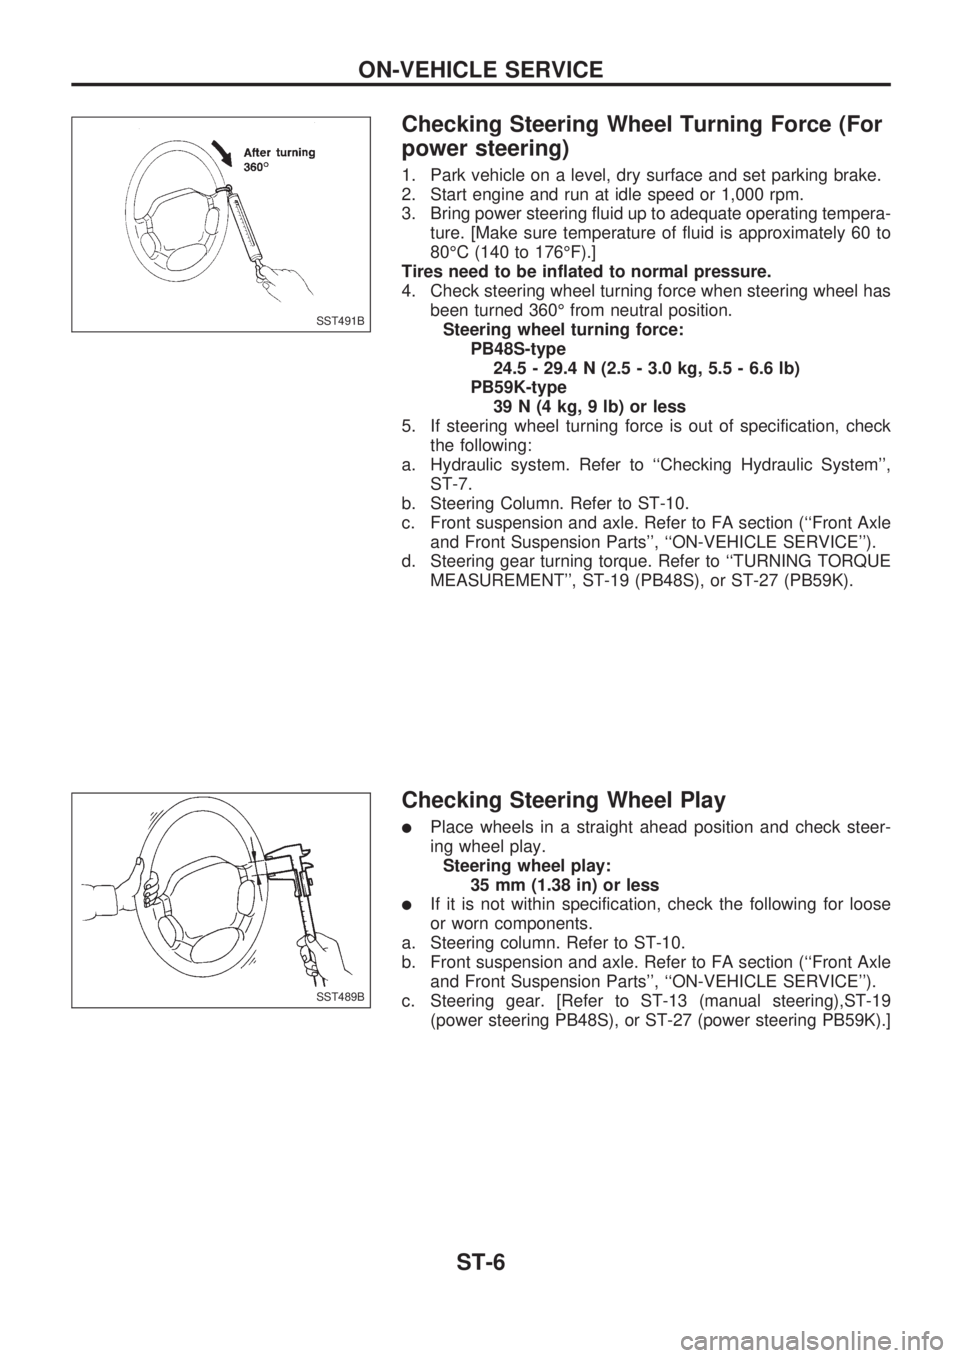
Checking Steering Wheel Turning Force (For
power steering)
1. Park vehicle on a level, dry surface and set parking brake.
2. Start engine and run at idle speed or 1,000 rpm.
3. Bring power steering fluid up to adequate operating tempera-
ture. [Make sure temperature of fluid is approximately 60 to
80ÉC (140 to 176ÉF).]
Tires need to be inflated to normal pressure.
4. Check steering wheel turning force when steering wheel has
been turned 360É from neutral position.
Steering wheel turning force:
PB48S-type
24.5 - 29.4 N (2.5 - 3.0 kg, 5.5 - 6.6 lb)
PB59K-type
39 N (4 kg, 9 lb) or less
5. If steering wheel turning force is out of specification, check
the following:
a. Hydraulic system. Refer to ``Checking Hydraulic System'',
ST-7.
b. Steering Column. Refer to ST-10.
c. Front suspension and axle. Refer to FA section (``Front Axle
and Front Suspension Parts'', ``ON-VEHICLE SERVICE'').
d. Steering gear turning torque. Refer to ``TURNING TORQUE
MEASUREMENT'', ST-19 (PB48S), or ST-27 (PB59K).
Checking Steering Wheel Play
lPlace wheels in a straight ahead position and check steer-
ing wheel play.
Steering wheel play:
35 mm (1.38 in) or less
lIf it is not within specification, check the following for loose
or worn components.
a. Steering column. Refer to ST-10.
b. Front suspension and axle. Refer to FA section (``Front Axle
and Front Suspension Parts'', ``ON-VEHICLE SERVICE'').
c. Steering gear. [Refer to ST-13 (manual steering),ST-19
(power steering PB48S), or ST-27 (power steering PB59K).]
SST491B
SST489B
ON-VEHICLE SERVICE
ST-6
Page 1229 of 1659
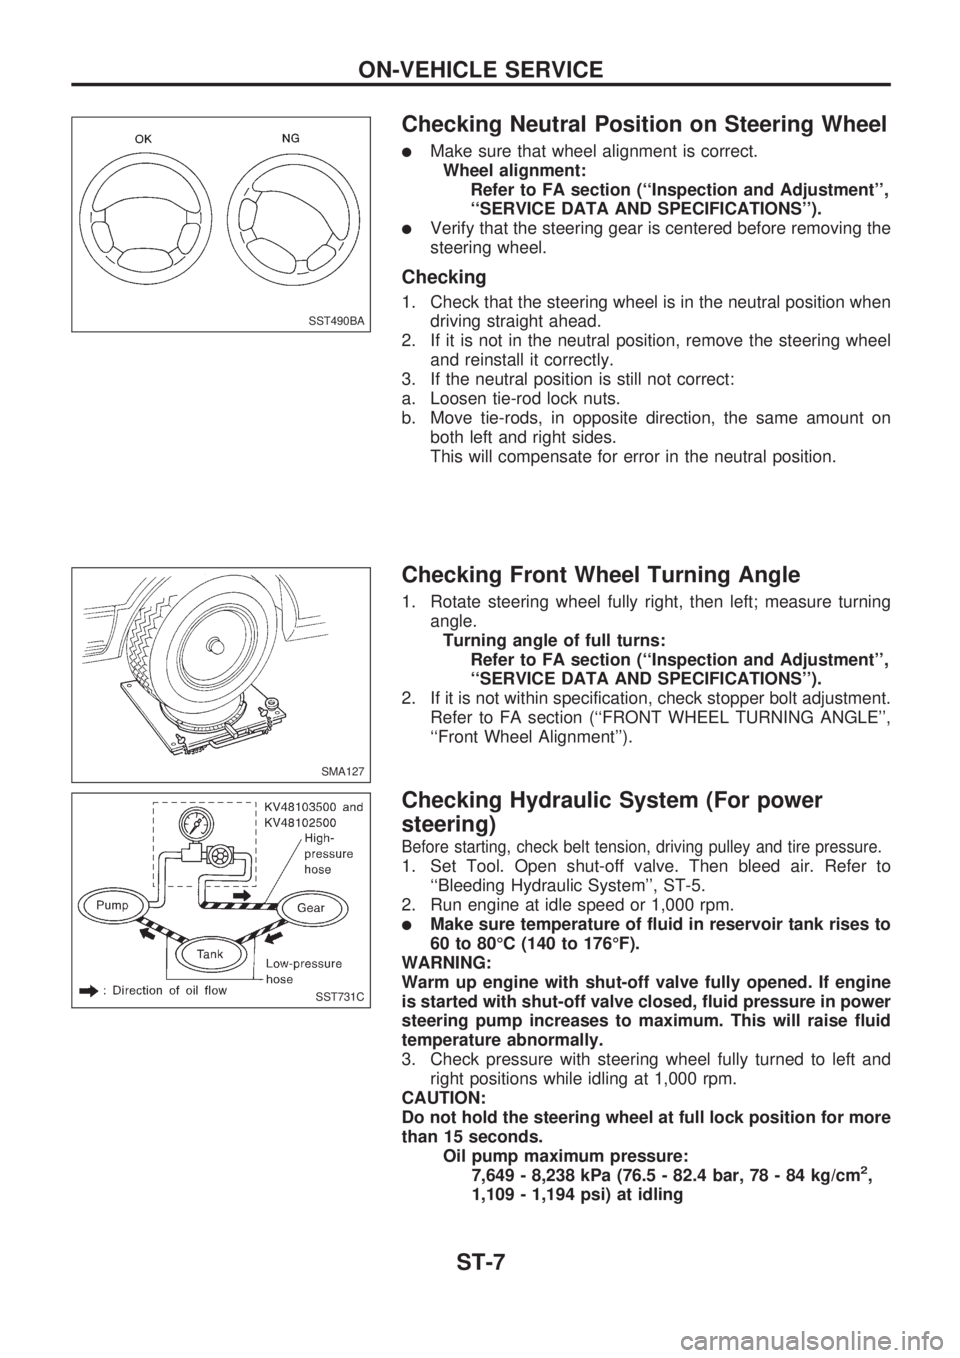
Checking Neutral Position on Steering Wheel
lMake sure that wheel alignment is correct.
Wheel alignment:
Refer to FA section (``Inspection and Adjustment'',
``SERVICE DATA AND SPECIFICATIONS'').
lVerify that the steering gear is centered before removing the
steering wheel.
Checking
1. Check that the steering wheel is in the neutral position when
driving straight ahead.
2. If it is not in the neutral position, remove the steering wheel
and reinstall it correctly.
3. If the neutral position is still not correct:
a. Loosen tie-rod lock nuts.
b. Move tie-rods, in opposite direction, the same amount on
both left and right sides.
This will compensate for error in the neutral position.
Checking Front Wheel Turning Angle
1. Rotate steering wheel fully right, then left; measure turning
angle.
Turning angle of full turns:
Refer to FA section (``Inspection and Adjustment'',
``SERVICE DATA AND SPECIFICATIONS'').
2. If it is not within specification, check stopper bolt adjustment.
Refer to FA section (``FRONT WHEEL TURNING ANGLE'',
``Front Wheel Alignment'').
Checking Hydraulic System (For power
steering)
Before starting, check belt tension, driving pulley and tire pressure.
1. Set Tool. Open shut-off valve. Then bleed air. Refer to
``Bleeding Hydraulic System'', ST-5.
2. Run engine at idle speed or 1,000 rpm.
lMake sure temperature of fluid in reservoir tank rises to
60 to 80ÉC (140 to 176ÉF).
WARNING:
Warm up engine with shut-off valve fully opened. If engine
is started with shut-off valve closed, fluid pressure in power
steering pump increases to maximum. This will raise fluid
temperature abnormally.
3. Check pressure with steering wheel fully turned to left and
right positions while idling at 1,000 rpm.
CAUTION:
Do not hold the steering wheel at full lock position for more
than 15 seconds.
Oil pump maximum pressure:
7,649 - 8,238 kPa (76.5 - 82.4 bar, 78 - 84 kg/cm
2,
1,109 - 1,194 psi) at idling
SST490BA
SMA127
SST731C
ON-VEHICLE SERVICE
ST-7
Page 1234 of 1659
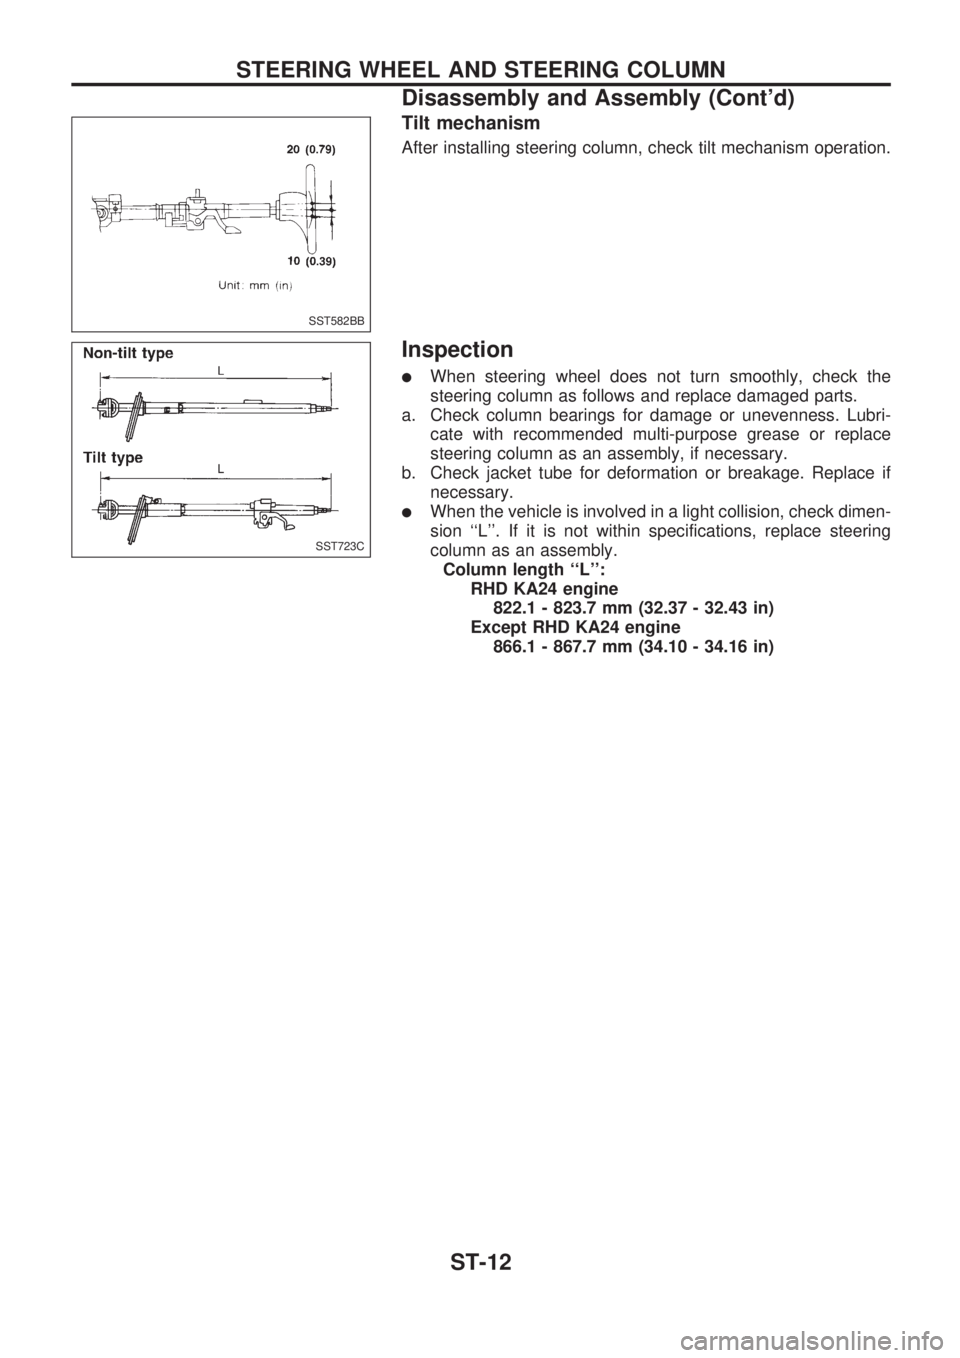
Tilt mechanism
After installing steering column, check tilt mechanism operation.
Inspection
lWhen steering wheel does not turn smoothly, check the
steering column as follows and replace damaged parts.
a. Check column bearings for damage or unevenness. Lubri-
cate with recommended multi-purpose grease or replace
steering column as an assembly, if necessary.
b. Check jacket tube for deformation or breakage. Replace if
necessary.
lWhen the vehicle is involved in a light collision, check dimen-
sion ``L''. If it is not within specifications, replace steering
column as an assembly.
Column length ``L'':
RHD KA24 engine
822.1 - 823.7 mm (32.37 - 32.43 in)
Except RHD KA24 engine
866.1 - 867.7 mm (34.10 - 34.16 in)
SST582BB
SST723C
STEERING WHEEL AND STEERING COLUMN
Disassembly and Assembly (Cont'd)
ST-12
Page 1262 of 1659
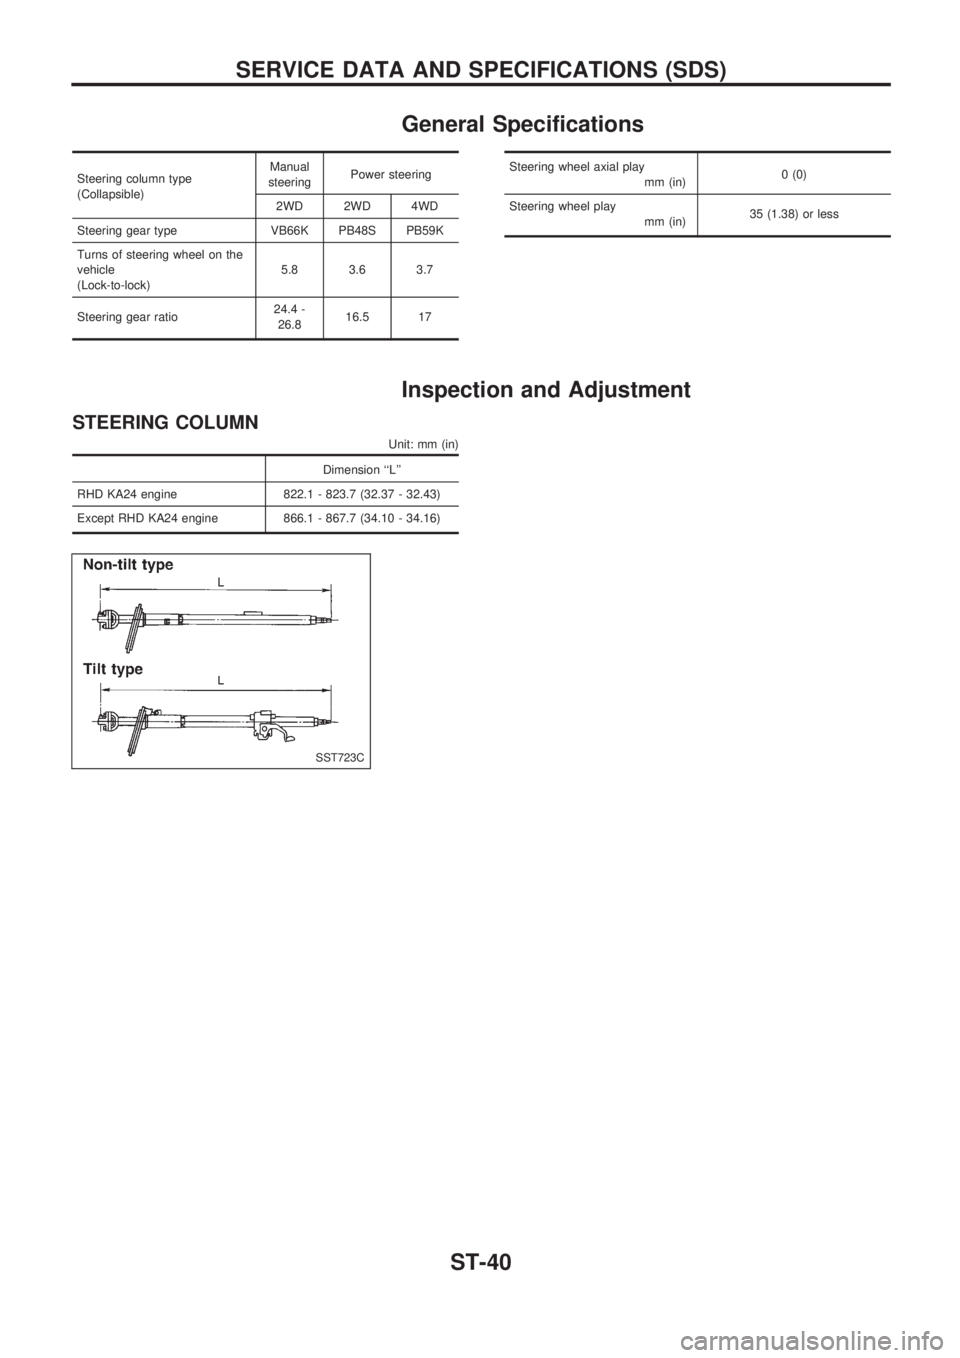
General Specifications
Steering column type
(Collapsible)Manual
steeringPower steering
2WD 2WD 4WD
Steering gear type VB66K PB48S PB59K
Turns of steering wheel on the
vehicle
(Lock-to-lock)5.8 3.6 3.7
Steering gear ratio24.4 -
26.816.5 17Steering wheel axial play
mm (in)0 (0)
Steering wheel play
mm (in)35 (1.38) or less
Inspection and Adjustment
STEERING COLUMN
Unit: mm (in)
Dimension ``L''
RHD KA24 engine 822.1 - 823.7 (32.37 - 32.43)
Except RHD KA24 engine 866.1 - 867.7 (34.10 - 34.16)
SST723C
SERVICE DATA AND SPECIFICATIONS (SDS)
ST-40
Page 1296 of 1659
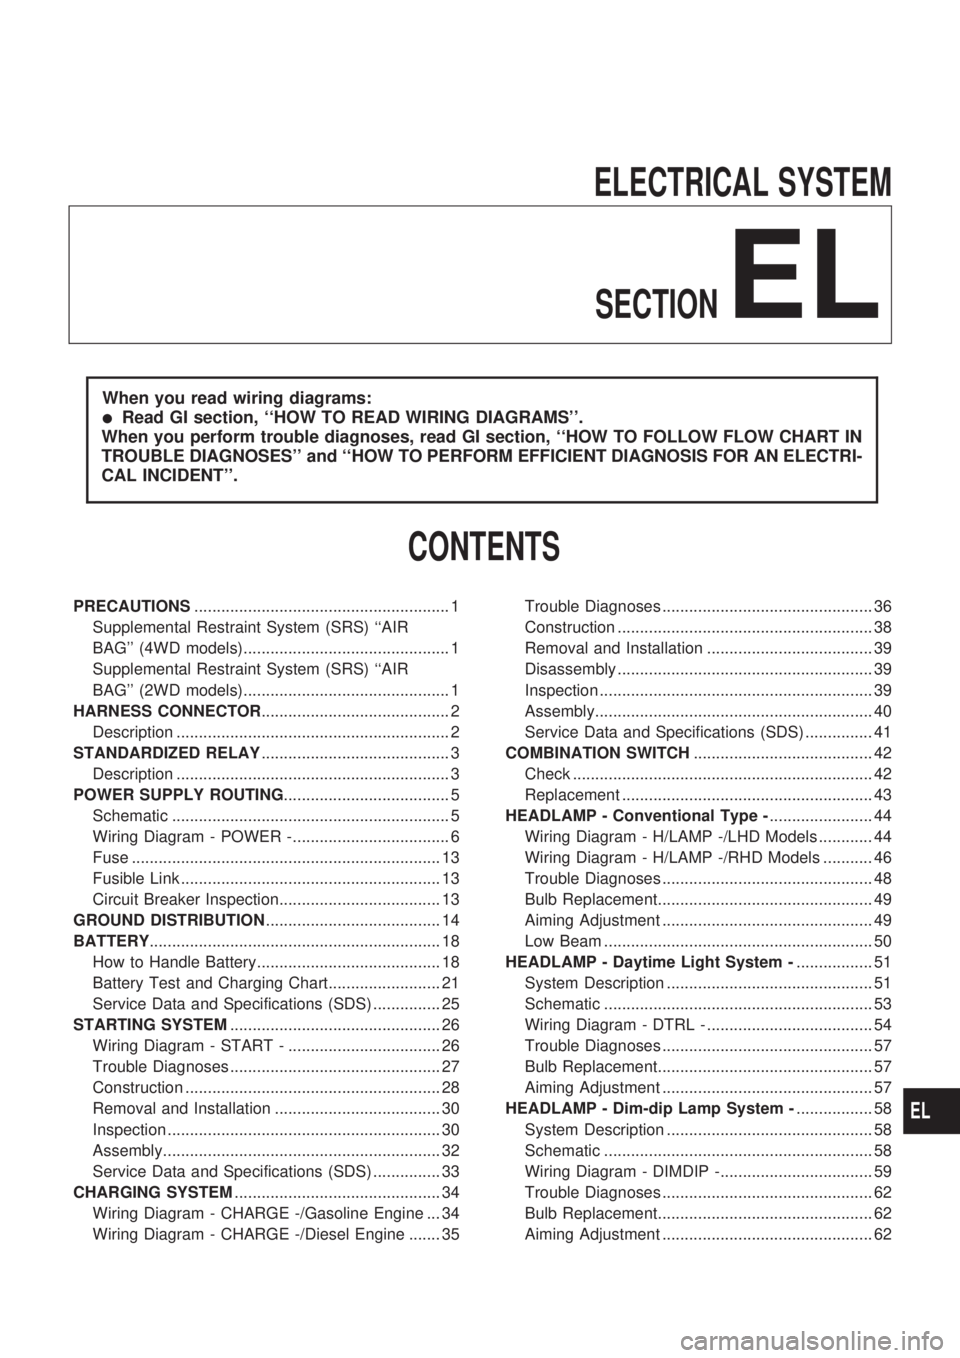
ELECTRICAL SYSTEM
SECTION
EL
When you read wiring diagrams:
lRead GI section, ``HOW TO READ WIRING DIAGRAMS''.
When you perform trouble diagnoses, read GI section, ``HOW TO FOLLOW FLOW CHART IN
TROUBLE DIAGNOSES'' and ``HOW TO PERFORM EFFICIENT DIAGNOSIS FOR AN ELECTRI-
CAL INCIDENT''.
CONTENTS
PRECAUTIONS......................................................... 1
Supplemental Restraint System (SRS) ``AIR
BAG'' (4WD models).............................................. 1
Supplemental Restraint System (SRS) ``AIR
BAG'' (2WD models).............................................. 1
HARNESS CONNECTOR.......................................... 2
Description ............................................................. 2
STANDARDIZED RELAY.......................................... 3
Description ............................................................. 3
POWER SUPPLY ROUTING..................................... 5
Schematic .............................................................. 5
Wiring Diagram - POWER -................................... 6
Fuse ..................................................................... 13
Fusible Link .......................................................... 13
Circuit Breaker Inspection.................................... 13
GROUND DISTRIBUTION....................................... 14
BATTERY................................................................. 18
How to Handle Battery......................................... 18
Battery Test and Charging Chart......................... 21
Service Data and Specifications (SDS) ............... 25
STARTING SYSTEM............................................... 26
Wiring Diagram - START - .................................. 26
Trouble Diagnoses ............................................... 27
Construction ......................................................... 28
Removal and Installation ..................................... 30
Inspection ............................................................. 30
Assembly.............................................................. 32
Service Data and Specifications (SDS) ............... 33
CHARGING SYSTEM.............................................. 34
Wiring Diagram - CHARGE -/Gasoline Engine ... 34
Wiring Diagram - CHARGE -/Diesel Engine ....... 35Trouble Diagnoses ............................................... 36
Construction ......................................................... 38
Removal and Installation ..................................... 39
Disassembly ......................................................... 39
Inspection ............................................................. 39
Assembly.............................................................. 40
Service Data and Specifications (SDS) ............... 41
COMBINATION SWITCH........................................ 42
Check ................................................................... 42
Replacement ........................................................ 43
HEADLAMP - Conventional Type -....................... 44
Wiring Diagram - H/LAMP -/LHD Models ............ 44
Wiring Diagram - H/LAMP -/RHD Models ........... 46
Trouble Diagnoses ............................................... 48
Bulb Replacement................................................ 49
Aiming Adjustment ............................................... 49
Low Beam ............................................................ 50
HEADLAMP - Daytime Light System -................. 51
System Description .............................................. 51
Schematic ............................................................ 53
Wiring Diagram - DTRL - ..................................... 54
Trouble Diagnoses ............................................... 57
Bulb Replacement................................................ 57
Aiming Adjustment ............................................... 57
HEADLAMP - Dim-dip Lamp System -................. 58
System Description .............................................. 58
Schematic ............................................................ 58
Wiring Diagram - DIMDIP -.................................. 59
Trouble Diagnoses ............................................... 62
Bulb Replacement................................................ 62
Aiming Adjustment ............................................... 62
EL
Page 1298 of 1659
Wiring Diagram - MULTI -/LHD Models ............ 175
Trouble Diagnoses ............................................. 179
ID Code Entry Procedure .................................. 182
NATS (Nissan Anti-Theft System)/Gasoline
engine for LHD models........................................ 183
Component Parts and Harness Connector
Location.............................................................. 183
System Description ............................................ 183
System Composition .......................................... 184
Wiring Diagram - NATS -................................... 185
CONSULT .......................................................... 186
Trouble Diagnoses ............................................. 188
How to Replace NATS IMMU ............................ 197
NATS (Nissan Anti-Theft System)/Diesel
engine.................................................................... 198
Component Parts and Harness Connector
Location.............................................................. 198
System Description ............................................ 199
System Composition .......................................... 199
Wiring Diagram - NATS -/LHD Models.............. 200
Wiring Diagram - NATS -/RHD Models ............. 201
CONSULT .......................................................... 202
Trouble Diagnoses ............................................. 205LOCATION OF ELECTRICAL UNITS................... 217
Engine Compartment ......................................... 217
Passenger Compartment ................................... 218
HARNESS LAYOUT.............................................. 220
Outline ................................................................ 220
How to Read Harness Layout ........................... 221
Main Harness ..................................................... 222
Engine Room Harness....................................... 232
Engine Control Harness..................................... 240
Engine Harness ................................................. 242
Alternator Harness ............................................. 244
Instrument Harness............................................ 245
Room Lamp Harness/LHD Models .................... 246
Room Lamp Harness/RHD Models ................... 247
Chassis Harness and Tail Harness ................... 248
Front Door Harness (LH side) ........................... 249
Front Door Harness (RH side)........................... 250
Rear Door Harness ............................................ 251
BULB SPECIFICATIONS...................................... 252
Headlamp ........................................................... 252
Exterior Lamp..................................................... 252
Interior Lamp ...................................................... 252
WIRING DIAGRAM CODES (CELL CODES)....... 253
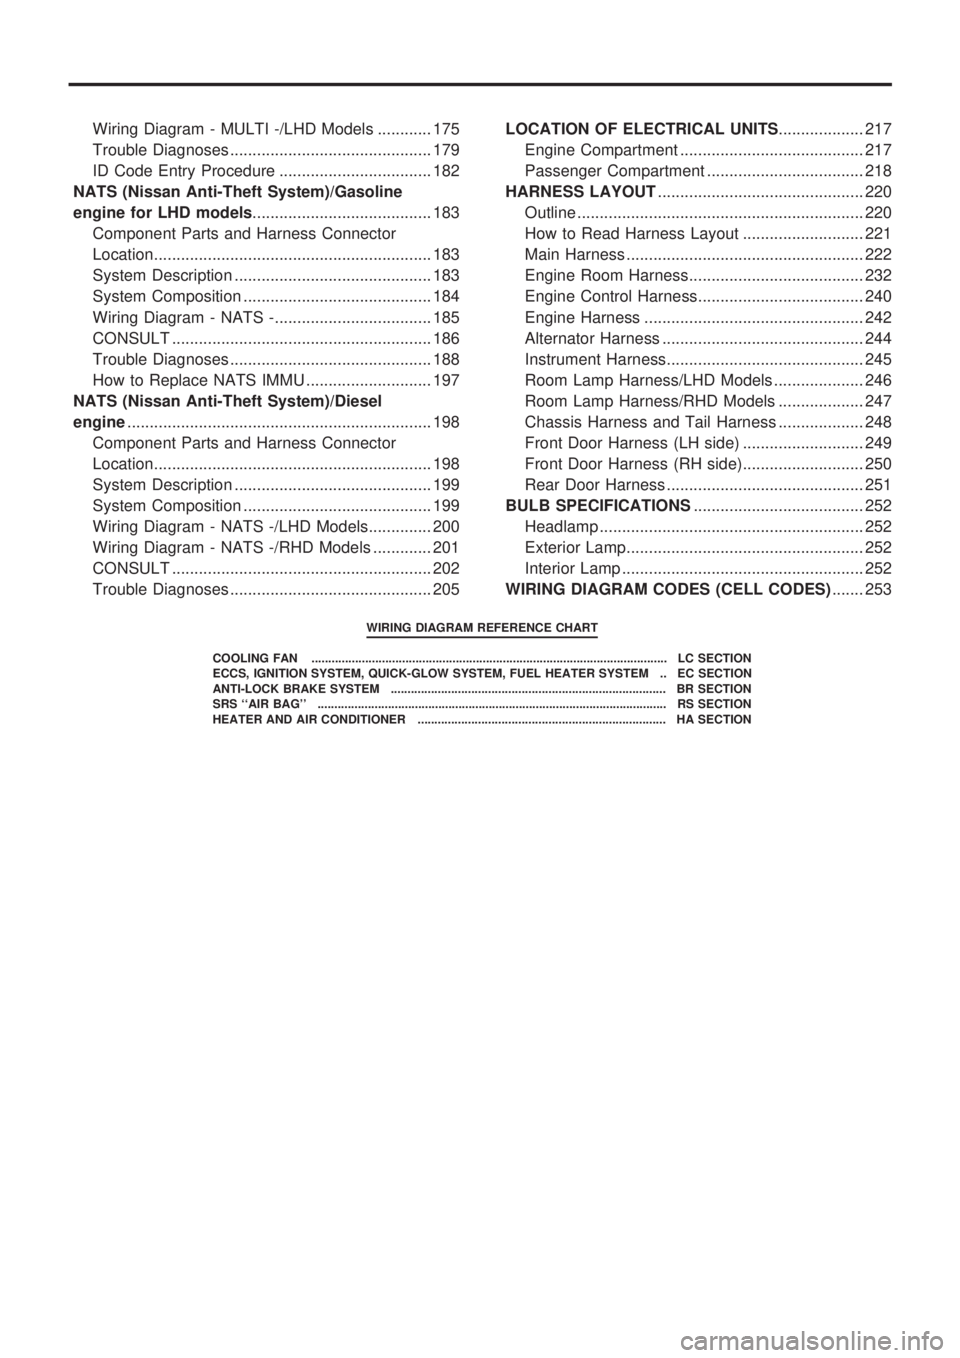
WIRING DIAGRAM REFERENCE CHART
COOLING FAN .......................................................................................................... LC SECTION
ECCS, IGNITION SYSTEM, QUICK-GLOW SYSTEM, FUEL HEATER SYSTEM .. EC SECTION
ANTI-LOCK BRAKE SYSTEM .................................................................................. BR SECTION
SRS ``AIR BAG'' ........................................................................................................ RS SECTION
HEATER AND AIR CONDITIONER .......................................................................... HA SECTION