Page 2131 of 2490
Seating - Front Seat Backrest Trim Panel
Removal and Installation
Removal
Installation
1. Slacken and remove the two ba ck finisher lower securing
screws.
2. Release back finisher from the side securing clips.
3. Release back finisher upper fir tree fasteners and remove back
finisher from seat.
1. Fit and align back finisher to seat.
2. Fully seat back finisher upper securing studs.
3. Position and fully seat fini sher side securing clips.
4. Fit and tighten the two back finisher lower securing screws.
Page 2132 of 2490

Seating - Front Seat Cushion
Removal and Installation
Removal
Installation
1. WARNING: FOLLOWING DISCONNECTION OF THE
BATTERY A PERIOD OF AT LEAST ONE MINUTE MUST BE
ALLOWED TO ELAPSE BEFORE WORKING ON A FRONT SEAT WITH
A SIDE AIRBAG FITTED.
Remove battery cover and disc onnect ground cable from
battery. Refer to 86.15.19.
2. Remove seat back fini sher. Refer to 76.70.09.
3. Remove seat cushion cover/pad assembly. Refer to 76.70.33.
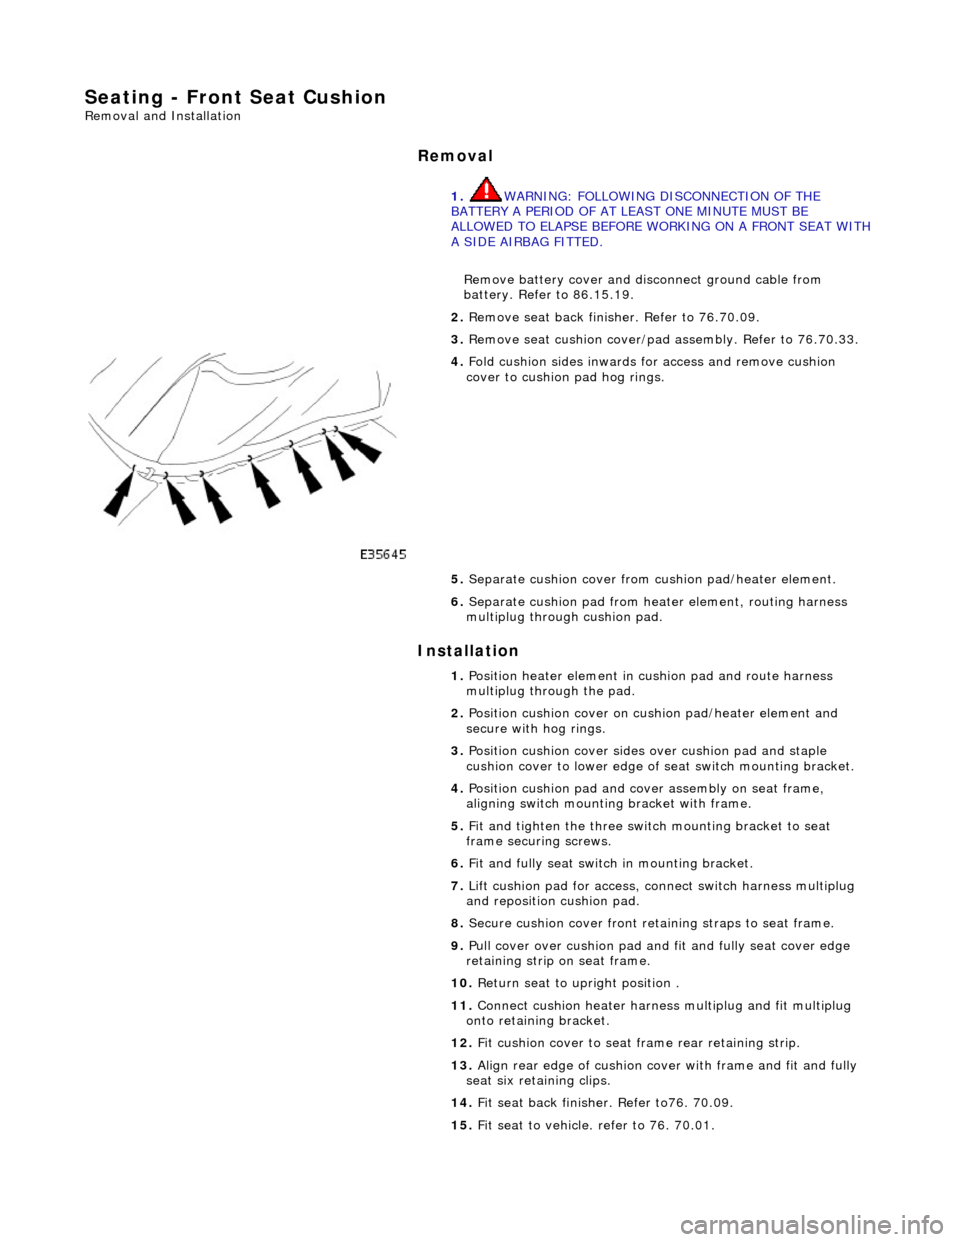
4. Fold cushion sides inwards for access and remove cushion
cover to cushion pad hog rings.
5. Separate cushion cover from cushion pad/heater element.
6. Separate cushion pad from heat er element, routing harness
multiplug through cushion pad.
1. Position heater element in cushion pad and route harness
multiplug through the pad.
2. Position cushion cover on cushion pad/heater element and
secure with hog rings.
3. Position cushion cover sides over cushion pad and staple
cushion cover to lower edge of seat switch mounting bracket.
4. Position cushion pad and cover assembly on seat frame,
aligning switch mounting bracket with frame.
5. Fit and tighten the three switch mounting bracket to seat
frame securing screws.
6. Fit and fully seat switch in mounting bracket.
7. Lift cushion pad for access, connect switch harness multiplug
and reposition cushion pad.
8. Secure cushion cover front retaining straps to seat frame.
9. Pull cover over cushion pad and fit and fully seat cover edge
retaining strip on seat frame.
10. Return seat to upright position .
11. Connect cushion heater harnes s multiplug and fit multiplug
onto retaining bracket.
12. Fit cushion cover to seat fra me rear retaining strip.
13. Align rear edge of cushion cover with frame and fit and fully
seat six retaining clips.
14. Fit seat back finisher. Refer to76. 70.09.
15. Fit seat to vehicle. refer to 76. 70.01.
Page 2135 of 2490
8. Detach cushion cover front elas tic retaining straps from seat
frame.
9. Remove seat cushion pad to cushion suspension hog rings.
10. Reposition cushion cover sides, lift and hold cushion pad for
access to rear of seat switch and disconnect harness multiplug.
11. Remove seat switch.
Release seat switchpack upper retaining tangs.
Release switchpack lower retaining tangs adjacent to seat
runners and remove switch.
Page 2137 of 2490

2.
Position cushion cover sides over cushion pad and staple
cushion cover to lower edge of seat switch mounting bracket.
3. Position cushion pad and cover assembly on seat frame,
aligning switchpack mounting bracket with frame
4. Fit and tighten the three switchpack mounting bracket to seat
frame securing screws.
5. Fit and fully seat swtchpac k in mounting bracket.
6. Lift cushion pad for access, connect switchpack harness
multiplug and reposi tion cushion pad
7. Secure cushion cover front retaining straps to seat frame.
8. Pull cover over cushion pad and fit and fully seat cover edge
retaining strip on seat frame.
9. Return seat to upright position
10. Connect cushion heater harnes s multiplug and fit multiplug
onto retaining bracket.
11. Fit cushion cover to seat fra me rear retaining strip.
12. Align rear edge of cushion cover with frame and fit and fully
seat six retaining clips.
13. Fit seat back finisher. Refer to 76.70.09.
14. Fit seat to vehicle. Refer to 76.70.01.
15. Connect ground cable to batt ery terminal and fit battery
cover. Refer to 86.15.15
Page 2138 of 2490

Seating - Front Seat Cushion Heater Mat
Removal and Installation
Removal
Installation
1. WARNING: FOLLOWING DISCONNECTION OF THE
BATTERY A PERIOD OF AT LEAST ONE MINUTE MUST BE
ALLOWED TO ELAPSE BEFORE WORKING ON A FRONT SEAT WITH
A SIDE AIRBAG FITTED.
Remove battery cover and disc onnect ground cable from
battery. Refer to 86.15.19.
2. Remove front seat from vehicle. Refer to 76.70.01
3. Remove seat back fini sher. Refer to 76.70.09.
4. Remove seat cushion cover as sembly. Refer to 76.70.33.
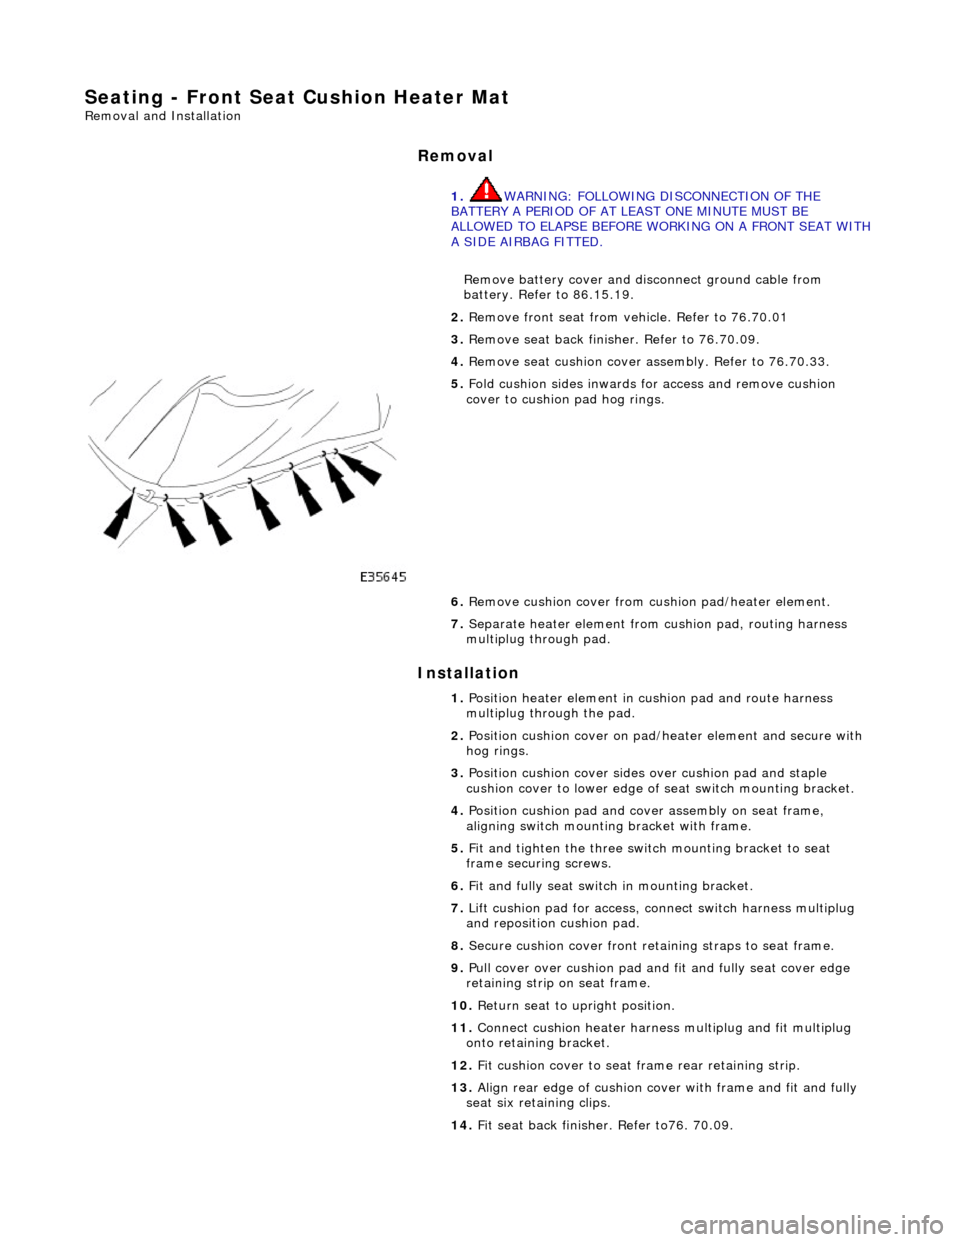
5. Fold cushion sides inwards for access and remove cushion
cover to cushion pad hog rings.
6. Remove cushion cover from cushion pad/heater element.
7. Separate heater element from cushion pad, routing harness
multiplug through pad.
1. Position heater element in cushion pad and route harness
multiplug through the pad.
2. Position cushion cover on pad/heater element and secure with
hog rings.
3. Position cushion cover sides over cushion pad and staple
cushion cover to lower edge of seat switch mounting bracket.
4. Position cushion pad and cover assembly on seat frame,
aligning switch mounting bracket with frame.
5. Fit and tighten the three switch mounting bracket to seat
frame securing screws.
6. Fit and fully seat switch in mounting bracket.
7. Lift cushion pad for access, connect switch harness multiplug
and reposition cushion pad.
8. Secure cushion cover front retaining straps to seat frame.
9. Pull cover over cushion pad and fit and fully seat cover edge
retaining strip on seat frame.
10. Return seat to upright position.
11. Connect cushion heater harnes s multiplug and fit multiplug
onto retaining bracket.
12. Fit cushion cover to seat fra me rear retaining strip.
13. Align rear edge of cushion cover with frame and fit and fully
seat six retaining clips.
14. Fit seat back finisher. Refer to76. 70.09.
Page 2144 of 2490
Seating - Front Seat Recliner Motor
Removal and Installation
Removal
1. WARNING: FOLLOWING DISCONNECTION OF THE
BATTERY A PERIOD OF AT LEAST ONE MINUTE MUST BE
ALLOWED TO ELAPSE BEFORE WORKING ON A FRONT SEAT WITH
A SIDE AIRBAG FITTED.
Remove battery cover and disc onnect ground cable from
battery terminal. Refer to 86,.15.19.
2. Remove front seat and position for access. Refer to 76.70.01.
3. Remove front seat back finisher. Refer to 76.70.09.
4. Release seat squab cover securing clips from frame.
5. Release seat squab cover lower edge retaining strip from
frame.
6. Disconnect recline motor/potentiometer harness multiplug
(white).
7. Remove and discard gearbox RH drive shaft end securing clip.
Page 2146 of 2490
tighten securing bolts.
2.
Position potentiometer on gearbox.
3. Engage drive shaft in po tentiometer and gearbox.
4. Install potentiometer retaining plate.
5. Rotate potentiometer to en gage retaining plate tang.
6. Fit and tighten retaining plate/gearbox securing bolts.
7. Fit and fully seat new gearbo x drive shaft securing clip
8. Fit seat cover RH side to seat frame and fully seat securing
clips.
9. Fit seat cover LH side to seat frame and fully seat securing
clips.
10. Fit seat cover to lower frame retaining strip.
11. Position seat for acces and fit seat back finisher. Refer to
76.70.09.
12. Install seat in vehicle. Refer to 76.70.01.
13. Connect ground cable to batt ery terminal and fit battery
cover. Refer to 86.15.15.
14. Motor seat fully forward and fully rearward, checking for
satisfactory operation.
15. Return seat to original position.
Page 2156 of 2490
Seating - Rear Seat Backrest
Removal and Installation
Removal
1. Heated seat only. Remove batt ery cover and disconnect ground cable from battery terminal. Refer to 86.15.19.
2. Remove rear seat cushion. Refer to 76.70.37.
3. Remove rear he ad restraints.
4. Slacken and remove outer seat belt lower anchor securing
bolts.
5. Slacken and remove bolt securi ng centre seat belt lower
anchor plate and buckle cable to seat pan.
6. Remove seat be lt escutcheon.
1. Using a flat-bladed screwdriver in the two rectangular apertures, carefully withdraw
escutcheon from squab top roll.
2. Remove escutcheon from belt via split in moulding.
7. Slacken and remove the four seat squab securing screws.