Page 2028 of 2490
Front End Body Panels - Cowl Panel Grille
Removal and Installation
Installation
1.
Open the hood and fit fender covers.
2. Remove the wiper arm and blade assembly. Refer to
84.15.44.90.
3. Slacken and remove the five pl enum cover securing screws.
4. Position the plenum cover for access and disconnect windshield
washer pump tube from pl enum cover connector.
5. Remove plenum cover from vehicle.
6. Remove screenwasher conne ctor from plenum cover.
7. Remove plenum cover spacers,
1. Fit washer hose connector to plenum cover.
2. Fit and fully seat plenum cover spacers.
3. Position plenum cover for access and fit windshield washer
pump to plenum connector hose.
4. Fit plenum cover ensuring that it seats correctly in upper seal.
5. Fit and tighten securing screws.
6. Fit washer hose to plenum connector.
7. Fit wiper arm and blade. Refer to 84.15.44.90.
8. Close hood and remove fender covers.
Page 2031 of 2490
Front End Body Panels - Radiator Grille Opening Panel
Removal and Installation
Removal
Installation
1.
Open hood and fit fender covers.
2. Slacken and remove the ten cl osing panel securing bolts.
3. Position closing panel for access and disconnect hood switch
harness multiplug.
4. Remove closing panel from vehicle.
5. Remove and discard the two rubbe r grommets locating top of
radiator.
1. Fit and secure hood switch to closing panel.
2. Fit new rubber grommets to closing panel.
3. Position closing panel for access and connect hood harness
multiplug.
4. Fully seat closing panel and fit and tighten securing bolts.
5. Close hood and remove fender covers.
Page 2032 of 2490
Front End Body Panels - Radiator Grille Opening Panel Reinforcement Removal and Installation
Removal
Installation
1.
Remove radiator grilles. Refer to 76.55.03.
2. Remove radiator grille surround. (Refer to 76.55.15)
3. Open hood.
4. Fit front fender cover.
5. Slacken headlamp trim panel to headlamp securing screw.
6. Carefully release headlamp trim panel fir tree fastener from BIW
and remove panel from vehicle.
7. Remove securing screw from trim panel and remove and discard fir
tree fastener.
1. Fit new fir tree fastener to headlamp trim panel.
2. Fit but do not tighten securing screw to headlamp trim panel.
3. Position headlamp trim panel on BIW front panel, locating securing
screw in headlamp slot.
4. Fully seat fir tree fastener in BIW front panel.
5. Finally tighten headlamp trim panel securing screw.
6. Close hood and remove fender cover.
7. Fit radiator grill surround. Refer to 76.55.15
8. Fit radiator grilles. Refer to 76.55.03.
Page 2035 of 2490

the BIW front upper crossmember. Two gas struts secured to the hood by pi vot pins and snap-on couplings, support the
hood in the open position. A full width insulating pad is secured by screws to the underside of the hood. A sponge rubber
tubular seal is mounted transversely to wards the front of the hood underside.
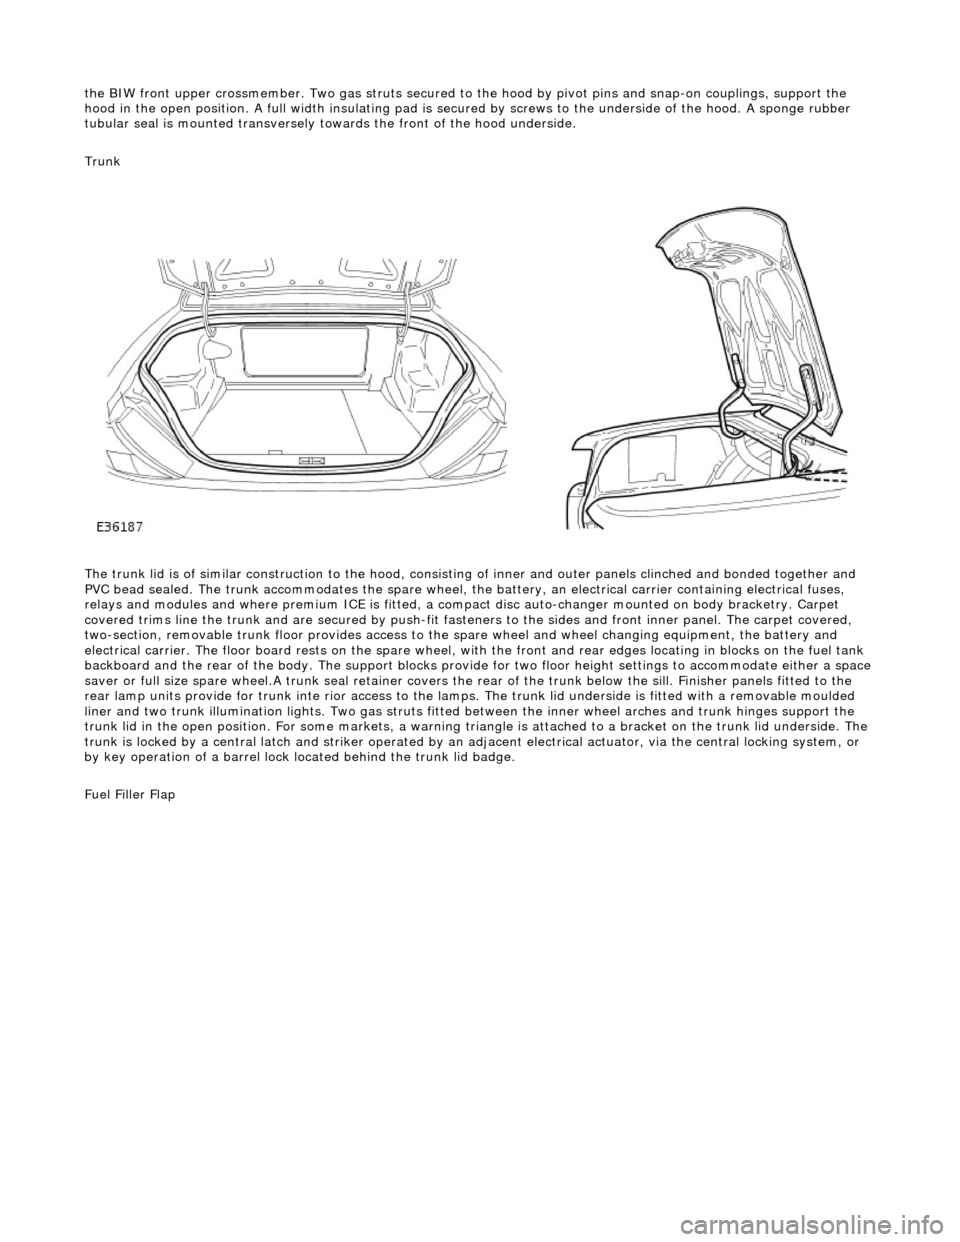
Trunk
The trunk lid is of similar construction to the hood, consisting of inner and outer panels clinched and bonded together and
PVC bead sealed. The trunk accommodates the spare wheel, the battery, an electrical carrier containing electrical fuses,
relays and modules and where premium ICE is fitted, a compac t disc auto-changer mounted on body bracketry. Carpet
covered trims line the trunk and are secured by push-fit fasten ers to the sides and front inner panel. The carpet covered,
two-section, removable trunk floor prov ides access to the spare wheel and wheel changing equipment, the battery and
electrical carrier. The floor board rests on the spare wheel, with the front and rear e dges locating in blocks on the fuel tank
backboard and the rear of the body. The support blocks provide for two floor height settings to accommodate either a space
saver or full size spare wheel.A trunk seal retainer covers the re ar of the trunk below the sill. Finisher panels fitted to the
rear lamp units provide for trunk inte rior access to the lamps. The trunk lid underside is fitted with a removable moulded
liner and two trunk illumination lights. Two gas struts fitted between the inner wheel arches and trunk hinges support the
trunk lid in the open position. For some markets, a warning triangle is attached to a bracket on the trunk lid underside. The
trunk is locked by a central latch and stri ker operated by an adjacent electrical actuator, via the central locking system, or
by key operation of a barrel lock located behind the trunk lid badge.
Fuel Filler Flap
Page 2037 of 2490
Body Closures - Hood Alignment
General Procedures
1.
Open hood and fit fender covers.
2. Slacken hood to hinge securing bo lts. just sufficiently to permit
movement of hood.
3. Adjust position of hood on hing es and tighten one bolt on each
hinge.
4. Carefully close hood and check alignment.
5. Repeat steps 2 to 4 as necessar y to achieve satisfactory hood
alignment.
6. Fully tighten all hood hinge bolts.
7. Close hood and remove fender covers.
Page 2042 of 2490
Body Closures - Hood
Removal and Installation
Removal
1. CAUTION: The hood assembly must be fully supported
throughout the following procedure.
Fit fender covers.
2. Open hood and apply protective masking tape to forward edge
of hood. at rear of ra diator grill surround.
3. Ensure that the hood is adequately supported.
4. Slacken the six hood to hinge securing bolts.
5. Disconnect upper end of each gas strut from hood pivot.
6. With the hood fully supported , remove the securing bolts
and position ground strap clear of hood.
7. Remove hood from vehicle.
8. Release hood front seal securi ng pegs and remove seal from
hood.
Page 2045 of 2490

Body Closures - Hood Hinge
Removal and Installation
Removal
Installation
1.
CAUTION: Before slackening hi nge bolts, ensure that the
hood is sufficiently supported to prevent damage to paintwork
and gas support struts.
Remove cover from battery and disconnect ground cable from
battery terminal. Refer to 86.15.19.
2. Open hood and fit fender covers.
3. Remove radiator grille. Refer to 76.55.03.
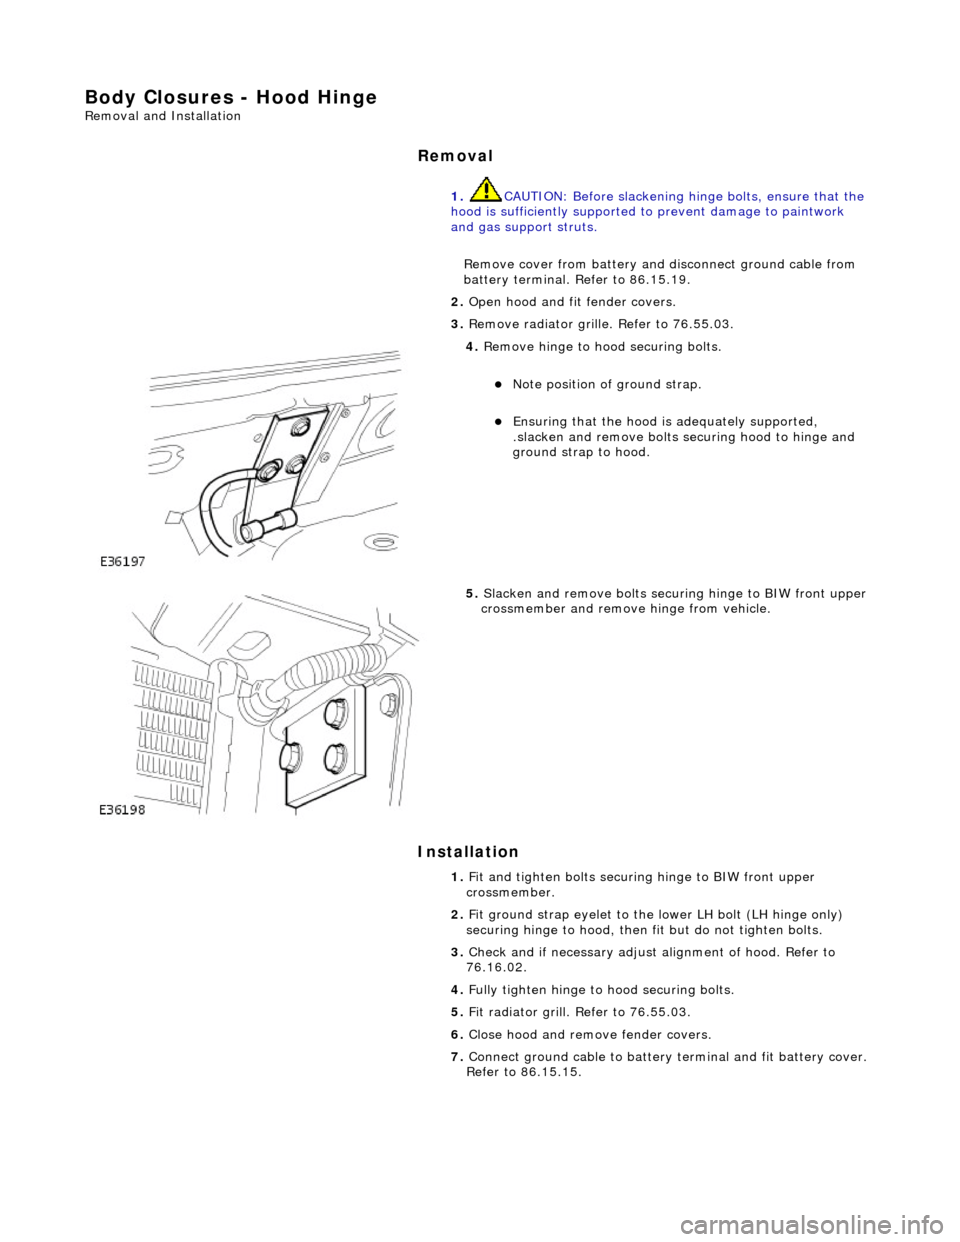
4. Remove hinge to hood securing bolts.
Note position of ground strap.
Ensuring that the hood is adequately supported,
.slacken and remove bolts se curing hood to hinge and
ground strap to hood.
5. Slacken and remove bolts securi ng hinge to BIW front upper
crossmember and remove hinge from vehicle.
1. Fit and tighten bolts securing hinge to BIW front upper
crossmember.
2. Fit ground strap eyelet to the lower LH bolt (LH hinge only)
securing hinge to hood, then fit but do not tighten bolts.
3. Check and if necessary adjust alignment of hood. Refer to
76.16.02.
4. Fully tighten hinge to hood securing bolts.
5. Fit radiator grill. Refer to 76.55.03.
6. Close hood and remove fender covers.
7. Connect ground cable to battery terminal and fit battery cover.
Refer to 86.15.15.
Page 2047 of 2490
Body Closures - Hood Strut
Removal and Installation
Removal
Installation
1.
Open hood and fit fender covers.
2. Install suitable supports for hood.
3. Release retaining clip in stru t upper end and disconnect end
from pivot.
4. Release retaining clip at stru t lower end and disconnect end
from pivot.
5. Remove strut from vehicle.
1. Fit strut body end to lower pivot ensuring that clip fully seats.
2. Fit strut rod end to upper pivot en suring that clip fully seats.
3. Remove hood supports and check that hood closes correctly.
4. Remove fender covers.