Page 2256 of 2490
17. Install centre vent/clock assembly.
1. Install new centre vent retaining screw inserts in
facia.
2. Position centre vent/clo ck assembly at facia and
connect clock harness multiplug to facia harness.
18. Position centre vent/clock as sembly in facia and install
securing screws.
19. Install RH side vent/duct assembly.
1. Install new RH side vent/duct retaining screw inserts in facia.
2. Position RH side vent in facia and install securing
screws.
20. Install new LH side vent/duct re taining screw inserts in facia.
21. Position LH side vent/duct in fa cia and install securing screws.
22. Position passenger air bag mo dule and deployment door
assembly in facia aperture. and install four new securing nuts.
Page 2261 of 2490
46. Connect passenger side facia harness to passenger
compartment harness multiplug and secure with retaining
lever.
47. Install trim pad on passenger side lower 'A' post. Refer to
76.13.30.
48. Connect passenger air bag link harness multiplug.
49. Install passenger glovebox assembly. Refer to 76.52.03.
50. Install 'J' gate assembly. Refer to 76.25.24 and 76.25.26.
51. Position centre console rear vent duct in air conditioning unit
and install rear securing screw.
52. Install centre console. Refer to 76.25.01.
53. Install centre console switch module. Refer to 76.13.30.
Page 2264 of 2490

Instrument Panel and Console - Instrument Panel Finish Panel
Removal and Installation
Removal
1. WARNINGS:
FOLLOWING DISCONNECTION OF THE BATTERY, A PERIOD
OF AT LEAST ONE MINUTE MUST BE ALLOWED TO ELAPSE
BEFORE ANY WORK IS CARRIED OUT ON AN AIR BAG MODULE.
IN THE EVENT OF A FAULT RUPTURING THE 10A BATTERY
SUPPLY FUSE (F4 LOCATED IN THE FUSE-BOX AT THE DRIVER'S
END OF THE FASCIA), THE FUSE MUST NOT BE RENEWED UNTIL
THE AIRBAG/SRS SYSTEM HAS BEEN DE-ACTIVATED. FUSES OF
ANY OTHER VALUE MUST NEVER BE USED, AS THIS CAN CAUSE
DISARM FAILURE.
Remove battery cover and disconnect ground cable from
battery terminal. Refer to 86.15.19.
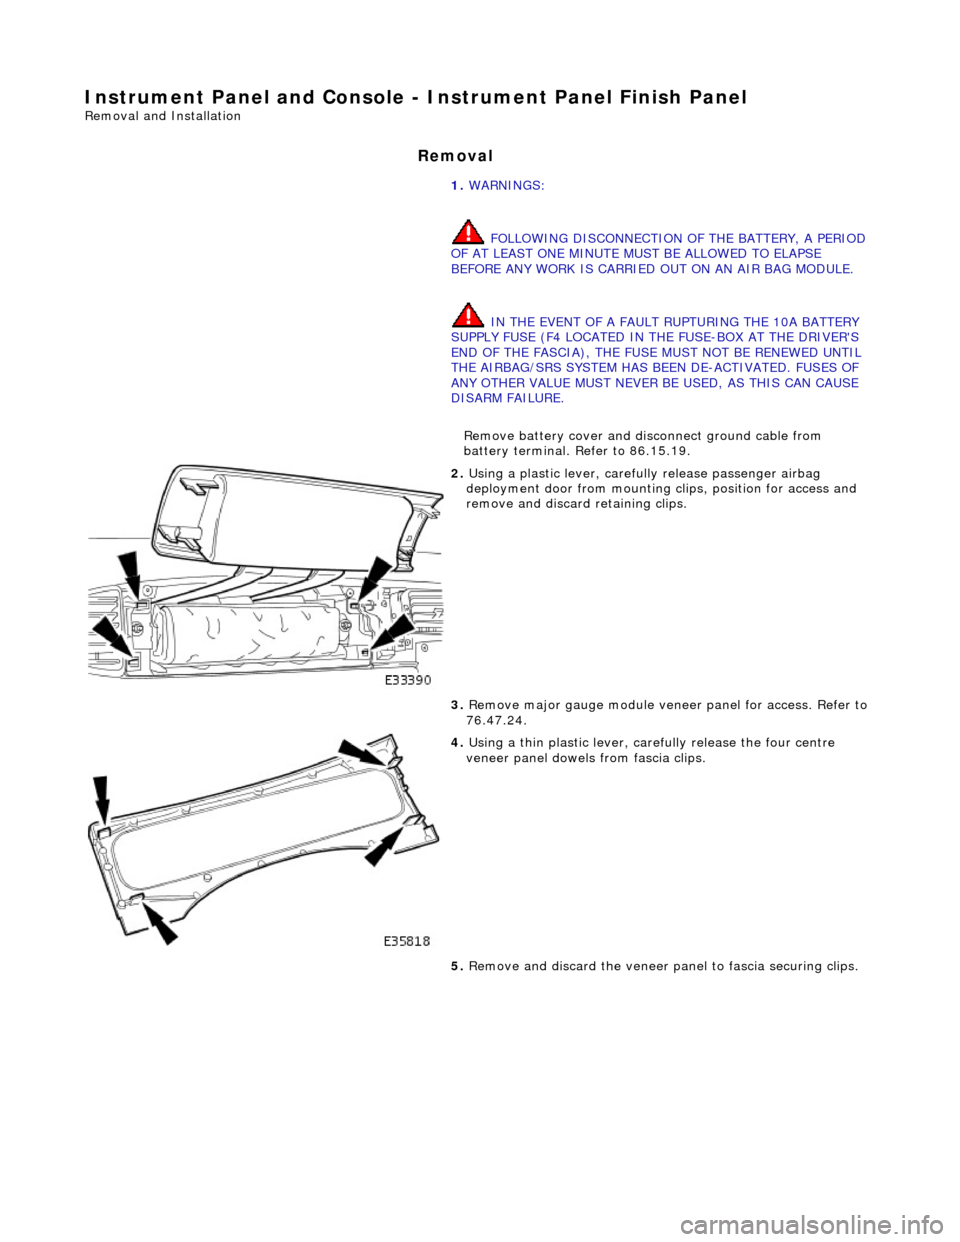
2. Using a plastic lever, carefu lly release passenger airbag
deployment door from mounting cl ips, position for access and
remove and discard retaining clips.
3. Remove major gauge module veneer panel for access. Refer to
76.47.24.
4. Using a thin plastic lever, care fully release the four centre
veneer panel dowels from fascia clips.
5. Remove and discard the veneer pa nel to fascia securing clips.
Page 2265 of 2490
Installation
1. Fit and fully seat new veneer panel securing clips to fascia.
2. Position center veneer panel on fascia, align dowels with clips
and press firmly at edges to fully seat.
3. Fit major gauge module veneer panel. Refer to 76.47.24.
4. Using new retaining clips, fit and fully seat passenger airbag
deployment door.
5. Connect ground cable to batt ery terrminal and fit battery
cover. Refer to 86.15.15.
Page 2369 of 2490

Supplemental Restraint System - Air Bag Supplemental Restraint System
(SRS)
Description and Operation
Supplementary Restraint Air Bag System
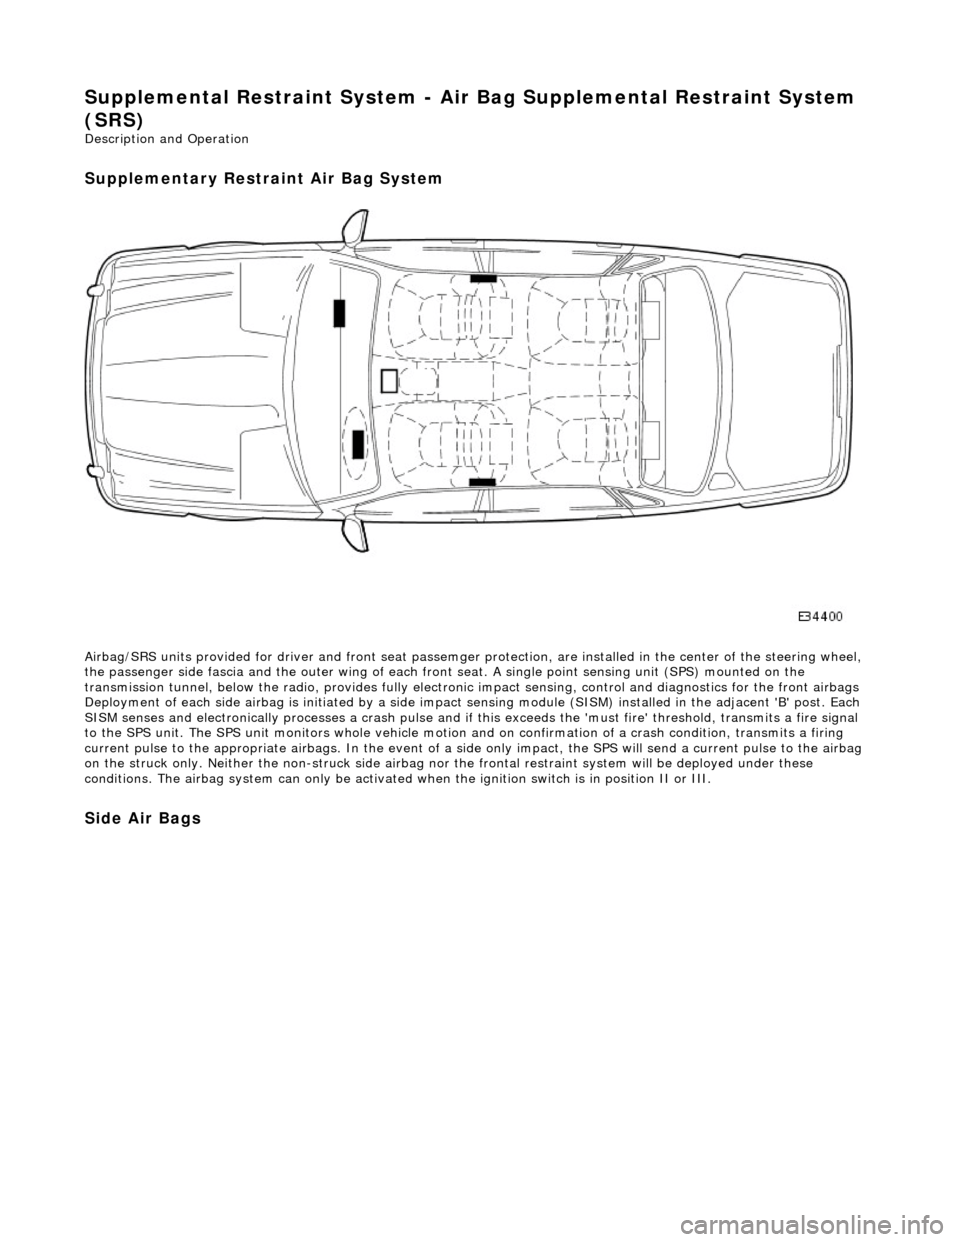
Airbag/SRS units provided for driver and fro nt seat passemger protection, are installed in the center of the steering wheel,
the passenger side fascia and the oute r wing of each front seat. A single point sensing unit (SPS) mounted on the
transmission tunnel, below the ra dio, provides fully electronic impact sensing, control and diagnostics for the front airbags
Deployment of each side airbag is initia ted by a side impact sensing module (SISM) installed in the adjacent 'B' post. Each
SISM senses and electronically processes a crash pulse and if this exceeds the 'must fire' threshold, transmits a fire signal
to the SPS unit. The SPS unit monitors wh ole vehicle motion and on confirmation of a crash condition, transmits a firing
current pulse to the appropriate airbags. In the event of a side only impact, the SPS will send a current pulse to the airbag
on the struck only. Neither th e non-struck side airbag nor the frontal restraint system will be deployed under these
conditions. The airbag system can only be activated wh en the ignition switch is in position II or III.
Side Air Bags
Page 2374 of 2490

Supplemental Restraint System - Passenger Air Bag Module
Removal and Installation
Removal
• WARNINGS:
FOLLOWING DISCONNECTION OF THE BATTERY, A PERIOD OF AT LEAST ONE MINUTE MUST BE ALLOWED TO ELAPSE
BEFORE ANY WORK IS CARRIED OUT ON AN AIR BAG MODULE.
FOLLOWING TEN YEARS IN SERVICE, AN AIR BAG MO DULE MUST BE REMOVED AND DISPOSED OF IN THE
APPROVED MANNER, AND A NEW AIR BAG MUST BE FITTED.
AIR BAGS CONTAIN A CHEMICAL IRRITANT. IF AN AIR BAG IS RENEWED, THE ORIGINAL UNIT MUST BE DISPOSED
OF IN ACCORDANCE WITH CURRENT SAFETY PROCEDURES.
IN THE EVENT OF A FAULT RUPTURING THE 10A BATTERY SUPPLY FUSE (F4 LOCATED IN THE FUSE-BOX AT THE
DRIVER'S END OF THE FASCIA), THE FUSE MUST NOT BE RENEWED UNTIL THE AIRBAG/SRS SYSTEM HAS BEEN DE-
ACTIVATED. FUSES OF ANY OTHER VALUE MUST NEVER BE USED, AS THIS CAN CAUSE DISARM FAILURE.
1. Remove battery cover and disc onnect ground cable from
terminal. Refer to 86.15.19.
2. Remove glove box. Refer to 76.52.03.
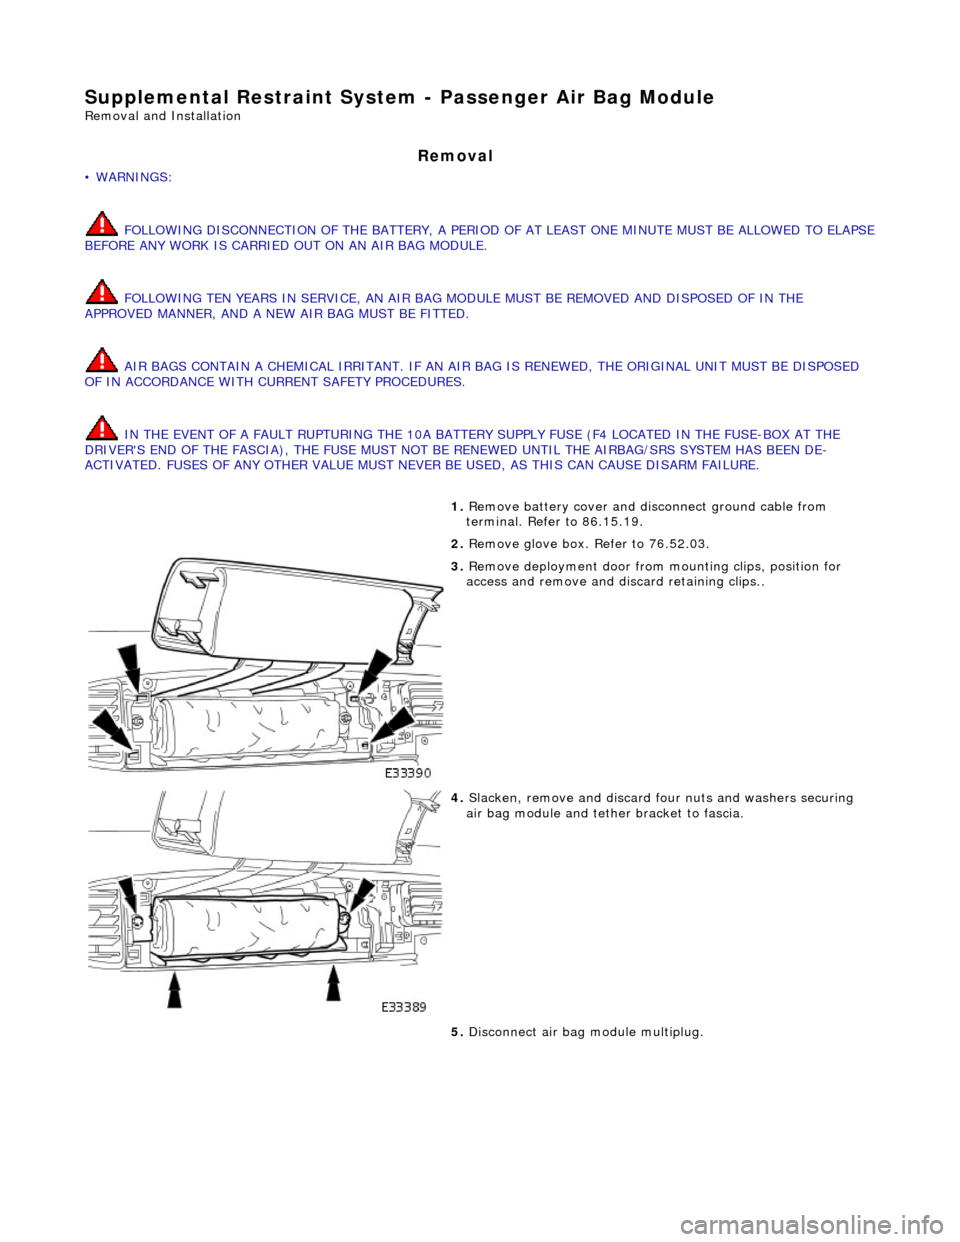
3. Remove deployment door from mounting clips, position for
access and remove and di scard retaining clips..
4. Slacken, remove and discard fo ur nuts and washers securing
air bag module and tether bracket to fascia.
5. Disconnect air bag module multiplug.