Page 2920 of 3342

8J6CHECK INSTALLATION OF TONE
WHEEL.
Tightening torque:
13±3 N⋅m (1.3±0.3 kg-m, 9±2.2 ft-lb)
: Are the tone wheel installation bolts tight-
ened securely?
: Go to step8J7.
: Tighten tone wheel installation bolts securely.
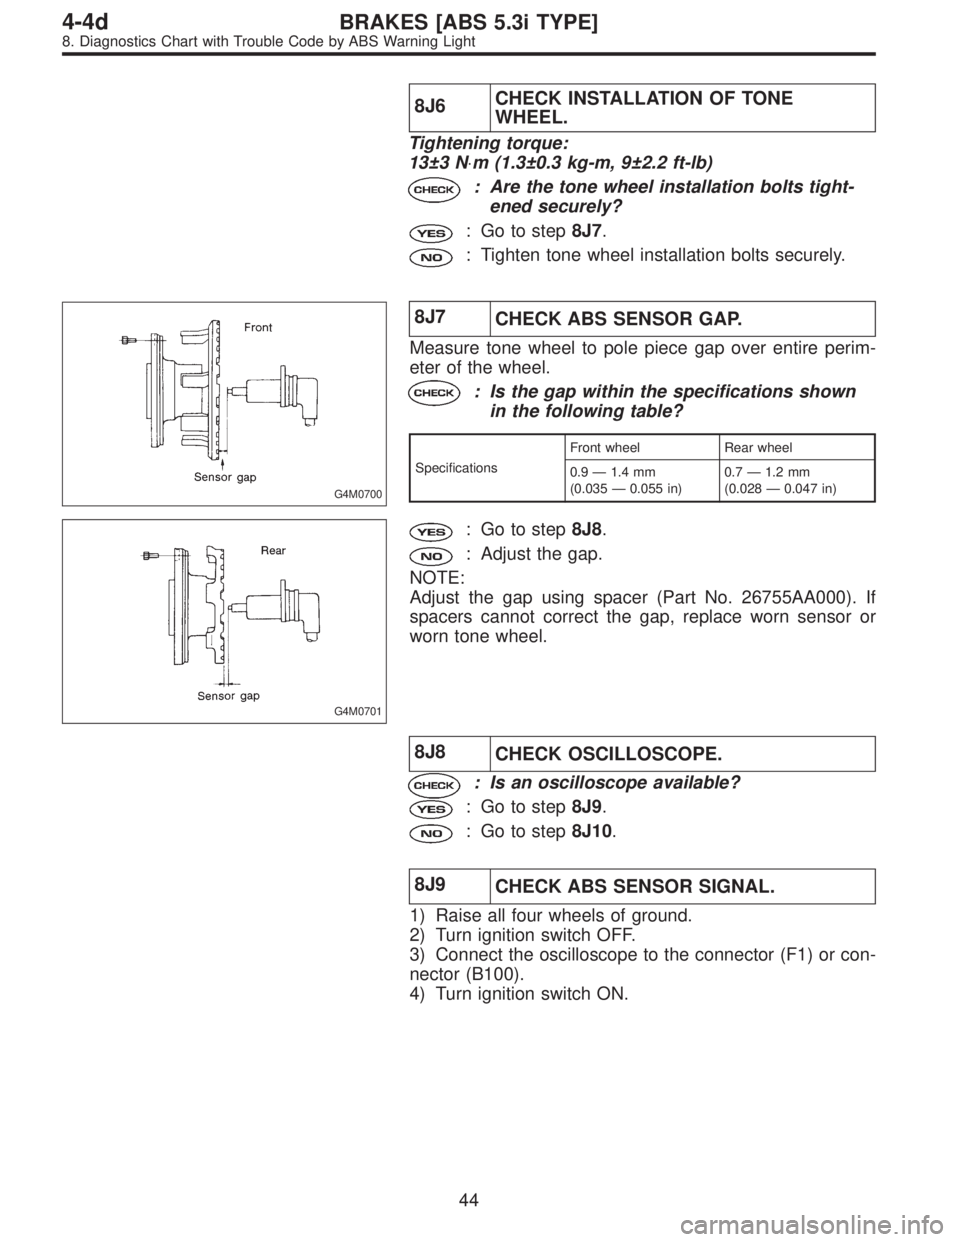
G4M0700
8J7
CHECK ABS SENSOR GAP.
Measure tone wheel to pole piece gap over entire perim-
eter of the wheel.
: Is the gap within the specifications shown
in the following table?
SpecificationsFront wheel Rear wheel
0.9—1.4 mm
(0.035—0.055 in)0.7—1.2 mm
(0.028—0.047 in)
G4M0701
: Go to step8J8.
: Adjust the gap.
NOTE:
Adjust the gap using spacer (Part No. 26755AA000). If
spacers cannot correct the gap, replace worn sensor or
worn tone wheel.
8J8
CHECK OSCILLOSCOPE.
: Is an oscilloscope available?
: Go to step8J9.
: Go to step8J10.
8J9
CHECK ABS SENSOR SIGNAL.
1) Raise all four wheels of ground.
2) Turn ignition switch OFF.
3) Connect the oscilloscope to the connector (F1) or con-
nector (B100).
4) Turn ignition switch ON.
44
4-4dBRAKES [ABS 5.3i TYPE]
8. Diagnostics Chart with Trouble Code by ABS Warning Light
Page 2922 of 3342
8J13
CHECK ABSCM&H/U.
1) Turn ignition switch to OFF.
2) Connect all connectors.
3) Erase the memory.
4) Perform inspection mode.
5) Read out the trouble code.
: Is the same trouble code as in the current
diagnosis still being output?
: Replace ABSCM&H/U.
: Go to step8J14.
8J14CHECK ANY OTHER TROUBLE CODES
APPEARANCE.
: Are other trouble codes being output?
: Proceed with the diagnosis corresponding to the
trouble code.
: A temporary poor contact.
46
4-4dBRAKES [ABS 5.3i TYPE]
8. Diagnostics Chart with Trouble Code by ABS Warning Light
Page 2924 of 3342
B4M1234A
8N1CHECK INPUT VOLTAGE OF
ABSCM&H/U.
1) Disconnect connector from ABSCM&H/U.
2) Run the engine at idle.
3) Measure voltage between ABSCM&H/U connector and
chassis ground.
Connector & terminal
(F49) No. 1 (+)—Chassis ground (�):
: Is the voltage between 10 V and 15 V?
: Go to step8N2.
: Repair harness connector between battery, igni-
tion switch and ABSCM&H/U.
B4M1243A
8N2CHECK GROUND CIRCUIT OF
ABSCM&H/U.
1) Turn ignition switch to OFF.
2) Measure resistance between ABSCM&H/U connector
and chassis ground.
Connector & terminal
(F49) No. 23—Chassis ground:
: Is the resistance less than 0.5Ω?
: Go to step8N3.
: Repair ABSCM&H/U ground harness.
8N3CHECK POOR CONTACT IN CONNEC-
TORS.
: Is there poor contact in connectors between
generator, battery and ABSCM&H/U?
to FOREWORD [T3C1].>
: Repair connector.
: Go to step8N4.
48
4-4dBRAKES [ABS 5.3i TYPE]
8. Diagnostics Chart with Trouble Code by ABS Warning Light
Page 2927 of 3342

B4M1234A
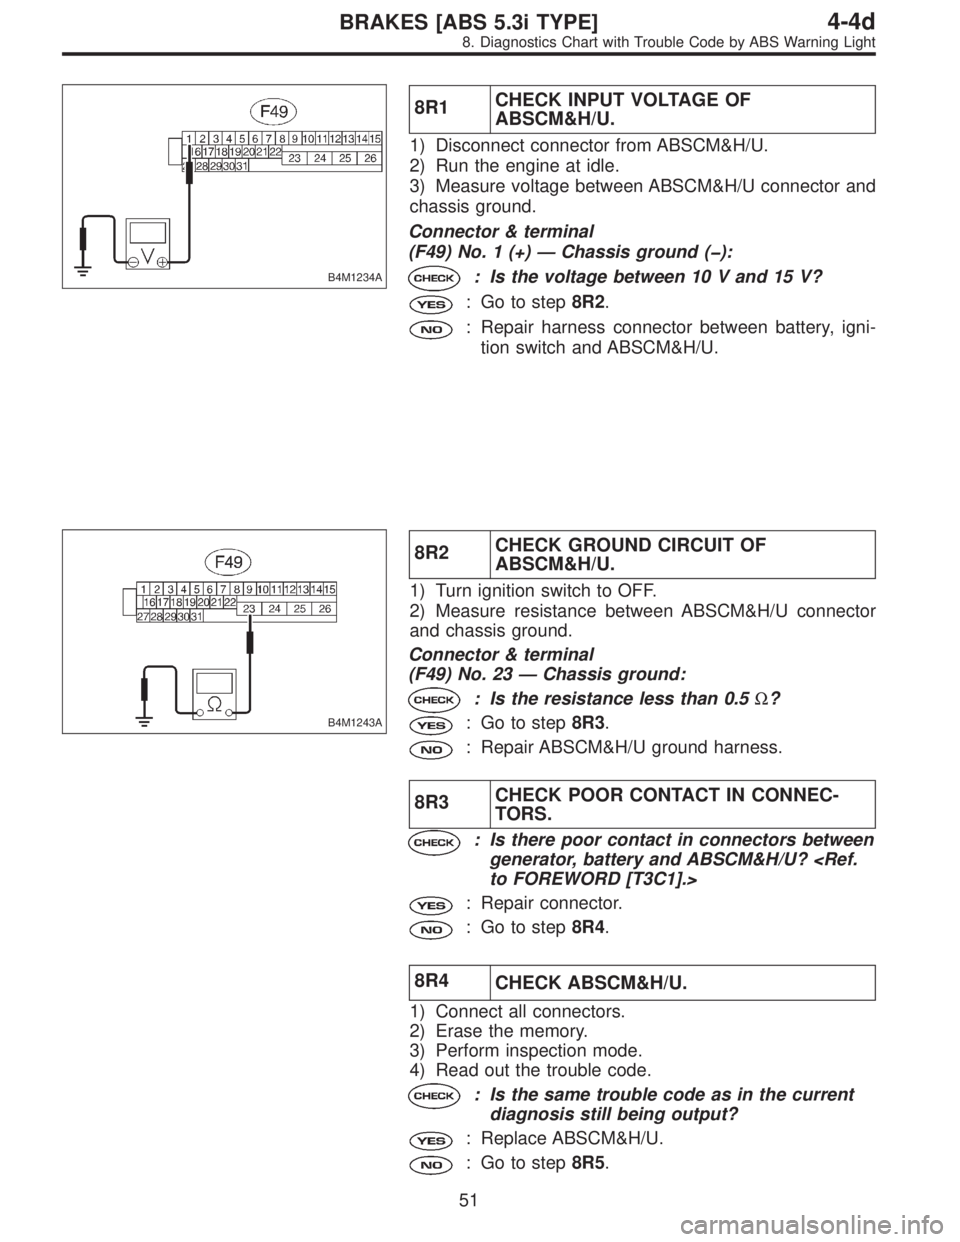
8R1CHECK INPUT VOLTAGE OF
ABSCM&H/U.
1) Disconnect connector from ABSCM&H/U.
2) Run the engine at idle.
3) Measure voltage between ABSCM&H/U connector and
chassis ground.
Connector & terminal
(F49) No. 1 (+)—Chassis ground (�):
: Is the voltage between 10 V and 15 V?
: Go to step8R2.
: Repair harness connector between battery, igni-
tion switch and ABSCM&H/U.
B4M1243A
8R2CHECK GROUND CIRCUIT OF
ABSCM&H/U.
1) Turn ignition switch to OFF.
2) Measure resistance between ABSCM&H/U connector
and chassis ground.
Connector & terminal
(F49) No. 23—Chassis ground:
: Is the resistance less than 0.5Ω?
: Go to step8R3.
: Repair ABSCM&H/U ground harness.
8R3CHECK POOR CONTACT IN CONNEC-
TORS.
: Is there poor contact in connectors between
generator, battery and ABSCM&H/U?
to FOREWORD [T3C1].>
: Repair connector.
: Go to step8R4.
8R4
CHECK ABSCM&H/U.
1) Connect all connectors.
2) Erase the memory.
3) Perform inspection mode.
4) Read out the trouble code.
: Is the same trouble code as in the current
diagnosis still being output?
: Replace ABSCM&H/U.
: Go to step8R5.
51
4-4dBRAKES [ABS 5.3i TYPE]
8. Diagnostics Chart with Trouble Code by ABS Warning Light
Page 2930 of 3342

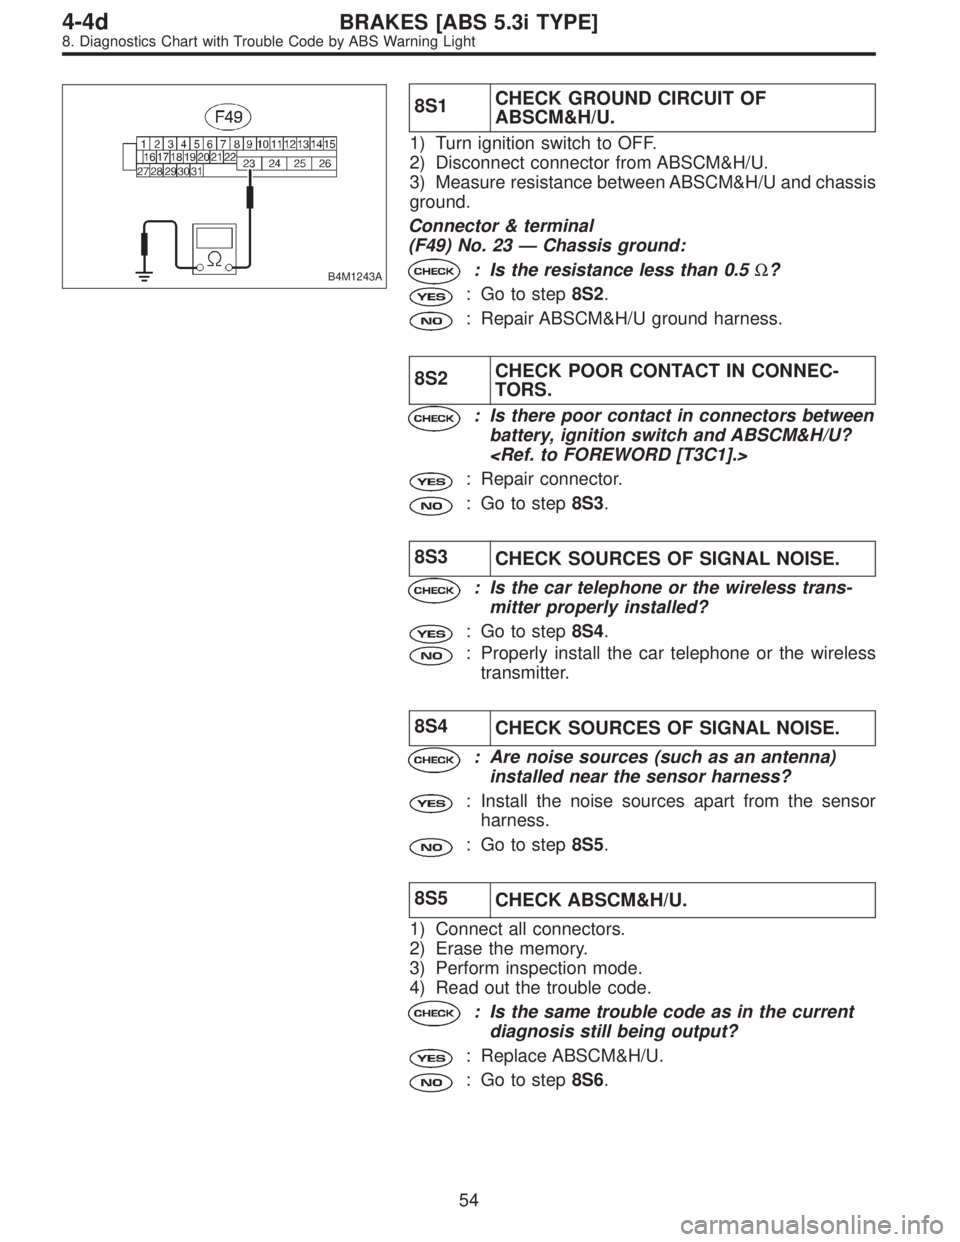
B4M1243A
8S1CHECK GROUND CIRCUIT OF
ABSCM&H/U.
1) Turn ignition switch to OFF.
2) Disconnect connector from ABSCM&H/U.
3) Measure resistance between ABSCM&H/U and chassis
ground.
Connector & terminal
(F49) No. 23—Chassis ground:
: Is the resistance less than 0.5Ω?
: Go to step8S2.
: Repair ABSCM&H/U ground harness.
8S2CHECK POOR CONTACT IN CONNEC-
TORS.
: Is there poor contact in connectors between
battery, ignition switch and ABSCM&H/U?
: Repair connector.
: Go to step8S3.
8S3
CHECK SOURCES OF SIGNAL NOISE.
: Is the car telephone or the wireless trans-
mitter properly installed?
: Go to step8S4.
: Properly install the car telephone or the wireless
transmitter.
8S4
CHECK SOURCES OF SIGNAL NOISE.
: Are noise sources (such as an antenna)
installed near the sensor harness?
: Install the noise sources apart from the sensor
harness.
: Go to step8S5.
8S5
CHECK ABSCM&H/U.
1) Connect all connectors.
2) Erase the memory.
3) Perform inspection mode.
4) Read out the trouble code.
: Is the same trouble code as in the current
diagnosis still being output?
: Replace ABSCM&H/U.
: Go to step8S6.
54
4-4dBRAKES [ABS 5.3i TYPE]
8. Diagnostics Chart with Trouble Code by ABS Warning Light
Page 2933 of 3342
B4M0430
8T1
CHECK GENERATOR.
1) Start engine.
2) Idling after warm-up.
3) Measure voltage between generator B terminal and
chassis ground.
Terminal
Generator B terminal—Chassis ground:
: Is the voltage between 10 V and 17 V?
: Go to step8T2.
: Repair generator.
8T2
CHECK BATTERY TERMINAL.
Turn ignition switch to OFF.
: Are the positive and negative battery termi-
nals tightly clamped?
: Go to step8T3.
: Tighten the clamp of terminal.
B4M1234A
8T3CHECK INPUT VOLTAGE OF
ABSCM&H/U.
1) Disconnect connector from ABSCM&H/U.
2) Run the engine at idle.
3) Measure voltage between ABSCM&H/U connector and
chassis ground.
Connector & terminal
(F49) No. 1 (+)—Chassis ground (�):
: Is the voltage between 10 V and 17 V?
: Go to step8T4.
: Repair harness connector between battery, igni-
tion switch and ABSCM&H/U.
57
4-4dBRAKES [ABS 5.3i TYPE]
8. Diagnostics Chart with Trouble Code by ABS Warning Light
Page 2934 of 3342
B4M1243A
8T4CHECK GROUND CIRCUIT OF
ABSCM&H/U.
1) Turn ignition switch to OFF.
2) Measure resistance between ABSCM&H/U connector
and chassis ground.
Connector & terminal
(F49) No. 23—Chassis ground:
: Is the resistance less than 0.5Ω?
: Go to step8T5.
: Repair ABSCM&H/U ground harness.
8T5CHECK POOR CONTACT IN CONNEC-
TORS.
: Is there poor contact in connectors between
generator, battery and ABSCM&H/U?
to FOREWORD [T3C1].>
: Repair connector.
: Go to step8T6.
8T6
CHECK ABSCM&H/U.
1) Connect all connectors.
2) Erase the memory.
3) Perform inspection mode.
4) Read out the trouble code.
: Is the same trouble code as in the current
diagnosis still being output?
: Replace ABSCM&H/U.
: Go to step8T7.
8T7CHECK ANY OTHER TROUBLE CODES
APPEARANCE.
: Are other trouble codes being output?
: Proceed with the diagnosis corresponding to the
trouble code.
: A temporary poor contact.
58
4-4dBRAKES [ABS 5.3i TYPE]
8. Diagnostics Chart with Trouble Code by ABS Warning Light
Page 2936 of 3342
B4M1248A
8U1CHECK SPECIFICATIONS OF THE
ABSCM.
Check specifications of the mark to the ABSCM&H/U.
Mark Model
C3 AWD AT
C4 AWD MT
: Is an ABSCM&H/U for AT model installed on
a MT model?
: Replace ABSCM&H/U.
: Go to step8U2.
B4M1249A
8U2
CHECK GROUND SHORT OF HARNESS.
1) Turn ignition switch to OFF.
2) Disconnect two connectors from TCM.
3) Disconnect connector from ABSCM&H/U.
4) Measure resistance between ABSCM&H/U connector
and chassis ground.
Connector & terminal
(F49) No. 3—Chassis ground:
: Is the resistance more than 1 MΩ?
: Go to step8U3.
: Repair harness between TCM and ABSCM&H/U.
B4M1250A
8U3
CHECK BATTERY SHORT OF HARNESS.
Measure voltage between ABSCM&H/U connector and
chassis ground.
Connector & terminal
(F49) No. 3 (+)—Chassis ground (�):
: Is the voltage less than 1 V?
: Go to step8U4.
: Repair harness between TCM and ABSCM&H/U.
60
4-4dBRAKES [ABS 5.3i TYPE]
8. Diagnostics Chart with Trouble Code by ABS Warning Light