Page 1476 of 2053
SSANGYONG MY2002
6C-8 POWER STEERING GEAR
KAA6C040
KAA6C030
ON-VEHICLE SERVICE
RACK AND PINION ASSEMBLY
Tools Required
661 589 13 33 00 Ball Joint Remover
Removal and Installation Procedure
1. Raise and suitably support the vehicle.
2. Remove the wheels. Refer to Section 2E, Tires
and Wheels.
3. Remove the intermediate shaft. Refer to
“Intermediate shaft” in this section.
4. Disconnect the return line pipe from the power
steering gear outlet. Place a drain pan under the
steering gear to catch the power steering fluid.
Installation Notice
REPAIR INSTRUCTIONS
Tightening Torque 17 Nm (13 lb-ft)
5. Disconnect the pressure line pipe from the power
steering gear inlet.
Installation Notice
Tightening Torque 17 Nm (13 lb-ft)
Page 1477 of 2053
POWER STEERING GEAR 6C-9
SSANGYONG MY2002
KAA6C140
KAA6C050
KAA6C050
6. Remove the outer tie rod nuts and disconnect the
tie rod ends from the knuckle using the ball joint
remover 661 589 13 33 00.
Installation Notice
7. Remove the rack and pinion assembly mounting
bolts and remove therackand pinion assembly.
Installation Notice
Tightening Torque 40 Nm (30 lb-ft)
After installing the rack and pinion assembly,
bleed the power steering system. Refer to
Section 6A, Power Steering System.
OUTER TIE ROD
Tools Required
661589 13 33 00 BallJointRemover
Removal and Installation Procedure
1. Remove the wheel. Refer to Section 2E, Tires and
wheels.
2. Mark the threads on the inner tie rod to aid in
repositioning the adjusting nut.
3. Remove the outer tie rod nut and disconnect the
outer tie rod from the knuckle using the ball joint
remover 661 589 13 33 00.
Installation Notice
Tightening Torque 78 Nm (58 lb-ft)
Tightening Torque 40 Nm (30 lb-ft)
Page 1478 of 2053

SSANGYONG MY2002
6C-10 POWER STEERING GEAR
KAA6C090
KAA6C100
KAA6C110
KAA6C080
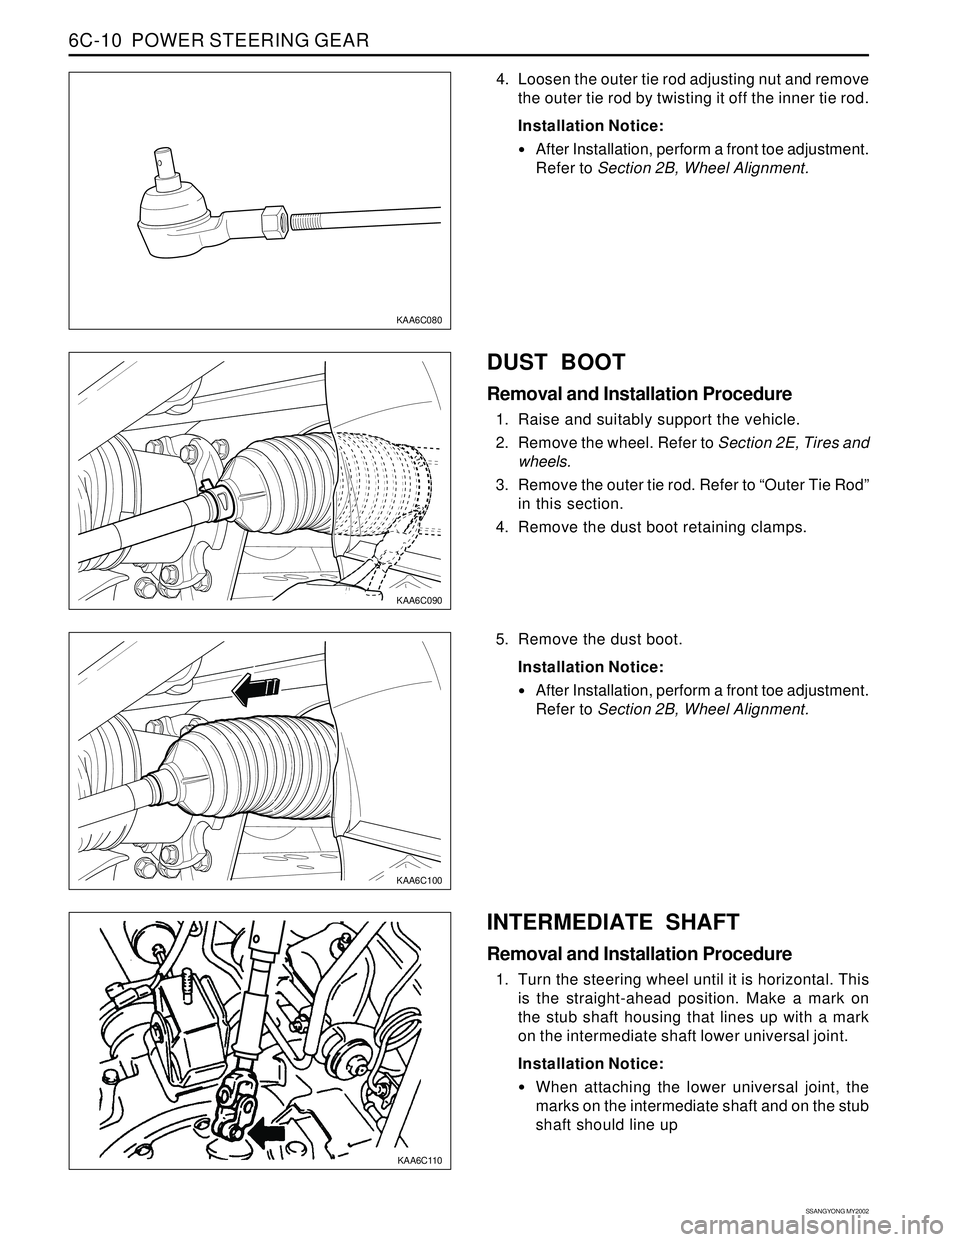
4. Loosen the outer tie rod adjusting nut and remove
the outer tie rod by twisting it off the inner tie rod.
Installation Notice:
After Installation, perform a front toe adjustment.
Refer to Section 2B, Wheel Alignment.
DUST BOOT
Removal and Installation Procedure
1. Raise and suitably support the vehicle.
2. Remove the wheel. Refer to Section 2E, Tires and
wheels.
3. Remove the outer tie rod. Refer to “Outer Tie Rod”
in this section.
4. Remove the dust boot retaining clamps.
5. Remove the dust boot.
Installation Notice:
After Installation, perform a front toe adjustment.
Refer to Section 2B, Wheel Alignment.
INTERMEDIATE SHAFT
Removal and Installation Procedure
1. Turn the steering wheel until it is horizontal. This
is the straight-ahead position. Make a mark on
the stub shaft housing that lines up with a mark
on the intermediate shaft lower universal joint.
Installation Notice:
When attaching the lower universal joint, the
marks on the intermediate shaft and on the stub
shaft should line up
Page 1479 of 2053
POWER STEERING GEAR 6C-11
SSANGYONG MY2002
KAA6C120
KAA6C130
2. Remove the lower pinch bolt from the universal
joint on the intermediate shaft.
Installation Notice
Tightening Torque 27 Nm (20 lb-ft)
3. Make a mark on the steering column shaft that
lines up with a mark on the intermediate shaft
upper universal joint.
Installation Notice:
When attaching the upper universal joint, the
marks on the intermediate shaft and steering
column shaft should line up
4. Remove the upper pinch bolt from the universal
joint on the intermediate shaft.
Installation Notice
5. Remove the intermediate shaft.
Tightening Torque 27 Nm (20 lb-ft)
HYDRAULIC CYLINDER LINES
Removal and Installation Procedure
1. Siphon the power steering fluid from the power
steering fluid reservoir.
2. Disconnect the power steering gear hydraulic
cylinder pipes from the power steering gear at the
valve end. Replace the O-ring seals as needed.
Installation Notice
Tightening Torque 14 Nm (10 lb-ft)
Page 1480 of 2053
SSANGYONG MY2002
6C-12 POWER STEERING GEAR
KAA6C140
3. Raise and suitably support the vehicle.
4. Disconnect the power steering gear hydraulic
cylinder pipes from the power steering gear at the
cylinder end.
5. Remove the steering gear hydraulic cylinder pipes
from the vehicle.
Installation Notice
Tightening Torque 61 Nm (44 lb-ft)
When adding power steering fluid or making a
complete change, always use DEXRON. - II pow-
er steering fluid. Failure to use the proper fluid
will cause hose and seal damage and fluid
leaks.
Fill the reservoir with power steering fluid.
Inspect for leaks. If there are leaks, correct the
cause of the leaks and bleed the system. Refer
to “Bleeding the Power Steering System” in this
section.
Page 1481 of 2053

POWER STEERING GEAR 6C-13
SSANGYONG MY2002
KAA6C150
UNIT REPAIR
RACK AND PINION
Disassembly and Assembly Procedure
1. Remove the rack and pinion assembly from the
vehicle. Refer to “Rack and Pinion Assembly” in
this section.
2. Remove the valve and pinion assembly from the
rack and pinion steering assembly. Refer to “Valve
and Pinion” in this section.
3. Remove the rack bearing assembly from the rack
and pinion steering assembly. Refer to “Rack
Bearing” in this section.
4. Mark the threads on the inner tie rod to aid in
repositioning the adjusting nut.
5. Loosen the adjusting nut and remove the outer tie
rod nut and the adjusting nut.
Installation Notice:
When installing the outer tie rod nut, the mark
on the inner tie rod and adjusting nut should
line up.
After installation, perform a front toe adjustment.
Refer to Section 2B, Wheel Alignment.
KAA6C160
KAA6C170
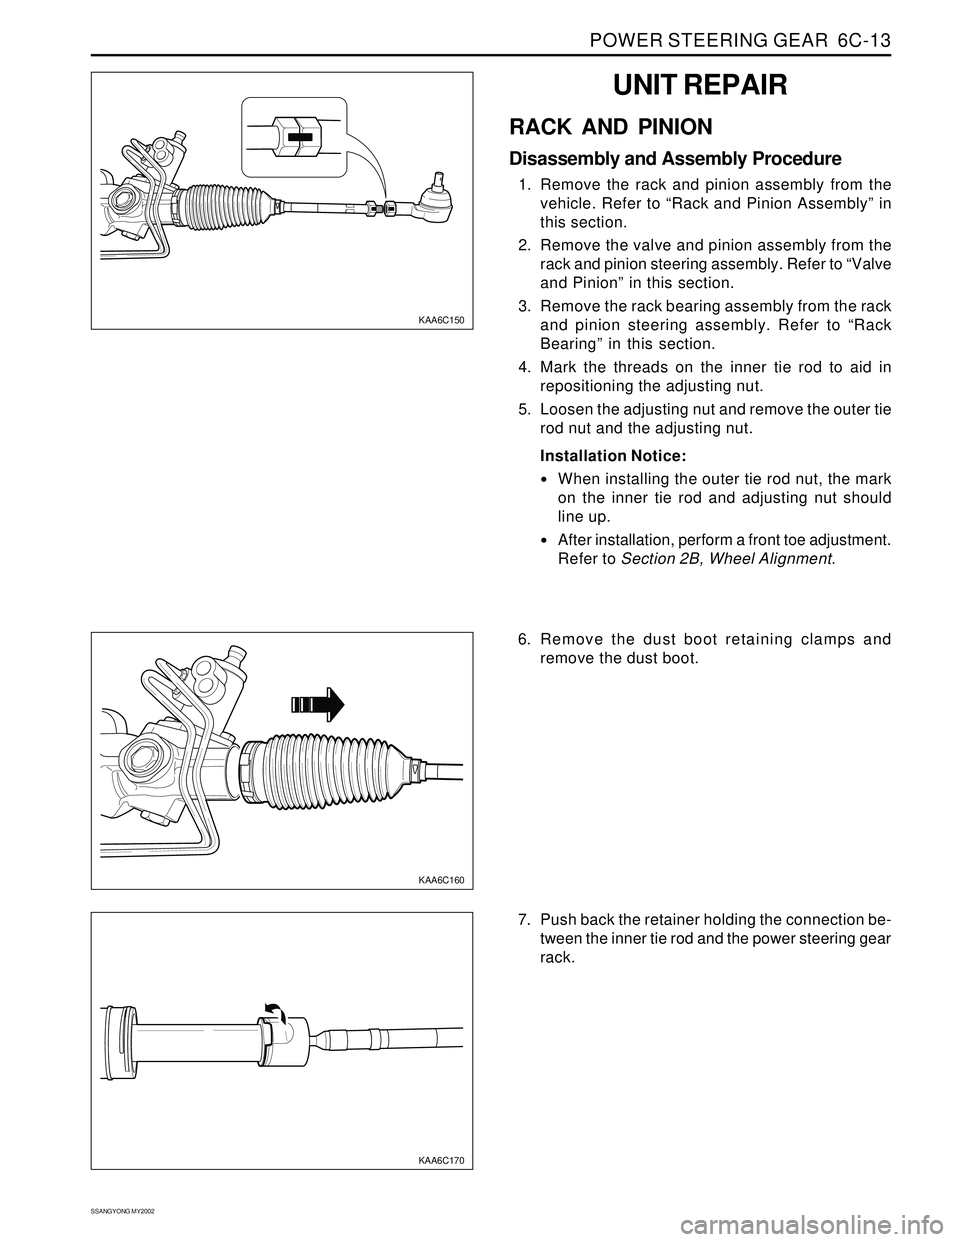
6. Remove the dust boot retaining clamps and
remove the dust boot.
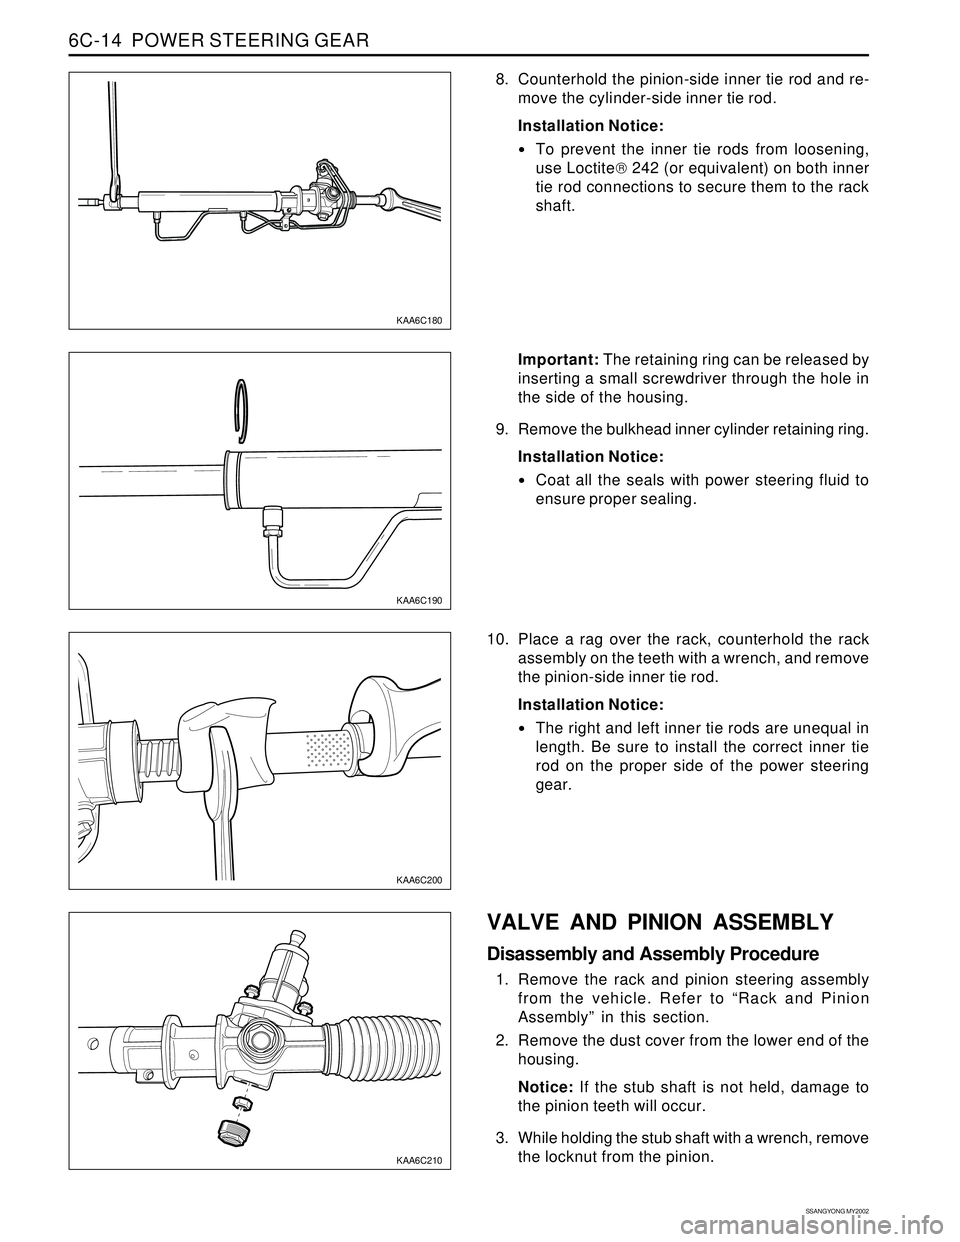
7. Push back the retainer holding the connection be-
tween the inner tie rod and the power steering gear
rack.
Page 1482 of 2053

SSANGYONG MY2002
6C-14 POWER STEERING GEAR
8. Counterhold the pinion-side inner tie rod and re-
move the cylinder-side inner tie rod.
Installation Notice:
To prevent the inner tie rods from loosening,
use Loctite 242 (or equivalent) on both inner
tie rod connections to secure them to the rack
shaft.
KAA6C180
KAA6C190
KAA6C210
KAA6C200
Important: The retaining ring can be released by
inserting a small screwdriver through the hole in
the side of the housing.
9. Remove the bulkhead inner cylinder retaining ring.
Installation Notice:
Coat all the seals with power steering fluid to
ensure proper sealing.
10. Place a rag over the rack, counterhold the rack
assembly on the teeth with a wrench, and remove
the pinion-side inner tie rod.
Installation Notice:
The right and left inner tie rods are unequal in
length. Be sure to install the correct inner tie
rod on the proper side of the power steering
gear.
VALVE AND PINION ASSEMBLY
Disassembly and Assembly Procedure
1. Remove the rack and pinion steering assembly
from the vehicle. Refer to “Rack and Pinion
Assembly” in this section.
2. Remove the dust cover from the lower end of the
housing.
Notice: If the stub shaft is not held, damage to
the pinion teeth will occur.
3. While holding the stub shaft with a wrench, remove
the locknut from the pinion.
Page 1483 of 2053
POWER STEERING GEAR 6C-15
SSANGYONG MY2002
4. Remove the stub shaft and stub shaft housing.
KAA6C220
KAA6C230
KAA6C240
5. Remove the stub shaft from the stub shaft housing
6. Remove the stub shaft seal in the stub shaft.
Installation Notice:
Coat all the seals with power steering fluid to
ensure proper sealing.
RACK BEARING
Disassembly and Assembly Procedure
Tools Required
DW310-040Power Steering Rack Guide Spring Cap
Wrench
1. Remove the rack and pinion steering assembly
from the vehicle. Refer to “Rack and Pinion
Assembly” in this section.
2. Remove the adjuster plug locknut from the
adjuster plug, and remove the adjuster plug from
the housing with the power steering rack guide
spring cap wrench DW310-040.
Installation Notice
Tightening Torque 59 Nm (43 lb-ft)