Page 44 of 247
Key operation
To unlock the rear door, turn the key coun-
terclockwise. To open the rear door, lift up
on the opener handle near the license plate.
To close, lower and push the rear door
down securely.
To lock the rear door without the key, set the
lock lever to the lock position following the
``Push to Lock'' instructions near the latch,
then close the rear door securely.
WARNING
Do not drive with the rear door or glass
open. This could allow dangerous ex-
haust gases to be drawn into the ve-
hicle. See ``Exhaust gas'' in the ``Start-
ing and driving'' section.
APD0824
REAR DOOR LOCK
2-11
ZX
Page 45 of 247
To lock the rear door with the key, turn the
key clockwise as shown in the illustration.
Turning the key fully clockwise unlocks the
rear window on models equipped with the
flip-up rear window. The rear wiper auto-
matically lowers when the key is turned fully
clockwise. Do not force the wiper to lower
by hand.
To close the rear window, firmly push on the
window until it locks in place.
APD0802
2-12
ZX
Page 48 of 247

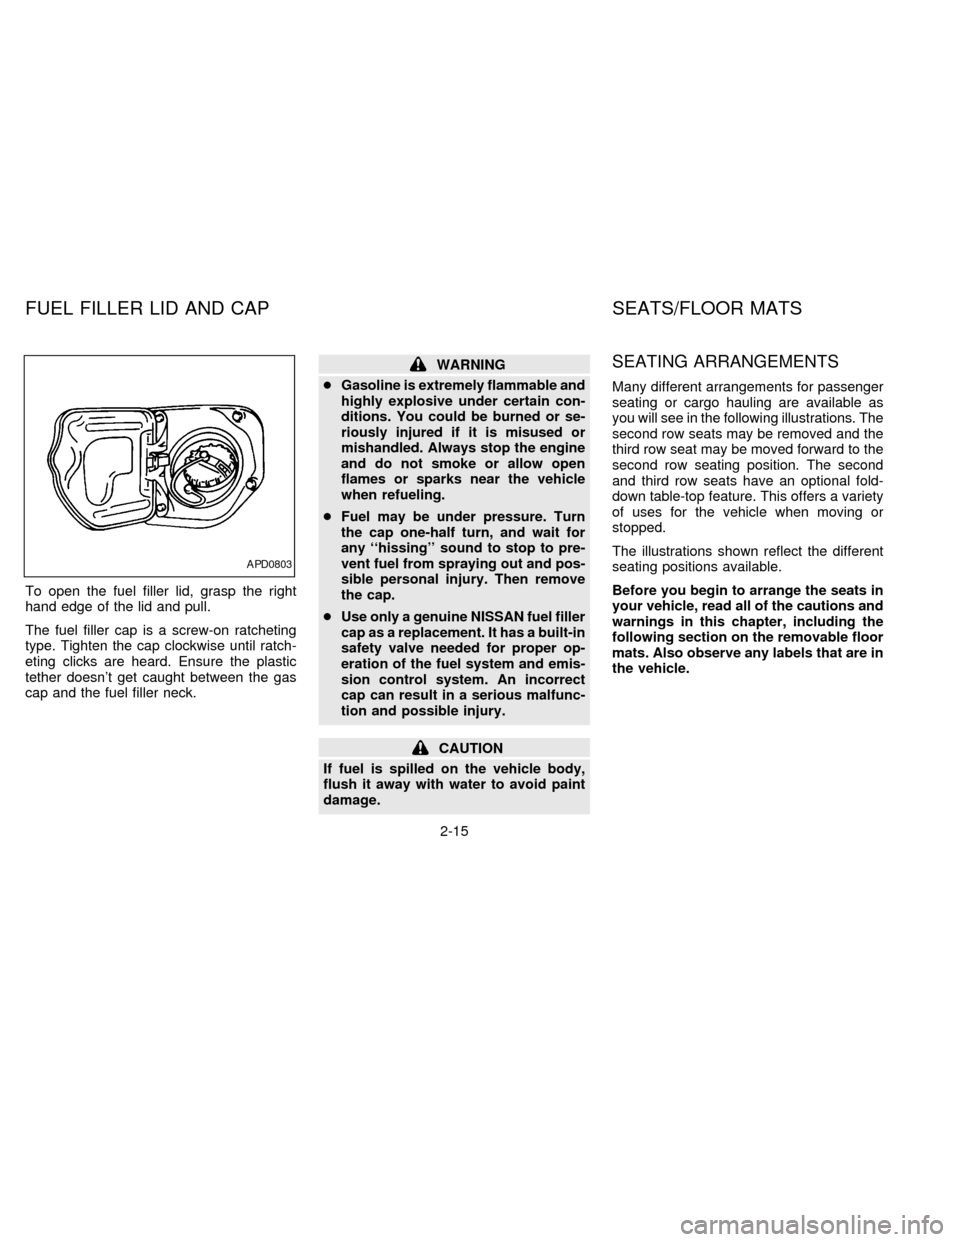
To open the fuel filler lid, grasp the right
hand edge of the lid and pull.
The fuel filler cap is a screw-on ratcheting
type. Tighten the cap clockwise until ratch-
eting clicks are heard. Ensure the plastic
tether doesn't get caught between the gas
cap and the fuel filler neck.
WARNING
cGasoline is extremely flammable and
highly explosive under certain con-
ditions. You could be burned or se-
riously injured if it is misused or
mishandled. Always stop the engine
and do not smoke or allow open
flames or sparks near the vehicle
when refueling.
cFuel may be under pressure. Turn
the cap one-half turn, and wait for
any ``hissing'' sound to stop to pre-
vent fuel from spraying out and pos-
sible personal injury. Then remove
the cap.
cUse only a genuine NISSAN fuel filler
cap as a replacement. It has a built-in
safety valve needed for proper op-
eration of the fuel system and emis-
sion control system. An incorrect
cap can result in a serious malfunc-
tion and possible injury.
CAUTION
If fuel is spilled on the vehicle body,
flush it away with water to avoid paint
damage.
SEATING ARRANGEMENTS
Many different arrangements for passenger
seating or cargo hauling are available as
you will see in the following illustrations. The
second row seats may be removed and the
third row seat may be moved forward to the
second row seating position. The second
and third row seats have an optional fold-
down table-top feature. This offers a variety
of uses for the vehicle when moving or
stopped.
The illustrations shown reflect the different
seating positions available.
Before you begin to arrange the seats in
your vehicle, read all of the cautions and
warnings in this chapter, including the
following section on the removable floor
mats. Also observe any labels that are in
the vehicle.
APD0803
FUEL FILLER LID AND CAP SEATS/FLOOR MATS
2-15
ZX
Page 59 of 247
MANUAL FRONT SEAT
ADJUSTMENT
WARNING
cDo not adjust the driver's seat while
driving. The seat may move sud-
denly and could cause loss of con-
trol of the vehicle.
cAfter adjustment, gently rock in the
seat to make sure it is securely
locked.
Forward and backward
Rotate the lever up while you slide the seat
forward or backward to the desired position.
Release the lever to lock the seat in posi-
tion.
Reclining
To recline the seatback, pull the lever up
and lean back. To bring the seatback for-
ward again, pull the lever and move your
body forward. The seatback moves forward.
Release the lever to lock the seatback in
position.
APD0119
SEATS
2-26
ZX
Page 65 of 247

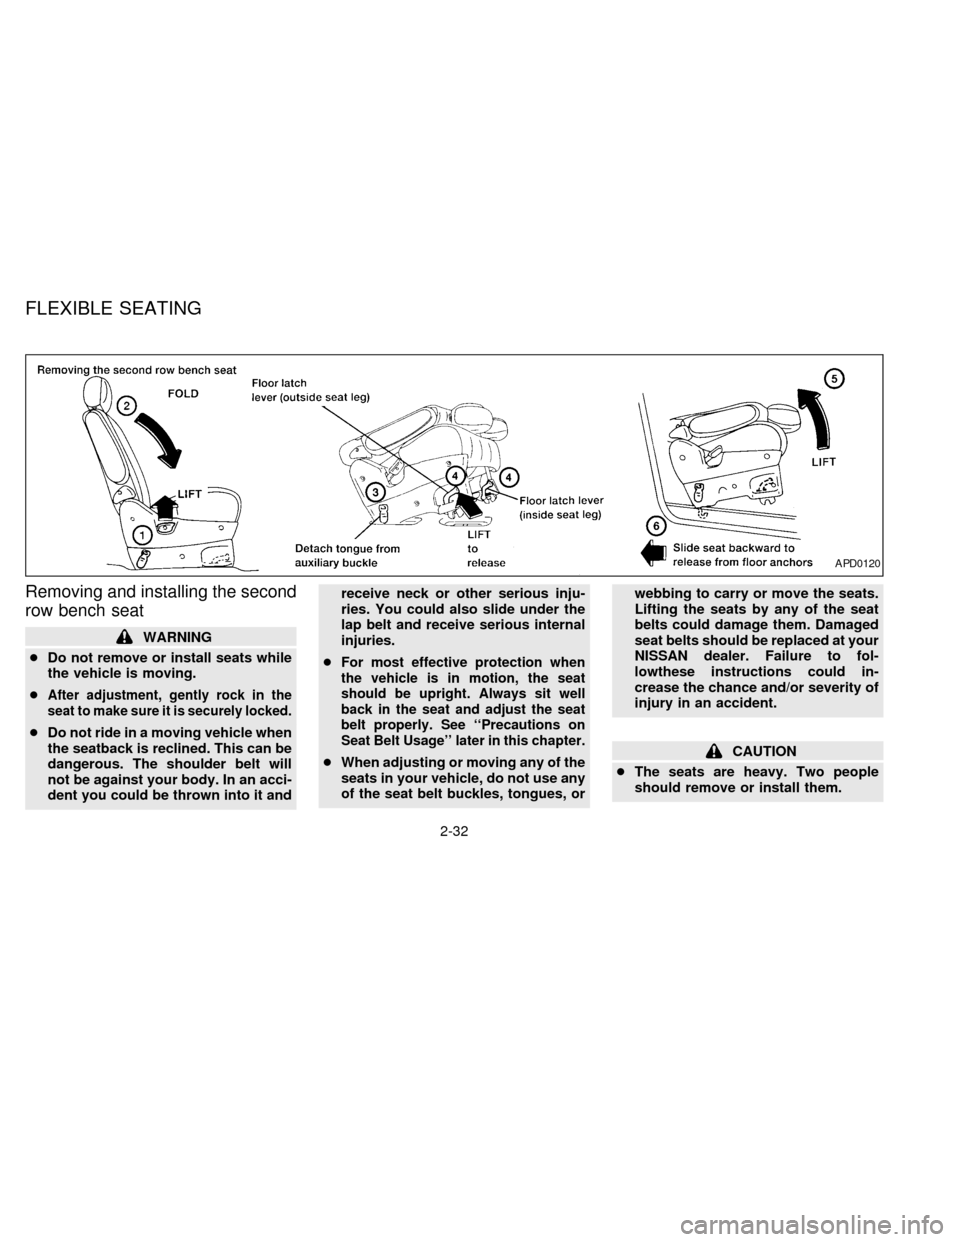
Removing and installing the second
row bench seat
WARNING
cDo not remove or install seats while
the vehicle is moving.
c
After adjustment, gently rock in the
seat to make sure it is securely locked.
cDo not ride in a moving vehicle when
the seatback is reclined. This can be
dangerous. The shoulder belt will
not be against your body. In an acci-
dent you could be thrown into it andreceive neck or other serious inju-
ries. You could also slide under the
lap belt and receive serious internal
injuries.
c
For most effective protection when
the vehicle is in motion, the seat
should be upright. Always sit well
back in the seat and adjust the seat
belt properly. See ``Precautions on
Seat Belt Usage'' later in this chapter.
cWhen adjusting or moving any of the
seats in your vehicle, do not use any
of the seat belt buckles, tongues, orwebbing to carry or move the seats.
Lifting the seats by any of the seat
belts could damage them. Damaged
seat belts should be replaced at your
NISSAN dealer. Failure to fol-
lowthese instructions could in-
crease the chance and/or severity of
injury in an accident.CAUTION
cThe seats are heavy. Two people
should remove or install them.
APD0120
FLEXIBLE SEATING
2-32
ZX
Page 66 of 247

cDo not sit in seats that have been
removed from the vehicle. They may
tip over and you could be injured.
1. Lift up the recliner lever.
2. Fold the seatback fully forward.
3. Detach the single window tongue from
the auxiliary buckle mounted to the side
of the seat and store the tongue out of
the way. (For detailed information, see
``Two buckle seat belt system for the
second row bench seat'' later in this
section.)
4. Unlock the seat legs at the two front floor
latch levers.
5. Lift the front of the seat.
6. Slide it rearward off the rear anchor
positions.
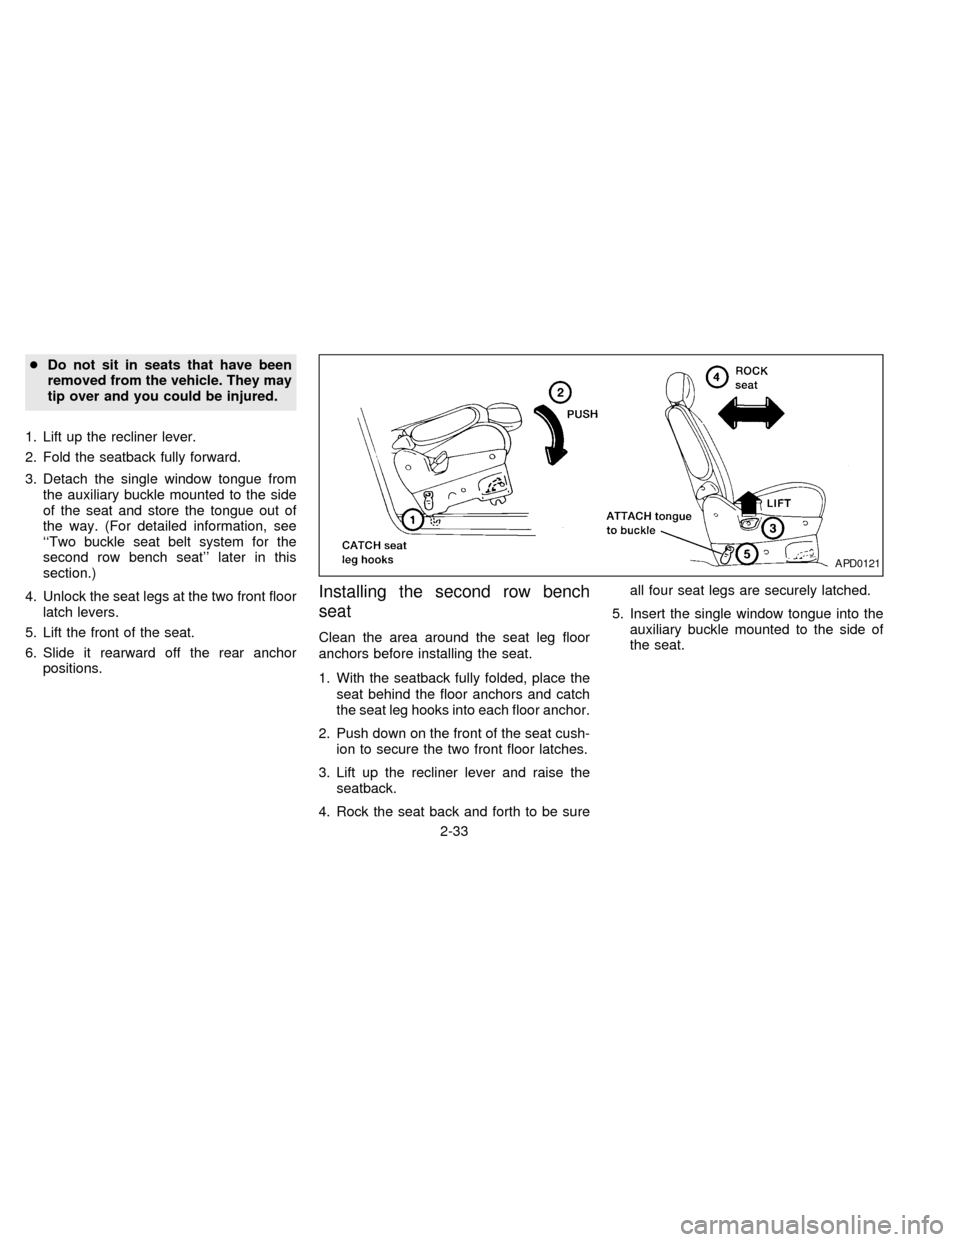
Installing the second row bench
seat
Clean the area around the seat leg floor
anchors before installing the seat.
1. With the seatback fully folded, place the
seat behind the floor anchors and catch
the seat leg hooks into each floor anchor.
2. Push down on the front of the seat cush-
ion to secure the two front floor latches.
3. Lift up the recliner lever and raise the
seatback.
4. Rock the seat back and forth to be sureall four seat legs are securely latched.
5. Insert the single window tongue into the
auxiliary buckle mounted to the side of
the seat.
APD0121
2-33
ZX
Page 67 of 247

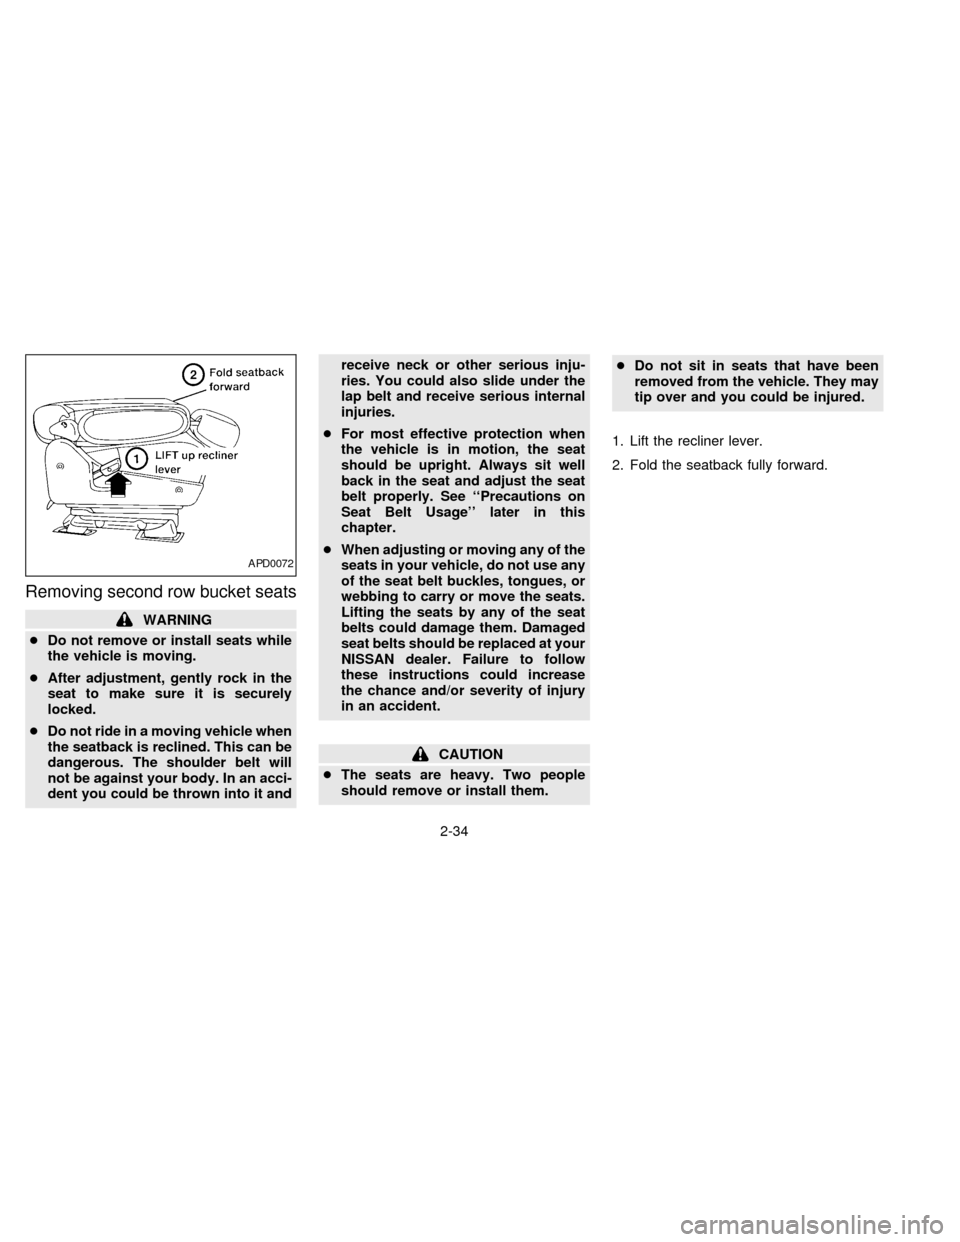
Removing second row bucket seats
WARNING
cDo not remove or install seats while
the vehicle is moving.
cAfter adjustment, gently rock in the
seat to make sure it is securely
locked.
cDo not ride in a moving vehicle when
the seatback is reclined. This can be
dangerous. The shoulder belt will
not be against your body. In an acci-
dent you could be thrown into it andreceive neck or other serious inju-
ries. You could also slide under the
lap belt and receive serious internal
injuries.
cFor most effective protection when
the vehicle is in motion, the seat
should be upright. Always sit well
back in the seat and adjust the seat
belt properly. See ``Precautions on
Seat Belt Usage'' later in this
chapter.
cWhen adjusting or moving any of the
seats in your vehicle, do not use any
of the seat belt buckles, tongues, or
webbing to carry or move the seats.
Lifting the seats by any of the seat
belts could damage them. Damaged
seat belts should be replaced at your
NISSAN dealer. Failure to follow
these instructions could increase
the chance and/or severity of injury
in an accident.
CAUTION
cThe seats are heavy. Two people
should remove or install them.cDo not sit in seats that have been
removed from the vehicle. They may
tip over and you could be injured.
1. Lift the recliner lever.
2. Fold the seatback fully forward.
APD0072
2-34
ZX
Page 68 of 247
3. Unlock the seat legs at the two front floor
latch levers.
4. Lift the front of the seat and slide it
rearward off the rear anchor positions.
APD0124
2-35
ZX