1997 CHEVROLET CORVETTE door lock
[x] Cancel search: door lockPage 116 of 356
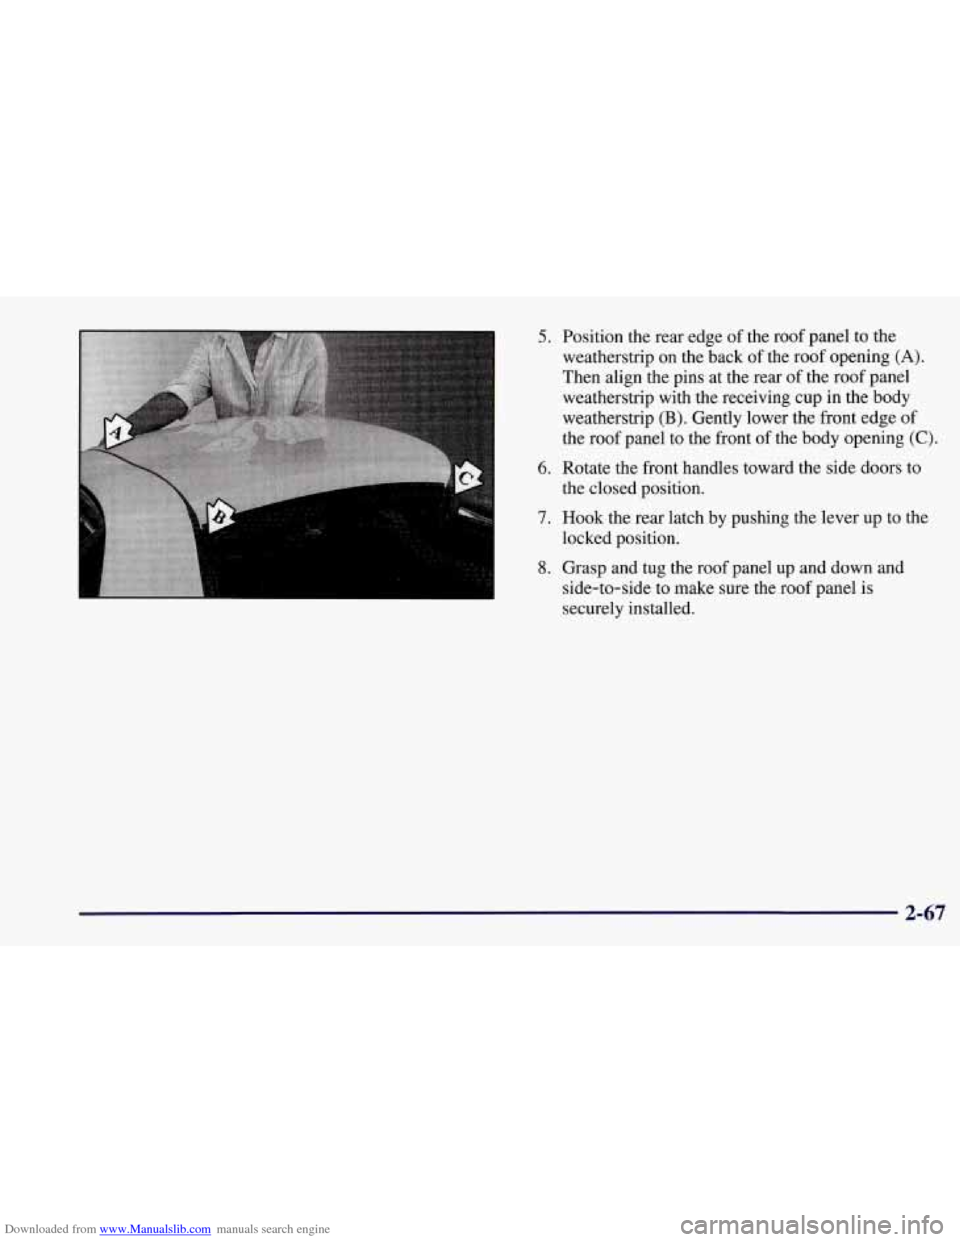
Downloaded from www.Manualslib.com manuals search engine 5. Position the rear edge of the roof panel to the
weatherstrip on the back of the roof opening
(A).
Then align the pins at the rear of the roof panel
weatherstrip with the receiving cup in the body
weatherstrip
(B). Gently lower the front edge of
the roof panel to the front of the body opening
(C).
6. Rotate the front handles toward the side doors to
the closed position.
7. Hook the rear latch by pushing the lever up to the
locked position.
8. Grasp and tug the roof panel up and down and
side-to-side to make sure the roof panel is
securely installed.
2-67
Page 118 of 356

Downloaded from www.Manualslib.com manuals search engine A. Turn SignalNultifunction Lever
B. Driver Information Center (DIC)
C. Instrument Panel Cluster
D. Windshield WiperNVasher Lever
E. DIC Buttons
F. Hazard Warning Flasher Button
G. Center Air Vent
H. Audio System
I. Comfort Controls
J. Fog Lamp Button (Option)
K. Remote Hatch Release Button
L. Ignition Switch
M. Shift Lever (Automatic Shown)
N. Traction Control System (TCS) Switch
0. Selective Real Time Damping (Option)
P. Instrument Panel Cupholder
Q. Ashtray & Cigarette Lighter
R. Remote Fuel Door Release Button
S. Parking Brake
T. Glove Box
U. Instrument Panel Fuse Block
V. Power Accessory Outlet
2-69
Page 130 of 356

Downloaded from www.Manualslib.com manuals search engine Driver Information Center (DIC)
The Driver Information Center (DIC) will display
information about how your vehicle is functioning, as
well as warning messages if a system problem is
detected. The DIC display area is located in the
instrument cluster below the speedometer and
tachometer, directly above the steering column.
The following buttons are on the DIC control panel
which is located to the right of the cluster:
1 FUEL: Press this button to display fuel information
such as fuel economy and range.
2 GAGES: Use this button to display gage information
like oil pressure and temperature, coolant temperature,
transmission fluid temperature, battery voltage and
fronurear tire pressures.
3 TRIP: Use this button to display your total and trip
miles, the elapsed time function, your average speed and
the oil life.
4 OPTIONS: This button allows you to choose personal
options available with your vehicle such as security,
door locks, easy entry seats and language.
5 EM: Use this button to change the display between
English and metric units.
RESET: This button, used along with the other buttons,
will reset system functions and turn off or acknowledge
messages on the DIC.
At the top
of the DIC control buttons is a light sensor.
Be sure not to block the sensor or your lighting
functions may be disrupted.
2-81
Page 136 of 356

Downloaded from www.Manualslib.com manuals search engine 4 OPTIONS
This button allows you to choose personal options
available with your vehicle, such as security, door
locks, easy entry seats and language. Some of these
functions work along with the key fob transmitter.
When returning to the options menu, the first item of
the options list will always be displayed, not the one
you were last in when you changed buttons.
1 PASSIVE UNLK DRIVER 1
APPROACH LIGHTS ON
AUTO LOCK
ON
I AUTO UNLOCK-DRIVER I
I SEAT EASY ENTRY ON
t LANGUAGE ENGLISH
LI
r
I FOB TRAINING I
The following are the options listed under the
OPTIONS button:
Lock and Arm
Press the OPTIONS button until LOCK & ARM
appears on the display, then use the RESET button to
page through the following selections:
0 LOCK & ARM OFF
0 LOCK & ARM HORN ONLY
0 LOCK & ARM LIGHTS ONLY
0 LOCK & ARM HORN & LTS
If you choose LOCK & ARM OFF, you will receive no
security feedback when locking or unlocking your vehicle.
If you choose LOCK
& ARM HORN ONLY, only the
horn will chirp to let you know when your alarm system
has armed when locking your vehicle.
If you choose LOCK
& ARM LIGHTS, only your
exterior lights will flash to let you know when your
alarm system has armed when locking your vehicle.
If you choose LOCK
& ARM HORN & LTS, the horn
will chirp and the exterior lights will flash briefly to
let you know the system has armed when locking
your vehicle.
2-87
Page 137 of 356
Downloaded from www.Manualslib.com manuals search engine Alarm
Press the OPTIONS button until ALARM appears on
the display, then use the RESET button to page through
the following selections:
ALARM HORN
0 ALARM HORN & LIGHTS
If you choose ALARM HORN, the horn will sound
during an alarm. If you choose ALARM HORN
&
LIGHTS, the horn will sound and the exterior lights
will flash during an alarm.
Passive Unlock
Press the OPTIONS button until PASSIVE UNLOCK
appears on the display, then
use the RESET button to
page through the following selections:
PASSIVE UNLOCK- DRIVER
PASSIVE UNLOCK- BOTH
If you choose the PASSIVE UNLOCK- DRIVER, only
the driver’s door lock will be programmed to passively
unlock. The driver’s door will passively unlock when
you approach the vehicle with the key fob transmitter
slider switch set to
ON.
If you choose PASSIVE UNLOCK- BOTH, the driver
and passenger’s door locks will be programmed to
passively unlock. The driver and passenger doors will
passively unlock when you approach the vehicle with
the key fob transmitter slider switch set to ON.
See “Remote Function Actuation (WA)” in the Index
for more information.
Approach Lights
Press the OPTIONS button until APPROACH LIGHTS
appears on the display, then use the RESET button to
page through the following choices:
APPROACH LIGHTS ON
0 APPROACH LIGHTS OFF
If you choose APPROACH LIGHTS ON, the fog lamps,
front turn signal, rear back-up and courtesy lamps will
come on for
30 seconds as you approach the vehicle
with the key fob transmitter. This will occur only when
it is dark outside.
APPROACH LIGHTS OFF turns
off this option.
See “Remote Function Actuation System” in the Index
for more information.
2-88
Page 138 of 356
Downloaded from www.Manualslib.com manuals search engine Auto Lock
Press the OPTIONS button until AUTO LOCK appears
on the display, then use the RESET button to page
through the following choices:
AUTO LOCK ON
AUTO LOCK OFF
If you choose AUTO LOCK ON, both doors will
automatically lock when the vehicle exceeds
10 mph
(16 krn/h) in a manual transmission. In a vehicle with
an automatic transmission, both doors will automatically
lock when you move the shifter out of PARK (P).
Choose AUTO LOCK OFF to turn this option off.
Auto Unlock
The AUTO UNLOCK will be available only if AUTO
LOCK
is set to ON.
Press the OPTIONS button until AUTO UNLOCK
appears on the display, then use the RESET button to
page through the following choices:
AUTO UNLOCK - DRIVER
AUTO UNLOCK - BOTH
AUTO UNLOCK OFF If you
choose AUTO UNLOCK- DRIVER, the driver’s
door will automatically unlock when you turn the
vehicle
off and pull the key out of the ignition.
Choose AUTO UNLOCK
- BOTH, and both doors will
automatically unlock when you turn the vehicle
off and
pull the key out of the ignition.
AUTO UNLOCK OFF turns
off this option.
Easy Entry
The easy entry feature will only be available if the
vehicle is equipped with the memory option.
Press the OPTIONS button until SEAT EASY ENTRY
appears on the display, then use the RESET button to
page through the following choices:
SEAT EASY ENTRY ON
0 SEAT EASY ENTRY OFF
If you choose SEAT EASY ENTRY ON, when you
turn the ignition off and remove the key, the seat will
automatically move back for an easy exit or an easy
entrance when returning to the vehicle.
SEAT EASY ENTRY OFF turns
off this option.
2-89
Page 173 of 356
Downloaded from www.Manualslib.com manuals search engine The CD changer door is open. Completely close the
changer door to restore normal operation.
An empty magazine is inserted in the CD changer.
Try the magazine again with a disc loaded on one of
the trays.
If any error occurs repeatedly or if an error cannot be
corrected, please contact your dealer.
Theft-Deterrent Feature
THEFTLOCK" is designed to discourage theft of your
radio. It works by using a secret code to disable all radio
functions whenever battery power is removed.
The THEFTLOCK feature for the radio may be used
or ignored. If ignored, the system plays normally and the
radio is not protected by the feature. If THEFTLOCK is
activated, your radio will not operate if stolen.
When THEFTLOCK is activated, the radio will display
LOC to indicate a locked condition anytime battery
power has been interrupted. If your battery loses power
for any reason, you must unlock the radio with the
secret code before it will operate.
Activating the Theft-Deterrent Feature
The instructions which follow, explain how to enter your
secret code to activate the THEFTLOCK system. It is
recommended that you read through all nine steps
before starting the procedure.
NOTE: If you allow more than
15 seconds to elapse
between any steps, the radio automatically reverts to
time and you must
start the procedure over at Step 4.
1.
2.
3.
4.
Write down any three or four-digit number from
000 to 1999 and keep it in a safe place separate
from the vehicle.
Turn the ignition to ACCESSORY or
ON.
Turn the radio off.
Press the
1 and 4 buttons together. Hold them down
until
--- shows on the display. Next you will use the
secret code number which you have written down.
Page 298 of 356
Downloaded from www.Manualslib.com manuals search engine Fuses and Circuit Breakers
The wiring circuits in your vehicle are protected from
short circuits by a combination of maxi-fuses,
mini-fuses and circuit breakers. This greatly reduces the
chance of fires caused by electrical problems.
Look at the silver-colored band inside the fuse. If the
band is broken or melted, replace the fuse. Be sure you
replace a bad fuse with a new one of the identical size
and rating.
If you ever have a problem on the road and don’t have a
spare fuse, you can borrow one that has the same
amperage. Just pick some feature of your vehicle that
you can get along without
-- like the radio or cigarette
lighter
-- and use its fuse, if it is the correct amperage.
Replace it as soon as you can.
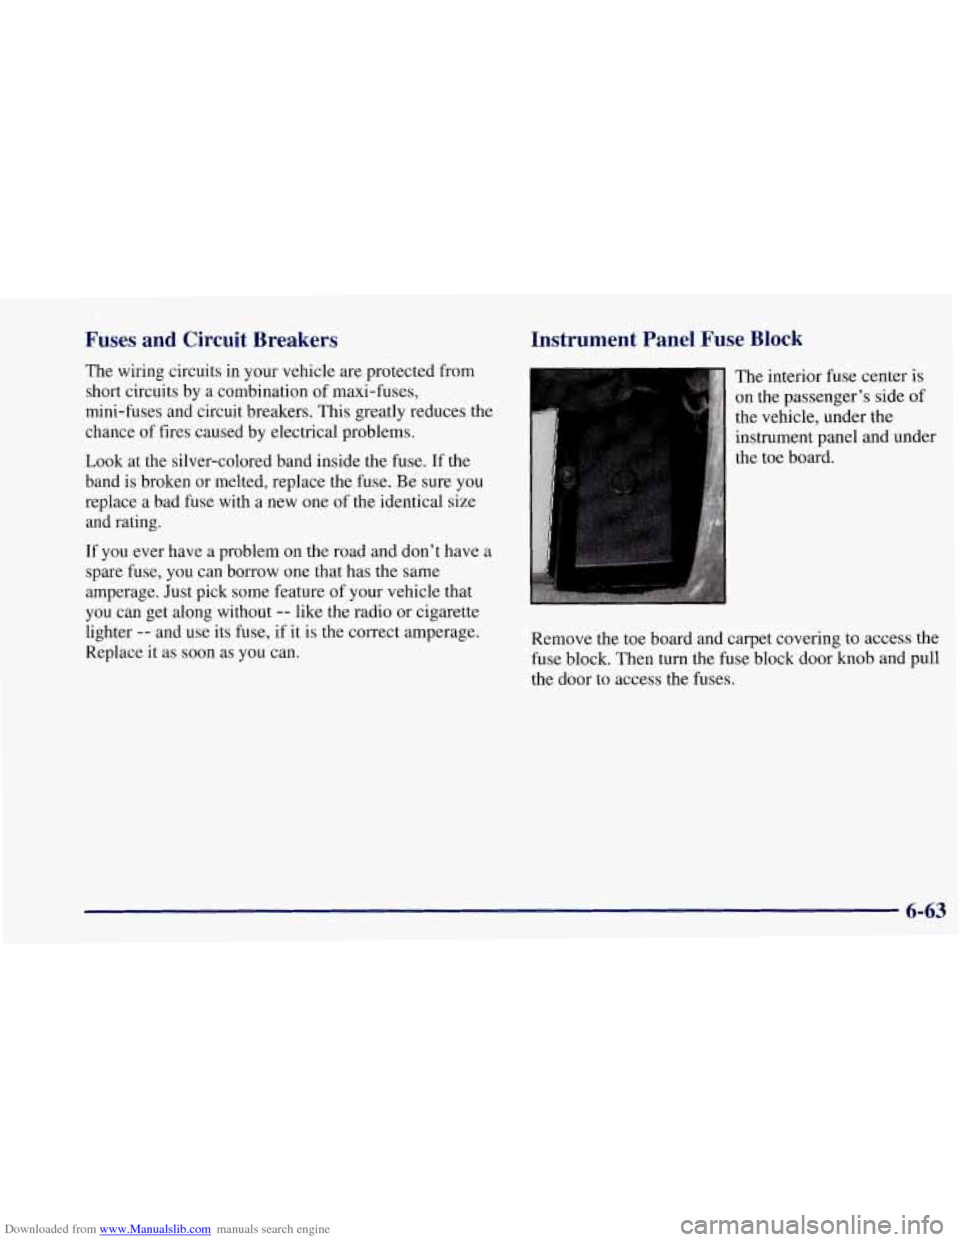
Instrument Panel Fuse Block
The interior fuse center is
on the passenger’s side of
the vehicle, under the
instrument panel and under
the toe board.
Remove the toe board and carpet covering
to access the
fuse block. Then turn the fuse block door
knob and pull
the door to access the fuses.
6-63